

Container chili growing – ever dreamt of fiery peppers bursting from pots on your patio, ready to spice up your meals? I know I have! There’s something incredibly satisfying about nurturing these little flavor bombs from seed to sizzling harvest, and you don’t need acres of land to do it.
For centuries, chili peppers have been a staple in cuisines around the globe, adding warmth and depth to dishes from Mexico to Thailand. Their vibrant colors and potent flavors have captivated cooks and gardeners alike. But what if you live in an apartment, or only have a small balcony? That’s where the magic of container gardening comes in!
This DIY guide is your passport to a thriving chili pepper garden, even in the most compact spaces. We’ll explore simple yet effective tricks and hacks that will transform your containers into chili-producing powerhouses. Forget complicated setups and expensive equipment. I’m going to show you how to maximize your yield, troubleshoot common problems, and enjoy a bountiful harvest of homegrown chilies. Container chili growing is easier than you think, and with a little know-how, you’ll be adding a spicy kick to your life in no time!
Growing Chili Peppers in Containers: A Spicy DIY Guide
Hey there, fellow chili enthusiasts! I’m so excited to share my tried-and-true method for growing vibrant, fiery chili peppers right in containers. Whether you’re short on space, want to control your soil, or simply enjoy the portability of container gardening, this guide will walk you through every step. Get ready to harvest a bumper crop of delicious chilies!
Choosing the Right Chili Variety
First things first, let’s talk about chili varieties. The world of chilies is vast and exciting, ranging from mild bell peppers to scorching habaneros. When growing in containers, it’s important to choose varieties that are well-suited to confined spaces.
Here are some of my favorite container-friendly chili peppers:
* Jalapeño: A classic for a reason! Jalapeños are relatively compact and produce a good yield.
* Serrano: These pack a bit more heat than jalapeños and are also well-suited to containers.
* Thai Chili: These small, fiery peppers are perfect for adding a kick to Asian cuisine. They thrive in containers.
* Cayenne: Another popular choice, cayenne peppers are easy to grow and produce long, slender fruits.
* Bell Peppers: If you prefer a milder flavor, bell peppers are a great option. Choose compact varieties like ‘Patio Bell’.
* Habanero: If you’re a heat seeker, habaneros can be grown in containers, but be prepared to provide them with plenty of sunlight and warmth.
Important Tip: Consider your climate when choosing your chili variety. Some varieties are more tolerant of cooler temperatures than others.
Gathering Your Supplies
Before we dive into the planting process, let’s make sure you have everything you need. Here’s a checklist of essential supplies:
* Containers: Choose containers that are at least 12 inches in diameter and depth. Larger containers are generally better, as they provide more room for the roots to grow. I personally prefer using 5-gallon buckets or large terracotta pots. Make sure your containers have drainage holes!
* Potting Mix: Use a high-quality potting mix that is well-draining and contains plenty of organic matter. Avoid using garden soil, as it can become compacted in containers. I like to use a mix of peat moss, perlite, and vermiculite.
* Chili Pepper Seeds or Seedlings: You can start your chili peppers from seed or purchase seedlings from a local nursery. If starting from seed, sow them indoors 6-8 weeks before the last expected frost.
* Fertilizer: Use a balanced fertilizer specifically formulated for vegetables. I recommend using a slow-release fertilizer at planting time and supplementing with a liquid fertilizer every few weeks during the growing season.
* Watering Can or Hose: You’ll need a way to water your chili peppers regularly.
* Gardening Gloves: Protect your hands from dirt and potential irritants.
* Trowel or Shovel: For planting and transplanting.
* Optional:
* Plant Markers: To label your chili varieties.
* Tomato Cage or Stakes: To support taller chili plants.
* Mulch: To help retain moisture and suppress weeds.
Planting Your Chili Peppers
Now for the fun part! Let’s get those chili peppers planted.
1. Prepare Your Containers: Make sure your containers are clean and have adequate drainage holes. If using terracotta pots, you may want to soak them in water for a few hours before planting to prevent them from drawing moisture away from the soil.
2. Fill with Potting Mix: Fill your containers with potting mix, leaving about an inch or two of space at the top.
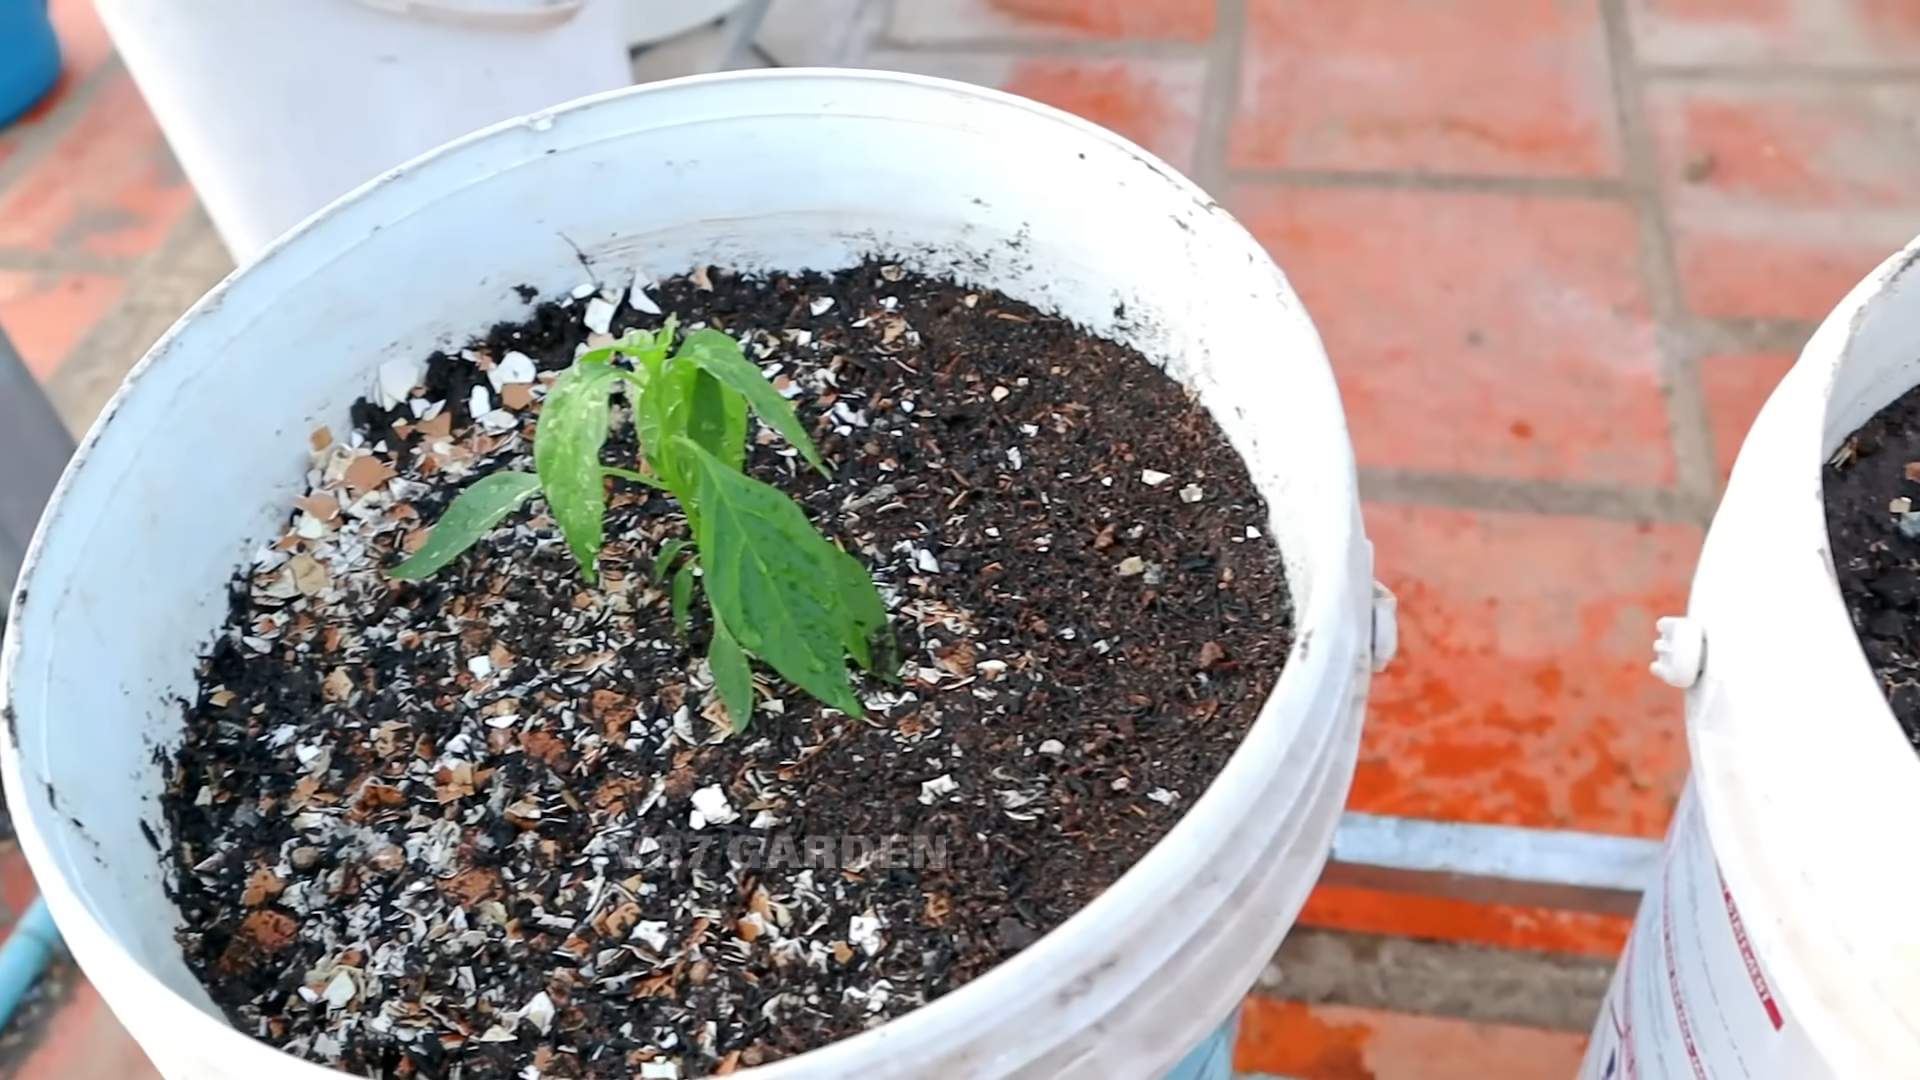
3. Plant Your Seeds or Seedlings:
* From Seed: Sow your chili pepper seeds about 1/4 inch deep and water gently. Keep the soil moist but not soggy.
* From Seedlings: Gently remove the seedlings from their containers and loosen the roots slightly. Dig a hole in the potting mix that is large enough to accommodate the root ball. Place the seedling in the hole and backfill with potting mix. Water thoroughly.
4. Add Fertilizer: Sprinkle a slow-release fertilizer around the base of the plants, following the instructions on the package.
5. Mulch (Optional): Add a layer of mulch around the base of the plants to help retain moisture and suppress weeds.
6. Label Your Plants: Use plant markers to label your chili varieties.
7. Place in a Sunny Location: Chili peppers need at least 6-8 hours of sunlight per day. Place your containers in a sunny location that is protected from strong winds.
Caring for Your Chili Peppers
Once your chili peppers are planted, it’s important to provide them with proper care to ensure a bountiful harvest.
1. Watering: Water your chili peppers regularly, especially during hot, dry weather. The soil should be kept moist but not soggy. Avoid overwatering, as this can lead to root rot. I usually water deeply when the top inch of soil feels dry to the touch.
2. Fertilizing: Fertilize your chili peppers every few weeks with a liquid fertilizer, following the instructions on the package.
3. Pruning: Pruning is not essential for chili peppers, but it can help to improve air circulation and encourage bushier growth. You can prune away any dead or yellowing leaves.
4. Pest and Disease Control: Keep an eye out for pests and diseases. Common pests that affect chili peppers include aphids, spider mites, and whiteflies. Diseases include powdery mildew and blossom end rot. Treat any infestations or diseases promptly with appropriate organic or chemical controls. I prefer using insecticidal soap for aphids and neem oil for other pests. For blossom end rot, ensure consistent watering and add calcium to the soil.
5. Support (Optional): Taller chili plants may need support to prevent them from falling over. You can use tomato cages or stakes to provide support.
6. Pollination: Chili peppers are self-pollinating, but you can help them along by gently shaking the plants or using a small paintbrush to transfer pollen from one flower to another. This is especially helpful if you’re growing your chili peppers indoors.
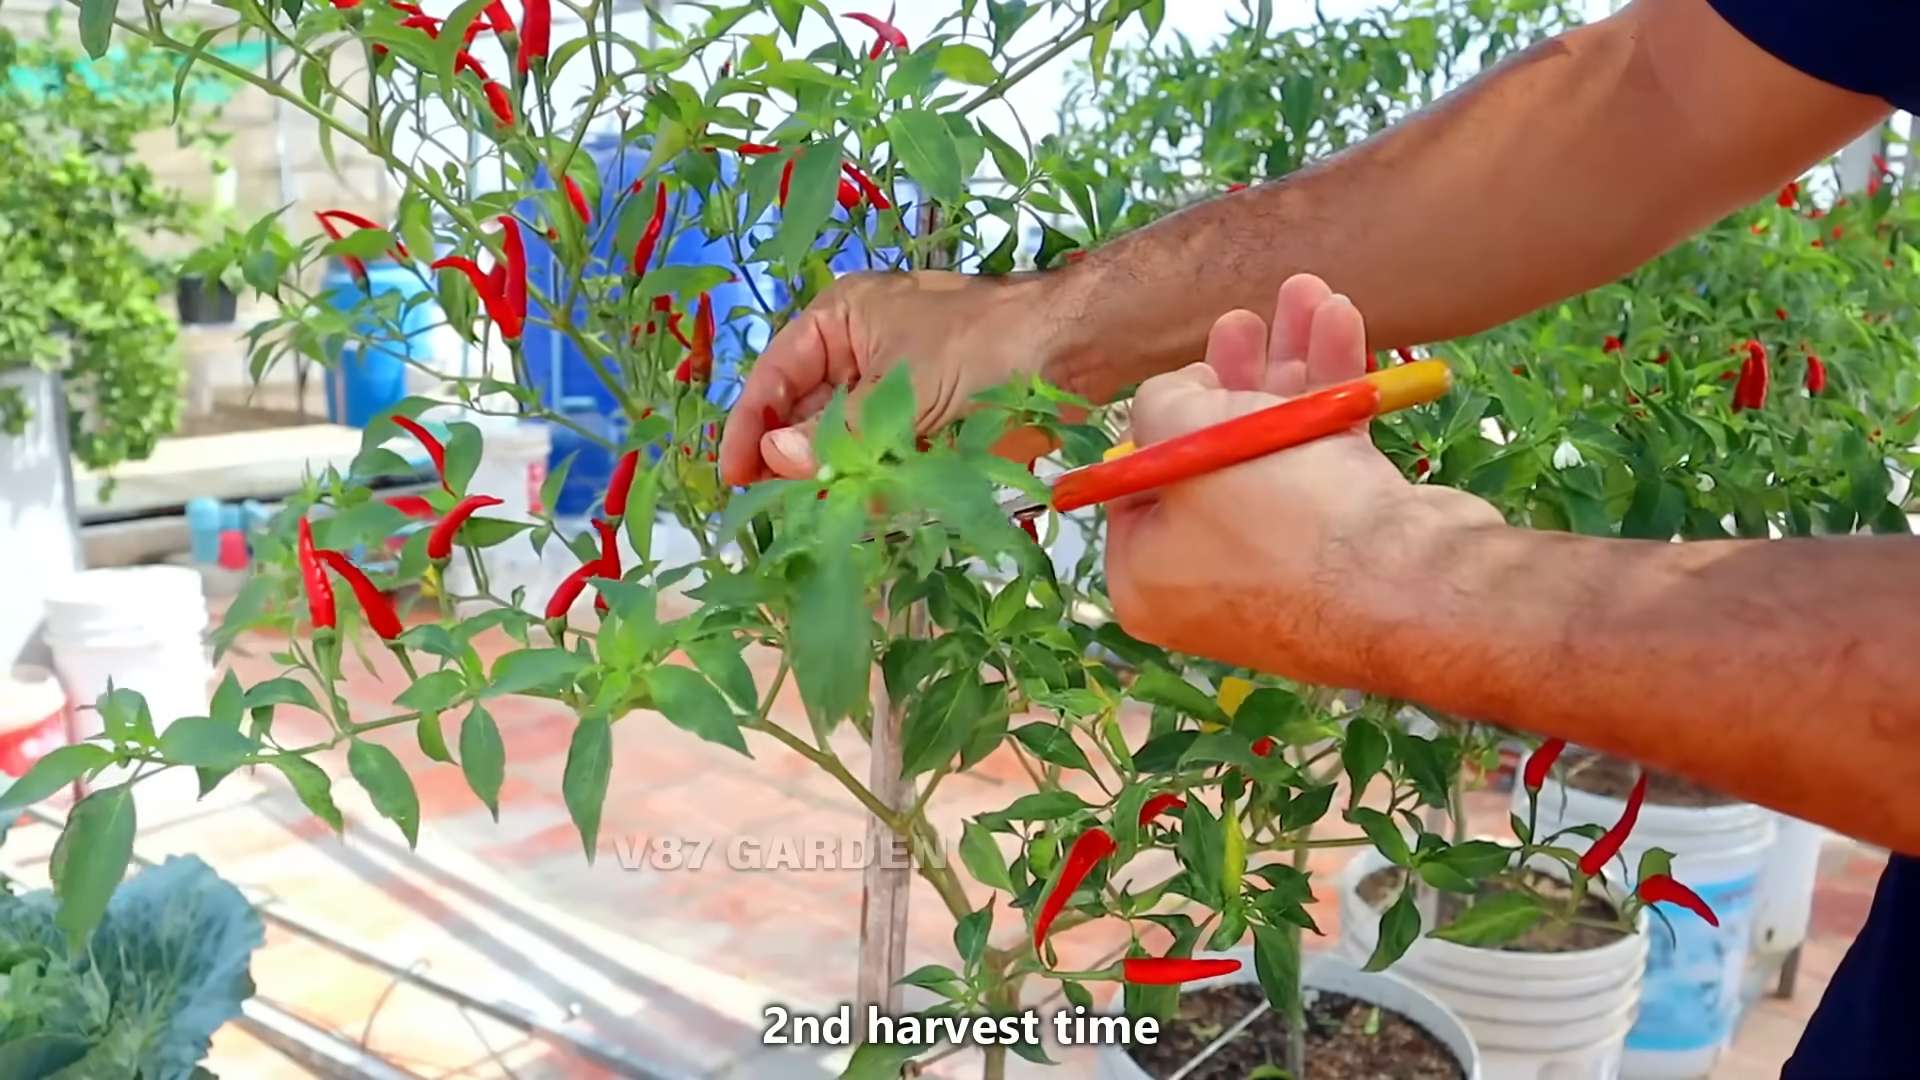
Harvesting Your Chili Peppers
The moment you’ve been waiting for! Harvesting your chili peppers is the most rewarding part of the process.
1. Timing: The time it takes for chili peppers to mature depends on the variety. Generally, chili peppers are ready to harvest when they have reached their mature color and size.
2. Harvesting: Use a sharp knife or scissors to cut the chili peppers from the plant. Be careful not to damage the plant.
3. Handling: Wear gloves when handling hot chili peppers to avoid burning your skin.
4. Storage: You can store your chili peppers in the refrigerator for up to a week. For longer storage, you can dry them, freeze them, or pickle them.
Troubleshooting Common Problems
Hey there, fellow chili enthusiasts! I’m so excited to share my tried-and-true method for growing vibrant, fiery chili peppers right in containers. Whether you’re short on space, want to control your soil, or simply enjoy the portability of container gardening, this guide will walk you through every step. Get ready to harvest a bumper crop of delicious chilies!
Choosing the Right Chili Variety
First things first, let’s talk about chili varieties. The world of chilies is vast and exciting, ranging from mild bell peppers to scorching habaneros. When growing in containers, it’s important to choose varieties that are well-suited to confined spaces.
Here are some of my favorite container-friendly chili peppers:
* Jalapeño: A classic for a reason! Jalapeños are relatively compact and produce a good yield.
* Serrano: These pack a bit more heat than jalapeños and are also well-suited to containers.
* Thai Chili: These small, fiery peppers are perfect for adding a kick to Asian cuisine. They thrive in containers.
* Cayenne: Another popular choice, cayenne peppers are easy to grow and produce long, slender fruits.
* Bell Peppers: If you prefer a milder flavor, bell peppers are a great option. Choose compact varieties like ‘Patio Bell’.
* Habanero: If you’re a heat seeker, habaneros can be grown in containers, but be prepared to provide them with plenty of sunlight and warmth.
Important Tip: Consider your climate when choosing your chili variety. Some varieties are more tolerant of cooler temperatures than others.
Gathering Your Supplies
Before we dive into the planting process, let’s make sure you have everything you need. Here’s a checklist of essential supplies:
* Containers: Choose containers that are at least 12 inches in diameter and depth. Larger containers are generally better, as they provide more room for the roots to grow. I personally prefer using 5-gallon buckets or large terracotta pots. Make sure your containers have drainage holes!
* Potting Mix: Use a high-quality potting mix that is well-draining and contains plenty of organic matter. Avoid using garden soil, as it can become compacted in containers. I like to use a mix of peat moss, perlite, and vermiculite.
* Chili Pepper Seeds or Seedlings: You can start your chili peppers from seed or purchase seedlings from a local nursery. If starting from seed, sow them indoors 6-8 weeks before the last expected frost.
* Fertilizer: Use a balanced fertilizer specifically formulated for vegetables. I recommend using a slow-release fertilizer at planting time and supplementing with a liquid fertilizer every few weeks during the growing season.
* Watering Can or Hose: You’ll need a way to water your chili peppers regularly.
* Gardening Gloves: Protect your hands from dirt and potential irritants.
* Trowel or Shovel: For planting and transplanting.
* Optional:
* Plant Markers: To label your chili varieties.
* Tomato Cage or Stakes: To support taller chili plants.
* Mulch: To help retain moisture and suppress weeds.
Planting Your Chili Peppers
Now for the fun part! Let’s get those chili peppers planted.
1. Prepare Your Containers: Make sure your containers are clean and have adequate drainage holes. If using terracotta pots, you may want to soak them in water for a few hours before planting to prevent them from drawing moisture away from the soil.
2. Fill with Potting Mix: Fill your containers with potting mix, leaving about an inch or two of space at the top.
3. Plant Your Seeds or Seedlings:
* From Seed: Sow your chili pepper seeds about 1/4 inch deep and water gently. Keep the soil moist but not soggy.
* From Seedlings: Gently remove the seedlings from their containers and loosen the roots slightly. Dig a hole in the potting mix that is large enough to accommodate the root ball. Place the seedling in the hole and backfill with potting mix. Water thoroughly.
4. Add Fertilizer: Sprinkle a slow-release fertilizer around the base of the plants, following the instructions on the package.
5. Mulch (Optional): Add a layer of mulch around the base of the plants to help retain moisture and suppress weeds.
6. Label Your Plants: Use plant markers to label your chili varieties.
7. Place in a Sunny Location: Chili peppers need at least 6-8 hours of sunlight per day. Place your containers in a sunny location that is protected from strong winds.
Caring for Your Chili Peppers
Once your chili peppers are planted, it’s important to provide them with proper care to ensure a bountiful harvest.
1. Watering: Water your chili peppers regularly, especially during hot, dry weather. The soil should be kept moist but not soggy. Avoid overwatering, as this can lead to root rot. I usually water deeply when the top inch of soil feels dry to the touch.
2. Fertilizing: Fertilize your chili peppers every few weeks with a liquid fertilizer, following the instructions on the package.
3. Pruning: Pruning is not essential for chili peppers, but it can help to improve air circulation and encourage bushier growth. You can prune away any dead or yellowing leaves.
4. Pest and Disease Control: Keep an eye out for pests and diseases. Common pests that affect chili peppers include aphids, spider mites, and whiteflies. Diseases include powdery mildew and blossom end rot. Treat any infestations or diseases promptly with appropriate organic or chemical controls. I prefer using insecticidal soap for aphids and neem oil for other pests. For blossom end rot, ensure consistent watering and add calcium to the soil.
5. Support (Optional): Taller chili plants may need support to prevent them from falling over. You can use tomato cages or stakes to provide support.
6. Pollination: Chili peppers are self-pollinating, but you can help them along by gently shaking the plants or using a small paintbrush to transfer pollen from one flower to another. This is especially helpful if you’re growing your chili peppers indoors.
Harvesting Your Chili Peppers
The moment you’ve been waiting for! Harvesting your chili peppers is the most rewarding part of the process.
1. Timing: The time it takes for chili peppers to mature depends on the variety. Generally, chili peppers are ready to harvest when they have reached their mature color and size.
2. Harvesting: Use a sharp knife or scissors to cut the chili peppers from the plant. Be careful not to damage the plant.
3. Handling: Wear gloves when handling hot chili peppers to avoid burning your skin.
4. Storage: You can store your chili peppers in the refrigerator for up to a week. For longer storage, you can dry them, freeze them, or pickle them.
Troubleshooting Common Problems
Even with the best care, you may encounter some problems when growing chili peppers in containers. Here are some common issues and how to address them:
* Yellowing Leaves: Yellowing leaves can be caused by a variety of factors, including overwatering, underwatering, nutrient deficiencies, and pests. Check the soil moisture and adjust your watering accordingly. Fertilize your plants with a balanced fertilizer. Inspect your plants for pests and treat them accordingly.
* Blossom End Rot: Blossom end rot is a condition that causes the bottom of the chili peppers to rot. It is caused by a calcium deficiency. Ensure consistent watering and add calcium to the soil.
* Lack of Fruit: A lack of fruit can be caused by a variety of factors, including insufficient sunlight, poor pollination, and nutrient deficiencies. Make sure your plants are getting at least 6-8 hours of sunlight per day. Hand-pollinate your plants if necessary. Fertilize your plants with a balanced fertilizer.
* Pests: Pests can damage your chili pepper plants and reduce your yield. Inspect your plants regularly for pests and treat them accordingly.
Enjoying Your Harvest
Congratulations! You’ve successfully grown chili peppers in containers. Now it’s time to enjoy your harvest. Use your chili peppers in your favorite recipes, make hot sauce, or dry them for later use. The possibilities are endless!
I hope this guide has been helpful. Happy gardening, and may your chili peppers be hot and plentiful!
Conclusion
So, there you have it! Growing chili peppers in containers is not only achievable, but it’s also incredibly rewarding. We’ve walked you through the essential steps, from selecting the right container and soil to nurturing your plants for a bountiful harvest. But why should you embrace this DIY trick?
Simply put, container chili growing offers unparalleled flexibility and control. Whether you have a sprawling garden or a tiny balcony, you can enjoy fresh, homegrown chilies. You dictate the soil quality, the watering schedule, and the sun exposure, ensuring your plants receive optimal care. This level of control often translates to healthier plants and a more abundant yield compared to in-ground planting, especially in areas with less-than-ideal soil conditions.
Beyond the practical benefits, there’s a certain satisfaction that comes from nurturing a plant from seed to table. Watching those tiny seedlings sprout and eventually bear fiery fruit is an experience that connects you to the natural world in a tangible way. Plus, imagine the bragging rights when you serve up a dish made with chilies you grew yourself!
But the fun doesn’t stop there. Container chili growing opens the door to a world of experimentation. Why not try growing different varieties of chilies in separate containers? From the mild poblano to the scorching habanero, you can create a diverse chili garden tailored to your specific taste preferences. You can also experiment with different soil amendments, fertilizers, and companion plants to see what works best for your growing conditions.
Consider adding some companion plants to your chili containers. Basil, for example, is known to repel pests and improve the flavor of chilies. Marigolds are another excellent choice, as they attract beneficial insects and deter nematodes. You could even interplant your chilies with low-growing herbs like thyme or oregano to create a visually appealing and fragrant container garden.
For those who want to take their container chili growing to the next level, consider investing in a self-watering container. These containers have a built-in reservoir that slowly releases water to the plants, reducing the need for frequent watering and preventing overwatering. They’re especially useful for busy gardeners or those who live in hot, dry climates.
Another variation to consider is vertical gardening. If you’re short on space, you can use a vertical planter or a hanging basket to grow your chilies. This not only saves space but also adds a unique visual element to your garden. Just be sure to choose a vertical planter that’s large enough to accommodate the root system of your chili plants.
Don’t be afraid to experiment with different chili varieties. Each variety has its own unique flavor profile and heat level. Some popular choices for container growing include jalapenos, serranos, cayenne peppers, and Thai chilies. Do some research to find varieties that are well-suited to your climate and growing conditions.
Ultimately, the best way to learn is by doing. So, grab a container, some soil, and a few chili seeds or seedlings, and get started! We’re confident that you’ll be amazed at how easy and rewarding container chili growing can be.
We encourage you to embark on this exciting journey and discover the joy of growing your own chilies. And once you’ve harvested your first batch, we’d love to hear about your experience! Share your tips, tricks, and photos with us in the comments below. Let’s build a community of container chili growers and inspire others to get their hands dirty! Happy growing!
Frequently Asked Questions (FAQ)
What is the best size container for growing chili peppers?
The ideal container size depends on the chili variety you’re growing. Generally, a container that is at least 5 gallons in size is recommended for most chili peppers. Larger varieties, like bell peppers or some of the larger chili types, may benefit from a 10-gallon or larger container. The key is to provide enough space for the roots to grow and develop properly. Smaller containers can lead to stunted growth and reduced yields. Ensure the container has adequate drainage holes to prevent waterlogging.
What type of soil should I use for container chili growing?
Avoid using garden soil directly in containers, as it tends to compact and doesn’t drain well. Instead, opt for a high-quality potting mix specifically formulated for containers. Look for a mix that contains ingredients like peat moss, perlite, and vermiculite, which provide good drainage, aeration, and water retention. You can also amend your potting mix with compost or other organic matter to improve its fertility. A slightly acidic to neutral pH (around 6.0 to 7.0) is ideal for chili peppers.
How often should I water my container chili plants?
Watering frequency depends on several factors, including the weather, the size of the container, and the type of soil you’re using. As a general rule, water your chili plants when the top inch of soil feels dry to the touch. Avoid overwatering, as this can lead to root rot. During hot, dry weather, you may need to water your plants daily. In cooler weather, you may only need to water them every few days. Use a watering can or a hose with a gentle spray nozzle to avoid damaging the plants.
How much sunlight do chili peppers need?
Chili peppers thrive in full sun, which means they need at least 6-8 hours of direct sunlight per day. If you’re growing your chilies indoors, you’ll need to supplement with artificial lighting, such as grow lights. Place your container chili plants in a sunny location, such as a south-facing window or a balcony that receives plenty of sunlight. If you live in a hot climate, you may need to provide some afternoon shade to prevent the plants from getting scorched.
What kind of fertilizer should I use for container chili plants?
Chili peppers are heavy feeders and benefit from regular fertilization. Use a balanced fertilizer with an NPK ratio (nitrogen, phosphorus, potassium) of around 10-10-10 or 14-14-14. You can also use a fertilizer specifically formulated for tomatoes or peppers, as these typically have the nutrients that chili plants need. Fertilize your plants every 2-3 weeks during the growing season. Avoid over-fertilizing, as this can lead to excessive foliage growth and reduced fruit production. Organic fertilizers, such as compost tea or fish emulsion, are also excellent choices.
How do I protect my container chili plants from pests and diseases?
Regularly inspect your plants for signs of pests or diseases. Common pests that affect chili peppers include aphids, spider mites, and whiteflies. You can control these pests with insecticidal soap, neem oil, or by handpicking them off the plants. Diseases that can affect chili peppers include powdery mildew, blossom end rot, and fungal infections. Prevent these diseases by providing good air circulation, avoiding overwatering, and using disease-resistant varieties. If you notice any signs of disease, treat the plants with a fungicide or remove the affected leaves.
When should I harvest my chili peppers?
The timing of harvest depends on the chili variety and your personal preference. Most chili peppers are ready to harvest when they reach their mature color and size. For example, jalapenos are typically harvested when they are dark green and about 2-3 inches long. Habaneros are harvested when they turn orange or red. You can also harvest chili peppers when they are still green, but they will be less spicy. Use a pair of scissors or pruning shears to cut the peppers from the plant, leaving a small stem attached.
Can I overwinter my container chili plants?
Yes, you can overwinter your container chili plants in a frost-free location. Before the first frost, bring your plants indoors and place them in a sunny window or under grow lights. Reduce watering and fertilization during the winter months. The plants may lose some of their leaves, but they should start to regrow in the spring. Once the weather warms up, you can gradually acclimate the plants back to the outdoors. Overwintering your chili plants can save you money and allow you to get a head start on the growing season.
What are some common problems with container chili growing and how can I fix them?
Some common problems include blossom drop (flowers falling off without producing fruit), which can be caused by temperature fluctuations, lack of pollination, or nutrient deficiencies. Ensure consistent temperatures, hand-pollinate if necessary, and fertilize regularly. Yellowing leaves can indicate overwatering, underwatering, or nutrient deficiencies. Adjust your watering schedule and fertilize as needed. Stunted growth can be caused by insufficient sunlight, poor soil, or pests. Provide adequate sunlight, use a high-quality potting mix, and control pests.
Can I grow chili peppers indoors year-round?
Yes, with the right conditions, you can grow chili peppers indoors year-round. You’ll need to provide adequate light, either from a sunny window or grow lights. Maintain a consistent temperature and humidity level. Water and fertilize regularly. You may also need to hand-pollinate the flowers to ensure fruit production. Choose compact chili varieties that are well-suited to indoor growing.

Leave a Comment