

Consistent Celery Harvest: Dreaming of crisp, crunchy celery sticks straight from your backyard? I know I am! There’s nothing quite like the satisfaction of growing your own food, and celery, with its refreshing flavor, is a fantastic addition to any home garden. But let’s be honest, achieving a consistent celery harvest can sometimes feel like a gardener’s riddle. We’ve all been there – either a glut of celery all at once or, worse, a sparse and disappointing yield.
Celery has a rich history, dating back to ancient times where it was used medicinally before becoming a culinary staple. From the Mediterranean to modern-day kitchens, this versatile vegetable has earned its place at the table. But unlike some of its more forgiving garden companions, celery can be a bit finicky. That’s where these DIY tricks and hacks come in!
This article is your ultimate guide to unlocking the secrets of a bountiful and continuous celery supply. Forget those grocery store prices and the uncertainty of freshness. I’m going to share simple, effective, and budget-friendly techniques that will help you enjoy a steady stream of delicious celery all season long. Whether you’re a seasoned gardener or just starting out, these tips will empower you to cultivate a thriving celery patch and finally achieve that consistent harvest you’ve always wanted. Let’s get growing!
Never Buy Celery Again: My Foolproof Guide to a Consistent Harvest!
Hey there, fellow gardening enthusiasts! Are you tired of buying celery from the grocery store, only to use a few stalks and watch the rest wilt away in your fridge? I was too! That’s why I embarked on a mission to achieve a consistent celery harvest right in my own backyard. And guess what? I cracked the code!
This guide will walk you through my tried-and-true method for growing celery that keeps on giving. We’re not just talking about a one-time harvest; we’re talking about a continuous supply of crisp, delicious celery all season long. Get ready to ditch those store-bought stalks and embrace the joy of homegrown goodness!
Understanding Celery’s Quirks
Before we dive into the nitty-gritty, let’s understand what makes celery tick. Celery can be a bit finicky, but once you understand its needs, it’s totally manageable.
* Moisture is Key: Celery is a thirsty plant! It needs consistent moisture to thrive. Think of it as a plant that loves to be pampered with regular drinks.
* Nutrient-Rich Soil: Celery is a heavy feeder, meaning it needs plenty of nutrients to grow those long, crunchy stalks. We’ll talk about soil amendments later.
* Cool Temperatures: Celery prefers cooler temperatures, making it an ideal crop for spring and fall. Hot weather can cause it to bolt (go to seed), which makes the stalks bitter.
* Patience is a Virtue: Celery isn’t the fastest-growing vegetable. It takes time and dedication, but the reward is well worth the effort.
Choosing the Right Celery Variety
Not all celery is created equal! Some varieties are more suited for home gardens than others. Here are a few of my favorites:
* ‘Utah Tall Green’: This is a classic variety known for its tall, dark green stalks and excellent flavor. It’s also relatively easy to grow.
* ‘Golden Self-Blanching’: This variety is unique because it doesn’t require blanching (covering the stalks to make them white). It has a milder flavor and a beautiful golden color.
* ‘Giant Red’: If you’re looking for something a little different, try ‘Giant Red’. It has reddish-purple stalks and a slightly peppery flavor.
Starting Celery from Seed (or Seedlings)
You have two options for starting your celery: from seed or from seedlings. Starting from seed gives you more control over the process, but it requires more time and effort. Buying seedlings is quicker and easier, but you’ll have fewer variety choices.
Starting from Seed:
1. Start Early: Celery seeds need a long growing season, so start them indoors 10-12 weeks before the last expected frost.
2. Sow the Seeds: Fill a seed tray with a seed-starting mix. Sprinkle the celery seeds on top of the soil and gently press them in. Celery seeds need light to germinate, so don’t bury them too deep.
3. Keep it Moist: Mist the soil regularly to keep it moist. Cover the seed tray with a plastic dome or plastic wrap to create a humid environment.
4. Provide Light: Place the seed tray under grow lights or in a sunny window. Celery seeds need at least 12 hours of light per day to germinate.
5. Be Patient: Celery seeds can take up to 3 weeks to germinate. Don’t give up!
6. Thin the Seedlings: Once the seedlings have a few true leaves, thin them out so that they are spaced about 2 inches apart.
7. Harden Off: Before transplanting the seedlings outdoors, you need to harden them off. This means gradually exposing them to outdoor conditions over a period of 1-2 weeks. Start by placing them in a sheltered spot for a few hours each day, gradually increasing the amount of time they spend outdoors.
Starting from Seedlings:
1. Choose Healthy Seedlings: Look for seedlings that are healthy and vigorous, with no signs of disease or pests.
2. Prepare the Soil: Before planting the seedlings, amend the soil with compost or well-rotted manure. This will provide the celery plants with the nutrients they need to thrive.
Planting Your Celery
Whether you started from seed or bought seedlings, the planting process is the same.
1. Choose a Sunny Location: Celery needs at least 6 hours of sunlight per day.
2. Prepare the Soil: Celery prefers well-drained soil that is rich in organic matter. Amend the soil with compost or well-rotted manure before planting. I like to add a little bone meal too, for extra phosphorus.
3. Space the Plants: Space the celery plants 6-8 inches apart in rows that are 18-24 inches apart.
4. Plant Carefully: Dig a hole that is slightly larger than the root ball of the seedling. Gently remove the seedling from its container and place it in the hole. Backfill the hole with soil and gently firm it around the base of the plant.
5. Water Thoroughly: Water the celery plants thoroughly after planting.
Consistent Watering: The Celery Secret Weapon
Remember how I said celery loves moisture? This is where the “consistent” part of our consistent harvest comes in.
1. Water Deeply and Regularly: Water your celery plants deeply and regularly, especially during hot, dry weather. Aim for at least 1 inch of water per week.
2. Mulch, Mulch, Mulch!: Apply a layer of mulch around the celery plants to help retain moisture and suppress weeds. I use straw, but you can also use wood chips or shredded leaves.
3. Consider a Soaker Hose: A soaker hose is a great way to deliver water directly to the roots of the celery plants, minimizing water loss through evaporation.
Feeding Your Celery: Keeping it Happy and Healthy
Celery is a heavy feeder, so it needs regular fertilization to produce those long, crunchy stalks.
1. Side-Dress with Compost: Side-dress the celery plants with compost every few weeks. This will provide them with a steady supply of nutrients.
2. Use a Balanced Fertilizer: You can also use a balanced fertilizer, such as 10-10-10, according to the package directions. I prefer organic fertilizers like fish emulsion or seaweed extract.
3. Watch for Deficiencies: Keep an eye out for signs of nutrient deficiencies, such as yellowing leaves or stunted growth. If you notice any deficiencies, adjust your fertilization accordingly.
Dealing with Pests and Diseases
Celery is relatively pest-resistant, but it can be susceptible to a few problems.
* Celery Leaf Tier: This pest can damage the leaves of celery plants. Handpick the caterpillars or use an organic insecticide like Bacillus thuringiensis (Bt).
* Aphids: Aphids are small, sap-sucking insects that can weaken celery plants. Spray them off with a strong stream of water or use an insecticidal soap.
* Celery Blight: This fungal disease can cause brown spots on the leaves and stalks of celery plants. Prevent celery blight by providing good air circulation and avoiding overhead watering. If you see signs of blight, remove the affected leaves and spray the plants with a fungicide.
The Secret to a Consistent Harvest: Cutting and Regrowing
This is the magic trick! Instead of pulling up the entire celery plant at once, we’re going to harvest it strategically, allowing it to regrow.
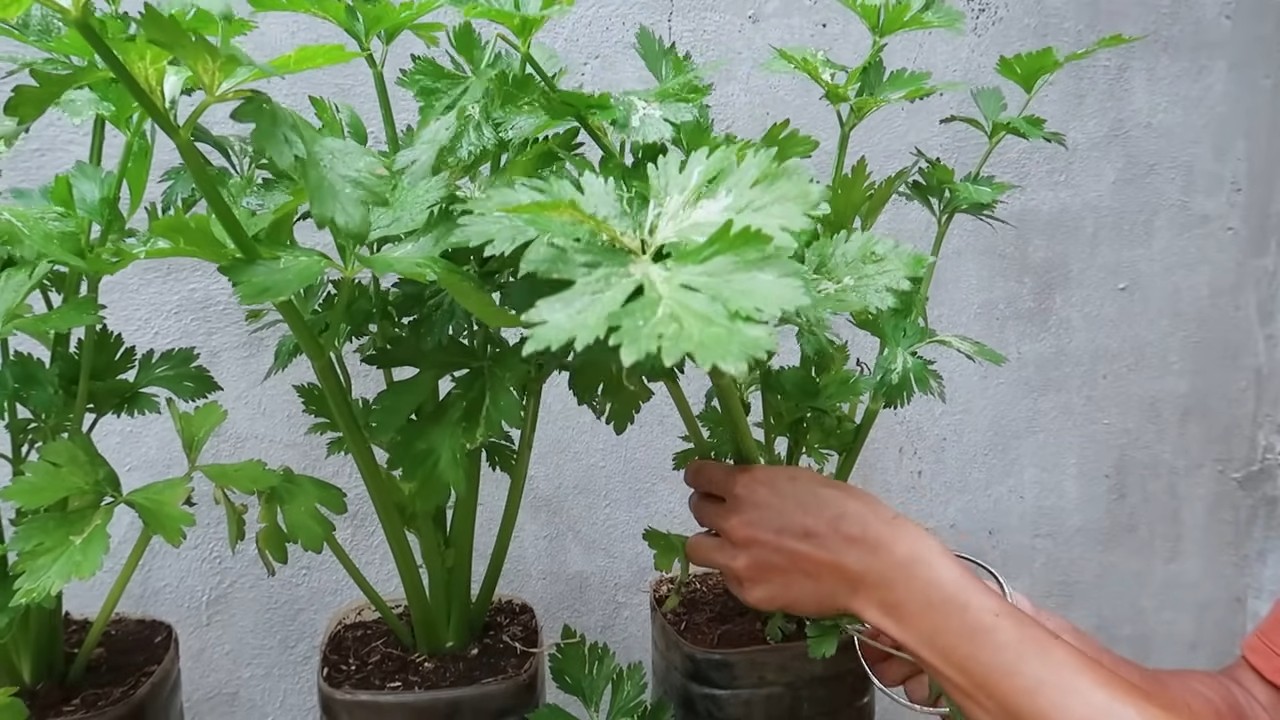
1. Harvest Outer Stalks: Once the celery plants are mature (about 80-100 days after planting), you can start harvesting the outer stalks. Use a sharp knife to cut the stalks off at the base of the plant.
2. Leave the Center Intact: Be sure to leave the center of the plant intact. This will allow the plant to continue growing and producing new stalks.
3. Repeat the Process: Continue harvesting the outer stalks as needed, leaving the center of the plant intact. With proper care, your celery plants will continue to produce stalks for several months.
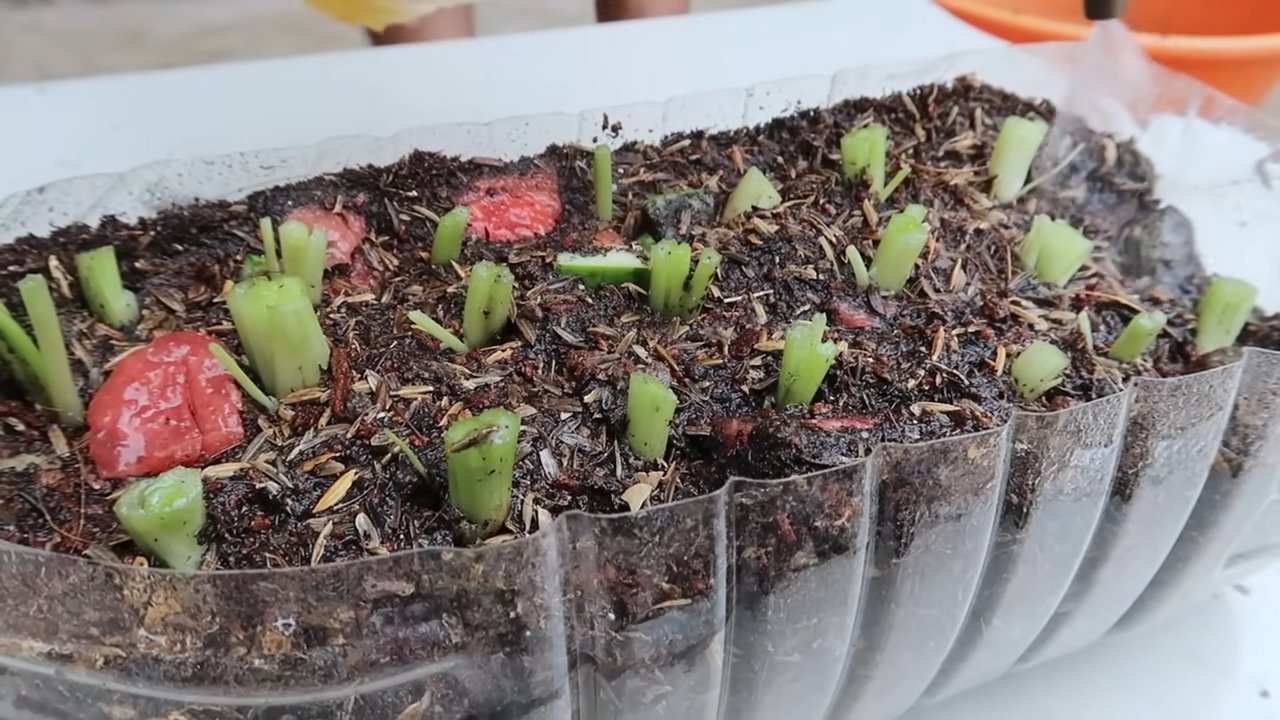
4. Cut and Regrow from the Base: Alternatively, you can cut the entire celery stalk about 2 inches from the base. Place the base in a shallow dish of water, and set it in a sunny location. Change the water every day or two. In a week or two, you should see new growth emerging from the center of the base. Once the new growth is a few inches tall, you can transplant the base into a pot or back into the garden.
Blanching (Optional)
Blanching is the process of covering the stalks of celery to make them white and more tender. While not necessary, it can improve the flavor and texture of some varieties.
1. Two Weeks Before Harvest: About two weeks before you plan to harvest the celery, blanch the stalks
Conclusion
So, there you have it! Achieving a consistent celery harvest doesn’t have to be a pipe dream relegated to professional gardeners. By implementing this simple yet effective DIY trick – the trench method – you can unlock a continuous supply of crisp, flavorful celery stalks right from your own backyard. Forget those wilted, overpriced bunches at the grocery store; imagine the satisfaction of snipping fresh celery whenever you need it, knowing you nurtured it from seed (or seedling) to table.
This method isn’t just about convenience; it’s about maximizing your yield and extending your harvest window. The trench provides a protected environment, shielding your celery from harsh weather and promoting healthy growth. Plus, the blanching effect of the soil around the stalks results in sweeter, more tender celery, perfect for snacking, salads, soups, and everything in between.
But don’t stop there! Feel free to experiment with variations to tailor this technique to your specific needs and preferences. Try different soil amendments to enrich the trench, such as compost, aged manure, or even coffee grounds. Consider using row covers or shade cloth to provide additional protection during extreme weather conditions. You could even try succession planting within the trench, staggering your planting dates to ensure a truly continuous harvest throughout the growing season.
And speaking of variations, consider the celery variety you choose. While this trench method works well for most types, some varieties are naturally more suited to blanching than others. ‘Golden Self-Blanching’ is a classic choice, but don’t be afraid to explore other options and see what works best in your climate and soil.
Ultimately, the key to a successful and consistent celery harvest lies in experimentation and observation. Pay attention to your plants, monitor their growth, and adjust your techniques as needed. Don’t be discouraged if you encounter challenges along the way; gardening is a learning process, and every mistake is an opportunity to improve.
We are confident that this DIY trick will revolutionize your celery-growing experience. It’s a game-changer for home gardeners of all skill levels, offering a simple, effective, and rewarding way to enjoy fresh, homegrown celery year-round.
Now, it’s your turn! We encourage you to give this method a try and see the difference it makes in your own garden. Share your experiences, tips, and photos with us in the comments below. We’d love to hear about your successes, challenges, and any variations you’ve discovered. Let’s build a community of celery-growing enthusiasts and help each other achieve the ultimate goal: a truly consistent celery harvest!
Frequently Asked Questions (FAQ)
What exactly is the “trench method” for growing celery?
The trench method involves planting celery seedlings in a shallow trench, typically 6-8 inches deep and wide. As the celery grows, you gradually fill the trench with soil, mounding it around the stalks. This process, known as blanching, excludes sunlight from the lower portion of the plant, resulting in sweeter, more tender celery. The trench also provides a sheltered environment that helps retain moisture and protect the plants from wind and temperature fluctuations.
Why is blanching important for celery?
Blanching is crucial for improving the flavor and texture of celery. When celery stalks are exposed to sunlight, they produce chlorophyll, which can make them bitter and tough. By excluding sunlight through blanching, you inhibit chlorophyll production, resulting in sweeter, more tender, and more palatable celery. The trench method naturally facilitates blanching as you gradually mound soil around the stalks.
What kind of soil is best for growing celery in a trench?
Celery thrives in rich, well-drained soil that is high in organic matter. Before planting, amend the soil in your trench with compost, aged manure, or other organic materials to improve its fertility and drainage. A slightly acidic to neutral pH (around 6.0 to 7.0) is ideal. Consider getting a soil test to determine the pH and nutrient levels of your soil and adjust accordingly.
How often should I water celery grown in a trench?
Celery needs consistent moisture to thrive. Water deeply and regularly, especially during hot, dry weather. Aim to keep the soil consistently moist but not waterlogged. Mulching around the plants can help retain moisture and suppress weeds. Check the soil moisture regularly by sticking your finger into the soil a few inches deep. If it feels dry, it’s time to water.
When is the best time to plant celery in a trench?
The best time to plant celery depends on your climate. In cooler climates, start seeds indoors 8-10 weeks before the last expected frost and transplant seedlings into the trench after the danger of frost has passed. In warmer climates, you can direct sow seeds or transplant seedlings in the fall for a winter harvest.
How do I prevent pests and diseases from affecting my celery crop?
Celery can be susceptible to various pests and diseases, including aphids, celery leaf miners, and fungal diseases. To prevent problems, practice good garden hygiene, such as removing weeds and debris that can harbor pests and diseases. Use organic pest control methods, such as insecticidal soap or neem oil, to control aphids and other pests. Ensure good air circulation around the plants to prevent fungal diseases. Crop rotation can also help prevent soilborne diseases.
Can I grow celery in a container using a similar method?
Yes, you can adapt the trench method for container gardening. Choose a large container (at least 12 inches in diameter) and fill it with a well-draining potting mix. Plant your celery seedlings in the container and gradually mound soil around the stalks as they grow. Ensure the container has drainage holes and water regularly.
How long does it take to harvest celery grown in a trench?
Celery typically takes 100-130 days to mature from seed. You can begin harvesting individual stalks as needed once the plants are large enough. To harvest, simply cut the stalks at the base of the plant. For a consistent celery harvest, harvest outer stalks first, allowing the inner stalks to continue growing.
What are some good companion plants for celery?
Celery benefits from being planted near certain companion plants. Onions, garlic, and marigolds are known to repel pests that can affect celery. Chamomile is believed to improve the flavor of celery. Avoid planting celery near parsley, as they can compete for nutrients.
What if my celery stalks are still green even after mounding soil around them?
If your celery stalks are still green after mounding soil around them, it means they are still being exposed to sunlight. Ensure that the soil is mounded high enough to completely cover the lower portion of the stalks. You can also use cardboard or other materials to further block sunlight. Remember that some celery varieties are naturally more green than others, so don’t be alarmed if they don’t turn completely white. The taste will still be improved by the partial blanching.


Leave a Comment