

Collard Greens Growing Tips: Unlock the secrets to a thriving, leafy harvest right in your own backyard! Have you ever dreamed of serving up a delicious, home-cooked meal featuring vibrant, homegrown collard greens? I know I have! But maybe you’ve been intimidated by the thought of cultivating these Southern staples yourself. Fear not, fellow gardening enthusiasts, because this DIY guide is here to transform you from a novice to a collard green guru!
Collard greens have a rich history, deeply rooted in African-American culinary traditions. Brought to the Americas during the era of slavery, they became a symbol of resilience and resourcefulness, providing essential nutrients and flavor to countless families. Today, they remain a beloved ingredient in Southern cuisine, and growing your own allows you to connect with this heritage in a tangible way.
Why should you embrace these collard greens growing tips? Well, beyond the historical significance and delicious taste, growing your own collard greens offers numerous benefits. You’ll have access to fresh, organic produce free from harmful pesticides. Plus, gardening is a fantastic way to relieve stress, connect with nature, and enjoy the satisfaction of nurturing something from seed to table. This DIY guide will provide you with simple, effective hacks to overcome common challenges and ensure a bountiful harvest. So, grab your gardening gloves, and let’s get started on your collard green adventure!
Growing Collard Greens Like a Pro: My Foolproof Guide
Hey there, fellow gardeners! I’m so excited to share my tried-and-true methods for growing the most delicious, vibrant collard greens you’ve ever tasted. I’ve been growing these leafy greens for years, and I’ve learned a thing or two along the way. Forget those tough, bitter greens you find at the store – with my tips, you’ll be harvesting tender, flavorful collards right from your own backyard. Let’s get started!
Choosing the Right Variety
First things first, let’s talk about choosing the right collard green variety. This is crucial because different varieties have different characteristics, like taste, size, and resistance to pests and diseases. Here are a few of my favorites:
* Georgia Southern: This is a classic, reliable variety known for its large, slightly crumpled leaves and mild flavor. It’s a great all-around choice.
* Vates: If you’re looking for cold hardiness, Vates is your go-to. It can withstand colder temperatures than many other varieties, making it ideal for gardeners in cooler climates.
* Champion: This variety is known for its fast growth and resistance to bolting (going to seed prematurely). It’s a good choice if you want a quick harvest.
* Top Bunch: As the name suggests, this variety produces a large bunch of leaves from a single plant. It’s a space-saver and a heavy producer.
Getting Started: Planting Your Collard Greens
Now that you’ve chosen your variety, it’s time to get your hands dirty! You can start collard greens from seed either indoors or directly in your garden. I usually prefer starting them indoors, especially if I want an early start to the season.
Starting Seeds Indoors:
1. Gather Your Supplies: You’ll need seed starting trays or small pots, seed starting mix, collard green seeds, a spray bottle, and a grow light (optional, but highly recommended).
2. Fill the Trays: Fill your seed starting trays or pots with seed starting mix. Gently pat it down to remove any air pockets.
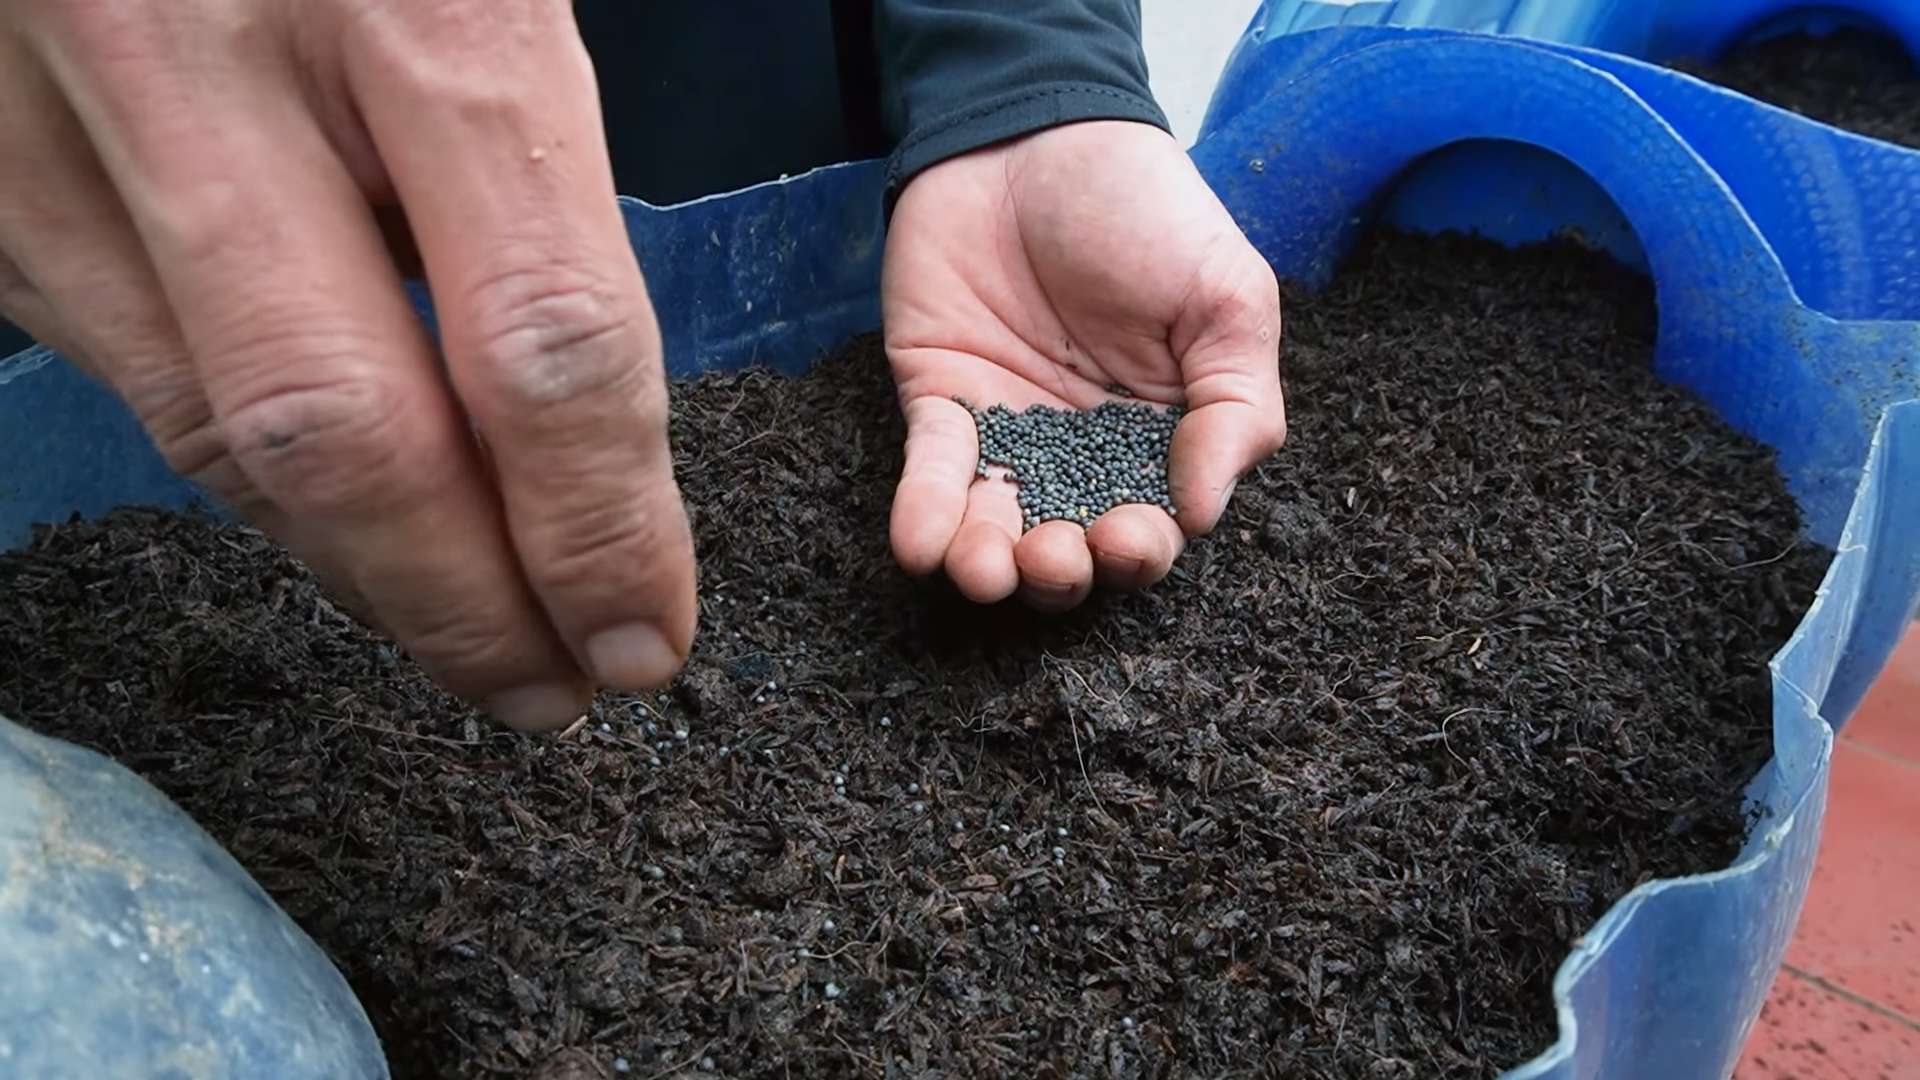
3. Sow the Seeds: Make a small indentation (about ¼ inch deep) in the center of each cell or pot. Place 2-3 collard green seeds in each indentation.
4. Cover the Seeds: Gently cover the seeds with seed starting mix.
5. Water Carefully: Use a spray bottle to moisten the soil. Avoid overwatering, as this can lead to damping off (a fungal disease that kills seedlings).
6. Provide Light and Warmth: Place the trays or pots in a warm location (around 70-75°F) and under a grow light if you have one. If you don’t have a grow light, place them near a sunny window, rotating them regularly to prevent them from leaning towards the light.
7. Keep the Soil Moist: Check the soil moisture daily and water as needed to keep it consistently moist but not soggy.
8. Thin the Seedlings: Once the seedlings have emerged and have a couple of true leaves (the second set of leaves), thin them to one seedling per cell or pot. Choose the strongest, healthiest-looking seedling and snip off the others at the soil line.
Direct Sowing in the Garden:
1. Prepare the Soil: Choose a sunny spot in your garden with well-drained soil. Amend the soil with compost or other organic matter to improve its fertility and drainage.
2. Sow the Seeds: Sow the seeds directly into the soil, about ½ inch deep and 2-3 inches apart.
3. Water Carefully: Gently water the soil to moisten it.
4. Thin the Seedlings: Once the seedlings have emerged and have a couple of true leaves, thin them to 12-18 inches apart.
Transplanting Your Seedlings
If you started your collard greens indoors, you’ll need to transplant them into your garden once they’re big enough. Here’s how I do it:
1. Harden Off the Seedlings: Before transplanting, you’ll need to harden off the seedlings. This means gradually exposing them to outdoor conditions over a period of 7-10 days. Start by placing them outside in a sheltered location for a few hours each day, gradually increasing the amount of time they spend outdoors.
2. Prepare the Planting Site: Choose a sunny spot in your garden with well-drained soil. Amend the soil with compost or other organic matter to improve its fertility and drainage.
3. Dig Holes: Dig holes that are slightly larger than the root balls of the seedlings, spacing them 12-18 inches apart.
4. Remove the Seedlings: Gently remove the seedlings from their trays or pots, being careful not to damage the roots.
5. Plant the Seedlings: Place the seedlings in the holes, making sure the top of the root ball is level with the soil surface.
6. Fill the Holes: Fill the holes with soil and gently pat it down around the seedlings.
7. Water Thoroughly: Water the seedlings thoroughly to help them settle in.
Caring for Your Collard Greens
Once your collard greens are planted, it’s important to provide them with the care they need to thrive. Here’s what I do:
* Watering: Collard greens need consistent moisture, especially during hot, dry weather. Water them deeply whenever the soil feels dry to the touch. Aim for about 1 inch of water per week.
* Fertilizing: Collard greens are heavy feeders, so they need regular fertilization. I like to use a balanced organic fertilizer, such as compost tea or fish emulsion, every 2-3 weeks.
* Weeding: Keep the area around your collard greens free of weeds, as weeds can compete with them for nutrients and water.
* Mulching: Apply a layer of mulch around your collard greens to help retain moisture, suppress weeds, and regulate soil temperature. I like to use straw, wood chips, or shredded leaves.
* Pest Control: Collard greens can be susceptible to a few pests, such as cabbage worms, aphids, and flea beetles. I prefer to use organic pest control methods, such as handpicking pests, using insecticidal soap, or applying Bacillus thuringiensis (Bt).
* Bolting Prevention: Bolting is when a plant prematurely goes to seed, which can make the leaves bitter. To prevent bolting, make sure your collard greens are getting enough water and nutrients, and harvest them regularly.
Dealing with Common Collard Green Pests and Diseases
Even with the best care, your collard greens might encounter some pests or diseases. Here’s how I tackle the most common problems:
* Cabbage Worms: These little green caterpillars can wreak havoc on your collard greens. I usually handpick them off the plants whenever I see them. You can also use Bacillus thuringiensis (Bt), a natural bacteria that kills caterpillars.
* Aphids: These tiny insects suck the sap from plants, causing them to weaken and become distorted. I usually spray them off with a strong stream of water. You can also use insecticidal soap or neem oil.
* Flea Beetles: These tiny beetles jump around when disturbed and can create small holes in the leaves. I usually cover my collard greens with row covers to prevent flea beetles from reaching them. You can also use diatomaceous earth.
* Downy Mildew: This fungal disease causes yellow spots on the upper surface of the leaves and a white, downy growth on the underside. To prevent downy mildew, make sure your collard greens have good air circulation and avoid overhead watering. If you see signs of downy mildew, remove the affected leaves and spray the plants with a copper fungicide.
Harvesting Your Collard Greens
The best part of growing collard greens is, of course, harvesting them! You can start harvesting collard greens when the leaves are about 10-12 inches long. Here’s how I do it:
1. Choose the Leaves: Select the outer, older leaves to harvest. These leaves are usually the largest and most mature.
2. Cut the Leaves: Use a sharp knife or scissors to cut the leaves off the plant, close to the stem.
3. Leave the Center Leaves: Leave the center leaves intact, as they will continue to grow and produce more leaves.
4. Harvest Regularly: Harvest your collard greens regularly to encourage continued growth.
Preparing and Cooking Your Collard Greens
Now that you’ve harvested your delicious collard greens, it’s time to prepare and cook them! Here’s my favorite method:
1. Wash the Leaves: Wash the collard green leaves thoroughly to remove any dirt or debris.
2. Remove the Stems: Remove the tough stems from the leaves. You can
Conclusion
So, there you have it! Mastering the art of growing your own collard greens is not only achievable, but incredibly rewarding. From selecting the right variety to warding off pests naturally, these tips provide a solid foundation for a bountiful harvest. The beauty of this DIY approach lies in its adaptability. Feel free to experiment with different companion plants, soil amendments, and even growing methods like container gardening if space is limited.
Why is this a must-try? Because nothing beats the flavor and freshness of homegrown collard greens. Store-bought greens simply can’t compare to the vibrant taste and nutritional value you get from cultivating your own. Plus, you have complete control over what goes into your garden, ensuring you’re enjoying pesticide-free, organically grown greens. This is a fantastic way to connect with your food, reduce your carbon footprint, and save money in the long run.
Consider adding a touch of smoked paprika to your soil for an extra layer of flavor in your greens. Or, try succession planting, sowing seeds every few weeks, to ensure a continuous supply of fresh collard greens throughout the growing season. For those in colder climates, explore growing collard greens in a greenhouse or cold frame to extend the harvest.
We’ve covered a lot of ground, from seed starting to pest control, but the most important thing is to get started! Don’t be afraid to experiment and learn as you go. Every garden is unique, and what works for one person might not work for another. The key is to observe your plants, pay attention to their needs, and adjust your approach accordingly.
Growing your own collard greens is more than just a gardening project; it’s an investment in your health, your well-being, and your connection to the natural world. It’s a chance to experience the satisfaction of nurturing something from seed to table. So, grab your gardening gloves, get your hands dirty, and embark on this exciting journey.
We’re confident that with these tips, you’ll be enjoying delicious, homegrown collard greens in no time. We encourage you to try these DIY tricks and share your experiences with us! Let us know what worked best for you, what challenges you faced, and any other tips you’ve discovered along the way. Your insights can help other gardeners succeed and inspire even more people to embrace the joy of growing their own food. Share your photos and stories on our social media pages using #HomegrownCollards. We can’t wait to see your amazing results!
Frequently Asked Questions (FAQ)
What is the best time of year to plant collard greens?
The ideal time to plant collard greens depends on your climate. In warmer regions with mild winters, you can plant them in the fall for a winter or spring harvest. In colder climates, start seeds indoors 6-8 weeks before the last expected frost and transplant them outdoors in the spring after the danger of frost has passed. You can also plant a second crop in late summer for a fall harvest. The key is to give them enough time to mature before the weather gets too hot or too cold.
How much sunlight do collard greens need?
Collard greens thrive in full sun, which means they need at least 6 hours of direct sunlight per day. However, they can tolerate partial shade, especially in hotter climates. If you’re growing them in a location with limited sunlight, try to choose a spot that gets morning sun, as this will help them dry off quickly and reduce the risk of fungal diseases.
What kind of soil is best for growing collard greens?
Collard greens prefer well-drained, fertile soil with a pH between 6.0 and 7.5. Amend your soil with compost or other organic matter before planting to improve drainage, fertility, and water retention. A soil test can help you determine the pH of your soil and identify any nutrient deficiencies. If your soil is too acidic, you can add lime to raise the pH.
How often should I water my collard greens?
Water collard greens regularly, especially during dry periods. Aim to keep the soil consistently moist but not waterlogged. Water deeply and less frequently, rather than shallowly and more often. This encourages deep root growth, which makes the plants more drought-tolerant. Mulching around the plants can also help retain moisture in the soil.
What are some common pests and diseases that affect collard greens?
Common pests that attack collard greens include aphids, cabbage worms, flea beetles, and slugs. Diseases include black rot, downy mildew, and clubroot. To prevent pest and disease problems, practice good garden hygiene, such as removing plant debris and weeds. Use row covers to protect plants from pests. Consider using organic pest control methods, such as insecticidal soap or neem oil, to control infestations. Choose disease-resistant varieties whenever possible.
How do I harvest collard greens?
You can start harvesting collard greens when the leaves are about 10-12 inches long. Harvest the outer leaves first, leaving the inner leaves to continue growing. This allows you to harvest greens over a longer period. Use a sharp knife or scissors to cut the leaves off close to the stem. Wash the leaves thoroughly before cooking.
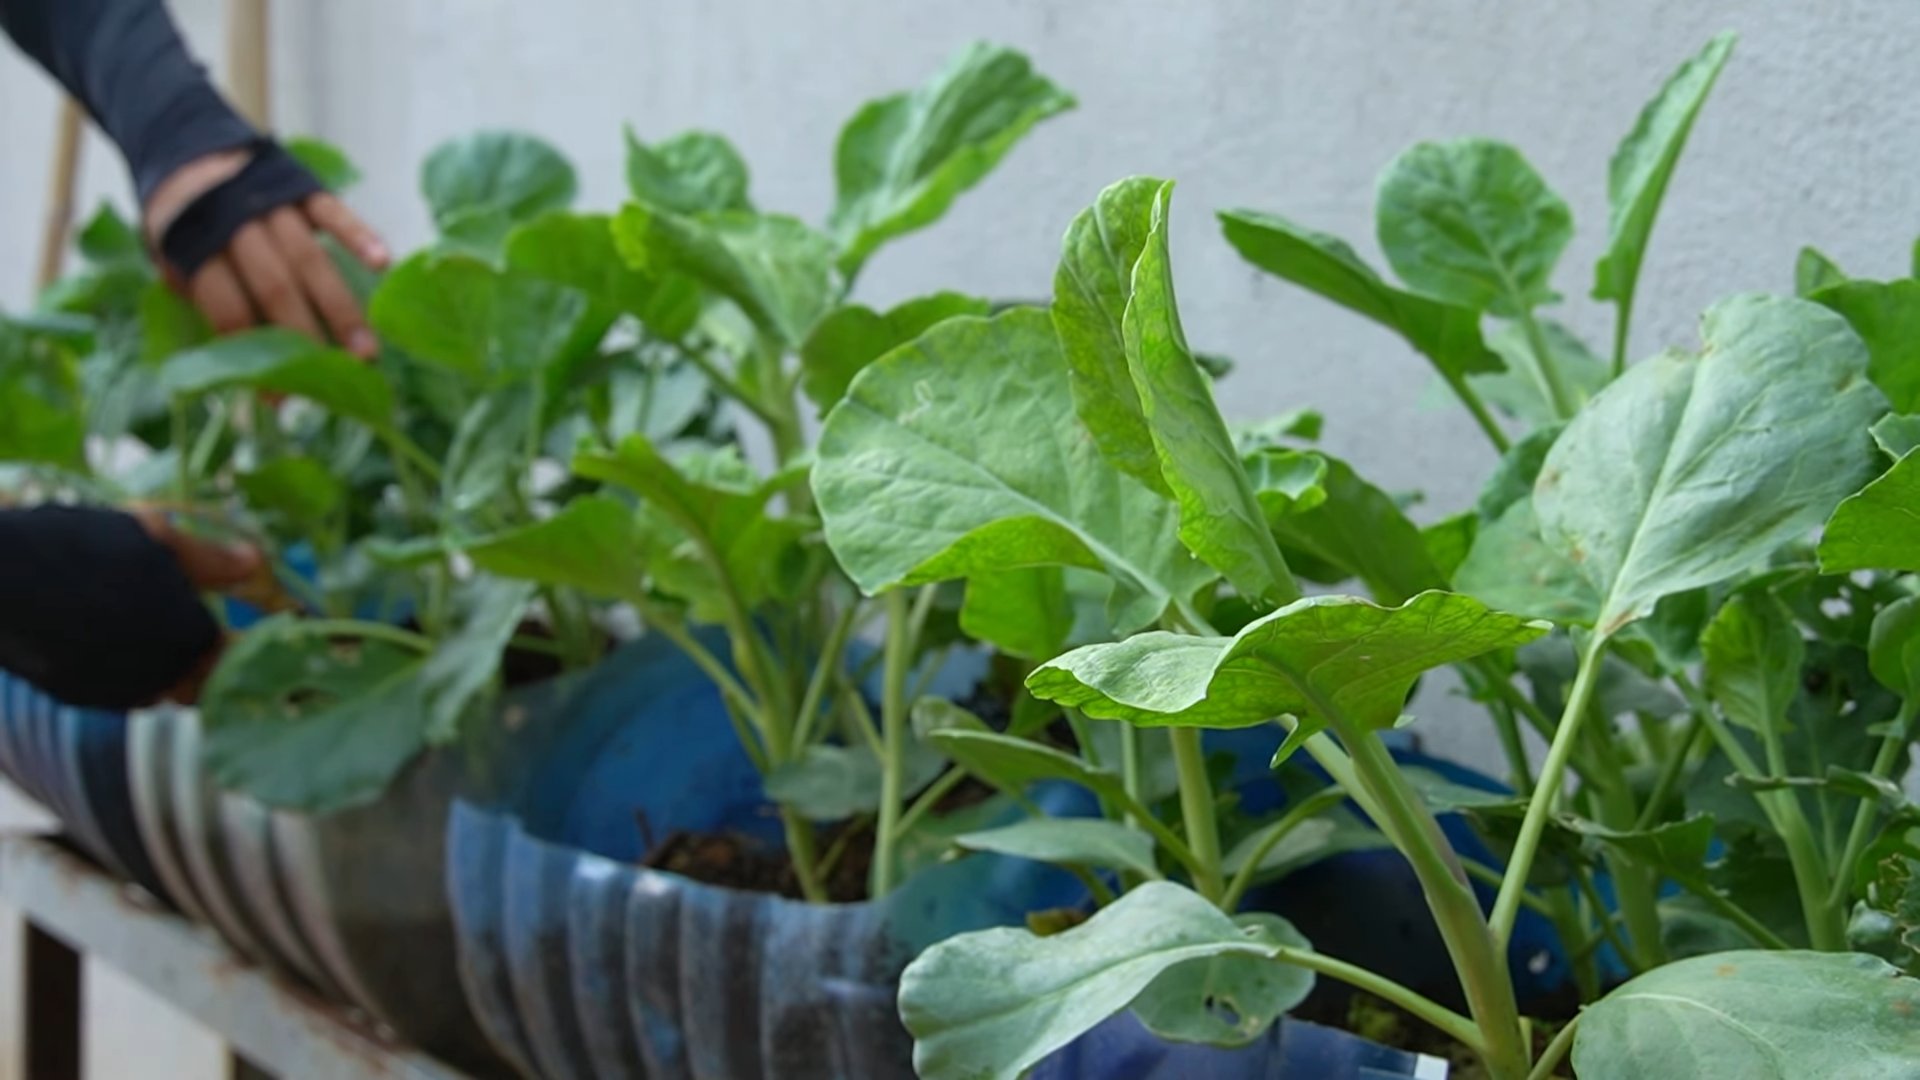
Can I grow collard greens in containers?
Yes, you can grow collard greens in containers. Choose a large container that is at least 12 inches deep and wide. Use a well-draining potting mix and water regularly. Container-grown collard greens may need to be fertilized more frequently than those grown in the ground. Make sure the container receives at least 6 hours of sunlight per day.
How do I store collard greens after harvesting?
To store collard greens, wash them thoroughly and pat them dry. Wrap them in a damp paper towel and place them in a plastic bag in the refrigerator. They should keep for up to a week. You can also freeze collard greens for longer storage. To freeze them, blanch them in boiling water for 2-3 minutes, then plunge them into ice water to stop the cooking process. Drain them well and pack them into freezer bags or containers.
Are collard greens nutritious?
Yes, collard greens are incredibly nutritious. They are an excellent source of vitamins A, C, and K, as well as folate, calcium, and fiber. They are also rich in antioxidants, which can help protect against chronic diseases. Adding collard greens to your diet is a great way to boost your overall health.
What are some different ways to cook collard greens?
Collard greens can be cooked in a variety of ways. They are often braised with ham hocks or bacon for a traditional Southern dish. They can also be steamed, sautéed, or added to soups and stews. For a healthier option, try steaming or sautéing them with garlic and olive oil. You can also add them to smoothies or salads for a nutritional boost. Experiment with different recipes and find your favorite way to enjoy these delicious and nutritious greens.

Leave a Comment