

Grow Celery Indoors Year Round? Absolutely! Imagine fresh, crisp celery stalks always at your fingertips, ready to add a delightful crunch to your salads, soups, or even just as a healthy snack. No more last-minute grocery store runs or wilted celery sitting in the crisper drawer. This DIY guide is your ticket to a year-round celery harvest, right in the comfort of your own home!
Celery, with its origins tracing back to the Mediterranean, has been enjoyed for centuries, not just for its culinary uses but also for its medicinal properties. Ancient Greeks even used celery leaves to crown victorious athletes! While traditionally grown outdoors, modern gardening techniques have made it incredibly easy to grow celery indoors year round, regardless of your climate or outdoor space.
But why should you bother with growing your own celery? Well, for starters, store-bought celery can often be expensive and lack the vibrant flavor of freshly harvested produce. Plus, growing your own allows you to control the growing environment, ensuring your celery is free from harmful pesticides and chemicals. I’m going to show you some simple, effective tricks and hacks that will empower you to cultivate a thriving indoor celery garden, saving you money, reducing waste, and adding a touch of green to your living space. Let’s get started!
Grow Celery Indoors Year-Round: A Beginner’s Guide
Hey there, fellow plant enthusiasts! Ever dreamt of having fresh, crunchy celery on hand whenever you need it, regardless of the season? Well, I’m here to tell you it’s totally achievable, even if you don’t have a sprawling garden. Growing celery indoors is a fun and rewarding project, and I’m going to walk you through every step of the way. Let’s get started!
What You’ll Need
Before we dive into the nitty-gritty, let’s gather our supplies. Here’s a checklist of everything you’ll need to successfully grow celery indoors:
* **Celery Stalk:** This is your starting point! Choose a healthy-looking celery stalk from the grocery store. Make sure the base (where the stalks are connected) is firm and intact.
* **Shallow Dish or Bowl:** This will be our propagation station.
* **Water:** Tap water is fine, but filtered water is even better.
* **Potting Mix:** A good quality potting mix is crucial for healthy growth. Avoid using garden soil, as it can be too dense and may contain pests or diseases.
* **Pot:** Choose a pot that’s at least 8 inches in diameter and 8 inches deep. Celery needs room for its roots to grow.
* **Grow Lights (Optional but Recommended):** While celery can grow indoors with natural light, grow lights will provide consistent and optimal lighting, especially during the darker months.
* **Spray Bottle:** For misting the celery leaves.
* **Fertilizer (Optional):** A balanced liquid fertilizer can help boost growth, but it’s not essential.
Section 1: Regrowing Celery from a Stalk
This is where the magic begins! We’re going to coax a new celery plant from the base of a store-bought stalk. It’s easier than you think!
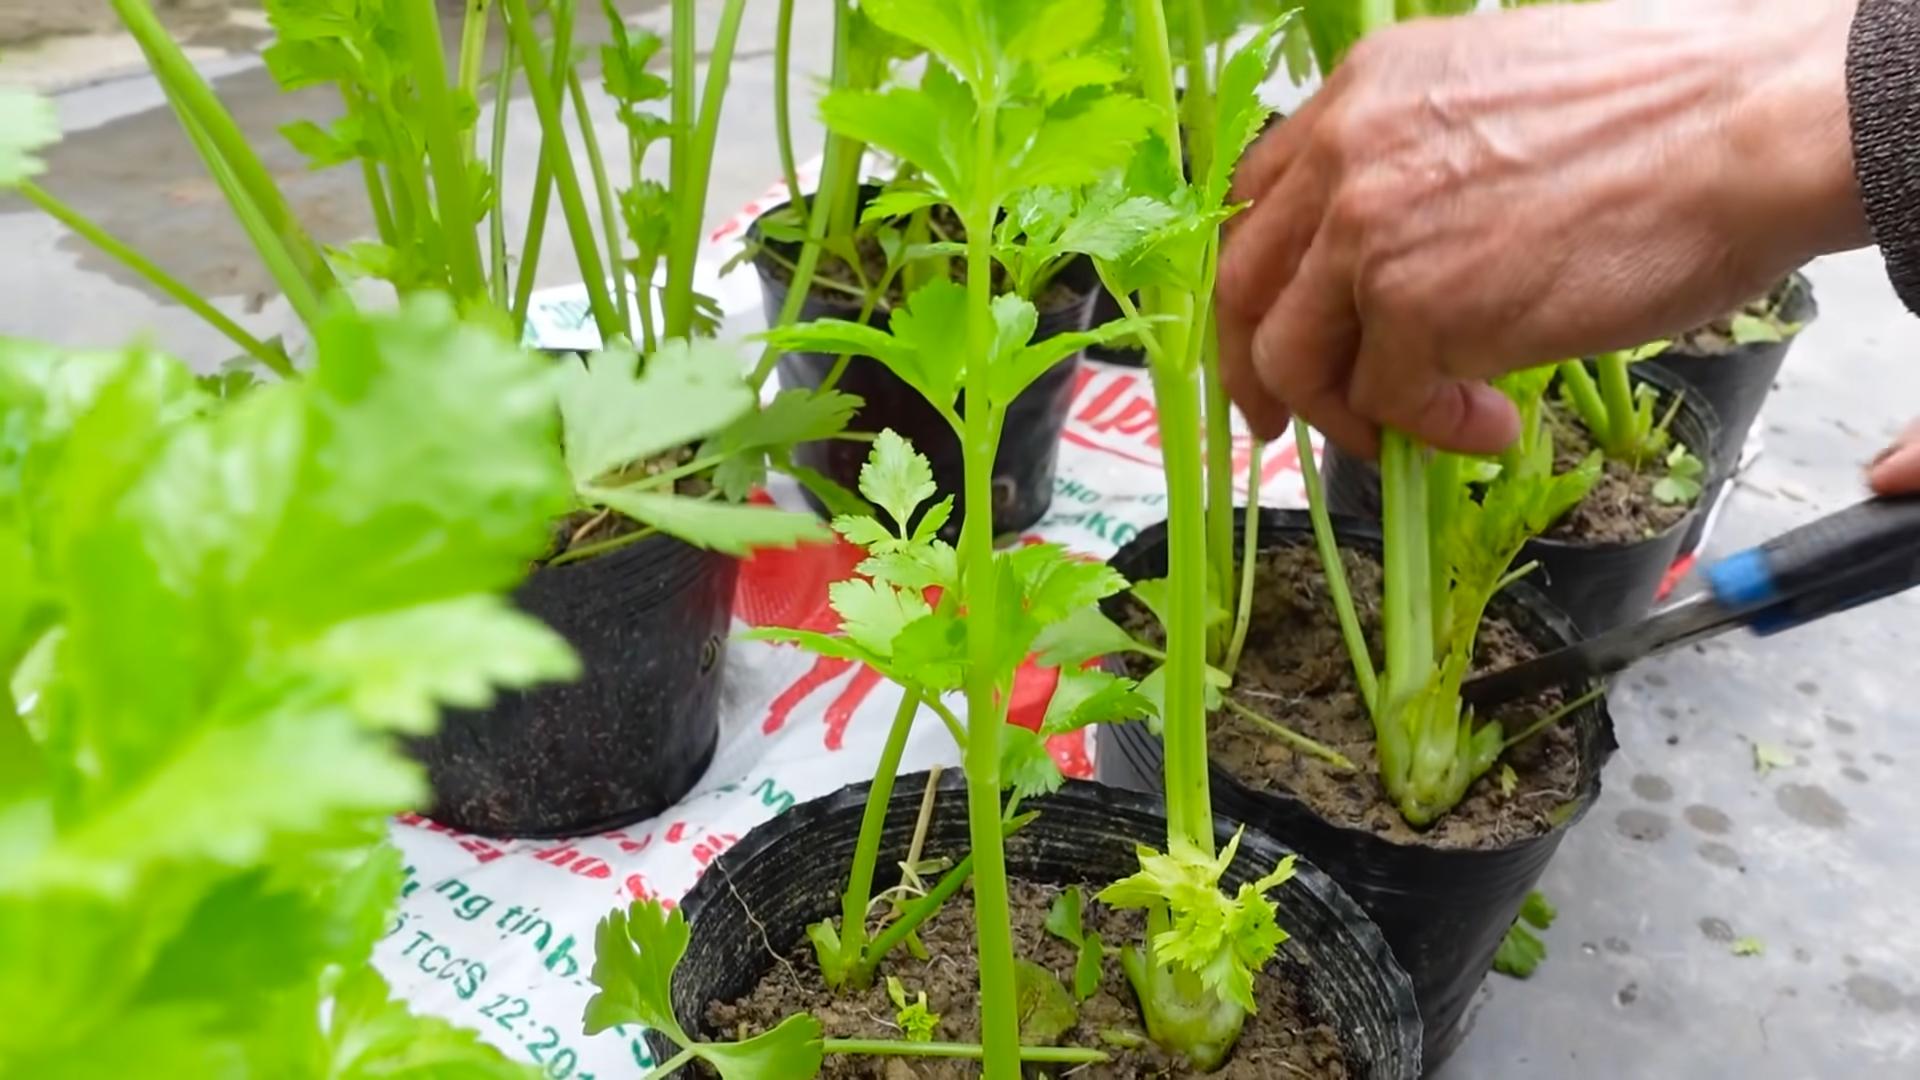
Step 1: Preparing the Celery Base
1. Carefully cut off the celery stalks about 2 inches from the base. Don’t throw away the stalks you cut off! You can use them in your favorite recipes.
2. You should now have the celery base, which looks like a little stump.
Step 2: Rooting the Celery Base
1. Place the celery base in your shallow dish or bowl.
2. Add water until it reaches about halfway up the base. You don’t want to submerge the entire base, just the bottom part.
3. Place the dish in a bright, sunny location, such as a windowsill. If you don’t have a sunny windowsill, you can use a grow light.
4. Change the water every 1-2 days to prevent bacteria growth.
Step 3: Watching for Roots
1. Be patient! It usually takes about 5-7 days for roots to start appearing. You’ll see small, white roots emerging from the bottom of the celery base.
2. Once the roots are about 1-2 inches long, it’s time to move on to the next step.
Section 2: Planting Your Celery
Now that our celery has roots, it’s time to give it a proper home in a pot.
Step 1: Preparing the Pot
1. Fill your pot with potting mix, leaving about an inch of space at the top.
2. Water the potting mix thoroughly until it’s evenly moist but not soggy.
Step 2: Planting the Celery Base
1. Carefully dig a small hole in the center of the potting mix, large enough to accommodate the celery base and its roots.
2. Gently place the celery base into the hole, making sure the roots are spread out.
3. Cover the roots with potting mix, leaving the top of the celery base exposed.
4. Gently pat down the soil around the base to secure it in place.
Step 3: Watering and Initial Care
1. Water the newly planted celery thoroughly.
2. Place the pot in a bright, sunny location or under a grow light.
3. Mist the leaves with water using a spray bottle to increase humidity.
Section 3: Ongoing Care and Maintenance
Congratulations! You’ve successfully planted your celery. Now, let’s talk about how to keep it happy and healthy.
Step 1: Watering
1. Celery needs consistent moisture, so water it regularly. Check the soil moisture by sticking your finger about an inch into the soil. If it feels dry, it’s time to water.
2. Avoid overwatering, as this can lead to root rot. The soil should be moist, not soggy.
Step 2: Lighting
1. Celery needs at least 6 hours of sunlight per day. If you’re using natural light, place your celery in a south-facing window.
2. If you’re using grow lights, keep them on for about 12-14 hours per day.
Step 3: Fertilizing (Optional)
1. If you want to give your celery a boost, you can fertilize it every 2-3 weeks with a balanced liquid fertilizer.
2. Follow the instructions on the fertilizer label carefully.
3. Don’t over-fertilize, as this can damage the plant.
Step 4: Pruning
1. As your celery grows, you may notice some yellowing or browning leaves. These are normal and can be removed.
2. Simply snip off the affected leaves with clean scissors or pruning shears.
Step 5: Pest Control
1. Keep an eye out for pests, such as aphids or spider mites.
2. If you notice any pests, you can try spraying the leaves with insecticidal soap or neem oil.
3. You can also try hand-picking the pests off the plant.
Section 4: Harvesting Your Celery
The best part! After a few months of care, you’ll be able to harvest your own homegrown celery.
Step 1: When to Harvest
1. You can start harvesting celery stalks when they are about 6-8 inches long.
2. The stalks should be firm and crisp.
Step 2: How to Harvest
1. To harvest a stalk, simply cut it off at the base of the plant with a sharp knife or scissors.
2. You can harvest individual stalks as needed, or you can harvest the entire plant at once.
Step 3: Enjoying Your Harvest
1. Wash the celery stalks thoroughly before eating.
2. Enjoy your fresh, homegrown celery in salads, soups, stews, or as a healthy snack!
Troubleshooting Tips
Even with the best care, you might encounter some challenges along the way. Here are a few common problems and how to fix them:
* **Yellowing Leaves:** This could be a sign of overwatering, underwatering, or nutrient deficiency. Adjust your watering schedule and consider fertilizing.
* **Leggy Growth:** This means your celery isn’t getting enough light. Move it to a brighter location or use grow lights.
* **Slow Growth:** This could be due to a variety of factors, including poor soil, insufficient light, or lack of nutrients. Make sure you’re using a good quality potting mix, providing adequate light, and fertilizing as needed.
* **Pests:** As mentioned earlier, keep an eye out for pests and treat them promptly with insecticidal soap or neem oil.
Advanced Tips for Celery Growing
Want to take your celery growing skills to the next level? Here are a few advanced tips:
* **Blanching:** Blanching is a technique that involves excluding light from the celery stalks to make them more tender and less bitter. You can do this by wrapping the stalks with paper or cardboard a few weeks before harvesting.
* **Succession Planting:** To ensure a continuous supply of celery, plant new celery bases every few weeks.
* **Companion Planting:** Celery grows well with other plants, such as tomatoes, onions, and cabbage.
Growing celery indoors is a rewarding experience that allows you to enjoy fresh, homegrown celery year-round. With a little patience and care, you can successfully grow your own celery and impress your friends and family with your green thumb! Happy growing!
Conclusion
So, there you have it! Growing celery indoors year-round isn’t just a whimsical gardening dream; it’s an achievable reality with a little patience and this simple DIY trick. We’ve walked you through the process, from rescuing that celery base to nurturing it into a thriving indoor plant. Why is this a must-try? Because it offers a continuous supply of fresh, crisp celery right at your fingertips, regardless of the season. Imagine the convenience of snipping off a stalk or two for your soups, salads, or even a healthy snack, all without a trip to the grocery store.
Beyond the sheer convenience, this method is incredibly rewarding. It’s a fantastic way to reduce food waste, giving new life to something that would otherwise end up in the compost bin. Plus, it’s a fun and educational project for the whole family, teaching valuable lessons about plant life cycles and sustainable living.
But the beauty of this DIY celery growing adventure lies in its adaptability. Feel free to experiment with different celery varieties. Try growing red celery for a pop of color, or explore heirloom varieties for unique flavors. You can also adjust the size of your container to suit your space. A small pot is perfect for a windowsill herb garden, while a larger container can accommodate a more substantial celery plant.
Consider companion planting to enhance your indoor garden. Basil, parsley, and chives are all excellent companions for celery, attracting beneficial insects and improving the overall health of your plants. You can even add a small trellis to support the celery stalks as they grow taller.
Don’t be afraid to get creative with your setup. Use recycled containers, decorate your pots, and personalize your growing space. The possibilities are endless!
Ultimately, this DIY trick for growing celery indoors year-round is more than just a gardening project; it’s a step towards a more sustainable and self-sufficient lifestyle. It’s about connecting with nature, reducing waste, and enjoying the simple pleasure of fresh, homegrown produce.
We wholeheartedly encourage you to give this a try. It’s easier than you might think, and the rewards are well worth the effort. Once you’ve embarked on your indoor celery growing journey, we’d love to hear about your experience. Share your photos, tips, and challenges in the comments below. Let’s create a community of indoor celery enthusiasts and inspire others to embrace the joy of homegrown goodness. Let us know if you have successfully implemented this **grow celery indoors** method. Happy growing!
Frequently Asked Questions (FAQ)
1. What kind of celery works best for this method?
Any type of celery you buy from the grocery store will work, but organic celery is often recommended. This is because non-organic celery may have been treated with chemicals that could inhibit regrowth. However, even non-organic celery can be successful. The key is to choose a celery stalk with a healthy, firm base. Avoid celery that is wilted, discolored, or has signs of rot. Experiment with different varieties if you want to see which ones thrive best in your indoor environment.
2. How long does it take for celery to regrow?
You should start to see new growth within a week or two. Small leaves will emerge from the center of the celery base. However, it will take several months to grow a full-sized celery stalk. Be patient and continue to provide adequate water, sunlight, and nutrients. The exact time frame will depend on factors such as the variety of celery, the growing conditions, and the overall health of the plant.
3. What kind of soil should I use?
Use a well-draining potting mix. A mix that contains peat moss, perlite, and vermiculite is ideal. This type of mix will provide good aeration and drainage, which is essential for healthy celery growth. Avoid using garden soil, as it can be too heavy and compact, leading to root rot. You can also amend your potting mix with compost or other organic matter to provide additional nutrients.
4. How much sunlight does celery need?
Celery needs at least 6 hours of sunlight per day. Place your celery plant in a sunny windowsill or under a grow light. If you’re using a grow light, position it about 6-12 inches above the plant. Rotate the plant regularly to ensure that all sides receive equal light exposure. Insufficient sunlight can lead to leggy growth and reduced yields.
5. How often should I water my celery plant?
Keep the soil consistently moist, but not waterlogged. Water when the top inch of soil feels dry to the touch. Avoid overwatering, as this can lead to root rot. Check the soil moisture regularly, especially during hot weather. You may need to water more frequently during the summer months.
6. Do I need to fertilize my celery plant?
Yes, celery is a heavy feeder and benefits from regular fertilization. Use a balanced liquid fertilizer diluted to half strength. Fertilize every two to three weeks during the growing season. Avoid over-fertilizing, as this can burn the roots. You can also use organic fertilizers, such as compost tea or fish emulsion.
7. Can I harvest the entire celery stalk?
You can harvest individual stalks as needed, or you can harvest the entire plant. To harvest individual stalks, simply cut them off at the base of the plant. To harvest the entire plant, cut it off at the soil line. The celery base will continue to produce new growth, so you can potentially harvest multiple times from the same plant.
8. What if my celery plant starts to bolt (flower)?
Bolting is a natural process that occurs when celery is exposed to stress, such as high temperatures or drought. Once celery bolts, the stalks become bitter and less palatable. To prevent bolting, provide consistent watering, adequate sunlight, and protection from extreme temperatures. If your celery plant does bolt, you can still harvest the seeds for future planting.
9. Are there any common pests or diseases that affect indoor celery?
Common pests that can affect indoor celery include aphids, spider mites, and whiteflies. These pests can be controlled with insecticidal soap or neem oil. Common diseases that can affect indoor celery include root rot and fungal diseases. These diseases can be prevented by providing good drainage, avoiding overwatering, and ensuring adequate air circulation.
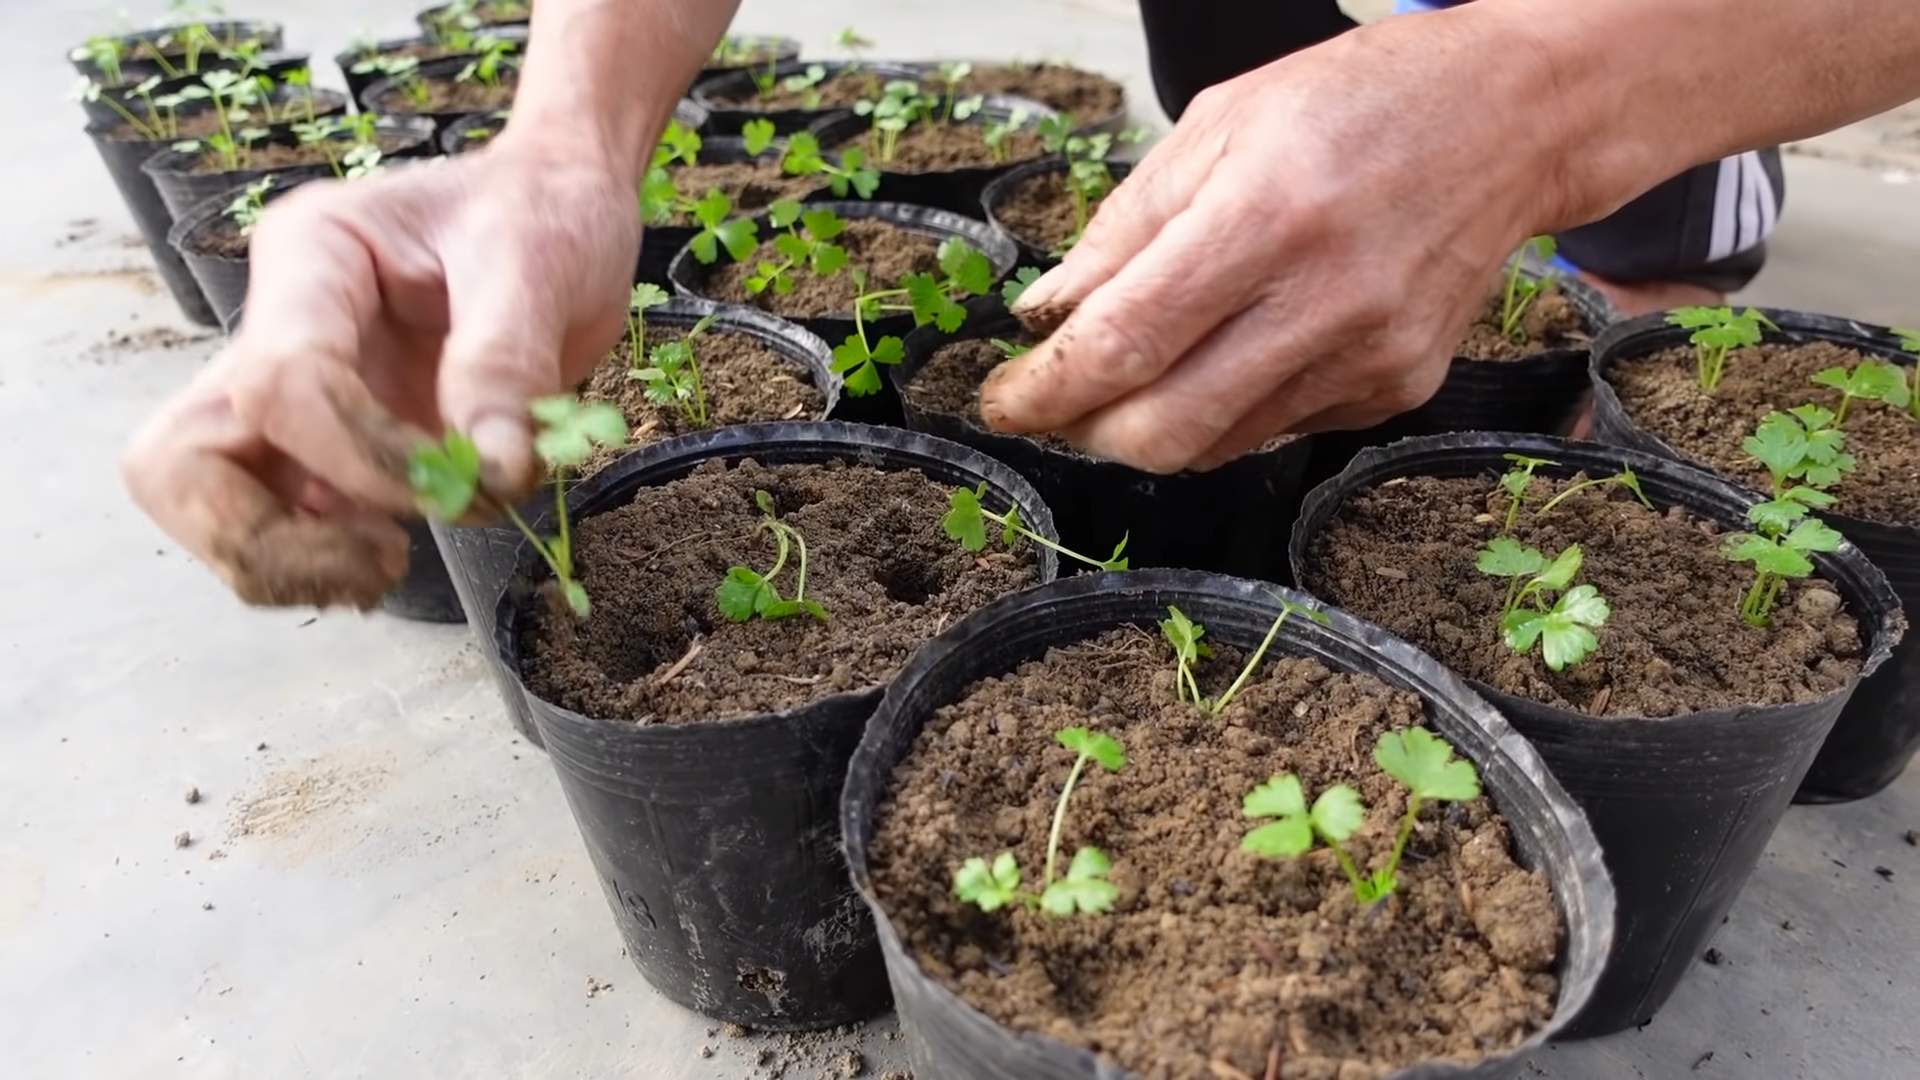
10. Can I grow celery from seed indoors?
Yes, you can grow celery from seed indoors. Start the seeds indoors 8-10 weeks before the last frost. Sow the seeds in a seed starting mix and keep them moist. Once the seedlings have developed several sets of true leaves, transplant them into individual pots. Provide adequate sunlight and water, and fertilize regularly.
11. My celery is growing, but the stalks are thin and weak. What am I doing wrong?
Thin and weak stalks can be caused by several factors, including insufficient sunlight, lack of nutrients, or overcrowding. Make sure your celery plant is receiving at least 6 hours of sunlight per day. Fertilize regularly with a balanced liquid fertilizer. If you have multiple celery plants in the same container, thin them out to provide more space for each plant to grow.
12. Can I transplant my indoor celery plant outdoors?
Yes, you can transplant your indoor celery plant outdoors, but it’s important to acclimate it gradually to the outdoor conditions. Start by placing the plant outdoors for a few hours each day, gradually increasing the amount of time it spends outside. Protect the plant from direct sunlight and strong winds during the acclimation period. Once the plant is fully acclimated, you can transplant it into your garden.
13. How do I store harvested celery?
Store harvested celery in the refrigerator. Wrap the celery stalks in a damp paper towel and place them in a plastic bag. This will help to keep the celery crisp and fresh. You can also store celery in a container of water in the refrigerator. Change the water every few days to keep the celery fresh.
14. Is growing celery indoors year-round truly sustainable?
While growing celery indoors year-round is a great way to reduce your reliance on store-bought produce, its sustainability depends on your practices. Using energy-efficient grow lights, rainwater harvesting, and composting kitchen scraps to enrich your soil can significantly enhance the sustainability of your indoor celery garden. Consider the energy consumption of your grow lights and choose LED options for lower energy usage.
15. Can I propagate celery from cuttings other than the base?
While the base is the most reliable method, you can try propagating celery from side shoots or smaller stalks. Place the cutting in water, ensuring that a node is submerged. Change the water every few days. Once roots develop, transplant the cutting into potting mix. This method is less reliable than using the base, but it’s worth experimenting with.


Leave a Comment