

Chili Plant Care Tips: Want to spice up your life, literally? I’m here to tell you that growing your own chilies at home is easier than you think! For centuries, chilies have been more than just a source of fiery flavor; they’ve been integral to cultures around the globe, from adding zest to ancient Mesoamerican cuisine to warming hearts in Indian curries.
But let’s face it, sometimes our chili plants can be a little… temperamental. Are your leaves turning yellow? Are your chilies refusing to ripen? Don’t worry, you’re not alone! Many home gardeners struggle with getting their chili plants to thrive. That’s why I’ve put together this guide packed with simple, effective chili plant care tips and DIY hacks that will transform your chili-growing game.
Imagine harvesting baskets full of vibrant, flavorful chilies right from your own backyard or balcony. No more bland meals! With these easy-to-follow tips, you’ll be well on your way to enjoying a bountiful harvest and impressing your friends and family with your green thumb. Let’s dive in and unlock the secrets to successful chili plant care!
DIY: Supercharge Your Chili Plant Growth!
Hey fellow chili enthusiasts! I’m so excited to share my tried-and-true method for getting your chili plants to explode with peppers. Forget those tiny, sad harvests – we’re going for a chili bonanza! This guide is packed with tips and tricks I’ve learned over the years, and I promise, even if you’re a beginner, you can achieve amazing results.
Choosing the Right Chili Variety
Before we dive into the nitty-gritty, let’s talk about variety. Not all chili peppers are created equal! Some are easier to grow than others, and some are better suited to certain climates.
* Beginner-Friendly Options: Jalapeños, Serrano peppers, and Anaheim peppers are generally considered easier to grow. They’re relatively forgiving and produce reliably.
* Heat Levels: Consider your spice tolerance! Scotch Bonnets and Habaneros pack a serious punch, while Poblano peppers are much milder.
* Space Considerations: Some chili plants grow quite large, while others stay relatively compact. If you’re growing in containers, opt for smaller varieties.
* Climate: Research which varieties thrive in your region. Some peppers need a longer growing season than others.
Starting Your Chili Plants
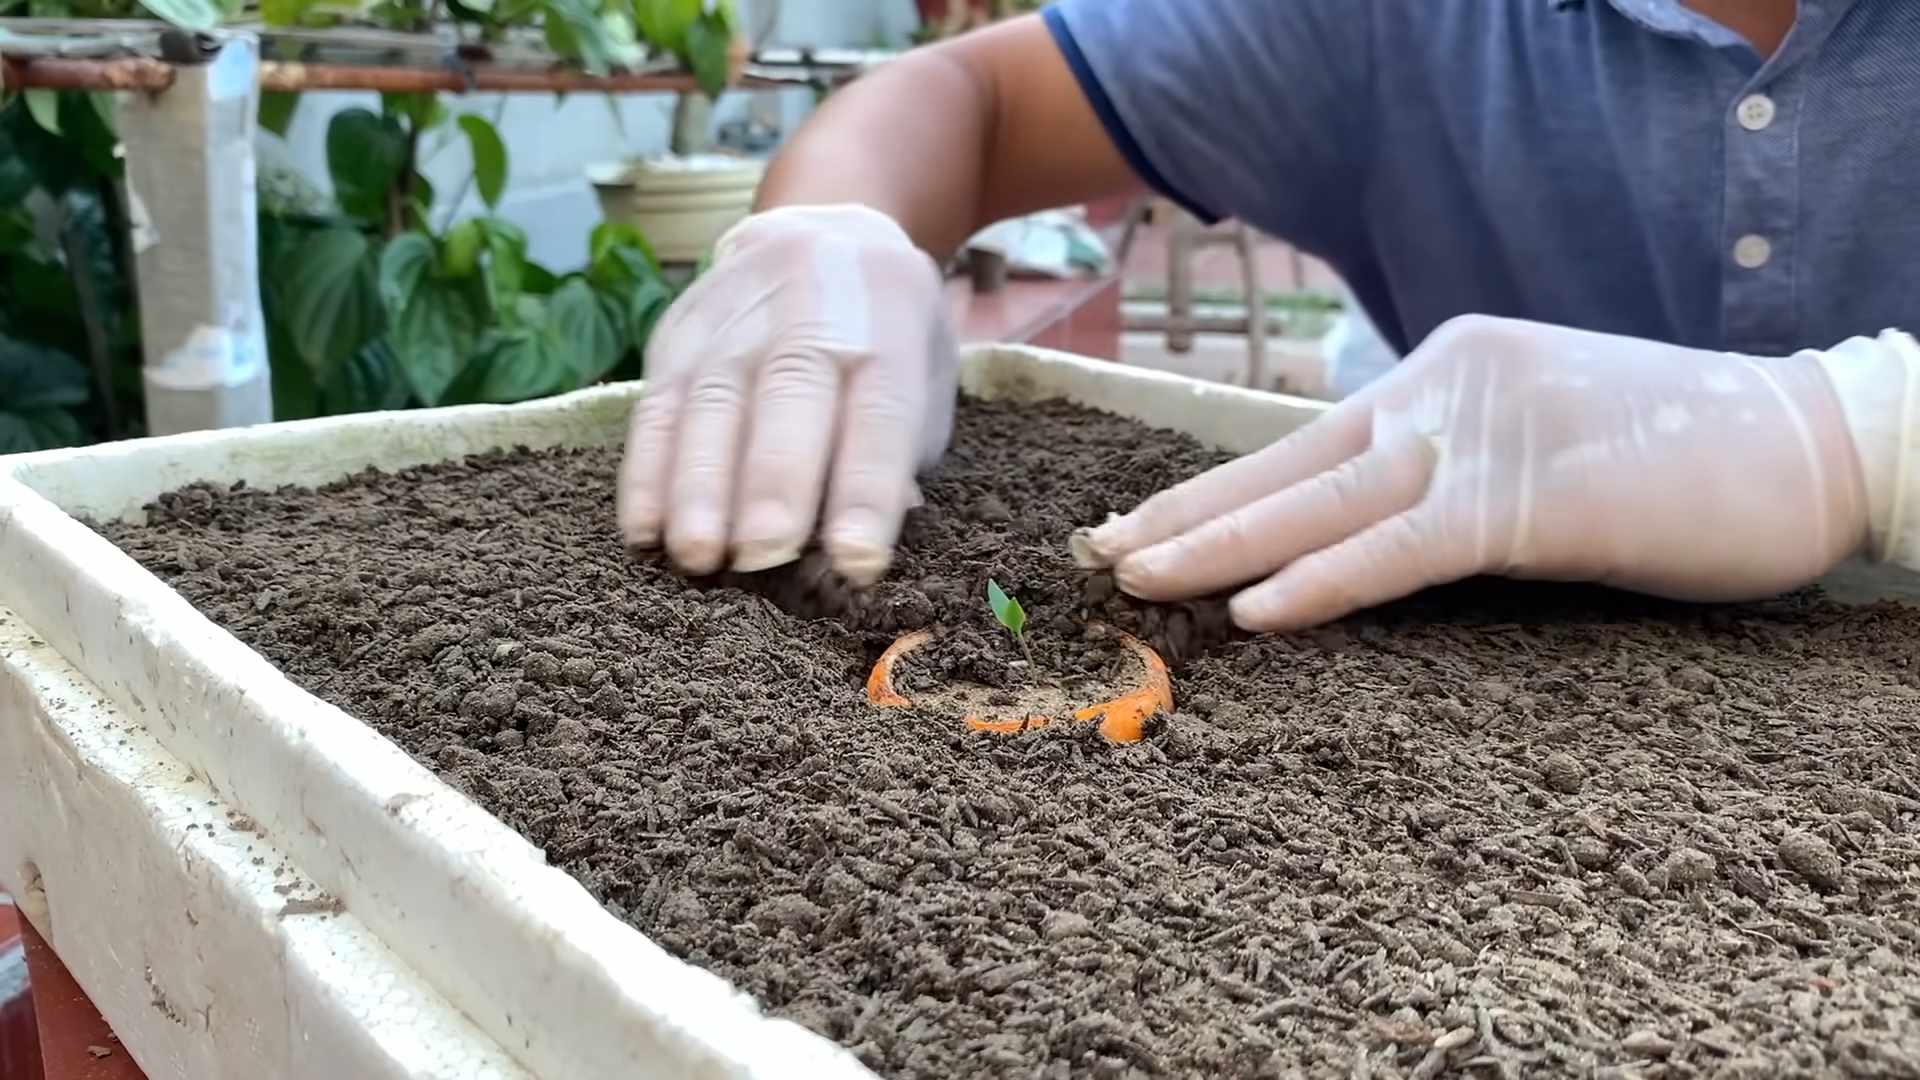
You can either start your chili plants from seed or purchase seedlings from a nursery. I personally prefer starting from seed, as it gives me more control over the process.
Starting from Seed:
1. Gather Your Supplies: You’ll need chili seeds, seed starting trays or small pots, seed starting mix (a light, well-draining soil), a spray bottle, and a heat mat (optional, but highly recommended).
2. Sow the Seeds: Fill your seed starting trays or pots with seed starting mix. Moisten the soil with the spray bottle – you want it damp, not soggy. Plant 2-3 seeds per cell or pot, about ¼ inch deep.
3. Provide Warmth: Chili seeds need warmth to germinate. Place the trays or pots on a heat mat, if you have one. Otherwise, find a warm spot in your house, like near a radiator.
4. Maintain Moisture: Keep the soil consistently moist by spraying it with water whenever it starts to dry out. Don’t overwater, as this can lead to rot.
5. Be Patient: Chili seeds can take anywhere from 7 to 21 days to germinate, so don’t give up!
6. Provide Light: Once the seedlings emerge, they’ll need plenty of light. Place them under grow lights or in a very sunny window.
7. Thin the Seedlings: Once the seedlings have a few sets of true leaves (the leaves that look like miniature versions of the adult leaves), thin them out, leaving only the strongest seedling in each cell or pot.
Transplanting Seedlings:
1. Harden Off the Seedlings: Before transplanting your seedlings outdoors, you need to “harden them off.” This means gradually exposing them to outdoor conditions over a period of 7-10 days. Start by placing them outside for an hour or two each day, gradually increasing the amount of time they spend outdoors.
2. Choose the Right Location: Chili plants need at least 6-8 hours of sunlight per day. Choose a location that gets plenty of sun and has well-draining soil.
3. Prepare the Soil: Amend the soil with compost or other organic matter to improve drainage and fertility.
4. Transplant Carefully: Dig a hole that’s slightly larger than the root ball of the seedling. Gently remove the seedling from its pot and place it in the hole. Backfill with soil and water thoroughly.
5. Space Appropriately: Space your chili plants according to the variety. Generally, you’ll want to space them about 18-24 inches apart.
Essential Chili Plant Care
Now that your chili plants are in the ground (or in pots), it’s time to focus on providing them with the care they need to thrive.
* Watering: Chili plants need consistent watering, especially during hot weather. Water deeply whenever the top inch of soil feels dry. Avoid overwatering, as this can lead to root rot.
* Fertilizing: Chili plants are heavy feeders, so they need regular fertilization. Use a balanced fertilizer (e.g., 10-10-10) every 2-3 weeks. Once the plants start to flower, switch to a fertilizer that’s higher in phosphorus (the middle number) to promote fruit production. I personally love using bone meal for this!
* Pruning: Pruning can help to improve air circulation and encourage bushier growth. Remove any dead or yellowing leaves. You can also pinch off the tips of the branches to encourage branching.
* Support: As your chili plants grow, they may need support to prevent them from falling over. Use stakes or cages to support the plants.
* Pest Control: Keep an eye out for pests like aphids, spider mites, and whiteflies. Treat infestations promptly with insecticidal soap or neem oil.
* Weed Control: Keep the area around your chili plants free of weeds. Weeds compete with the plants for nutrients and water.
My Secret Weapon: Epsom Salts!
This is where my chili-growing secret comes in! Epsom salts (magnesium sulfate) can work wonders for your chili plants. Magnesium is essential for chlorophyll production, which is necessary for photosynthesis. It also helps the plants absorb other nutrients, like nitrogen and phosphorus.
* How to Use Epsom Salts: Dissolve 1 tablespoon of Epsom salts in 1 gallon of water. Use this solution to water your chili plants every 2-3 weeks. You can also spray the foliage with the solution, but be sure to do this in the early morning or late evening to avoid burning the leaves.
* Why It Works: I’ve noticed a significant difference in the health and productivity of my chili plants since I started using Epsom salts. The leaves are greener, the plants are stronger, and the pepper production is much higher.
Troubleshooting Common Chili Plant Problems
Even with the best care, you may encounter some problems with your chili plants. Here are some common issues and how to address them:
* Blossom End Rot: This is a condition where the bottom of the chili peppers turns black and leathery. It’s caused by a calcium deficiency. To prevent blossom end rot, make sure your soil is rich in calcium and water your plants consistently. You can also add calcium to the soil by mixing in crushed eggshells or bone meal.
* Leaf Curl: Leaf curl can be caused by a variety of factors, including pests, diseases, and environmental stress. Inspect your plants for pests and treat accordingly. Make sure your plants are getting enough water and sunlight.
* Lack of Fruit Production: If your chili plants are not producing fruit, it could be due to a lack of pollination. Chili plants are self-pollinating, but they may need some help from you. Gently shake the plants or use a small paintbrush to transfer pollen from one flower to another.
* Yellowing Leaves: Yellowing leaves can be a sign of nutrient deficiency, overwatering, or underwatering. Check the soil moisture and adjust your watering accordingly. Fertilize your plants with a balanced fertilizer.
Harvesting Your Chili Peppers
The moment you’ve been waiting for! Knowing when to harvest your chili peppers is key to getting the best flavor and heat.
* Color: The color of the chili pepper is a good indicator of ripeness. Most chili peppers will turn from green to red, yellow, or orange when they’re ripe.
* Firmness: Ripe chili peppers should be firm to the touch.
* Size: The size of the chili pepper will vary depending on the variety.
* Taste: The best way to determine if a chili pepper is ripe is to taste it! Be careful, though – some chili peppers are very hot!
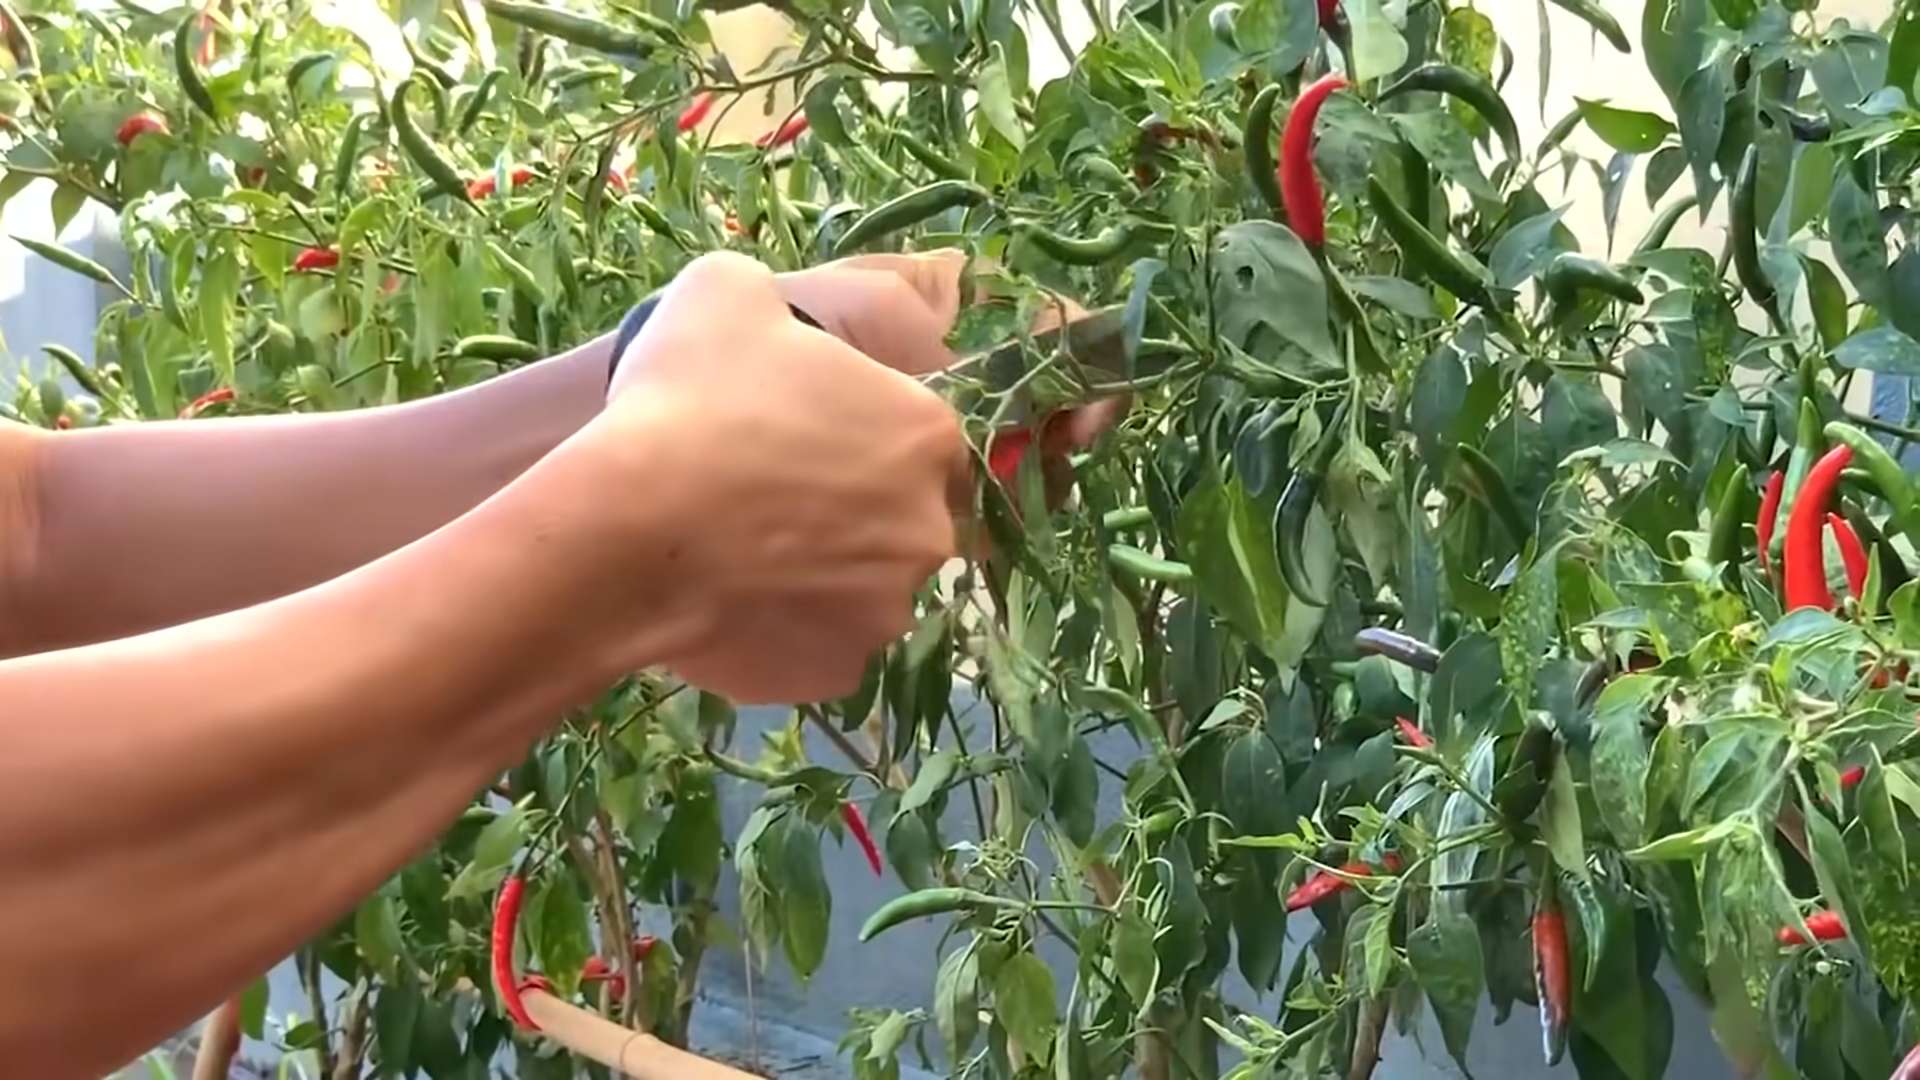
* Harvesting Technique: Use scissors or pruning shears to cut the chili peppers from the plant. Be careful not to damage the plant.
Preserving Your Chili Peppers
If you have a bumper crop of chili peppers, you’ll want to preserve them so you can enjoy them all year long. Here are some popular methods:
* Drying: Drying is a simple and effective way to preserve chili peppers. You can dry them in a dehydrator, in the oven, or by hanging them in a warm, dry place.
* Pickling: Pickling is another great way to preserve chili peppers. You can pickle them in vinegar, brine, or oil.
* Freezing: Freezing is a quick and easy way to preserve chili peppers. Simply wash and dry the peppers, then place them in a freezer bag.
* Making Chili Powder: Dry your chili peppers, then grind them into a powder using a spice grinder or blender.
Enjoying Your Homegrown Chilis!
Now that you’
Conclusion
So, there you have it! Mastering these simple yet effective chili plant care tips can truly transform your gardening experience and reward you with a bountiful harvest of fiery peppers. We’ve covered everything from the importance of sunlight and well-draining soil to the nuances of watering, fertilizing, and pest control. Remember, growing chili plants isn’t just about following a set of rules; it’s about understanding their needs and adapting your approach accordingly.
Why is this DIY approach a must-try? Because it empowers you to take control of your chili plant’s health and productivity. You’re not relying on expensive, potentially harmful chemicals or generic advice that may not be suitable for your specific climate and growing conditions. Instead, you’re learning to observe your plants, identify their needs, and provide them with the care they require to thrive. This hands-on approach fosters a deeper connection with your garden and a greater appreciation for the natural world.
But the journey doesn’t end here! Feel free to experiment with different variations to further personalize your chili plant care routine. For example, try using different types of organic fertilizers, such as compost tea or worm castings, to boost nutrient levels in the soil. You could also explore companion planting, pairing your chili plants with herbs like basil or marigolds to deter pests and attract beneficial insects. Consider different methods of pest control, such as neem oil sprays or introducing ladybugs to your garden.
Don’t be afraid to get creative and tailor these tips to your specific needs and preferences. The beauty of gardening lies in its adaptability and the endless possibilities for experimentation.
We’re confident that by implementing these chili plant care tips, you’ll be well on your way to enjoying a vibrant and productive chili garden. Imagine the satisfaction of harvesting your own homegrown peppers, bursting with flavor and ready to add a kick to your favorite dishes!
Now, it’s your turn. We encourage you to put these tips into practice and share your experiences with us. Let us know what works best for you, what challenges you encounter, and any other insights you gain along the way. Your feedback is invaluable and will help us continue to refine and improve our chili plant care advice.
So, grab your gardening gloves, get your hands dirty, and embark on this exciting journey of growing your own chili peppers. We’re here to support you every step of the way. Happy gardening!
Frequently Asked Questions (FAQ)
What type of soil is best for chili plants?
Chili plants thrive in well-draining soil that is rich in organic matter. A slightly acidic to neutral pH (around 6.0 to 7.0) is ideal. You can improve soil drainage by adding perlite or coarse sand to your potting mix. Incorporating compost or well-rotted manure will provide essential nutrients and improve soil structure. Avoid heavy clay soils, as they can retain too much water and lead to root rot. A good starting mix would be equal parts potting soil, compost, and perlite.
How often should I water my chili plants?
Watering frequency depends on several factors, including the climate, soil type, and size of the plant. Generally, chili plants need consistent moisture but should not be overwatered. Water deeply when the top inch of soil feels dry to the touch. Avoid watering the foliage directly, as this can increase the risk of fungal diseases. During hot, dry weather, you may need to water more frequently. In cooler, wetter conditions, reduce watering accordingly. Using a moisture meter can help you determine the moisture level in the soil and prevent overwatering or underwatering.
How much sunlight do chili plants need?
Chili plants are sun-loving plants and require at least 6-8 hours of direct sunlight per day to thrive. Insufficient sunlight can lead to leggy growth, reduced flowering, and smaller peppers. If you’re growing chili plants indoors, place them near a sunny window or use grow lights to supplement natural light. Rotate the plants regularly to ensure even light exposure on all sides. If you live in a very hot climate, providing some afternoon shade can prevent the plants from getting scorched.
What are the best fertilizers for chili plants?
Chili plants benefit from regular fertilization, especially during the growing season. Use a balanced fertilizer with equal amounts of nitrogen, phosphorus, and potassium (e.g., 10-10-10) early in the season to promote healthy growth. Once the plants start flowering, switch to a fertilizer with a higher phosphorus content (e.g., 5-10-5) to encourage fruit production. Avoid over-fertilizing, as this can lead to excessive foliage growth at the expense of flowering and fruiting. Organic fertilizers, such as compost tea, worm castings, and bone meal, are also excellent options for providing essential nutrients.
How do I protect my chili plants from pests and diseases?
Chili plants can be susceptible to various pests and diseases, including aphids, spider mites, whiteflies, and fungal infections. Regularly inspect your plants for signs of infestation or disease. Remove any affected leaves or stems promptly. Use insecticidal soap or neem oil to control pests. Ensure good air circulation around the plants to prevent fungal diseases. Avoid overwatering, as this can create a favorable environment for fungal growth. Consider using companion planting to deter pests and attract beneficial insects. For example, basil and marigolds are known to repel certain pests.
When should I harvest my chili peppers?
The harvesting time depends on the variety of chili pepper and your desired level of ripeness. Most chili peppers will change color as they ripen, typically from green to red, yellow, or orange. The peppers are generally ready to harvest when they have reached their mature color and size. Use pruning shears or scissors to cut the peppers from the plant, leaving a small stem attached. Handle the peppers carefully to avoid bruising or damaging them. Remember to wear gloves when handling hot peppers to avoid skin irritation.
Can I grow chili plants indoors?
Yes, you can successfully grow chili plants indoors, provided you meet their basic needs. Choose a sunny location near a window that receives at least 6-8 hours of direct sunlight per day. Use grow lights to supplement natural light if necessary. Select a pot that is large enough to accommodate the plant’s root system. Use a well-draining potting mix and water regularly, allowing the soil to dry slightly between waterings. Fertilize the plants regularly with a balanced fertilizer. Be mindful of pests and diseases, and take appropriate measures to control them.
How do I overwinter my chili plants?
If you live in a climate with cold winters, you can overwinter your chili plants indoors to keep them alive until the next growing season. Before the first frost, prune the plants back to about 6-8 inches tall. Dig up the plants carefully and pot them in containers with fresh potting mix. Place the plants in a cool, bright location indoors, such as a sunny window or a basement with grow lights. Water sparingly, allowing the soil to dry out slightly between waterings. Fertilize the plants sparingly during the winter months. In the spring, gradually acclimate the plants to outdoor conditions before transplanting them back into the garden.
What are some common problems with chili plants and how can I fix them?
Some common problems with chili plants include leaf curl, blossom drop, and stunted growth. Leaf curl can be caused by aphids, spider mites, or nutrient deficiencies. Treat the plants with insecticidal soap or neem oil to control pests. Ensure that the plants are receiving adequate nutrients by fertilizing them regularly. Blossom drop can be caused by temperature stress, insufficient pollination, or overwatering. Provide shade during hot weather, hand-pollinate the flowers if necessary, and adjust your watering schedule. Stunted growth can be caused by poor soil, insufficient sunlight, or pest infestations. Improve the soil by adding compost or well-rotted manure. Ensure that the plants are receiving at least 6-8 hours of direct sunlight per day. Treat the plants with insecticidal soap or neem oil to control pests.
How can I make my chili peppers hotter?
The heat level of chili peppers is determined by genetics, but you can influence it to some extent through environmental factors. Stressing the plants slightly can increase the heat level of the peppers. For example, you can reduce watering slightly or expose the plants to slightly higher temperatures. Avoid over-fertilizing, as this can reduce the heat level of the peppers. Harvesting the peppers later in the season, when they are fully ripe, can also increase their heat level. Remember that the heat level of chili peppers can vary depending on the specific variety and growing conditions.
Leave a Comment