

Bucket Potato Growing: Imagine harvesting a bounty of fresh, homegrown potatoes right from your patio or balcony! No sprawling garden required. Sounds too good to be true? It’s not! For centuries, humans have cultivated potatoes in ingenious ways, adapting to limited spaces and challenging environments. From the terraced fields of the Andes, where potatoes originated, to the modern urban gardener, the desire to grow this versatile staple remains strong.
But let’s face it, not everyone has access to acres of farmland. That’s where this DIY guide comes in. I’m going to show you how to master bucket potato growing, a simple and effective method that’s perfect for beginners and seasoned gardeners alike. This trick is a game-changer because it allows you to control the soil quality, manage pests easily, and even move your potato crop to chase the sun!
Why do you need this DIY trick? Because store-bought potatoes simply can’t compare to the flavor and satisfaction of harvesting your own. Plus, it’s a fun and rewarding project that connects you with nature, even in the heart of the city. So, grab a bucket, some soil, and get ready to grow your own delicious potatoes!
DIY Bucket Potato Growing: A Bountiful Harvest in a Small Space!
Hey there, fellow gardening enthusiasts! Are you dreaming of fresh, homegrown potatoes but short on space? Well, I’ve got the perfect solution for you: bucket potato growing! It’s a fun, easy, and surprisingly productive way to cultivate these starchy delights, even if you only have a balcony or patio. I’ve been doing this for years, and I’m excited to share my secrets with you. Let’s get started!
What You’ll Need
Before we dive into the nitty-gritty, let’s gather our supplies. Here’s a checklist of everything you’ll need to embark on your bucket potato adventure:
* Buckets: 5-gallon buckets are ideal, but you can use larger ones if you prefer. Make sure they’re clean and food-grade if possible. I usually grab mine from local bakeries or restaurants – they often have extras they’re willing to give away!
* Seed Potatoes: These are potatoes specifically grown for planting. You can find them at your local garden center or online. Choose varieties that are well-suited to your climate. I personally love Yukon Gold for their creamy texture and reliable yields.
* Potting Mix: A well-draining potting mix is crucial. Avoid using garden soil, as it can become compacted in the bucket and hinder drainage. I usually mix equal parts of compost, peat moss (or coco coir), and perlite.
* Fertilizer: A slow-release fertilizer formulated for vegetables will provide your potatoes with the nutrients they need to thrive. I prefer organic options like bone meal or fish emulsion.
* Drill (optional): For drainage holes, if your buckets don’t already have them.
* Watering Can or Hose: For keeping your potato plants hydrated.
* Trowel or Shovel: For planting and adding soil.
* Gloves: To keep your hands clean and protected.
Preparing Your Buckets
Proper preparation is key to a successful bucket potato garden. Here’s how to get your buckets ready for planting:
* Drainage: If your buckets don’t have drainage holes, drill several (about 1/2 inch in diameter) in the bottom. This is essential to prevent waterlogging, which can lead to root rot. I usually drill about 4-5 holes evenly spaced around the bottom.
* Cleaning: Give your buckets a good scrub with soap and water to remove any dirt or debris.
* Optional: Consider painting the outside of your buckets a light color. Dark colors can absorb heat and potentially overheat the soil, especially in warmer climates. I’ve used light grey and white with great success.
Preparing Your Seed Potatoes
Now, let’s get those seed potatoes ready for planting!
* Chitting (Optional but Recommended): Chitting is the process of encouraging your seed potatoes to sprout before planting. This gives them a head start and can result in an earlier harvest. To chit your potatoes, place them in a cool, bright location (but not direct sunlight) for a few weeks. You’ll notice small sprouts (called “eyes”) emerging from the potatoes.
* Cutting (If Necessary): If your seed potatoes are large (bigger than an egg), you can cut them into smaller pieces. Each piece should have at least one or two “eyes.” Allow the cut surfaces to dry and callous over for a day or two before planting. This helps prevent rot. I usually cut mine into pieces about the size of a golf ball.
Planting Your Potatoes
Alright, it’s time to get our hands dirty and plant those potatoes!
1. Add Soil: Fill the bottom of your bucket with about 4-6 inches of potting mix.
2. Plant the Seed Potatoes: Place 2-3 seed potato pieces (or whole small seed potatoes) on top of the soil, with the “eyes” facing upwards. Space them evenly around the bucket.
3. Cover with Soil: Cover the seed potatoes with another 4-6 inches of potting mix.
4. Water Thoroughly: Water the soil gently but thoroughly until it’s evenly moist.
“Hilling” Your Potatoes
This is where the magic happens! “Hilling” is the process of gradually adding more soil to the bucket as the potato plants grow. This encourages the plants to produce more potatoes along the stems.
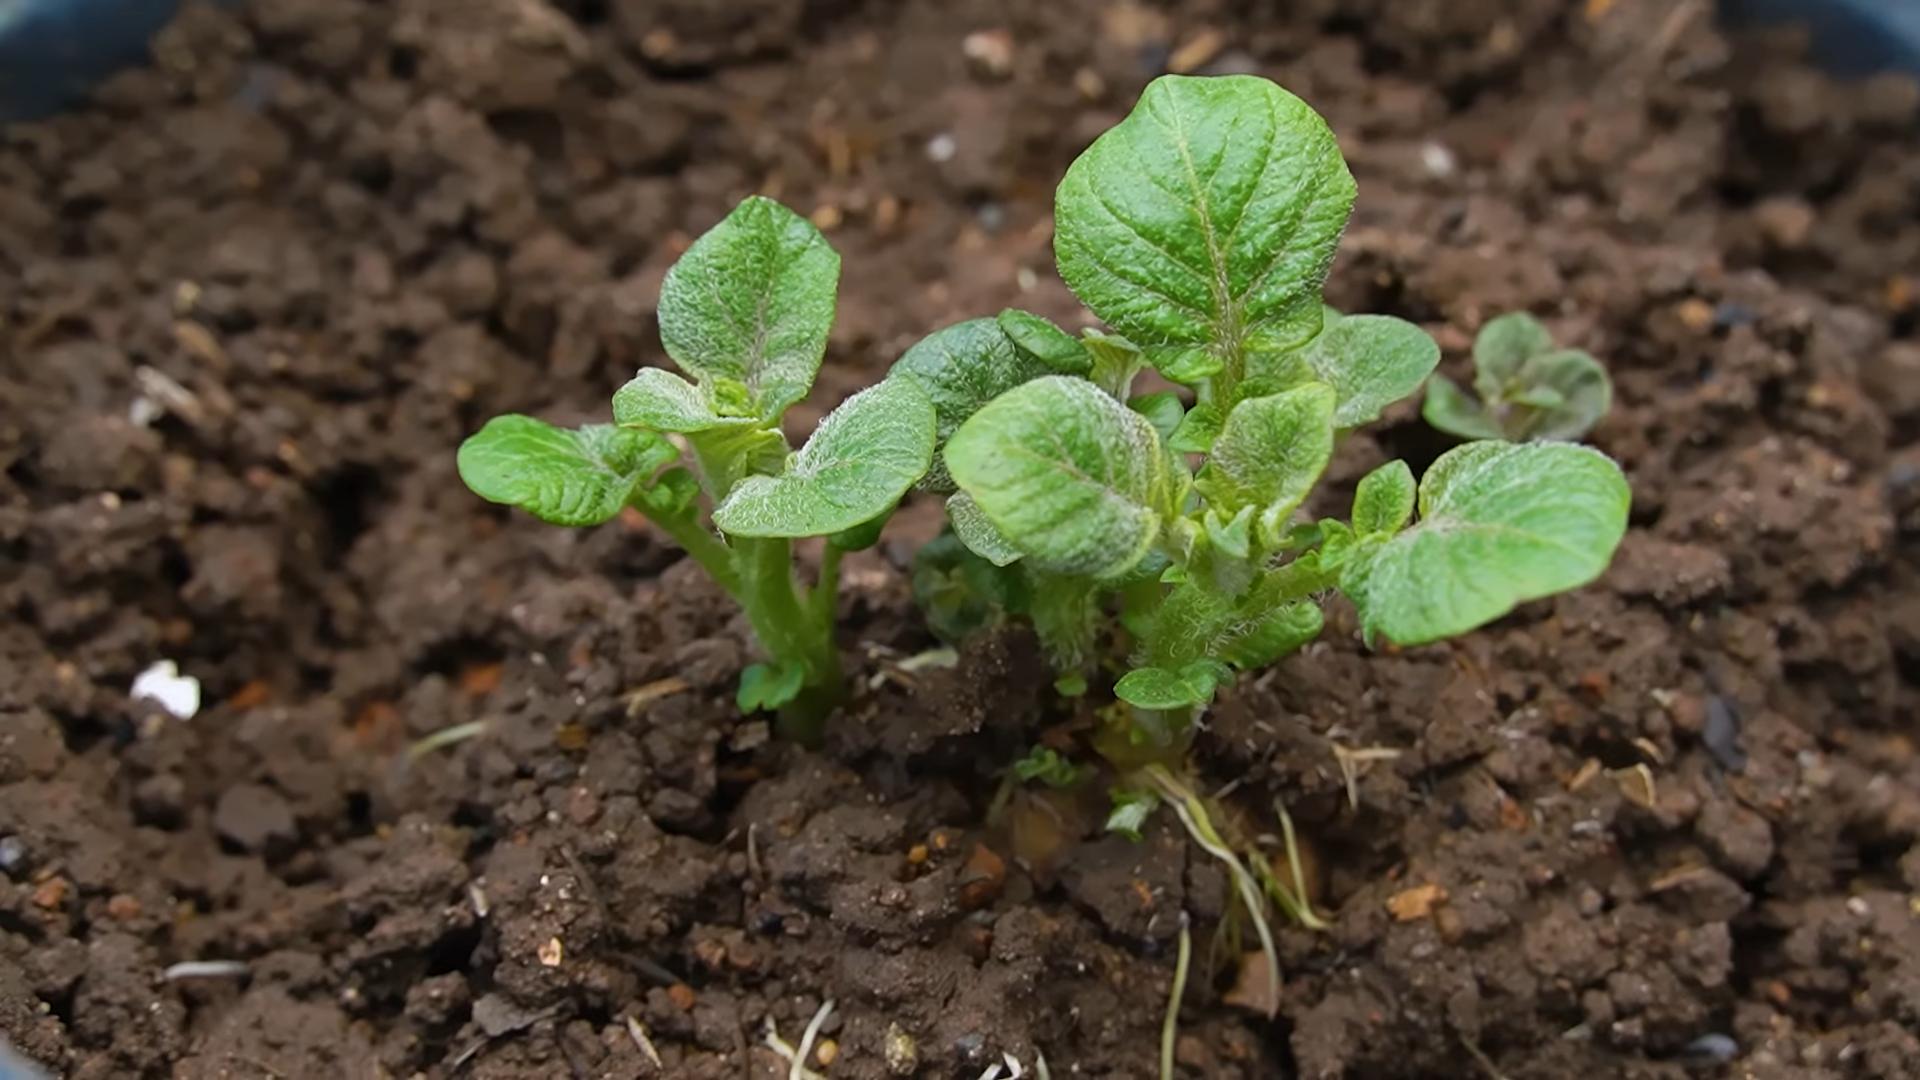
1. Wait for Growth: Once the potato plants emerge from the soil and reach about 6-8 inches tall, it’s time to start hilling.
2. Add More Soil: Add enough potting mix to cover the stems, leaving only the top few leaves exposed.
3. Repeat: Continue this process every few weeks as the plants grow, until the bucket is almost full. I usually leave about 2-3 inches of space at the top for watering.
Caring for Your Potato Plants
Now that your potatoes are planted and hilling is underway, it’s important to provide them with the care they need to thrive.
* Watering: Water your potato plants regularly, especially during dry periods. The soil should be consistently moist, but not waterlogged. I usually check the soil moisture by sticking my finger about an inch into the soil. If it feels dry, it’s time to water.
* Fertilizing: Feed your potato plants with a balanced fertilizer every few weeks. Follow the instructions on the fertilizer package. I like to use a liquid fertilizer diluted in water for easy application.
* Sunlight: Potato plants need at least 6-8 hours of sunlight per day. Place your buckets in a sunny location.
* Pest Control: Keep an eye out for pests like aphids, potato beetles, and flea beetles. If you spot any pests, take action immediately. I prefer using organic pest control methods like insecticidal soap or neem oil.
* Disease Prevention: Potato plants can be susceptible to diseases like blight. To prevent disease, ensure good air circulation around the plants and avoid overhead watering.
Harvesting Your Potatoes
The moment we’ve all been waiting for! Harvesting your homegrown potatoes is incredibly rewarding.
* When to Harvest: You can harvest “new potatoes” (small, tender potatoes) about 2-3 weeks after the plants flower. For larger, mature potatoes, wait until the foliage starts to die back and turn yellow. This usually takes about 80-100 days from planting.
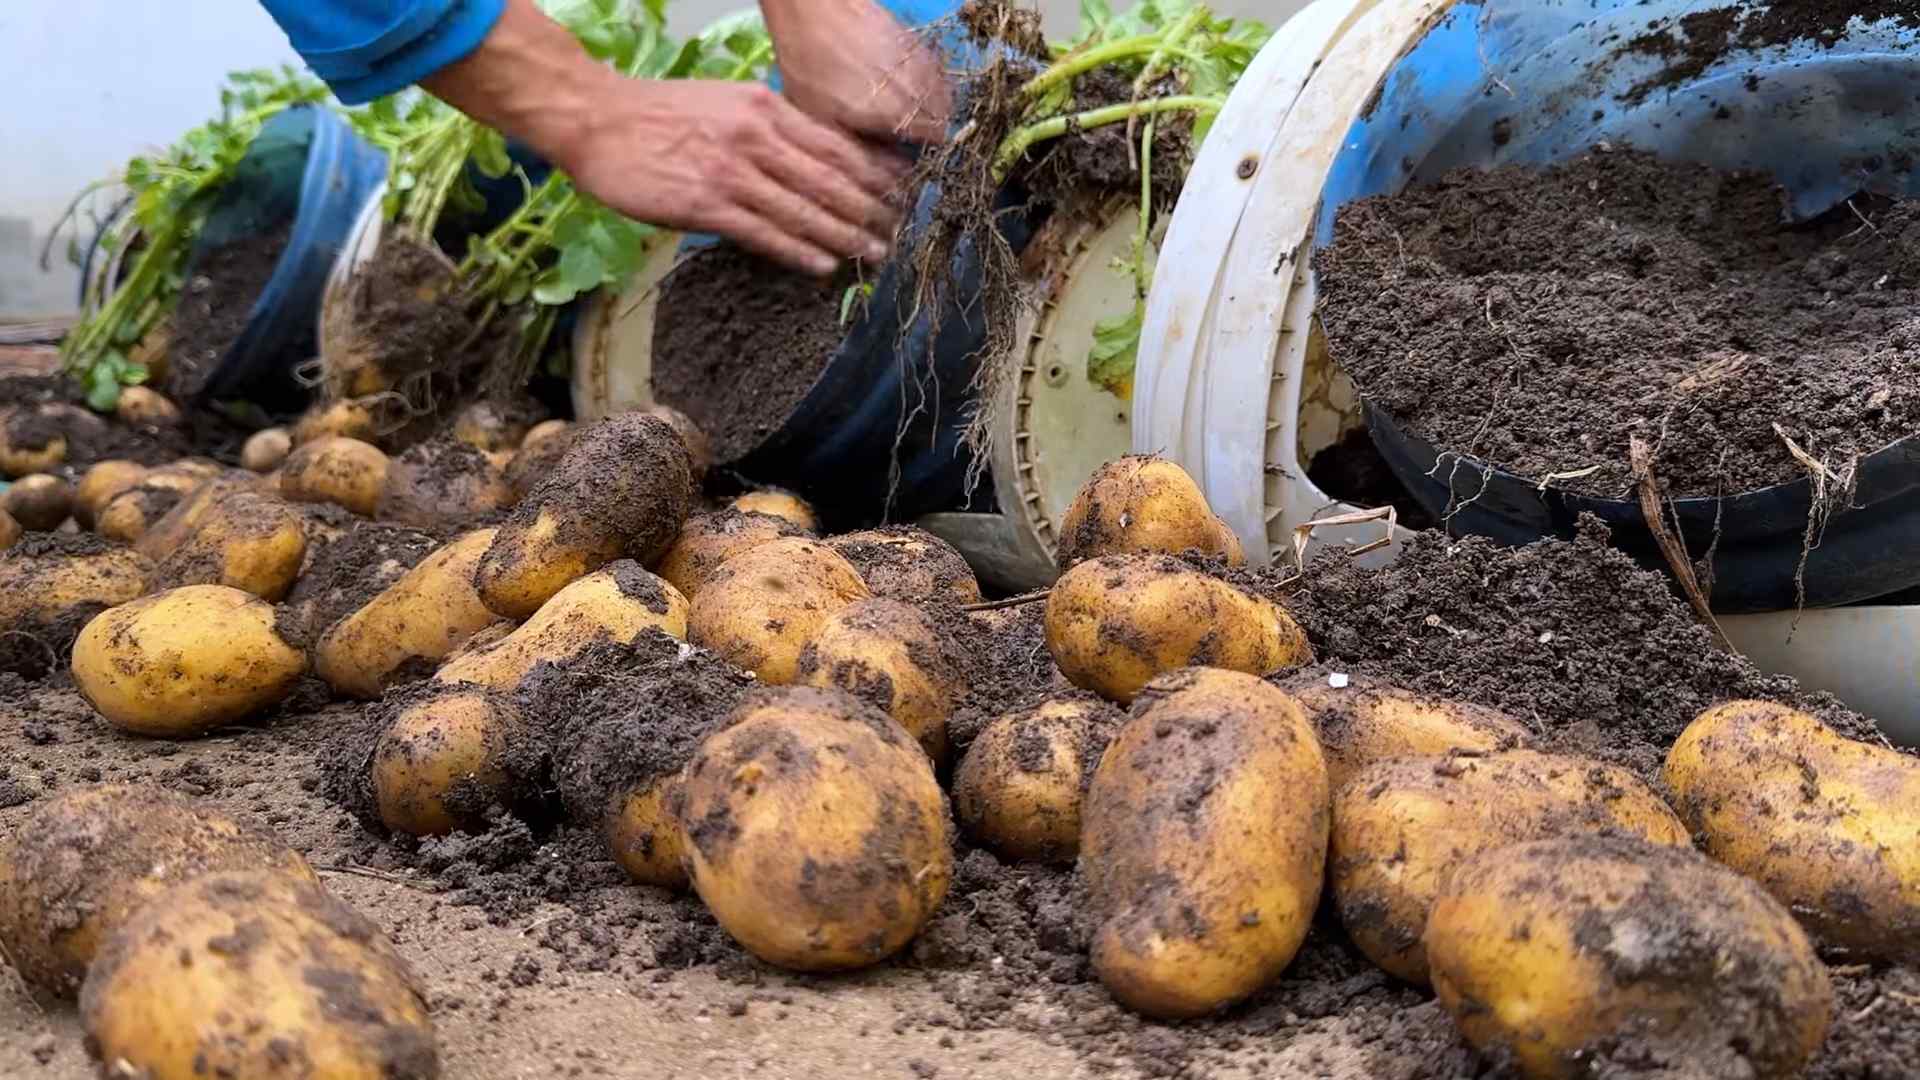
* Harvesting: To harvest your potatoes, simply tip the bucket over and carefully sift through the soil. You can also use a trowel or shovel to gently dig around the plants.
* Curing (Optional): If you plan to store your potatoes for an extended period, it’s best to cure them first. To cure potatoes, spread them out in a cool, dark, and well-ventilated place for about a week. This allows the skins to harden and helps prevent rot.
Troubleshooting
Even with the best planning, sometimes things don’t go exactly as expected. Here are a few common problems you might encounter and how to address them:
* Yellowing Leaves: This could be a sign of overwatering, underwatering, nutrient deficiency, or disease. Check the soil moisture, fertilize if necessary, and inspect the plants for signs of disease.
* Lack of Potatoes: This could be due to insufficient sunlight, poor soil, or improper hilling. Make sure your plants are getting enough sunlight, use a good quality potting mix, and hill regularly.
* Pests: As mentioned earlier, keep an eye out for pests and take action immediately.
Choosing the Right Potato Variety
Selecting the right potato variety is crucial for a successful harvest. Consider your climate, growing conditions, and personal preferences when making your choice. Here are a few popular varieties that do well in buckets:
* Yukon Gold: A classic all-purpose potato with a creamy texture and buttery flavor.
* Red Pontiac: A red-skinned potato with a firm texture, great for boiling and salads.
* Kennebec: A versatile potato that’s good for baking, frying, and mashing.
* Fingerling Potatoes: These small, elongated potatoes have a unique flavor and texture.
Tips for Success
Here are a few extra tips to help you maximize your potato harvest:
* Rotate Your Crops: Avoid planting potatoes in the same buckets year after year. This can help prevent soilborne diseases.
* Use a Soil Thermometer: Potatoes prefer soil temperatures between 60-70°F. Use a soil thermometer to monitor the temperature and adjust your planting schedule accordingly.
* Don’t Overcrowd: Avoid planting too many seed potatoes in each bucket. Overcrowding can reduce yields.
* Have Fun! Gardening should be enjoyable. Experiment with different varieties, techniques, and fertilizers to find what works best for you.
Enjoy Your Homegrown Potatoes!
There you have it! Everything you
Conclusion
So, there you have it! Growing potatoes in buckets is not just a gardening trend; it’s a game-changer for anyone, regardless of space or experience. We’ve walked through the simple steps, highlighted the benefits, and hopefully, inspired you to ditch the traditional garden bed (at least for a few spuds!). The beauty of this method lies in its accessibility. Whether you’re a seasoned gardener with limited space or a complete beginner with a balcony, bucket potato growing offers a rewarding and surprisingly productive experience.
Why is this a must-try? Because it’s efficient, manageable, and yields delicious results. Imagine harvesting your own homegrown potatoes, bursting with flavor and freshness, right from your patio. Think of the satisfaction of knowing exactly where your food comes from and the joy of sharing your bounty with friends and family. Plus, the mobility of buckets allows you to chase the sun, protect your plants from unexpected frosts, and even move them indoors during extreme weather.
But the fun doesn’t stop there! Feel free to experiment with different potato varieties. Russets, Yukon Golds, fingerlings – each offers a unique flavor and texture profile. You can also try companion planting in your buckets. Marigolds can help deter pests, while basil can enhance the flavor of your potatoes. Consider adding a layer of compost tea every few weeks to give your plants an extra boost of nutrients.
Don’t be afraid to get creative with your bucket setup. Use colorful buckets to add a touch of personality to your garden. Drill drainage holes in unique patterns. Even decorate the buckets with paint or stencils. The possibilities are endless!
The key takeaway is this: bucket potato growing is an incredibly rewarding and accessible way to grow your own food. It’s a fantastic project for families, a great way to teach children about gardening, and a satisfying hobby for anyone who enjoys fresh, homegrown produce.
We encourage you to give this DIY trick a try. Start with just one or two buckets and see how it goes. You might be surprised at how easy and productive it is. And most importantly, don’t forget to share your experience with us! We’d love to hear about your successes, your challenges, and any tips or tricks you discover along the way. Share your photos and stories on our social media pages or in the comments section below. Let’s build a community of bucket potato growers and inspire others to get their hands dirty! Happy growing!
Frequently Asked Questions (FAQs)
What kind of potatoes are best for bucket growing?
While you can technically grow any type of potato in a bucket, some varieties tend to perform better than others. Determinate potatoes, which produce all their tubers in one layer, are generally recommended. These include varieties like Yukon Gold, Red Pontiac, and Irish Cobbler. These varieties are well-suited for the limited space of a bucket. Indeterminate potatoes, like Russets, can also be grown, but they require more hilling (adding soil as the plant grows) and may need a larger bucket to accommodate their extensive root system. Experimenting with different varieties is part of the fun, so don’t be afraid to try something new! Just be mindful of the potato’s growth habit and adjust your bucket size and hilling accordingly. Seed potatoes are the best way to start, but you can also use potatoes from the grocery store that have started to sprout (just make sure they are organic to avoid any growth inhibitors).
How big should my bucket be?
The size of your bucket is crucial for successful potato growth. A minimum of 10 gallons is recommended, but 20 gallons is even better, especially for indeterminate varieties. The larger the bucket, the more room the roots have to grow and the more potatoes you’ll harvest. Ensure the bucket has adequate drainage holes to prevent waterlogging, which can lead to root rot. You can drill several holes in the bottom of the bucket or even add a layer of gravel at the bottom for improved drainage. Consider using food-grade buckets to avoid any potential contamination of your potatoes.
What kind of soil should I use?
Potatoes thrive in well-draining, nutrient-rich soil. A good potting mix is essential. Avoid using garden soil, as it can be too heavy and compact, hindering root growth. A mix of potting soil, compost, and perlite or vermiculite is ideal. The compost provides essential nutrients, while the perlite or vermiculite improves drainage and aeration. You can also add a slow-release fertilizer to the soil mix to provide a steady supply of nutrients throughout the growing season. Ensure the soil pH is slightly acidic, around 6.0 to 6.5, for optimal potato growth.
How often should I water my bucket potatoes?
Watering frequency depends on several factors, including the weather, the size of the bucket, and the type of soil you’re using. Generally, you should water your potatoes when the top inch of soil feels dry to the touch. Avoid overwatering, as this can lead to root rot. During hot, dry weather, you may need to water daily. In cooler, wetter weather, you may only need to water every few days. Check the soil moisture regularly and adjust your watering schedule accordingly. A good rule of thumb is to water deeply, allowing the water to drain out of the bottom of the bucket.
How much sunlight do bucket potatoes need?
Potatoes need at least six hours of sunlight per day to thrive. Choose a location that receives plenty of direct sunlight. If you live in a particularly hot climate, you may need to provide some afternoon shade to prevent the plants from overheating. The beauty of bucket growing is that you can easily move your plants to follow the sun or protect them from extreme weather. Monitor your plants closely and adjust their location as needed to ensure they receive adequate sunlight.
How do I “hill” my potatoes in a bucket?
Hilling is the process of adding soil around the potato plant as it grows. This encourages the plant to produce more tubers along the buried stem. When your potato plant is about 6-8 inches tall, add a few inches of soil to the bucket, covering the lower part of the stem. Repeat this process every few weeks as the plant grows, until the bucket is almost full. Be careful not to bury the leaves of the plant. Hilling is essential for maximizing your potato yield in a bucket.
When are my bucket potatoes ready to harvest?
The time it takes for potatoes to mature depends on the variety. Generally, you can start harvesting “new potatoes” (small, tender potatoes) about 7-8 weeks after planting. To harvest new potatoes, carefully dig around the edges of the bucket and remove a few potatoes, leaving the rest to continue growing. For mature potatoes, wait until the foliage starts to die back, usually about 12-14 weeks after planting. At this point, stop watering the plants and allow the soil to dry out slightly. Then, simply tip the bucket over and harvest your potatoes!
What are some common pests and diseases that affect bucket potatoes?
Potatoes can be susceptible to various pests and diseases, including aphids, potato beetles, and blight. Regularly inspect your plants for signs of infestation or disease. If you spot any problems, take action immediately. You can use organic pest control methods, such as insecticidal soap or neem oil, to control aphids and potato beetles. To prevent blight, ensure good air circulation around your plants and avoid overhead watering. If blight does occur, remove and destroy the affected foliage immediately.
Can I reuse the soil from my bucket potatoes?
You can reuse the soil from your bucket potatoes, but it’s important to replenish the nutrients. After harvesting your potatoes, remove any remaining plant debris and add compost, aged manure, or other organic matter to the soil. You can also add a slow-release fertilizer to provide a boost of nutrients for the next crop. Avoid planting potatoes in the same soil year after year, as this can increase the risk of disease. Rotate your crops to maintain soil health.
What if I don’t have a sunny balcony or patio?
Even if you don’t have a sunny balcony or patio, you can still grow potatoes in buckets. Consider using grow lights to provide supplemental lighting. Place the buckets under the grow lights for at least 12-14 hours per day. You can also try growing potatoes indoors near a sunny window. However, be aware that indoor-grown potatoes may not produce as large of a yield as those grown outdoors in full sun.
Leave a Comment