

Broccoli harvest weekly schedule: Are you dreaming of fresh, vibrant broccoli florets gracing your dinner plate, all grown with your own two hands? Imagine the satisfaction of bypassing the grocery store and heading straight to your backyard oasis for the star ingredient of your next meal! This isn’t just a pipe dream; it’s an achievable reality with a little planning and the right know-how.
For centuries, cultivating broccoli has been a rewarding endeavor, dating back to the Roman Empire where it was prized for its nutritional value and unique flavor. Today, the joy of harvesting your own broccoli remains a timeless tradition, connecting us to the earth and providing a sustainable source of healthy food. But let’s face it, figuring out the perfect broccoli harvest weekly schedule can feel a bit daunting. When do you pick them? How do you know they’re ready?
That’s where this DIY guide comes in! I’m here to share my tried-and-true tips and tricks for ensuring a bountiful and continuous broccoli harvest throughout the growing season. No more guessing games or disappointing yields! We’ll break down the process step-by-step, empowering you to confidently manage your broccoli patch and enjoy a steady supply of delicious, homegrown goodness. Get ready to unlock the secrets to a thriving broccoli garden and savor the fruits (or rather, the florets!) of your labor.
Creating a Weekly Broccoli Harvest Schedule for Maximum Yield
Okay, so you’ve decided to grow your own broccoli! That’s fantastic! Nothing beats the taste of fresh, homegrown broccoli. But to really maximize your harvest and enjoy a continuous supply, you need a solid harvesting schedule. Trust me, it’s not rocket science, but a little planning goes a long way. This guide will walk you through creating a weekly broccoli harvest schedule that works for you.
Understanding Broccoli Growth and Harvesting
Before we dive into the schedule itself, let’s quickly cover some basics about broccoli growth and harvesting. This knowledge will help you understand *why* we’re doing things a certain way, making the whole process much easier.
* Broccoli Varieties: Different varieties mature at different rates. Some are ready in as little as 50 days, while others take 80 days or more. Knowing your variety is crucial! Check your seed packet or plant tag for the “days to maturity.”
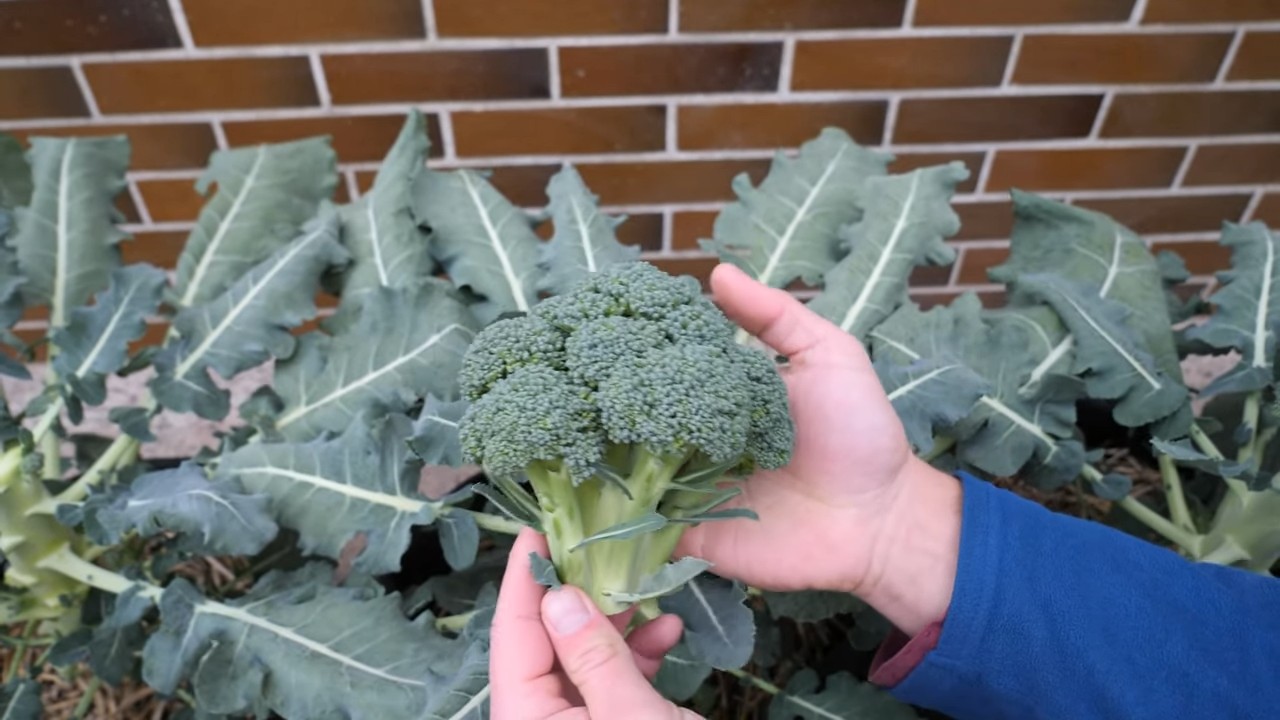
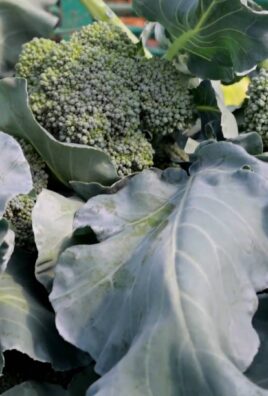
* Head Size Matters: You want to harvest your broccoli heads when they’re firm, tight, and a good size for your variety. Usually, this is around 4-8 inches in diameter. Don’t wait too long, or the florets will start to separate and flower, making the broccoli less palatable.
* Side Shoots: After you harvest the main head, most broccoli varieties will produce side shoots. These are smaller, but still delicious, and will extend your harvest for weeks!
* Timing is Key: Harvest broccoli in the morning, before the sun heats up the heads. This helps to preserve their freshness and flavor.
Planning Your Planting Schedule
The foundation of a successful weekly harvest schedule is a well-planned planting schedule. This involves staggering your plantings so that you have broccoli maturing at different times.
* Succession Planting: This is the key to a continuous harvest. Instead of planting all your broccoli seeds or seedlings at once, plant them in intervals.
* Calculate Planting Intervals: Based on the “days to maturity” of your chosen variety, determine how often you need to plant to have broccoli ready to harvest each week. A good starting point is to plant new seedlings every 2-3 weeks.
* Record Keeping: Keep a record of your planting dates. This will help you predict when your broccoli will be ready to harvest and fine-tune your schedule over time. I use a simple notebook, but you can also use a gardening app or spreadsheet.
Creating Your Weekly Harvest Schedule: Step-by-Step
Okay, let’s get down to the nitty-gritty of creating your weekly harvest schedule. I’ll break it down into manageable steps.
1. Determine Your First Planting Date: This depends on your local climate and the last expected frost date. Broccoli is a cool-season crop, so you can plant it a few weeks before the last frost. Check your local gardening resources for specific dates.
2. Choose Your Broccoli Variety (or Varieties!): As I mentioned earlier, knowing your variety is crucial. If you want to extend your harvest even further, consider planting a few different varieties with varying maturity dates.
3. Calculate Your Planting Intervals: Let’s say you’re planting a variety that takes 60 days to mature. If you want to harvest broccoli every week, you’ll need to plant new seedlings approximately every 7-10 days, depending on your desired harvest size.
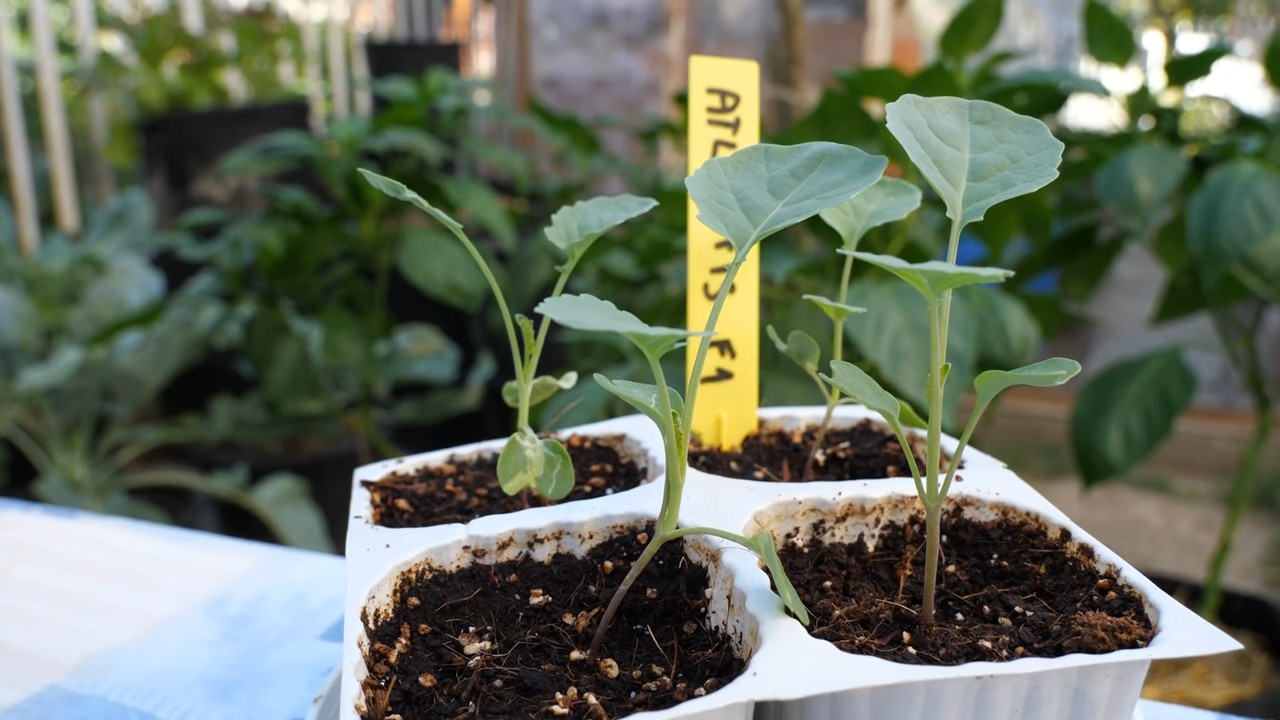
4. Start Your Seeds (or Buy Seedlings): You can either start your broccoli seeds indoors 6-8 weeks before your last frost or purchase seedlings from a local nursery. Starting seeds indoors gives you more control over the process, but buying seedlings is a convenient option.
5. Transplant Your Seedlings: Once your seedlings have a few sets of true leaves and the weather has warmed up, transplant them into your garden. Space them according to the recommendations on the seed packet or plant tag (usually around 18-24 inches apart).
6. Record Your Planting Dates: This is super important! Write down the date you transplanted each batch of seedlings. This will be your reference point for predicting harvest dates.
7. Monitor Your Broccoli: Keep an eye on your broccoli plants as they grow. Watch for signs of pests or diseases and take action as needed.
8. Predict Your Harvest Dates: Based on your planting dates and the “days to maturity” of your variety, estimate when your broccoli will be ready to harvest. Remember that this is just an estimate, and the actual harvest date may vary depending on weather conditions.
9. Harvest Your Main Heads: When the main head is firm, tight, and the desired size, it’s time to harvest! Use a sharp knife to cut the stem at an angle, about 5-6 inches below the head.
10. Encourage Side Shoots: After harvesting the main head, leave the plant in the ground. It will start to produce side shoots, which you can harvest as they mature.
11. Adjust Your Planting Schedule: As you gain experience, you can fine-tune your planting schedule to better match your needs and local conditions. For example, you might find that you need to plant more frequently during certain times of the year to maintain a consistent harvest.
12. Repeat! Keep planting new seedlings according to your schedule to ensure a continuous supply of fresh broccoli.
Troubleshooting Common Issues
Even with the best-laid plans, things can sometimes go wrong. Here are a few common issues you might encounter and how to deal with them:
* Premature Flowering (Bolting): This can happen if the weather gets too hot. To prevent bolting, choose heat-tolerant varieties and provide shade during the hottest part of the day.
* Pest Problems: Cabbage worms, aphids, and other pests can damage your broccoli plants. Use organic pest control methods, such as insecticidal soap or Bacillus thuringiensis (Bt).
* Disease Issues: Downy mildew and other fungal diseases can affect broccoli. Provide good air circulation and avoid overhead watering.
* Poor Head Formation: This can be caused by nutrient deficiencies or inconsistent watering. Make sure your soil is rich in organic matter and water regularly.
Okay, so you’ve decided to grow your own broccoli! That’s fantastic! Nothing beats the taste of fresh, homegrown broccoli. But to really maximize your harvest and enjoy a continuous supply, you need a solid harvesting schedule. Trust me, it’s not rocket science, but a little planning goes a long way. This guide will walk you through creating a weekly broccoli harvest schedule that works for you.
Understanding Broccoli Growth and Harvesting
Before we dive into the schedule itself, let’s quickly cover some basics about broccoli growth and harvesting. This knowledge will help you understand *why* we’re doing things a certain way, making the whole process much easier.
* Broccoli Varieties: Different varieties mature at different rates. Some are ready in as little as 50 days, while others take 80 days or more. Knowing your variety is crucial! Check your seed packet or plant tag for the “days to maturity.”
* Head Size Matters: You want to harvest your broccoli heads when they’re firm, tight, and a good size for your variety. Usually, this is around 4-8 inches in diameter. Don’t wait too long, or the florets will start to separate and flower, making the broccoli less palatable.
* Side Shoots: After you harvest the main head, most broccoli varieties will produce side shoots. These are smaller, but still delicious, and will extend your harvest for weeks!
* Timing is Key: Harvest broccoli in the morning, before the sun heats up the heads. This helps to preserve their freshness and flavor.
Planning Your Planting Schedule
The foundation of a successful weekly harvest schedule is a well-planned planting schedule. This involves staggering your plantings so that you have broccoli maturing at different times.
* Succession Planting: This is the key to a continuous harvest. Instead of planting all your broccoli seeds or seedlings at once, plant them in intervals.
* Calculate Planting Intervals: Based on the “days to maturity” of your chosen variety, determine how often you need to plant to have broccoli ready to harvest each week. A good starting point is to plant new seedlings every 2-3 weeks.
* Record Keeping: Keep a record of your planting dates. This will help you predict when your broccoli will be ready to harvest and fine-tune your schedule over time. I use a simple notebook, but you can also use a gardening app or spreadsheet.
Creating Your Weekly Harvest Schedule: Step-by-Step
Okay, let’s get down to the nitty-gritty of creating your weekly harvest schedule. I’ll break it down into manageable steps.
1. Determine Your First Planting Date: This depends on your local climate and the last expected frost date. Broccoli is a cool-season crop, so you can plant it a few weeks before the last frost. Check your local gardening resources for specific dates.
2. Choose Your Broccoli Variety (or Varieties!): As I mentioned earlier, knowing your variety is crucial. If you want to extend your harvest even further, consider planting a few different varieties with varying maturity dates.
3. Calculate Your Planting Intervals: Let’s say you’re planting a variety that takes 60 days to mature. If you want to harvest broccoli every week, you’ll need to plant new seedlings approximately every 7-10 days, depending on your desired harvest size.
4. Start Your Seeds (or Buy Seedlings): You can either start your broccoli seeds indoors 6-8 weeks before your last frost or purchase seedlings from a local nursery. Starting seeds indoors gives you more control over the process, but buying seedlings is a convenient option.
5. Transplant Your Seedlings: Once your seedlings have a few sets of true leaves and the weather has warmed up, transplant them into your garden. Space them according to the recommendations on the seed packet or plant tag (usually around 18-24 inches apart).
6. Record Your Planting Dates: This is super important! Write down the date you transplanted each batch of seedlings. This will be your reference point for predicting harvest dates.
7. Monitor Your Broccoli: Keep an eye on your broccoli plants as they grow. Watch for signs of pests or diseases and take action as needed.
8. Predict Your Harvest Dates: Based on your planting dates and the “days to maturity” of your variety, estimate when your broccoli will be ready to harvest. Remember that this is just an estimate, and the actual harvest date may vary depending on weather conditions.
9. Harvest Your Main Heads: When the main head is firm, tight, and the desired size, it’s time to harvest! Use a sharp knife to cut the stem at an angle, about 5-6 inches below the head.
10. Encourage Side Shoots: After harvesting the main head, leave the plant in the ground. It will start to produce side shoots, which you can harvest as they mature.
11. Adjust Your Planting Schedule: As you gain experience, you can fine-tune your planting schedule to better match your needs and local conditions. For example, you might find that you need to plant more frequently during certain times of the year to maintain a consistent harvest.
12. Repeat! Keep planting new seedlings according to your schedule to ensure a continuous supply of fresh broccoli.
Troubleshooting Common Issues
Even with the best-laid plans, things can sometimes go wrong. Here are a few common issues you might encounter and how to deal with them:
* Premature Flowering (Bolting): This can happen if the weather gets too hot. To prevent bolting, choose heat-tolerant varieties and provide shade during the hottest part of the day.
* Pest Problems: Cabbage worms, aphids, and other pests can damage your broccoli plants. Use organic pest control methods, such as insecticidal soap or Bacillus thuringiensis (Bt).
* Disease Issues: Downy mildew and other fungal diseases can affect broccoli. Provide good air circulation and avoid overhead watering.
* Poor Head Formation: This can be caused by nutrient deficiencies or inconsistent watering. Make sure your soil is rich in organic matter and water regularly.
Example Weekly Harvest Schedule
To give you a better idea of how this works in practice, here’s an example of a weekly harvest schedule for a broccoli variety that takes 60 days to mature:
* Week 1: Start seeds indoors (or purchase seedlings).
* Week 7: Transplant seedlings into the garden.
* Week 8: Start a second batch of seeds indoors (or purchase seedlings).
* Week 14: Harvest the first batch of broccoli heads.
* Week 15: Transplant the second batch of seedlings into the garden.
* Week 21: Harvest the second batch of broccoli heads.
* Continue planting new seedlings every 7-10 days to maintain a continuous harvest.
Remember, this is just an example. You’ll need to adjust the schedule based on your specific variety, climate, and needs.
Harvesting and Storing Your Broccoli
Okay, so you’ve followed your schedule, and your broccoli is ready to harvest! Here’s how to do it properly and store it to keep it fresh:
* Harvesting: As mentioned before, harvest in the morning when the heads are firm and tight. Use a sharp knife to cut the stem at an angle.
* Cleaning: Rinse the broccoli heads under cold water to remove any dirt or insects.
* Storing: Store broccoli in the refrigerator in a plastic bag or container. It will stay fresh for up to a week. You can also blanch and freeze broccoli for longer storage.
Enjoying Your Homegrown Broccoli
The best part of all this hard work is, of course, enjoying your homegrown broccoli! There are so many ways to prepare it: steamed, roasted, stir-fried, or even eaten raw in salads. Experiment with different recipes and find your favorites.
Growing your own broccoli and creating a weekly harvest schedule is a rewarding experience. It takes a little planning and effort, but the taste of fresh, homegrown broccoli is well worth it. Plus, you’ll have the satisfaction of knowing that you grew it yourself! Happy gardening!
Conclusion
So, there you have it! Mastering a weekly broccoli harvest schedule isn’t just about getting fresh broccoli; it’s about maximizing your garden’s yield, minimizing waste, and enjoying the fruits (or rather, vegetables) of your labor at their absolute peak flavor and nutritional value. By implementing the strategies we’ve discussed, you’ll transform your broccoli patch from a potential source of frustration into a consistent provider of delicious, healthy meals.
Think about it: no more trips to the grocery store for subpar broccoli that’s been sitting on the shelf for days. Instead, you’ll have crisp, vibrant florets ready to be steamed, roasted, stir-fried, or enjoyed raw in salads. The difference in taste and texture is truly remarkable, and you’ll wonder why you didn’t start following a dedicated harvest schedule sooner.
But the benefits extend beyond just taste. A well-managed harvest schedule also promotes healthier plants. By regularly removing mature heads, you encourage the plant to produce more side shoots, extending your harvest window and increasing your overall yield. This is especially important for those of us with limited garden space – every inch counts!
Don’t be afraid to experiment with variations on the schedule to suit your specific needs and preferences. For example, if you prefer smaller, more tender florets, you can harvest the main head earlier, even if it’s not quite as large as you initially anticipated. Or, if you’re planning a large gathering, you can stagger your planting dates to ensure a continuous supply of broccoli over several weeks.
Consider also the impact of your local climate. Gardeners in warmer regions may need to harvest more frequently to prevent bolting (premature flowering), while those in cooler climates may have a slightly longer harvest window. Pay attention to your plants and adjust your schedule accordingly.
And speaking of variations, why not try growing different varieties of broccoli? Some varieties are better suited for specific climates or have unique flavor profiles. Experimenting with different types of broccoli can add even more excitement to your gardening experience. You could try sprouting broccoli, which produces numerous small florets over a longer period, or Romanesco broccoli, with its stunning fractal pattern and delicate flavor.
Ultimately, the key to a successful broccoli harvest schedule is observation and adaptation. Pay close attention to your plants, monitor the weather conditions, and adjust your schedule as needed. Don’t be afraid to make mistakes – gardening is a learning process, and every season brings new opportunities to improve your skills.
We’re confident that by following these tips, you’ll be well on your way to enjoying a bountiful harvest of delicious, homegrown broccoli. So, grab your gardening gloves, head out to your broccoli patch, and start implementing your new harvest schedule today!
We’d love to hear about your experiences! Share your tips, tricks, and photos of your homegrown broccoli on social media using #BroccoliHarvestSchedule. Let’s build a community of gardeners who are passionate about growing their own food and maximizing their harvests. Happy gardening!
Frequently Asked Questions (FAQ)
Q: How do I know when my broccoli is ready to harvest?
A: This is a crucial question! The best time to harvest broccoli is when the head is firm, tight, and the individual florets are still tightly closed. If the florets start to separate or the head begins to turn yellow, it’s a sign that the broccoli is starting to bolt and should be harvested immediately, even if it’s not quite as large as you’d like. The ideal size of the head will depend on the variety, but generally, a head that’s 6-8 inches in diameter is ready for harvest. Regularly check your plants, especially during warm weather, as broccoli can mature quickly.
Q: What tools do I need to harvest broccoli?
A: You’ll need a sharp knife or pruning shears. A dull blade can crush the stem and damage the plant, making it more susceptible to disease. Make sure your tools are clean to prevent the spread of any potential pathogens. A basket or container to collect your harvested broccoli is also helpful.
Q: How do I harvest broccoli without damaging the plant?
A: Cut the main head of broccoli from the plant at a 45-degree angle, leaving about 4-6 inches of stem. This will encourage the plant to produce side shoots, which will provide you with additional harvests. Be careful not to damage the surrounding leaves or stems.
Q: How often should I harvest broccoli?
A: This depends on the variety of broccoli you’re growing and the weather conditions. Generally, you should harvest the main head when it’s ready, and then continue to harvest the side shoots as they mature. Check your plants every few days to see if any new heads are ready for harvest. A consistent broccoli harvest schedule will ensure you get the most out of your plants.
Q: What do I do with the side shoots after harvesting the main head?
A: The side shoots are a delicious bonus! They’re typically smaller than the main head, but they’re just as flavorful. Harvest them when they’re about 4-6 inches in diameter. Continue to monitor the plant and harvest any new side shoots that develop.
Q: How do I store broccoli after harvesting it?
A: To keep your harvested broccoli fresh, store it in the refrigerator. Wrap the head loosely in a damp paper towel and place it in a plastic bag with a few holes for ventilation. This will help to prevent the broccoli from drying out. Broccoli can typically be stored in the refrigerator for up to a week.
Q: My broccoli is bolting (flowering). Can I still eat it?
A: Yes, you can still eat broccoli that has started to bolt, but the flavor and texture may be slightly different. The florets may be more bitter and the stems may be tougher. However, it’s still perfectly safe to eat. You can try blanching the broccoli before cooking it to help reduce the bitterness.
Q: What are some common problems that can affect broccoli harvest?
A: Several factors can affect your broccoli harvest, including pests, diseases, and weather conditions. Cabbage worms, aphids, and flea beetles are common pests that can damage broccoli plants. Diseases such as clubroot and downy mildew can also affect the health of your plants. Extreme heat or cold can also impact the growth and development of broccoli. Regularly inspect your plants for any signs of problems and take appropriate action to address them.
Q: Can I freeze broccoli that I’ve harvested?
A: Absolutely! Freezing broccoli is a great way to preserve it for later use. To freeze broccoli, first blanch it in boiling water for 3-5 minutes. Then, immediately transfer it to an ice bath to stop the cooking process. Drain the broccoli thoroughly and spread it out on a baking sheet to freeze. Once the broccoli is frozen, transfer it to a freezer bag or container. Frozen broccoli can be stored in the freezer for up to 12 months.
Q: What are some creative ways to use my homegrown broccoli?
A: The possibilities are endless! You can steam, roast, stir-fry, or grill broccoli. It’s also delicious in salads, soups, and casseroles. You can even use the stems in smoothies or soups. Don’t be afraid to experiment and try new recipes! Consider making broccoli cheddar soup, broccoli slaw, or roasted broccoli with garlic and parmesan cheese. The fresher the broccoli, the more flavorful your dishes will be!

Leave a Comment