

Balcony Sweet Potato Growing might sound like a far-fetched dream, especially if you’re living in a city apartment. But trust me, it’s totally achievable, and I’m here to show you how! Forget those bland, store-bought sweet potatoes – imagine harvesting your own vibrant, flavorful crop right outside your door.
Growing sweet potatoes isn’t just a modern trend; it’s a practice rooted in history. Originating in Central and South America, sweet potatoes have been a staple food source for centuries, revered for their nutritional value and versatility. They’ve traveled the globe, adapting to various climates and cultures, and now, they can thrive on your balcony too!
Why should you try this DIY project? Well, for starters, it’s incredibly rewarding to nurture a plant from start to finish and then enjoy the fruits (or, in this case, the tubers!) of your labor. Plus, balcony sweet potato growing is a fantastic way to connect with nature, even in a limited space. It’s also a sustainable choice, reducing your reliance on commercially grown produce and minimizing your carbon footprint. Let’s dive into the simple steps and unlock the secrets to a bountiful balcony harvest!
Growing Sweet Potatoes in Containers on Your Balcony: A DIY Guide
Hey there, fellow balcony gardeners! Ever thought about growing your own sweet potatoes? It might sound intimidating, but trust me, it’s totally doable, even if you only have a small balcony space. I’ve been doing it for a few years now, and there’s nothing quite like harvesting your own homegrown sweet potatoes. This guide will walk you through everything you need to know to successfully grow sweet potatoes in containers right on your balcony.
What You’ll Need
Before we dive into the nitty-gritty, let’s gather our supplies. This is what I’ve found works best:
* Large Containers: Think big! Sweet potatoes need room to grow. I recommend containers that are at least 20 gallons in size. The bigger, the better, really. I’ve used everything from large plastic tubs to repurposed barrels.
* Well-Draining Potting Mix: This is crucial. Sweet potatoes don’t like soggy feet. A mix of potting soil, compost, and perlite or vermiculite works wonders.
* Sweet Potato “Slips”: These are sprouts grown from a sweet potato. You can buy them online or at your local garden center, or you can even grow your own (more on that later!).
* Watering Can or Hose: For keeping your sweet potatoes hydrated.
* Fertilizer: A balanced fertilizer or one specifically formulated for root vegetables will help your sweet potatoes thrive.
* Trowel or Small Shovel: For planting and digging.
* Optional: Trellis or Support: Sweet potato vines can get quite long, so a trellis or some other support can help keep them contained and off the ground.
* Gardening Gloves: To keep your hands clean and protected.
Growing Your Own Sweet Potato Slips (Optional but Recommended!)
Okay, so you *could* just buy slips, but where’s the fun in that? Growing your own is surprisingly easy and super rewarding. Here’s how I do it:
1. Choose a Healthy Sweet Potato: Select a sweet potato that’s organic (to avoid any sprout inhibitors) and looks firm and healthy.
2. Prepare the Sweet Potato: There are two main methods:
* Water Method: Suspend the sweet potato in a jar or glass of water, with the bottom half submerged. You can use toothpicks to hold it in place.
* Soil Method: Bury the sweet potato horizontally in a container filled with moist potting mix, leaving the top exposed.
3. Provide Warmth and Light: Place the jar or container in a warm, sunny location. A windowsill works great.
4. Wait and Watch: Be patient! It can take several weeks for slips to start sprouting. Keep the water level consistent (for the water method) and the soil moist (for the soil method).
5. Harvest the Slips: Once the slips are about 6-8 inches long, gently twist or cut them off the sweet potato.
6. Root the Slips (Optional but Recommended): Place the slips in a glass of water for a few days until they develop roots. This will give them a head start when you plant them in your containers.
Planting Your Sweet Potato Slips
Alright, now for the main event! Planting those slips is where the magic happens.
1. Prepare Your Containers: Fill your large containers with your well-draining potting mix, leaving a few inches of space at the top.
2. Dig Holes: Dig small holes in the soil, about 4-6 inches apart.
3. Plant the Slips: Gently place each slip into a hole, burying the roots (if you rooted them) and the bottom part of the stem.
4. Water Thoroughly: Water the newly planted slips well to help them settle in.
5. Mulch (Optional): Add a layer of mulch around the base of the plants to help retain moisture and suppress weeds. I like to use straw or shredded leaves.
Caring for Your Sweet Potato Plants
Now that your sweet potato slips are planted, it’s time to nurture them and watch them grow!
1. Watering: Sweet potatoes need consistent moisture, especially during hot weather. Water deeply whenever the top inch of soil feels dry. Avoid overwatering, as this can lead to root rot.
2. Fertilizing: Feed your sweet potato plants every few weeks with a balanced fertilizer or one specifically formulated for root vegetables. Follow the instructions on the fertilizer package.
3. Sunlight: Sweet potatoes need at least 6-8 hours of sunlight per day. Make sure your containers are placed in a sunny spot on your balcony.
4. Pruning (Optional): You can prune the vines to keep them from getting too unruly. This can also encourage the plants to focus their energy on producing tubers.
5. Pest Control: Keep an eye out for pests like aphids, spider mites, and flea beetles. Treat any infestations promptly with insecticidal soap or neem oil.
6. Support (Optional): As the vines grow, they may need some support. You can use a trellis, stakes, or even just let them trail over the edge of the container.
Harvesting Your Sweet Potatoes
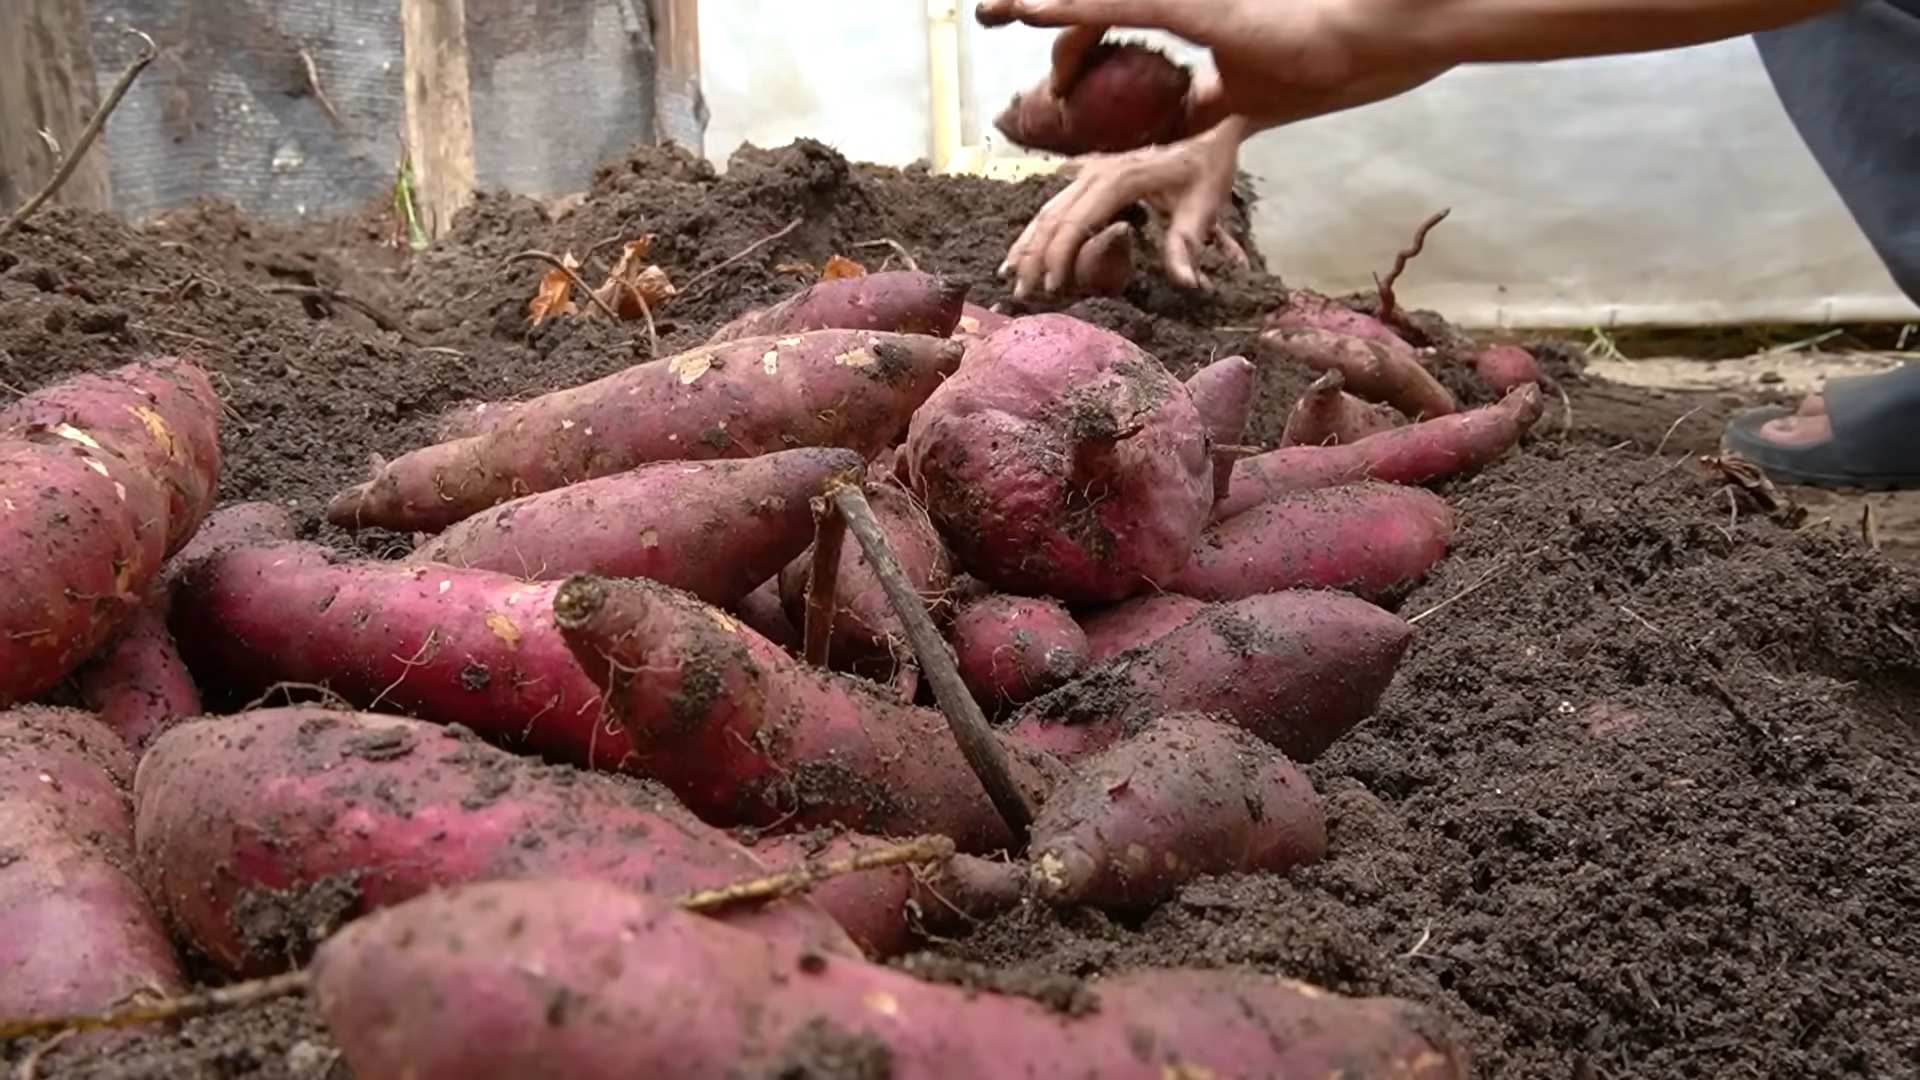
This is the moment you’ve been waiting for! Harvesting your own homegrown sweet potatoes is incredibly satisfying.
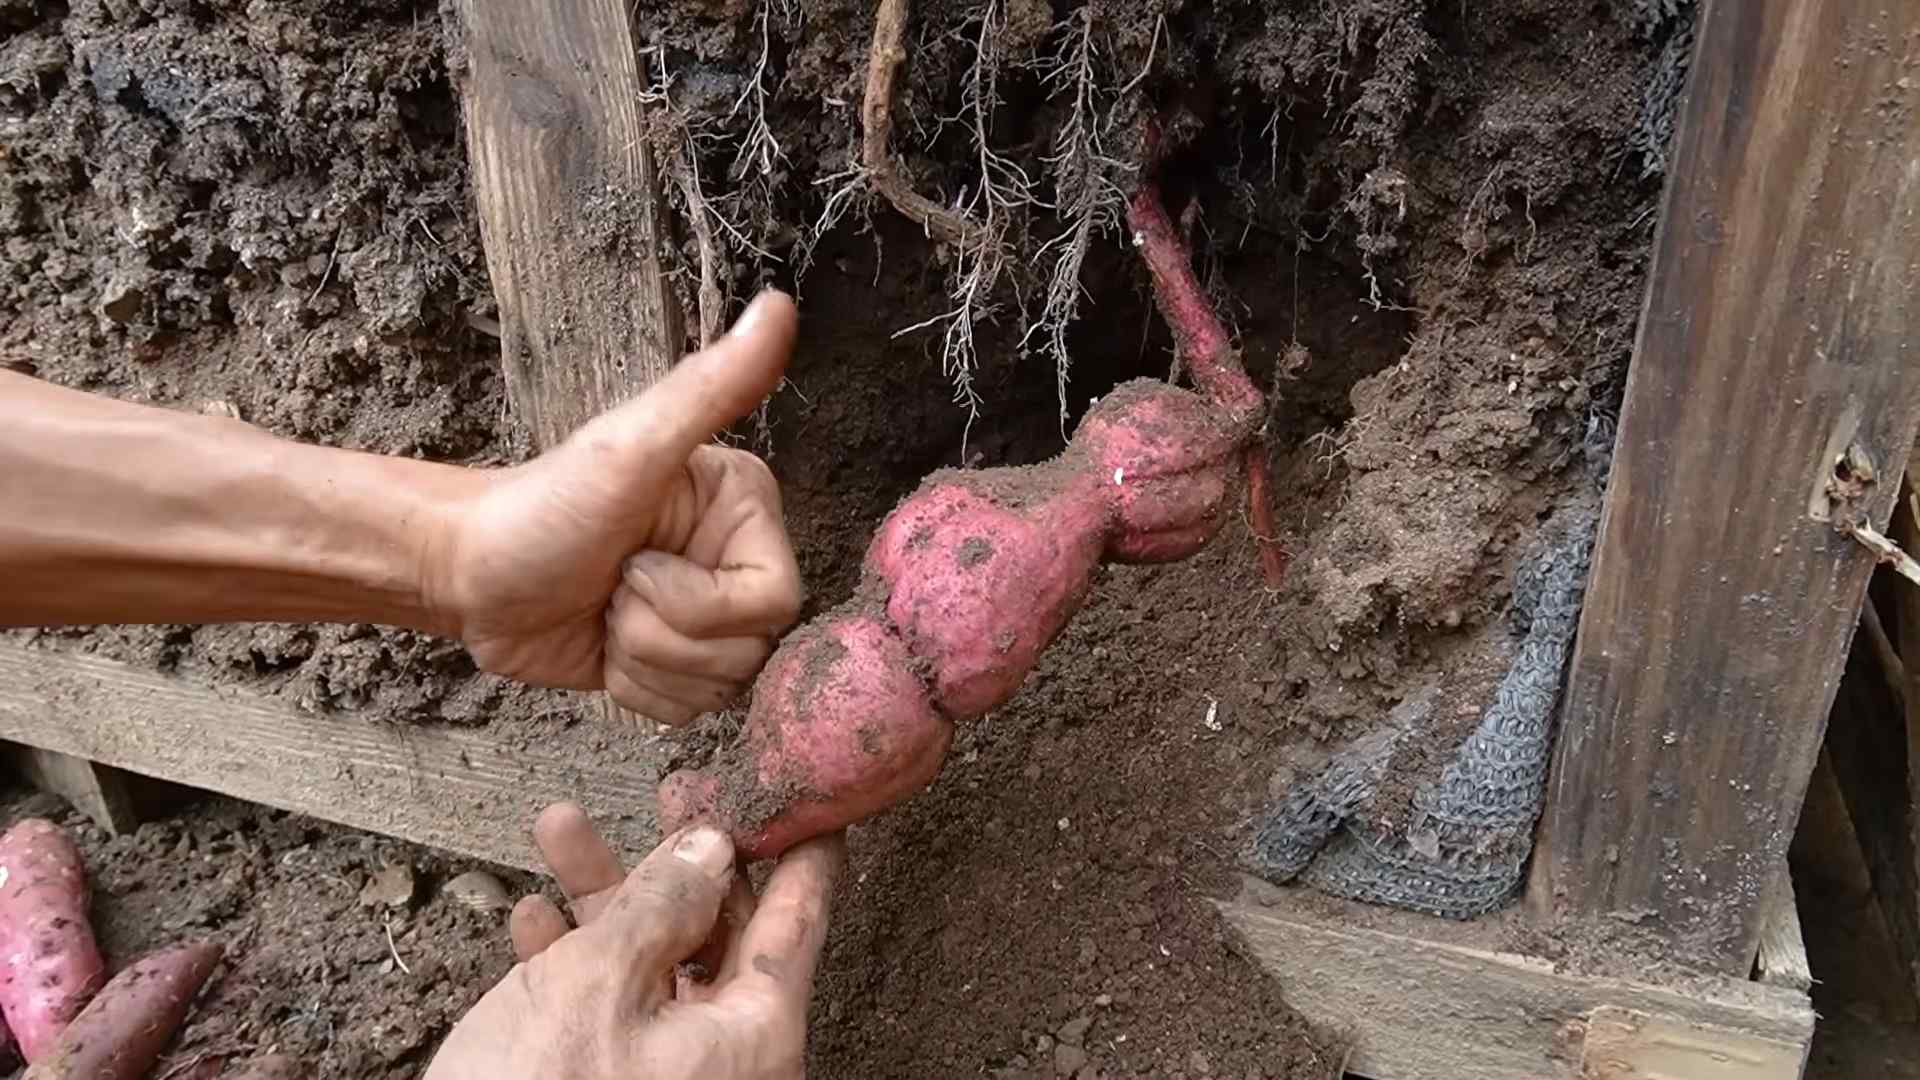
1. Timing: Sweet potatoes typically take 90-120 days to mature. You’ll know they’re ready to harvest when the vines start to yellow and die back.
2. Digging: Gently dig around the base of the plant, being careful not to damage the tubers. Use a trowel or small shovel to loosen the soil and lift the sweet potatoes out of the container.
Hey there, fellow balcony gardeners! Ever thought about growing your own sweet potatoes? It might sound intimidating, but trust me, it’s totally doable, even if you only have a small balcony space. I’ve been doing it for a few years now, and there’s nothing quite like harvesting your own homegrown sweet potatoes. This guide will walk you through everything you need to know to successfully grow sweet potatoes in containers right on your balcony.
What You’ll Need
Before we dive into the nitty-gritty, let’s gather our supplies. This is what I’ve found works best:
* Large Containers: Think big! Sweet potatoes need room to grow. I recommend containers that are at least 20 gallons in size. The bigger, the better, really. I’ve used everything from large plastic tubs to repurposed barrels.
* Well-Draining Potting Mix: This is crucial. Sweet potatoes don’t like soggy feet. A mix of potting soil, compost, and perlite or vermiculite works wonders.
* Sweet Potato “Slips”: These are sprouts grown from a sweet potato. You can buy them online or at your local garden center, or you can even grow your own (more on that later!).
* Watering Can or Hose: For keeping your sweet potatoes hydrated.
* Fertilizer: A balanced fertilizer or one specifically formulated for root vegetables will help your sweet potatoes thrive.
* Trowel or Small Shovel: For planting and digging.
* Optional: Trellis or Support: Sweet potato vines can get quite long, so a trellis or some other support can help keep them contained and off the ground.
* Gardening Gloves: To keep your hands clean and protected.
Growing Your Own Sweet Potato Slips (Optional but Recommended!)
Okay, so you *could* just buy slips, but where’s the fun in that? Growing your own is surprisingly easy and super rewarding. Here’s how I do it:
1. Choose a Healthy Sweet Potato: Select a sweet potato that’s organic (to avoid any sprout inhibitors) and looks firm and healthy.
2. Prepare the Sweet Potato: There are two main methods:
* Water Method: Suspend the sweet potato in a jar or glass of water, with the bottom half submerged. You can use toothpicks to hold it in place.
* Soil Method: Bury the sweet potato horizontally in a container filled with moist potting mix, leaving the top exposed.
3. Provide Warmth and Light: Place the jar or container in a warm, sunny location. A windowsill works great.
4. Wait and Watch: Be patient! It can take several weeks for slips to start sprouting. Keep the water level consistent (for the water method) and the soil moist (for the soil method).
5. Harvest the Slips: Once the slips are about 6-8 inches long, gently twist or cut them off the sweet potato.
6. Root the Slips (Optional but Recommended): Place the slips in a glass of water for a few days until they develop roots. This will give them a head start when you plant them in your containers.
Planting Your Sweet Potato Slips
Alright, now for the main event! Planting those slips is where the magic happens.
1. Prepare Your Containers: Fill your large containers with your well-draining potting mix, leaving a few inches of space at the top.
2. Dig Holes: Dig small holes in the soil, about 4-6 inches apart.
3. Plant the Slips: Gently place each slip into a hole, burying the roots (if you rooted them) and the bottom part of the stem.
4. Water Thoroughly: Water the newly planted slips well to help them settle in.
5. Mulch (Optional): Add a layer of mulch around the base of the plants to help retain moisture and suppress weeds. I like to use straw or shredded leaves.
Caring for Your Sweet Potato Plants
Now that your sweet potato slips are planted, it’s time to nurture them and watch them grow!
1. Watering: Sweet potatoes need consistent moisture, especially during hot weather. Water deeply whenever the top inch of soil feels dry. Avoid overwatering, as this can lead to root rot.
2. Fertilizing: Feed your sweet potato plants every few weeks with a balanced fertilizer or one specifically formulated for root vegetables. Follow the instructions on the fertilizer package.
3. Sunlight: Sweet potatoes need at least 6-8 hours of sunlight per day. Make sure your containers are placed in a sunny spot on your balcony.
4. Pruning (Optional): You can prune the vines to keep them from getting too unruly. This can also encourage the plants to focus their energy on producing tubers.
5. Pest Control: Keep an eye out for pests like aphids, spider mites, and flea beetles. Treat any infestations promptly with insecticidal soap or neem oil.
6. Support (Optional): As the vines grow, they may need some support. You can use a trellis, stakes, or even just let them trail over the edge of the container.
Harvesting Your Sweet Potatoes
This is the moment you’ve been waiting for! Harvesting your own homegrown sweet potatoes is incredibly satisfying.
1. Timing: Sweet potatoes typically take 90-120 days to mature. You’ll know they’re ready to harvest when the vines start to yellow and die back.
2. Digging: Gently dig around the base of the plant, being careful not to damage the tubers. Use a trowel or small shovel to loosen the soil and lift the sweet potatoes out of the container.
3. Curing: This is an important step that helps to improve the flavor and storage life of your sweet potatoes.
* Clean: Gently brush off any excess soil from the sweet potatoes. Avoid washing them, as this can promote rot.
* Cure: Place the sweet potatoes in a warm, humid place (around 80-85°F and 85-90% humidity) for 7-10 days. A greenhouse or a warm, sunny room works well. You can also use a humidifier to increase the humidity.
4. Storing: After curing, store your sweet potatoes in a cool, dry, and dark place (around 55-60°F). They should keep for several months.
Troubleshooting
Even with the best planning, things can sometimes go wrong. Here are a few common problems and how to fix them:
* Yellowing Leaves: This could be a sign of overwatering, underwatering, or nutrient deficiency. Check the soil moisture and adjust your watering schedule accordingly. Fertilize with a balanced fertilizer.
* Slow Growth: This could be due to insufficient sunlight, poor soil, or cool temperatures. Make sure your plants are getting enough sunlight and that the soil is well-draining and fertile.
* Pests: Inspect your plants regularly for pests. Treat any infestations promptly with insecticidal soap or neem oil.
* Root Rot: This is caused by overwatering. Make sure your containers have good drainage and avoid overwatering.
Tips for Success
Here are a few extra tips that I’ve learned over the years:
* Choose the Right Variety: Some sweet potato varieties are better suited for container growing than others. Look for varieties that are compact and don’t produce excessively long vines. ‘Bush Porto Rico’ and ‘Georgia Jet’ are good choices.
* Don’t Overcrowd: Give your sweet potato plants plenty of space to grow. Overcrowding can lead to stunted growth and reduced yields.
* Rotate Your Crops: If possible, rotate your sweet potato plants to a different container each year to help prevent soilborne diseases.
* Enjoy the Process! Growing your own sweet potatoes is a rewarding experience. Don’t be afraid to experiment and have fun!
Growing sweet potatoes on your balcony might seem like a challenge, but with a little bit of effort and the right knowledge, you can enjoy a bountiful harvest of delicious, homegrown sweet potatoes. Happy gardening!
Conclusion
So, there you have it! Transforming your balcony into a sweet potato haven is not only achievable, but incredibly rewarding. We’ve walked you through the simple steps to cultivate your own delicious and nutritious crop, even with limited space. This isn’t just about growing food; it’s about connecting with nature, embracing sustainability, and enjoying the unparalleled satisfaction of harvesting something you nurtured from start to finish.
Why is this DIY balcony sweet potato growing trick a must-try? Because it offers a unique blend of benefits that are hard to ignore. Firstly, you gain access to fresh, organic sweet potatoes, free from the pesticides and herbicides often found in commercially grown produce. Secondly, it’s a fantastic way to utilize small spaces and add a touch of greenery to your urban environment. Imagine stepping onto your balcony and being greeted by the vibrant foliage of your sweet potato vines – a mini-farm right at your doorstep! Thirdly, it’s an incredibly educational and engaging activity, perfect for families and individuals alike. Watching your sweet potatoes grow from slips to mature tubers is a truly fascinating process.
But the best part? The taste! Homegrown sweet potatoes have a depth of flavor that you simply won’t find in store-bought varieties. The sweetness is more pronounced, the texture is creamier, and the overall experience is simply divine.
Ready to take your balcony sweet potato growing to the next level? Consider these variations:
* Vertical Gardening: If you’re truly short on space, explore vertical gardening options. Use stacked planters or hanging baskets to maximize your growing area. Sweet potato vines are naturally trailing, making them perfect for cascading down from elevated containers.
* Companion Planting: Enhance your sweet potato patch by incorporating companion plants. Marigolds can deter pests, while herbs like basil and oregano can improve the overall health of your plants.
* Different Varieties: Don’t limit yourself to just one type of sweet potato! Experiment with different varieties to discover your favorites. Beauregard, Japanese, and Okinawan sweet potatoes all offer unique flavors and textures.
* Container Size Experimentation: While we recommended a specific container size, feel free to experiment. Larger containers may yield larger sweet potatoes, but smaller containers can still produce a respectable harvest. Just be sure to monitor the moisture levels and adjust your watering accordingly.
* Sweet Potato Greens: Don’t forget about the greens! Sweet potato leaves are edible and nutritious. Harvest them regularly for a delicious and healthy addition to salads, stir-fries, or soups.
We are confident that you will find this DIY project to be both enjoyable and rewarding. So, grab your supplies, follow our guide, and get ready to embark on your balcony sweet potato growing adventure!
We can’t wait to hear about your experiences! Share your photos, tips, and challenges in the comments below. Let’s create a community of balcony sweet potato growers and inspire others to embrace the joys of urban gardening. Happy growing!
Frequently Asked Questions (FAQ)
What is the best time of year to start growing sweet potatoes on my balcony?
The ideal time to start your balcony sweet potato project is in the late spring or early summer, after the last frost has passed. Sweet potatoes thrive in warm weather and require a soil temperature of at least 65°F (18°C) for optimal growth. If you live in a region with a shorter growing season, you can start your slips indoors 6-8 weeks before the last expected frost. This will give them a head start and ensure a successful harvest.
How much sunlight do sweet potatoes need when grown in containers?
Sweet potatoes are sun-loving plants and require at least 6-8 hours of direct sunlight per day to thrive. Choose a location on your balcony that receives ample sunlight throughout the day. If your balcony is partially shaded, try to position your containers in a way that maximizes sun exposure. You can also supplement with grow lights if necessary, especially if you live in a region with limited sunlight.
What type of soil is best for growing sweet potatoes in pots?
Sweet potatoes prefer well-draining, sandy loam soil that is rich in organic matter. Avoid heavy clay soils, as they can become waterlogged and hinder root development. You can purchase a pre-made potting mix specifically designed for vegetables, or you can create your own by mixing equal parts of garden soil, compost, and sand. Ensure the soil is loose and airy to allow for proper root growth.
How often should I water my balcony sweet potatoes?
Water your sweet potatoes regularly, especially during hot and dry weather. The soil should be consistently moist, but not waterlogged. Check the soil moisture by sticking your finger about an inch deep into the soil. If it feels dry, it’s time to water. Water deeply, allowing the water to drain out of the bottom of the container. Avoid overhead watering, as this can promote fungal diseases.
How do I fertilize my sweet potatoes grown in containers?
Sweet potatoes are heavy feeders and benefit from regular fertilization. Use a balanced fertilizer with an NPK ratio of 10-10-10 or 14-14-14. Apply the fertilizer according to the package instructions, typically every 2-3 weeks during the growing season. You can also supplement with organic fertilizers such as compost tea or fish emulsion. Avoid over-fertilizing, as this can lead to excessive foliage growth at the expense of tuber development.
How long does it take for sweet potatoes to mature and be ready for harvest?
Sweet potatoes typically take 90-120 days to mature, depending on the variety and growing conditions. You’ll know they’re ready to harvest when the foliage starts to turn yellow and die back. You can also gently dig around the base of the plant to check the size of the tubers. Harvest your sweet potatoes before the first frost, as frost can damage the tubers.
How do I cure sweet potatoes after harvesting them?
Curing sweet potatoes is essential for improving their flavor and storage life. After harvesting, gently brush off any excess soil and allow the sweet potatoes to dry in a warm, humid place (80-85°F or 27-29°C) for 7-10 days. This process allows the skins to harden and the starches to convert to sugars, resulting in a sweeter and more flavorful sweet potato. After curing, store your sweet potatoes in a cool, dry, and well-ventilated place (55-60°F or 13-16°C).
Can I grow sweet potatoes from store-bought sweet potatoes?
Yes, you can grow sweet potatoes from store-bought sweet potatoes, but it’s important to choose organic sweet potatoes that haven’t been treated with sprout inhibitors. Suspend the sweet potato in a jar of water, with the bottom half submerged. Place the jar in a warm, sunny location, and wait for sprouts (slips) to emerge. Once the slips are 6-8 inches long, gently twist them off and root them in water before transplanting them into your balcony containers.
Are there any common pests or diseases that affect sweet potatoes?
Sweet potatoes are generally resistant to pests and diseases, but they can be susceptible to certain problems, such as sweet potato weevils, wireworms, and fungal diseases. Inspect your plants regularly for signs of infestation or disease. If you notice any problems, take action immediately. You can use organic pest control methods such as neem oil or ins
So, there you have it! Transforming your balcony into a sweet potato haven is not only achievable, but incredibly rewarding. We’ve walked you through the simple steps to cultivate your own delicious and nutritious crop, even with limited space. This isn’t just about growing food; it’s about connecting with nature, embracing sustainability, and enjoying the unparalleled satisfaction of harvesting something you nurtured from start to finish.
Why is this DIY balcony sweet potato growing trick a must-try? Because it offers a unique blend of benefits that are hard to ignore. Firstly, you gain access to fresh, organic sweet potatoes, free from the pesticides and herbicides often found in commercially grown produce. Secondly, it’s a fantastic way to utilize small spaces and add a touch of greenery to your urban environment. Imagine stepping onto your balcony and being greeted by the vibrant foliage of your sweet potato vines – a mini-farm right at your doorstep! Thirdly, it’s an incredibly educational and engaging activity, perfect for families and individuals alike. Watching your sweet potatoes grow from slips to mature tubers is a truly fascinating process.
But the best part? The taste! Homegrown sweet potatoes have a depth of flavor that you simply won’t find in store-bought varieties. The sweetness is more pronounced, the texture is creamier, and the overall experience is simply divine.
Ready to take your balcony sweet potato growing to the next level? Consider these variations:
* Vertical Gardening: If you’re truly short on space, explore vertical gardening options. Use stacked planters or hanging baskets to maximize your growing area. Sweet potato vines are naturally trailing, making them perfect for cascading down from elevated containers.
* Companion Planting: Enhance your sweet potato patch by incorporating companion plants. Marigolds can deter pests, while herbs like basil and oregano can improve the overall health of your plants.
* Different Varieties: Don’t limit yourself to just one type of sweet potato! Experiment with different varieties to discover your favorites. Beauregard, Japanese, and Okinawan sweet potatoes all offer unique flavors and textures.
* Container Size Experimentation: While we recommended a specific container size, feel free to experiment. Larger containers may yield larger sweet potatoes, but smaller containers can still produce a respectable harvest. Just be sure to monitor the moisture levels and adjust your watering accordingly.
* Sweet Potato Greens: Don’t forget about the greens! Sweet potato leaves are edible and nutritious. Harvest them regularly for a delicious and healthy addition to salads, stir-fries, or soups.
We are confident that you will find this DIY project to be both enjoyable and rewarding. So, grab your supplies, follow our guide, and get ready to embark on your balcony sweet potato growing adventure!
We can’t wait to hear about your experiences! Share your photos, tips, and challenges in the comments below. Let’s create a community of balcony sweet potato growers and inspire others to embrace the joys of urban gardening. Happy growing!
Frequently Asked Questions (FAQ)
What is the best time of year to start growing sweet potatoes on my balcony?
The ideal time to start your balcony sweet potato project is in the late spring or early summer, after the last frost has passed. Sweet potatoes thrive in warm weather and require a soil temperature of at least 65°F (18°C) for optimal growth. If you live in a region with a shorter growing season, you can start your slips indoors 6-8 weeks before the last expected frost. This will give them a head start and ensure a successful harvest.
How much sunlight do sweet potatoes need when grown in containers?
Sweet potatoes are sun-loving plants and require at least 6-8 hours of direct sunlight per day to thrive. Choose a location on your balcony that receives ample sunlight throughout the day. If your balcony is partially shaded, try to position your containers in a way that maximizes sun exposure. You can also supplement with grow lights if necessary, especially if you live in a region with limited sunlight.
What type of soil is best for growing sweet potatoes in pots?
Sweet potatoes prefer well-draining, sandy loam soil that is rich in organic matter. Avoid heavy clay soils, as they can become waterlogged and hinder root development. You can purchase a pre-made potting mix specifically designed for vegetables, or you can create your own by mixing equal parts of garden soil, compost, and sand. Ensure the soil is loose and airy to allow for proper root growth.
How often should I water my balcony sweet potatoes?
Water your sweet potatoes regularly, especially during hot and dry weather. The soil should be consistently moist, but not waterlogged. Check the soil moisture by sticking your finger about an inch deep into the soil. If it feels dry, it’s time to water. Water deeply, allowing the water to drain out of the bottom of the container. Avoid overhead watering, as this can promote fungal diseases.
How do I fertilize my sweet potatoes grown in containers?
Sweet potatoes are heavy feeders and benefit from regular fertilization. Use a balanced fertilizer with an NPK ratio of 10-10-10 or 14-14-14. Apply the fertilizer according to the package instructions, typically every 2-3 weeks during the growing season. You can also supplement with organic fertilizers such as compost tea or fish emulsion. Avoid over-fertilizing, as this can lead to excessive foliage growth at the expense of tuber development.
How long does it take for sweet potatoes to mature and be ready for harvest?
Sweet potatoes typically take 90-120 days to mature, depending on the variety and growing conditions. You’ll know they’re ready to harvest when the foliage starts to turn yellow and die back. You can also gently dig around the base of the plant to check the size of the tubers. Harvest your sweet potatoes before the first frost, as frost can damage the tubers.
How do I cure sweet potatoes after harvesting them?
Curing sweet potatoes is essential for improving their flavor and storage life. After harvesting, gently brush off any excess soil and allow the sweet potatoes to dry in a warm, humid place (80-85°F or 27-29°C) for 7-10 days. This process allows the skins to harden and the starches to convert to sugars, resulting in a sweeter and more flavorful sweet potato. After curing, store your sweet potatoes in a cool, dry, and well-ventilated place (55-60°F or 13-16°C).
Can I grow sweet potatoes from store-bought sweet potatoes?
Yes, you can grow sweet potatoes from store-bought sweet potatoes, but it’s important to choose organic sweet potatoes that haven’t been treated with sprout inhibitors. Suspend the sweet potato in a jar of water, with the bottom half submerged. Place the jar in a warm, sunny location, and wait for sprouts (slips) to emerge. Once the slips are 6-8 inches long, gently twist them off and root them in water before transplanting them into your balcony containers.
Are there any common pests or diseases that affect sweet potatoes?
Sweet potatoes are generally resistant to pests and diseases, but they can be susceptible to certain problems, such as sweet potato weevils, wireworms, and fungal diseases. Inspect your plants regularly for signs of infestation or disease. If you notice any problems, take action immediately. You can use organic pest control methods such as neem oil or insecticidal soap to control pests. To prevent fungal diseases, ensure good air circulation and avoid overhead watering.
Can I eat the leaves of my sweet potato plants?
Yes, the leaves of sweet potato plants are edible and nutritious. They can be eaten raw in salads or cooked like spinach. Harvest the young, tender leaves for the best flavor and texture. Avoid eating the leaves if they have been treated with pesticides or herbicides.
Leave a Comment