

Backyard Grape Growing Hack: Imagine stepping into your backyard and plucking juicy, sun-ripened grapes straight from the vine. Sounds like a dream, right? Well, it doesn’t have to be! For centuries, grapevines have symbolized abundance and prosperity, gracing landscapes from ancient Roman vineyards to the sun-drenched hills of Napa Valley. But you don’t need a sprawling estate to enjoy the fruits (pun intended!) of your labor.
I’m here to tell you that even with limited space, you can cultivate your own thriving grapevine with a simple, yet effective backyard grape growing hack. Forget complicated techniques and expensive equipment. This DIY guide is all about making grape growing accessible and enjoyable for everyone, regardless of their gardening experience.
Why do you need this hack? Because store-bought grapes simply can’t compare to the taste of homegrown goodness. Plus, growing your own grapes is a rewarding experience that connects you with nature and provides a sustainable source of delicious fruit. So, ditch the grocery store grapes and get ready to transform your backyard into a mini-vineyard! Let’s dive in and unlock the secrets to successful backyard grape growing!
Backyard Grape Growing Hack: From Zero to Vineyard Hero!
Okay, so you’ve always dreamed of plucking juicy grapes straight from your own backyard vine, right? Me too! But the thought of complicated trellises and finicky plants can be intimidating. Well, fear not, fellow aspiring vintners! I’m going to share a super simple, budget-friendly hack that will have you enjoying homegrown grapes sooner than you think. This method focuses on maximizing sunlight and airflow, while minimizing the need for extensive pruning and support structures in the early stages.
Choosing the Right Grape Variety
Before we even think about planting, let’s talk grapes! Not all grapes are created equal, especially when it comes to backyard growing. You need to consider your climate, soil type, and personal taste.
* Climate is Key: Are you in a warm, sunny region or a cooler, more temperate zone? This will drastically affect which varieties will thrive. Look for “cold-hardy” varieties if you experience harsh winters.
* Disease Resistance: Some grape varieties are more susceptible to diseases like powdery mildew and black rot. Choosing disease-resistant varieties will save you a lot of headaches (and fungicide!).
* Table Grapes vs. Wine Grapes: Do you want to eat your grapes fresh off the vine, or are you planning on making wine? Table grapes are typically larger, sweeter, and have thinner skins. Wine grapes are smaller, have thicker skins, and a higher sugar content.
* Seedless vs. Seeded: This is purely a matter of personal preference. Seedless grapes are convenient for snacking, but some people find that seeded grapes have a richer flavor.
I personally recommend starting with a disease-resistant table grape variety like ‘Reliance’ (seedless, pink, cold-hardy) or ‘Marquis’ (seedless, green, good flavor). ‘Concord’ is a classic choice, but it can be susceptible to diseases in some areas. Do your research and choose a variety that’s well-suited to your specific location. Local nurseries are a great resource for finding varieties that thrive in your area.
Preparing the Planting Site
Grapes need sunshine, sunshine, and more sunshine! Aim for at least 6-8 hours of direct sunlight per day. Good drainage is also crucial. Grapes hate having wet feet!
* Sunlight Assessment: Observe your backyard throughout the day to identify the sunniest spot.
* Soil Testing: A soil test will tell you the pH level and nutrient content of your soil. Grapes prefer a slightly acidic soil (pH 6.0-7.0). You can purchase a soil testing kit at most garden centers or send a sample to your local agricultural extension office.
* Soil Amendment: Amend your soil with compost or well-rotted manure to improve drainage and fertility. This is especially important if you have heavy clay soil.
* Weed Control: Remove all weeds and grass from the planting area. Weeds compete with grapevines for nutrients and water.
The “Lazy Gardener” Trellis System
This is where the magic happens! Instead of building a complicated trellis system right away, we’re going to use a simple, temporary support structure that allows the grapevine to establish itself before we commit to a permanent trellis. This method is perfect for beginners because it’s easy to set up and requires minimal maintenance.
* The Goal: To provide initial support and encourage vertical growth without overwhelming the young vine.
* Materials: You’ll need a sturdy stake (a 6-foot metal or wooden stake will do), some soft twine or plant ties, and optionally, some bamboo stakes for added support.
* Why it Works: This system allows the vine to focus on root development and initial growth. It also makes it easier to prune and train the vine in the early years.
Step-by-Step Planting and Training Guide
Alright, let’s get our hands dirty! Here’s how to plant your grapevine and set up the temporary support system:
1. Dig the Hole: Dig a hole that’s twice as wide and just as deep as the root ball of your grapevine.
2. Amend the Soil (Again!): Mix some compost or well-rotted manure into the soil you removed from the hole.
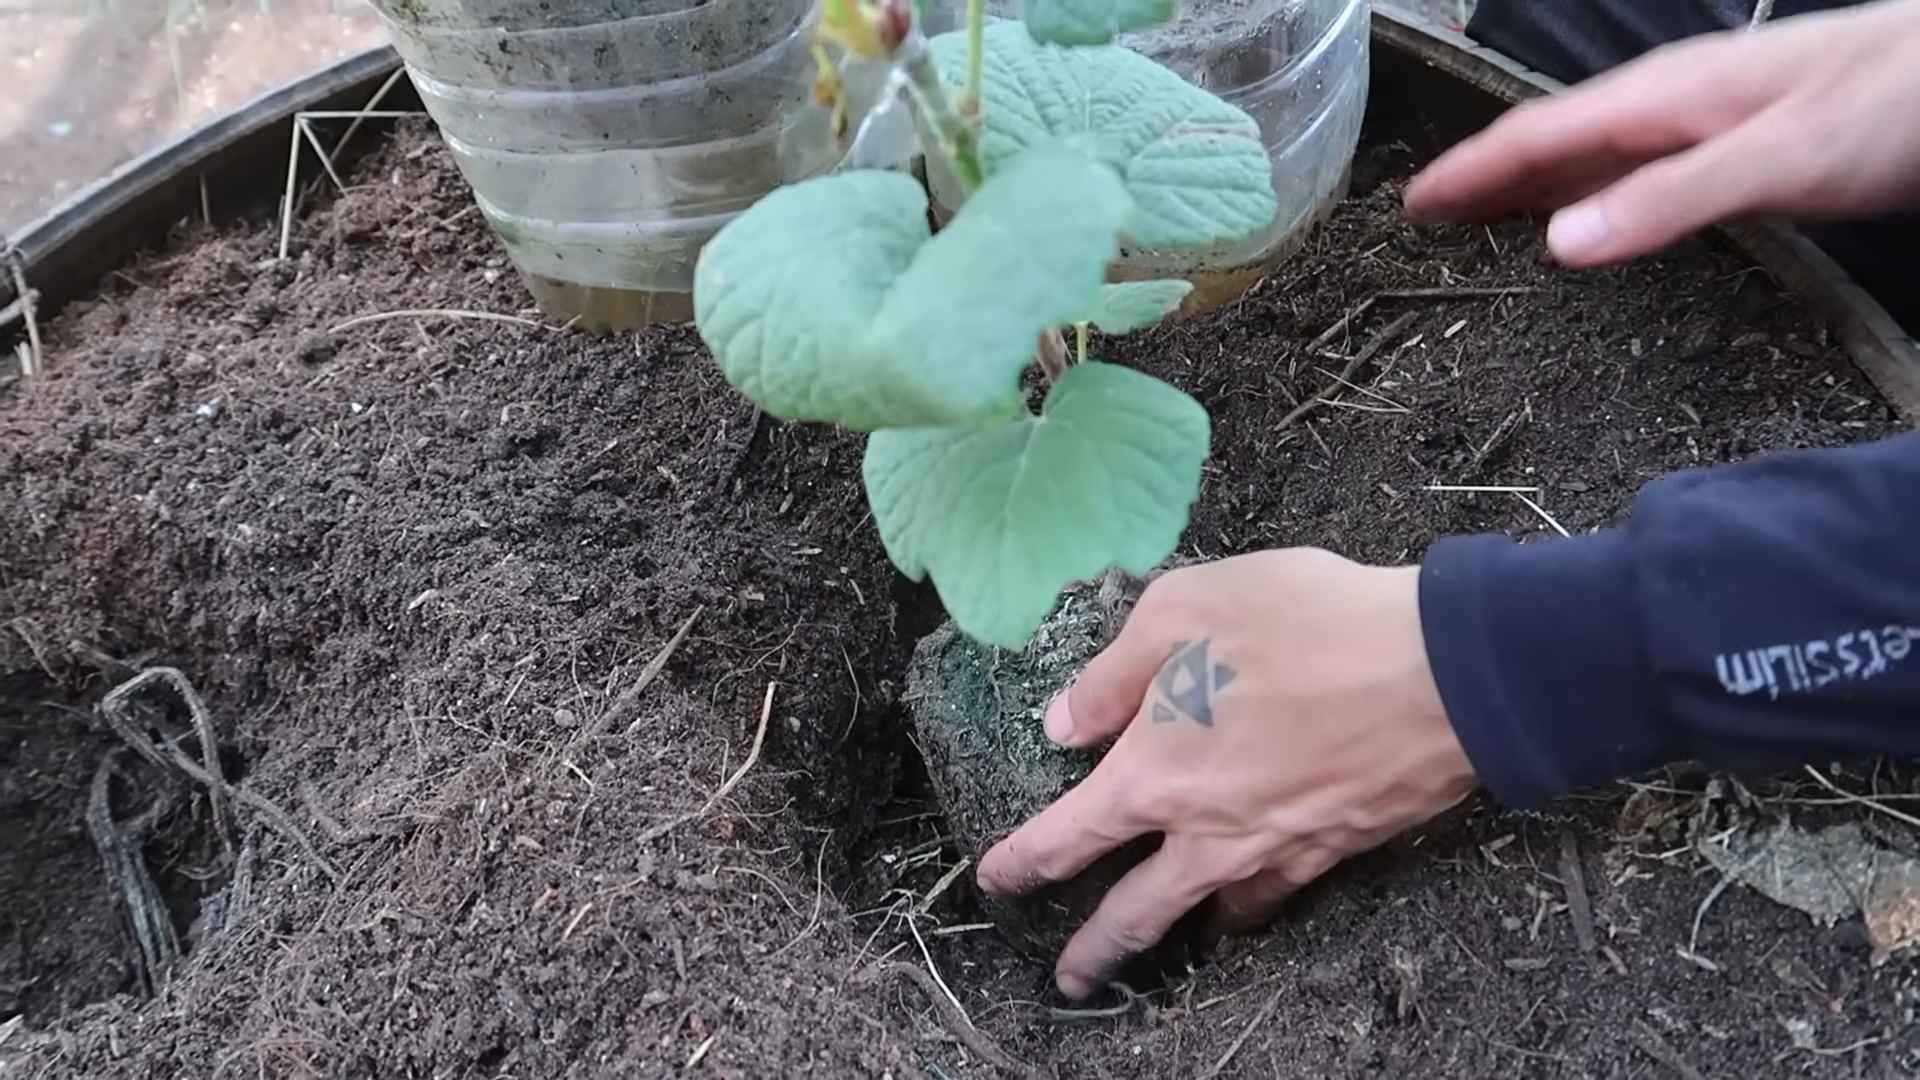
3. Plant the Grapevine: Gently remove the grapevine from its container and loosen any circling roots. Place the grapevine in the hole, making sure the top of the root ball is level with the ground.
4. Backfill the Hole: Fill the hole with the amended soil, gently tamping it down as you go.
5. Water Thoroughly: Water the newly planted grapevine deeply to settle the soil and hydrate the roots.
6. Install the Stake: Drive the stake into the ground about 6 inches away from the grapevine. Make sure the stake is sturdy and won’t wobble.
7. Initial Tie: Using soft twine or plant ties, loosely tie the main stem of the grapevine to the stake. Don’t tie it too tightly, as this can restrict growth.
8. Mulch: Apply a layer of mulch around the base of the grapevine to help retain moisture and suppress weeds.
9. Watering Schedule: Water regularly, especially during dry periods. Young grapevines need consistent moisture to establish themselves.
10. Training the Vine (First Year): As the grapevine grows, continue to tie the main stem to the stake. Remove any side shoots that emerge from the base of the plant. We want to encourage vertical growth.
11. Pruning (First Winter): In late winter or early spring, before the buds begin to swell, prune the grapevine back to a single, strong stem. Cut it back to about 2-3 feet above the ground. This may seem drastic, but it will encourage strong growth in the following year.
Second Year and Beyond: Building a Permanent Trellis
After the first year, your grapevine should be well-established and ready for a more permanent trellis system. There are many different trellis designs to choose from, but I’m going to share a simple and effective option that’s easy to build.
* The Goal: To provide a strong and durable support structure that allows the grapevine to spread out and produce fruit.
* Materials: You’ll need two sturdy posts (4×4 treated lumber is a good choice), wire (12-gauge galvanized wire is recommended), wire tensioners, and staples or wire clips.
* Trellis Design: A simple two-wire trellis is a great option for backyard grape growing. The wires should be spaced about 3 feet apart, with the bottom wire about 3 feet above the ground.
Building the Trellis: Step-by-Step
1. Install the Posts: Dig holes for the posts about 8-10 feet apart. The holes should be deep enough to bury about 2 feet of the post.
2. Set the Posts: Place the posts in the holes and fill the holes with concrete. Make sure the posts are plumb (perfectly vertical).
3. Attach the Wires: Once the concrete has set, attach the wires to the posts. Use staples or wire clips to secure the wires to the posts.
4. Install Wire Tensioners: Install wire tensioners at one end of each wire. These will allow you to tighten the wires as needed.
5. Tighten the Wires: Use the wire tensioners to tighten the wires until they are taut.
6. Training the Vine (Second Year): In the spring, select two strong shoots to become the main arms of the grapevine. Tie these shoots to the bottom wire of the trellis.
7. Pruning (Second Winter): In late winter or early spring, prune the grapevine to maintain its shape and encourage fruit production. Remove any dead, damaged, or diseased wood.
8. Ongoing Maintenance: Continue to train the grapevine to the trellis and prune it regularly to maintain its shape and encourage fruit production.
Fertilizing and Pest Control
Grapes are relatively low-maintenance plants, but they do benefit from regular fertilization and pest control.
* Fertilizing: Fertilize your grapevine in the spring with a balanced fertilizer. Follow the instructions on the fertilizer label.
* Pest Control: Monitor your grapevine for pests and diseases. If you notice any problems, take action immediately. There are many organic and conventional pest control options available.
* Common Pests: Japanese beetles, grape phylloxera, and spider mites are common pests of grapevines.
* Common Diseases: Powdery mildew, black rot, and downy mildew are common diseases of grapevines.
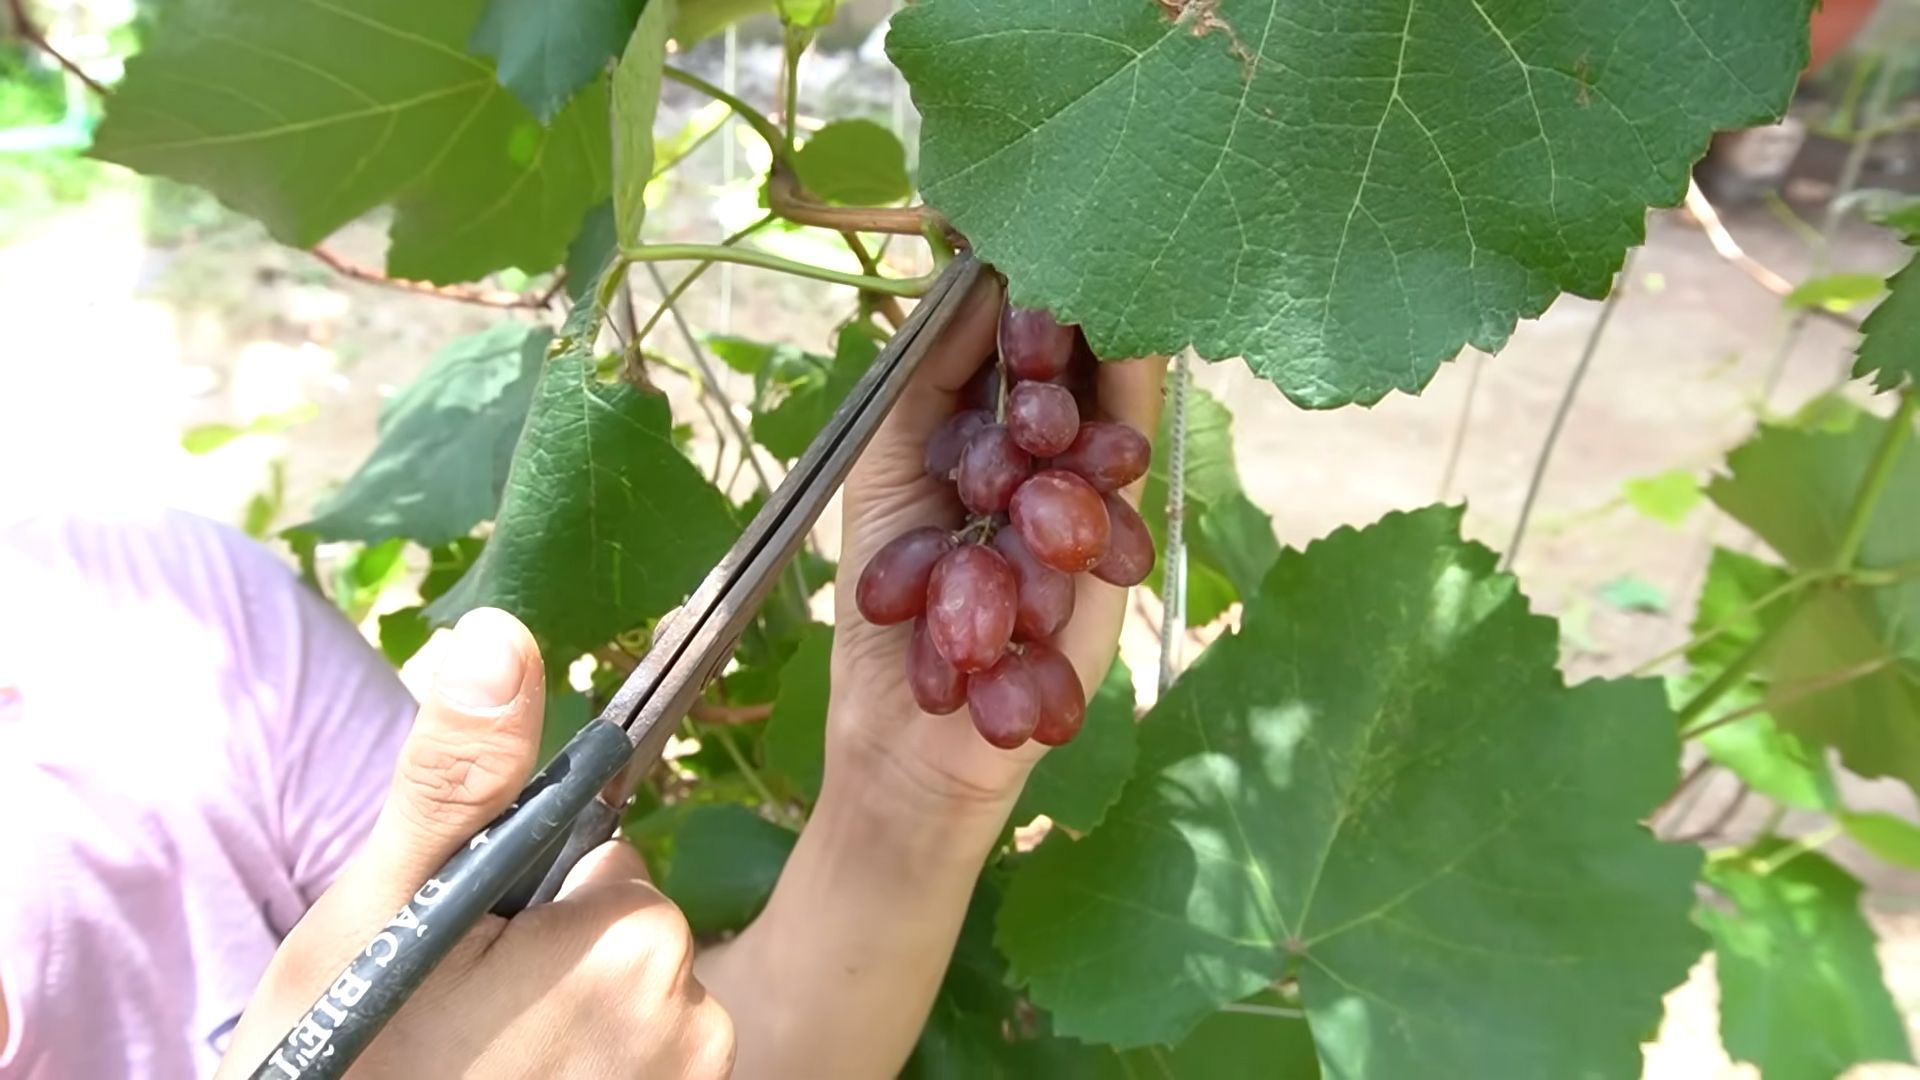
Harvesting Your Grapes
The moment you’ve been waiting for! Harvesting your own homegrown grapes is incredibly rewarding.
* When to Harvest: Grapes are typically ready to harvest in late summer or early fall. The exact timing will depend on the variety and your climate.
* How to Tell if They’re Ripe: The grapes should be plump,
Conclusion
So, there you have it! This simple, yet incredibly effective, backyard grape growing hack is a game-changer for anyone dreaming of bountiful harvests right in their own backyard. Forget complicated trellising systems and expensive equipment. This method is all about simplicity, sustainability, and maximizing your grape yield with minimal effort.
Why is this a must-try? Because it addresses the core needs of grapevines: sunlight, air circulation, and support, all while being incredibly budget-friendly and easy to implement. You’ll be amazed at how quickly your vines respond, producing healthier leaves, stronger stems, and, most importantly, more delicious grapes. Imagine the satisfaction of harvesting your own grapes, knowing you nurtured them from tiny vines to thriving producers using a clever, eco-conscious technique.
But don’t stop there! This hack is just the starting point. Feel free to experiment with different materials for your support structure. Bamboo poles, repurposed metal pipes, or even sturdy branches can all work wonders. Consider the specific needs of your grape variety. Some varieties might benefit from a slightly different spacing or pruning technique. Don’t be afraid to adapt the method to suit your unique growing conditions and personal preferences.
For those in colder climates, consider using this method in conjunction with protective measures during the winter months. Wrapping the base of the vines with burlap or straw can help insulate them from freezing temperatures. You can also experiment with different mulching techniques to retain moisture and suppress weeds.
And for those with limited space, this hack is particularly valuable. It allows you to grow grapes vertically, maximizing your yield in a small area. You can even adapt it for container gardening, creating a stunning and productive grape vine display on your patio or balcony.
The possibilities are endless! The key is to embrace the spirit of experimentation and find what works best for you and your grapevines.
We are confident that this backyard grape growing hack will transform your grape growing experience. It’s a simple, effective, and rewarding way to cultivate your own delicious grapes.
Now, it’s your turn! We encourage you to try this hack in your own backyard and share your results with us. Let us know what worked well, what challenges you faced, and any variations you came up with. Your feedback will help us refine this method and make it even more accessible to other grape growers. Share your photos and stories on our social media channels using #BackyardGrapeGrowingHack. We can’t wait to see your thriving grapevines and hear about your success! Happy growing!
Frequently Asked Questions (FAQ)
What type of grapes is this backyard grape growing hack best suited for?
This hack is generally suitable for most grape varieties, especially those that are vigorous growers and benefit from vertical support. However, it’s always a good idea to research the specific needs of your chosen grape variety. Some varieties might require more or less sunlight, different pruning techniques, or specific soil conditions. Table grapes, wine grapes, and even some ornamental grape varieties can thrive using this method. Consider the mature size of the vine when planning your support structure. Larger varieties might require a more robust support system.
How often should I water my grapevines using this method?
Watering frequency depends on several factors, including your climate, soil type, and the age of your vines. Newly planted vines will require more frequent watering than established vines. As a general rule, water deeply and less frequently, allowing the soil to dry out slightly between waterings. Check the soil moisture by sticking your finger a few inches into the soil. If it feels dry, it’s time to water. Avoid overwatering, as this can lead to root rot. During hot, dry periods, you might need to water more frequently. Consider using a soaker hose or drip irrigation system to deliver water directly to the roots.
What kind of fertilizer should I use for my grapevines?
Grapevines benefit from regular fertilization, especially during the growing season. Use a balanced fertilizer specifically formulated for fruit-bearing plants. Look for a fertilizer with a higher phosphorus content to promote fruit production. Follow the instructions on the fertilizer packaging carefully. Avoid over-fertilizing, as this can damage the vines. You can also amend the soil with compost or other organic matter to improve its fertility and drainage. Consider getting a soil test to determine the specific nutrient needs of your soil.
How do I prune my grapevines using this backyard grape growing hack?
Pruning is essential for maintaining the health and productivity of your grapevines. The best time to prune is during the dormant season, typically in late winter or early spring. Remove any dead, damaged, or diseased wood. Also, prune to shape the vine and encourage fruit production. The specific pruning technique will depend on the grape variety and the desired training system. Research the best pruning method for your chosen variety. Generally, you’ll want to remove most of the previous year’s growth, leaving only a few buds on each cane. This will encourage the vine to produce new growth and fruit in the coming season.
What are some common pests and diseases that affect grapevines, and how can I prevent them?
Grapevines can be susceptible to various pests and diseases, including aphids, spider mites, Japanese beetles, powdery mildew, and black rot. To prevent these problems, choose disease-resistant grape varieties. Provide good air circulation around the vines by spacing them properly and pruning regularly. Monitor your vines regularly for signs of pests or diseases. If you spot any problems, take action immediately. You can use organic pest control methods, such as insecticidal soap or neem oil, to control pests. For diseases, you can use fungicides specifically formulated for grapevines. Always follow the instructions on the product label carefully.
Can I grow grapes in containers using this backyard grape growing hack?
Yes, you can definitely grow grapes in containers using this hack! Choose a large container with good drainage. Select a grape variety that is well-suited for container growing, such as dwarf or compact varieties. Use a high-quality potting mix that is well-draining and rich in nutrients. Provide a sturdy support structure for the vines to climb on. Water regularly and fertilize as needed. Container-grown grapes might require more frequent watering and fertilization than those grown in the ground. Also, protect the containers from freezing temperatures during the winter months.
How long does it take for grapevines to produce fruit using this method?
Grapevines typically take 2-3 years to start producing fruit. The first year is focused on establishing the root system and growing the vine. In the second year, you might see some flowers, but it’s best to remove them to encourage further vegetative growth. In the third year, you should start to see a significant fruit production. The amount of fruit will increase as the vine matures. Proper care, including watering, fertilizing, and pruning, will help to accelerate fruit production.
What are some variations of this backyard grape growing hack?
There are many ways to customize this hack to suit your specific needs and preferences. You can use different materials for the support structure, such as bamboo poles, repurposed metal pipes, or even sturdy branches. You can also experiment with different spacing between the vines. For colder climates, you can use this method in conjunction with protective measures during the winter months. You can also adapt it for container gardening, creating a stunning and productive grape vine display on your patio or balcony. Consider using companion planting to attract beneficial insects and deter pests. The possibilities are endless!

Leave a Comment