

Backyard chili garden tips are your ticket to spicing up your life, one pepper at a time! Imagine stepping outside your back door and harvesting fresh, fiery chilies whenever you need a kick in your cooking. Forget bland, store-bought spices – with a little know-how, you can cultivate a vibrant chili garden that’s bursting with flavor and color.
Chili peppers have a rich history, dating back thousands of years in the Americas. They were prized by ancient civilizations like the Aztecs and Mayans, not just for their culinary uses, but also for their medicinal properties and even as a form of currency! Today, the love for chilies has spread worldwide, and growing your own is a fantastic way to connect with this fascinating history.
But why should *you* embark on this spicy adventure? Well, for starters, growing your own chilies is incredibly rewarding. There’s nothing quite like the satisfaction of nurturing a tiny seed into a thriving plant that produces delicious peppers. Plus, it’s a fantastic way to save money on groceries and reduce your carbon footprint. More importantly, mastering these backyard chili garden tips allows you to control exactly what goes into your food – no pesticides, no hidden ingredients, just pure, unadulterated chili goodness. I’m here to guide you through the process, sharing easy-to-follow DIY tricks and hacks that will transform your backyard into a chili paradise, even if you’re a complete beginner!
Dein eigener Chili-Garten im Hinterhof: Schärfe selbst anbauen!
Hey Chili-Liebhaber! Hast du jemals davon geträumt, deine eigenen Chilis anzubauen, direkt in deinem Garten? Ich kann dir sagen, es ist einfacher als du denkst und unglaublich befriedigend! Stell dir vor, du kannst jederzeit frische, scharfe Chilis für deine Lieblingsgerichte ernten. In diesem Artikel zeige ich dir, wie du deinen eigenen Chili-Garten im Hinterhof anlegst, von der Auswahl der richtigen Sorten bis zur Ernte. Los geht’s!
Was du für deinen Chili-Garten brauchst:
* Chilisamen oder Jungpflanzen: Wähle deine Lieblingssorten! Von milden Jalapeños bis zu feurigen Habaneros, die Auswahl ist riesig.
* Töpfe oder Pflanzkästen (optional): Wenn du keinen Garten hast oder deine Chilis lieber mobil halten möchtest.
* Gute Erde: Chili-Pflanzen lieben nährstoffreiche, gut durchlässige Erde.
* Kompost oder Dünger: Für einen extra Nährstoffkick.
* Gießkanne oder Gartenschlauch: Zum Bewässern.
* Gartengeräte: Spaten, Schaufel, eventuell eine kleine Harke.
* Pflanzstäbe (optional): Für Sorten, die etwas Unterstützung brauchen.
* Geduld und Liebe: Das Wichtigste!
Die richtige Chili-Sorte auswählen:
Bevor wir loslegen, ist es wichtig, die richtige Chili-Sorte für dich auszuwählen. Hier sind ein paar Tipps:
* Schärfegrad: Überlege dir, wie scharf du deine Chilis magst. Die Schärfe wird in Scoville-Einheiten (SHU) gemessen. Jalapeños sind relativ mild (2.500-8.000 SHU), während Habaneros schon ordentlich Feuer haben (100.000-350.000 SHU). Es gibt sogar Sorten, die über 2 Millionen SHU erreichen!
* Klima: Informiere dich, welche Sorten in deinem Klima gut gedeihen. Einige Chilisorten brauchen mehr Wärme und Sonne als andere.
* Verwendungszweck: Willst du die Chilis frisch essen, einlegen, trocknen oder zu Pulver verarbeiten? Einige Sorten eignen sich besser für bestimmte Zwecke als andere.
* Platz: Manche Chili-Pflanzen werden sehr groß, andere bleiben eher klein. Berücksichtige den verfügbaren Platz in deinem Garten.
Chilis vorziehen (optional, aber empfehlenswert):
Das Vorziehen von Chilisamen im Haus gibt ihnen einen Vorsprung, besonders in kühleren Klimazonen. Ich mache das immer, um sicherzustellen, dass meine Pflanzen stark und gesund sind, bevor sie nach draußen kommen.
1. Aussaat: Fülle kleine Anzuchttöpfe oder eine Anzuchtschale mit Anzuchterde. Lege die Chilisamen etwa 0,5-1 cm tief in die Erde und bedecke sie leicht.
2. Bewässerung: Befeuchte die Erde vorsichtig mit einer Sprühflasche. Die Erde sollte feucht, aber nicht nass sein.
3. Wärme: Chilisamen brauchen Wärme zum Keimen. Stelle die Anzuchttöpfe an einen warmen Ort, z.B. auf eine Heizung oder in ein Mini-Gewächshaus. Eine Temperatur von 22-28°C ist ideal.
4. Licht: Sobald die Samen gekeimt sind (das dauert je nach Sorte 1-3 Wochen), brauchen die kleinen Pflänzchen viel Licht. Stelle sie an ein helles Fenster oder verwende eine Pflanzenlampe.
5. Pikieren: Wenn die Pflänzchen ihre ersten richtigen Blätter (neben den Keimblättern) entwickelt haben, kannst du sie in größere Töpfe pikieren. Verwende dafür normale Blumenerde.
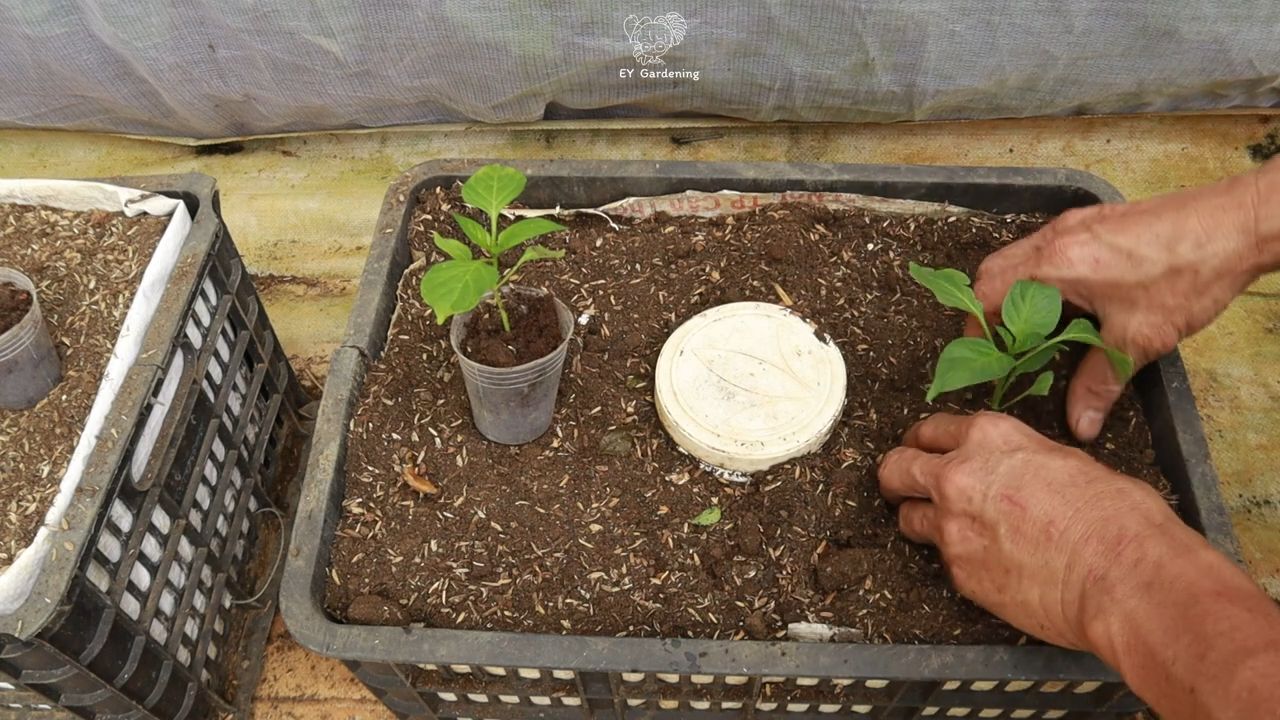
Chilis im Garten pflanzen:
Sobald die Temperaturen steigen und keine Frostgefahr mehr besteht, können die Chili-Pflanzen nach draußen in den Garten.
1. Vorbereitung des Bodens: Wähle einen sonnigen Standort für deinen Chili-Garten. Chilis lieben Sonne! Lockere den Boden gut auf und entferne Unkraut. Mische Kompost oder Dünger unter die Erde, um sie mit Nährstoffen anzureichern.
2. Pflanzabstand: Achte auf den richtigen Pflanzabstand. Je nach Sorte sollten die Pflanzen 30-60 cm auseinander stehen.
3. Pflanzen: Grabe ein Loch, das etwas größer ist als der Wurzelballen der Chili-Pflanze. Setze die Pflanze vorsichtig hinein und fülle das Loch mit Erde auf. Drücke die Erde leicht an.
4. Bewässerung: Gieße die Pflanzen nach dem Einpflanzen gründlich.
Chilis im Topf pflanzen:
Wenn du keinen Garten hast oder deine Chilis lieber auf dem Balkon oder der Terrasse anbauen möchtest, ist das Pflanzen im Topf eine tolle Alternative.
1. Topfgröße: Wähle einen Topf mit ausreichend Volumen. Für kleinere Sorten reichen 10-15 Liter, für größere Sorten sollten es mindestens 20 Liter sein.
2. Erde: Verwende hochwertige Blumenerde, die gut durchlässig ist. Du kannst auch etwas Kompost oder Dünger untermischen.
3. Drainage: Achte darauf, dass der Topf Drainagelöcher hat, damit überschüssiges Wasser ablaufen kann.
4. Pflanzen: Pflanze die Chili-Pflanze wie oben beschrieben in den Topf.
5. Standort: Stelle den Topf an einen sonnigen und warmen Standort.
Pflege deines Chili-Gartens:
Die richtige Pflege ist entscheidend für eine reiche Chili-Ernte.
1. Bewässerung: Gieße deine Chili-Pflanzen regelmäßig, besonders bei trockenem Wetter. Die Erde sollte immer leicht feucht sein, aber nicht nass. Vermeide Staunässe.
2. Düngung: Dünge deine Chili-Pflanzen regelmäßig mit einem speziellen Chili-Dünger oder einem organischen Dünger. Beginne etwa 2-3 Wochen nach dem Einpflanzen und wiederhole die Düngung alle 2-4 Wochen.
3. Unkrautbekämpfung: Entferne regelmäßig Unkraut, das die Nährstoffe und das Wasser der Chili-Pflanzen raubt.
4. Schädlinge und Krankheiten: Achte auf Schädlinge wie Blattläuse oder Spinnmilben. Bei Befall kannst du natürliche Schädlingsbekämpfungsmittel verwenden, z.B. Neemöl oder Schmierseifenlösung. Auch Pilzkrankheiten können auftreten, besonders bei feuchtem Wetter. Sorge für eine gute Belüftung und entferne befallene Blätter.
5. Stützen: Einige Chili-Sorten, besonders solche mit großen Früchten, brauchen Unterstützung. Verwende Pflanzstäbe oder Rankgitter, um die Pflanzen zu stabilisieren.
6. Ausgeizen: Bei einigen Chili-Sorten kann es sinnvoll sein, die Seitentriebe (Geiztriebe) auszugeizen, um die Bildung von Früchten zu fördern. Informiere dich, ob das für deine Sorte empfehlenswert ist.
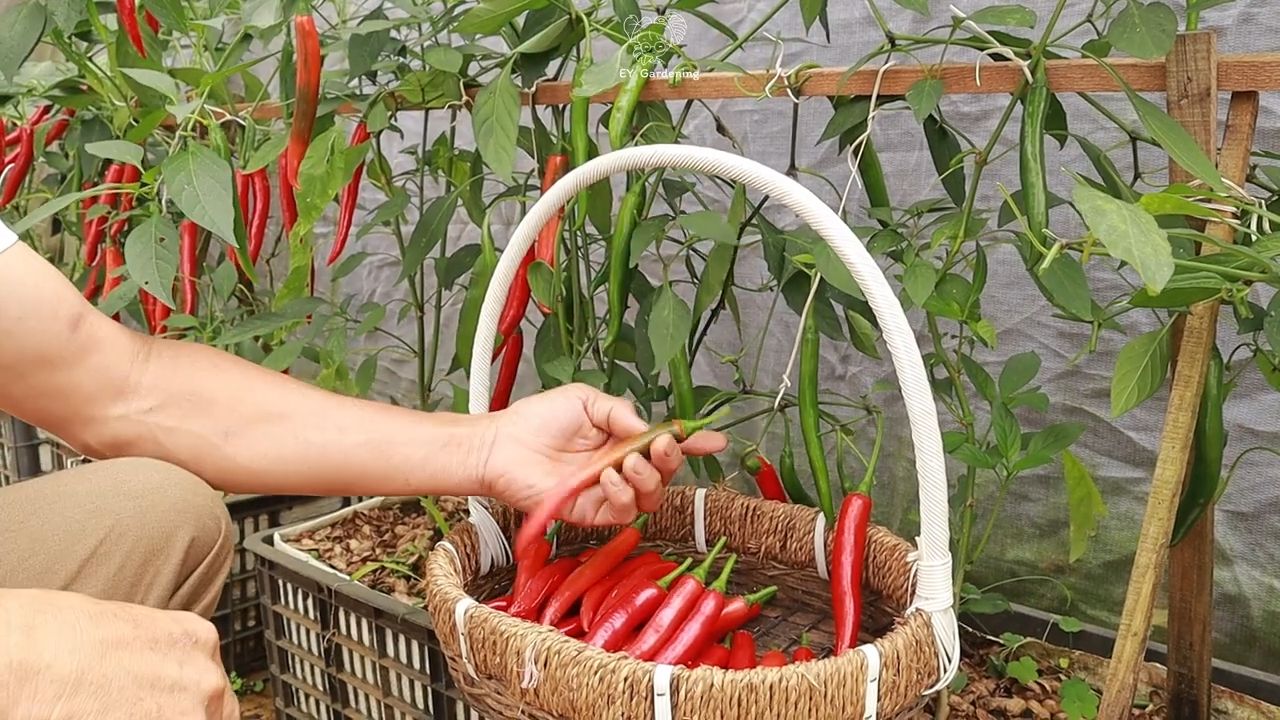
Die Chili-Ernte:
Endlich ist es soweit! Die Chilis sind reif und können geerntet werden.
1. Reifezeichen: Die Reifezeichen sind je nach Sorte unterschiedlich. In der Regel verändern die Chilis ihre Farbe von grün zu rot, gelb, orange oder braun. Sie sollten sich auch fest anfühlen.
2. Ernten: Schneide die Chilis mit einer Schere oder einem Messer vom Stiel ab. Trage am besten Handschuhe, um Hautreizungen zu vermeiden.
3. Verwendung: Du kannst die Chilis frisch verwenden, einlegen, trocknen oder zu Pulver verarbeiten.
Chilis trocknen:
Das Trocknen ist eine tolle Möglichkeit, deine Chili-Ernte haltbar zu machen.
1. Lufttrocknen: Fädle die Chilis mit einer Nadel auf einen Faden und hänge sie an einem trockenen, luftigen Ort auf. Das kann mehrere Wochen dauern.
2. Im Ofen trocknen: Lege die Chilis auf ein Backblech und trockne sie bei niedriger Temperatur (
Conclusion
So, there you have it! Transforming your backyard into a thriving chili garden is not only achievable, but it’s also incredibly rewarding. Imagine stepping outside your door and having a vibrant array of chili peppers at your fingertips, ready to add a fiery kick to your favorite dishes. This isn’t just about growing plants; it’s about cultivating flavor, embracing sustainability, and connecting with nature in a tangible way.
Why is this DIY chili garden trick a must-try? Because it empowers you to control the quality and variety of your chilies. Store-bought peppers can be expensive and often lack the intense flavor and heat you crave. With your own garden, you can choose from a vast selection of chili varieties, from the mildest poblanos to the scorching ghost peppers, tailoring your harvest to your exact preferences. Plus, you’ll know exactly what went into growing them – no harmful pesticides or questionable practices.
Beyond the practical benefits, creating a backyard chili garden is a fantastic way to enhance your outdoor space. The vibrant colors of the peppers, the lush greenery of the plants, and the buzzing of pollinators all contribute to a visually appealing and ecologically diverse environment. It’s a project that engages your senses and provides a constant source of satisfaction as you watch your plants flourish.
Ready to take your chili game to the next level?
Consider these variations to personalize your chili garden:
* **Vertical Gardening:** If you’re short on space, explore vertical gardening techniques. Trellises, hanging baskets, and stacked planters can maximize your growing area and add visual interest to your patio or balcony.
* **Companion Planting:** Enhance your chili garden’s health and productivity by incorporating companion plants like basil, tomatoes, and carrots. These plants can deter pests, improve soil quality, and even enhance the flavor of your chilies.
* **Hydroponics:** For a more advanced approach, consider hydroponic chili gardening. This method involves growing plants without soil, using nutrient-rich water solutions. It can be a great option for indoor growing or for those with limited outdoor space.
* **Container Gardening:** If you don’t have a backyard, you can still grow chilies in containers on your patio, balcony, or even indoors with sufficient sunlight. Choose appropriately sized pots and use a well-draining potting mix.
Don’t be afraid to experiment and find what works best for you and your local climate. The beauty of DIY gardening is that it’s a learning process, and every season brings new opportunities to refine your techniques and expand your knowledge.
We wholeheartedly encourage you to embark on this exciting journey of creating your own backyard chili garden. It’s a rewarding experience that will not only enhance your culinary creations but also connect you with the natural world in a meaningful way.
Once you’ve harvested your first batch of homegrown chilies, we’d love to hear about your experience! Share your photos, tips, and recipes with us and the rest of the community. Let’s inspire each other to grow the best chilies possible and celebrate the joys of DIY gardening. What are you waiting for? Get your hands dirty and start planting your dream chili garden today!
Frequently Asked Questions (FAQ)
What are the best chili pepper varieties to grow for beginners?
Starting with easier-to-grow varieties is a great way to build confidence. Poblano peppers are mild and versatile, perfect for stuffing or roasting. Jalapeños are another popular choice, offering a moderate level of heat and a wide range of culinary uses. Anaheim peppers are also relatively mild and easy to grow, ideal for those who prefer a milder flavor. Bell peppers, while not technically chilies, are related and can be a good starting point for learning basic gardening techniques. Remember to research the specific needs of each variety, such as sunlight requirements and watering frequency.
How much sunlight do chili plants need?
Chili plants thrive in full sun, requiring at least 6-8 hours of direct sunlight per day. Insufficient sunlight can lead to leggy growth, reduced flowering, and smaller, less flavorful peppers. If you’re growing chilies indoors, supplement natural light with grow lights to ensure they receive adequate illumination. Position your plants in the sunniest spot in your garden or on your balcony. If you live in a particularly hot climate, providing some afternoon shade can prevent the plants from getting scorched.
What kind of soil is best for chili plants?
Chili plants prefer well-draining soil that is rich in organic matter. A slightly acidic to neutral pH (around 6.0-7.0) is ideal. Amend your garden soil with compost, aged manure, or other organic materials to improve drainage and fertility. If you’re growing chilies in containers, use a high-quality potting mix specifically formulated for vegetables. Avoid heavy clay soils, as they can retain too much moisture and lead to root rot.
How often should I water my chili plants?
Water chili plants regularly, especially during hot, dry weather. The soil should be kept consistently moist but not waterlogged. Water deeply when the top inch of soil feels dry to the touch. Avoid overhead watering, as this can promote fungal diseases. Use a soaker hose or drip irrigation system to deliver water directly to the roots. Reduce watering frequency during cooler periods or when the plants are not actively growing.
How do I fertilize my chili plants?
Chili plants benefit from regular fertilization, especially during the flowering and fruiting stages. Use a balanced fertilizer with equal amounts of nitrogen, phosphorus, and potassium (e.g., 10-10-10) or a fertilizer specifically formulated for vegetables. Follow the instructions on the fertilizer label for application rates and frequency. You can also supplement with organic fertilizers like compost tea or fish emulsion. Avoid over-fertilizing, as this can lead to excessive foliage growth at the expense of pepper production.
How do I protect my chili plants from pests and diseases?
Regularly inspect your chili plants for signs of pests and diseases. Common pests include aphids, spider mites, and whiteflies. Control pests with insecticidal soap, neem oil, or by handpicking them off the plants. Prevent fungal diseases by providing good air circulation, avoiding overhead watering, and using a fungicide if necessary. Remove any diseased leaves or plants promptly to prevent the spread of infection. Companion planting with herbs like basil and marigolds can also help deter pests.
When is the best time to harvest chili peppers?
The best time to harvest chili peppers depends on the variety and your desired level of heat. Most chilies will change color as they ripen, typically from green to red, yellow, or orange. You can harvest them at any stage of ripeness, but the flavor and heat will intensify as they mature. Use pruning shears or scissors to cut the peppers from the plant, leaving a small stem attached. Handle chilies with care, as the oils can irritate your skin. Wear gloves when handling hot peppers.
Can I grow chili peppers indoors?
Yes, you can grow chili peppers indoors, but you’ll need to provide them with adequate light, warmth, and humidity. Choose a sunny location near a south-facing window or supplement with grow lights. Use a well-draining potting mix and water regularly. Maintain a consistent temperature of around 70-80°F (21-27°C). Increase humidity by misting the plants regularly or using a humidifier. Pollinate the flowers by hand using a small brush.
How do I save seeds from my chili peppers?
Saving seeds from your chili peppers is a great way to propagate your favorite varieties. Choose fully ripe peppers from healthy plants. Cut the peppers open and remove the seeds. Spread the seeds out on a paper towel and let them dry completely for several days. Store the dried seeds in an airtight container in a cool, dark, and dry place. Label the container with the variety and date. Seeds can remain viable for several years if stored properly.
What are some creative ways to use my homegrown chilies?
The possibilities are endless! You can use your homegrown chilies to make hot sauce, chili powder, salsa, chili oil, or chili flakes. Add them to soups, stews, stir-fries, and marinades. Pickle them, ferment them, or dry them for later use. Experiment with different recipes and flavor combinations to discover your favorite ways to enjoy your homegrown chilies. Don’t be afraid to get creative and share your culinary creations with friends and family.
Leave a Comment