

Waterless Celery Growing: Sounds like something out of a sci-fi movie, right? But trust me, it’s a real, and surprisingly simple, way to cultivate crisp, delicious celery right in your own backyard, even if you’re facing water restrictions or simply want to be more eco-conscious! For centuries, celery has been a staple in cuisines around the world, from the hearty soups of Europe to the refreshing salads of the Mediterranean. But traditional celery cultivation can be quite water-intensive, which isn’t ideal in our increasingly water-wise world.
That’s where this amazing DIY trick comes in! I’m going to show you how to achieve waterless celery growing, a method that minimizes water usage while maximizing your yield. Imagine enjoying fresh, crunchy celery sticks without the guilt of excessive water consumption. This hack is perfect for anyone looking to reduce their environmental footprint, save on water bills, or simply experiment with innovative gardening techniques.
This article will guide you through each step, from preparing your soil to harvesting your bounty. So, ditch the traditional watering can and get ready to discover the secrets of waterless celery growing – your garden (and your wallet) will thank you!
Waterless Celery Growing: A DIY Guide to Crispy Stalks Without the Fuss
Hey there, fellow gardening enthusiasts! Are you tired of constantly watering your celery, only to be met with limp, bitter stalks? Well, I’ve got a game-changer for you: waterless celery growing! Yes, you read that right. We’re going to coax delicious, crunchy celery from just a celery base and some clever techniques. This method is perfect for those of us who are a bit forgetful about watering (guilty!), live in water-restricted areas, or simply want a low-maintenance gardening project. Let’s dive in!
What You’ll Need
Before we get started, let’s gather our supplies. This is a pretty simple project, so you probably have most of these things lying around already.
* Celery Base: This is the most important ingredient! After you’ve used a bunch of celery, save the base (the part where all the stalks are connected). Make sure it’s firm and healthy-looking, not mushy or moldy.
* Sharp Knife: For trimming and preparing the celery base.
* Shallow Dish or Tray: Something to hold the celery base. A pie plate, a small plastic container, or even a saucer will work.
* Paper Towels: To provide moisture and support for the celery.
* Spray Bottle: Filled with water, for misting the paper towels.
* Well-Lit Location: Celery needs light to grow, so find a spot near a window or under a grow light. Indirect sunlight is best.
* Optional: Rooting Hormone: While not essential, rooting hormone can help speed up the process.
* Optional: Small Pot and Potting Mix: For transplanting the celery once it has established roots.
Preparing the Celery Base
This is a crucial step, so pay close attention! We want to encourage new growth, and that starts with a clean, healthy base.
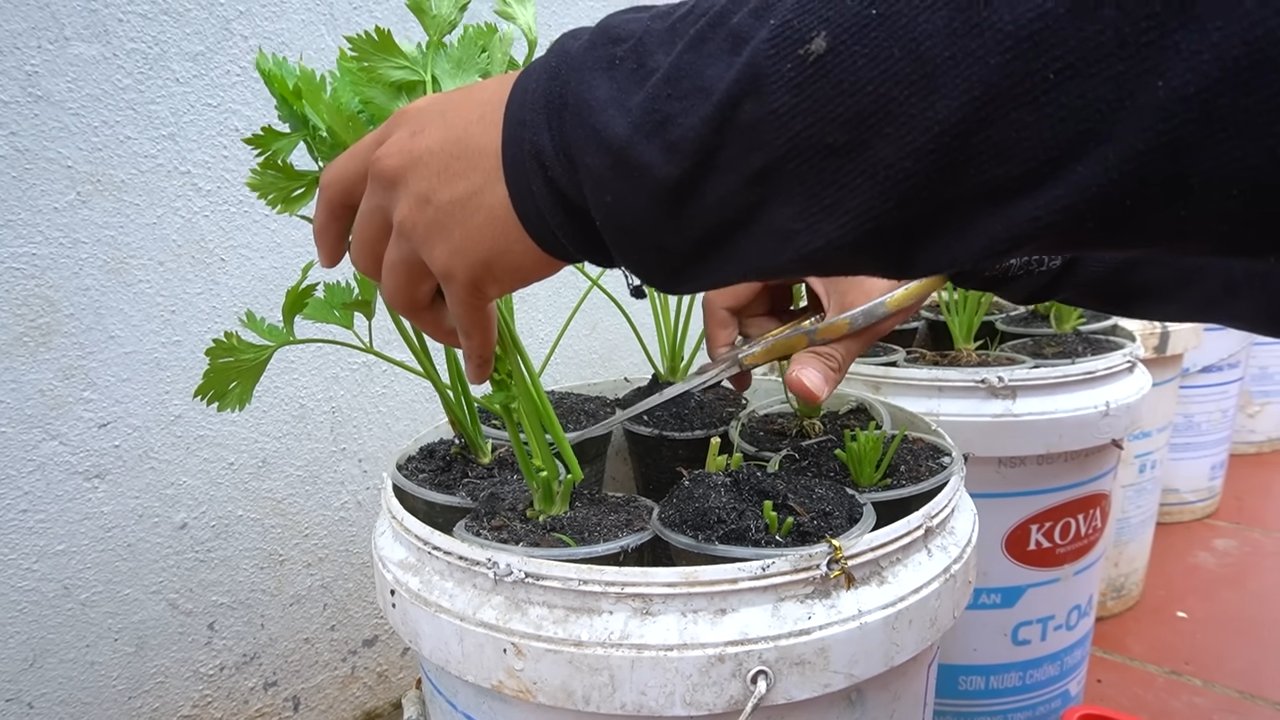
1. Trim the Stalks: Using your sharp knife, carefully trim the remaining celery stalks down to about 1-2 inches. This will encourage the plant to focus its energy on root and new stalk development rather than trying to keep the old stalks alive.
2. Clean the Base: Gently rinse the celery base under cool water to remove any dirt or debris. Be careful not to damage the small buds that might be starting to form.
3. Optional: Rooting Hormone: If you’re using rooting hormone, dip the cut end of the celery base into the powder or liquid, following the instructions on the product label. This will help stimulate root growth.
Creating the Waterless Growing Environment
Now for the fun part! We’re going to create a humid environment that will encourage the celery to sprout roots and new stalks, all without submerging it in water.
1. Prepare the Dish: Line your shallow dish or tray with a few layers of paper towels. Make sure the paper towels are thick enough to hold moisture without falling apart.
2. Moisten the Paper Towels: Thoroughly mist the paper towels with water from your spray bottle. They should be damp but not soaking wet. You want them to be moist enough to provide humidity but not so wet that the celery base will rot.
3. Position the Celery Base: Place the prepared celery base on top of the moistened paper towels, cut-side down. Make sure the base is in direct contact with the paper towels.
4. Maintain Humidity: Mist the paper towels with water every day or two, or whenever they start to feel dry. The key is to keep the environment consistently humid. You can also cover the dish loosely with plastic wrap to help retain moisture, but make sure to leave some ventilation to prevent mold growth.
Observing and Nurturing Growth
This is where patience comes in. It might take a week or two before you start to see any signs of growth, so don’t get discouraged!
1. Monitor for Root Growth: Keep an eye on the bottom of the celery base for the emergence of small, white roots. This is a sign that your celery is happy and healthy.
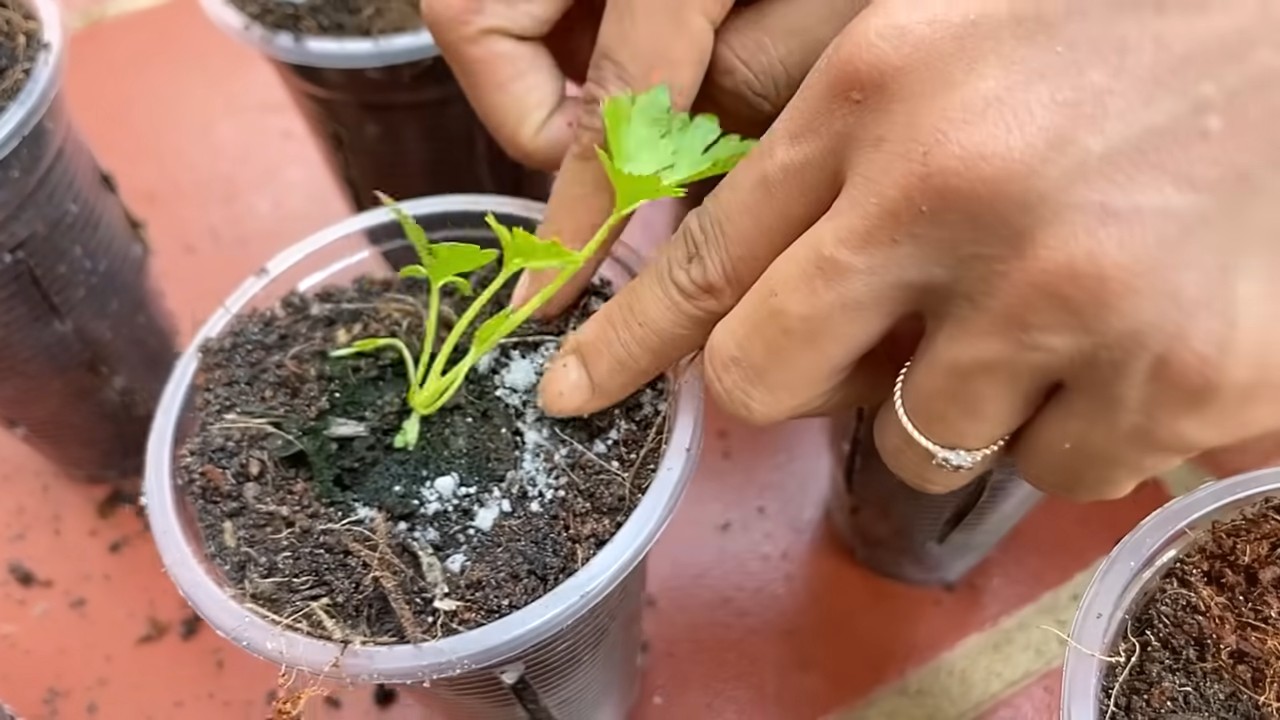
2. Watch for New Stalks: You should also start to see small, green stalks emerging from the center of the celery base. These are the new celery stalks that will eventually grow into a full-sized plant.
3. Adjust Moisture Levels: As the celery grows, you may need to adjust the amount of water you’re using. If the paper towels are drying out too quickly, you can add more water. If they’re staying too wet, you can reduce the amount of water you’re using or remove some of the paper towels.
4. Provide Adequate Light: Make sure your celery is getting enough light. If it’s not getting enough natural light, you can supplement with a grow light.
Transplanting (Optional)
Once your celery has developed a good root system and several new stalks, you can transplant it into a pot of soil if you want to grow it into a larger plant. This isn’t strictly necessary, as you can continue to grow it in the waterless environment, but transplanting will give it more room to grow and access to nutrients.
1. Prepare the Pot: Choose a small pot (about 6 inches in diameter) and fill it with a well-draining potting mix.
2. Carefully Remove the Celery: Gently lift the celery base from the paper towels, being careful not to damage the roots.
3. Plant the Celery: Dig a small hole in the center of the potting mix and carefully place the celery base into the hole. Make sure the roots are spread out and covered with soil.
4. Water Thoroughly: Water the potting mix thoroughly after planting.
5. Continue to Care for the Celery: Place the pot in a well-lit location and water regularly, allowing the soil to dry out slightly between waterings. Fertilize every few weeks with a balanced fertilizer.
Troubleshooting
Even with the best intentions, things don’t always go according to plan. Here are a few common problems you might encounter and how to fix them.
* Celery Base is Rotting: This is usually caused by too much moisture. Make sure the paper towels aren’t too wet and that the celery base has good air circulation. You can also try using a fungicide to prevent further rot.
* No Root Growth: This could be due to a number of factors, including poor quality celery base, insufficient moisture, or lack of light. Try using a fresh celery base, increasing the humidity, and providing more light.
* Stalks are Limp and Yellowing: This is usually a sign of nutrient deficiency. If you’ve transplanted your celery into soil, try fertilizing it with a balanced fertilizer. If you’re still growing it in the waterless environment, you can try adding a small amount of liquid fertilizer to the water you use to mist the paper towels.
* Mold Growth: Mold can sometimes grow on the paper towels or the celery base. This is usually caused by poor air circulation. Try removing the plastic wrap (if you’re using it) and increasing the ventilation. You can also try spraying the affected areas with a diluted solution of hydrogen peroxide.
Tips for Success
Here are a few extra tips to help you succeed with waterless celery growing:
* Choose a Healthy Celery Base: The quality of your celery base will have a big impact on your success. Choose a base that is firm, healthy-looking, and free from blemishes.
* Maintain Consistent Humidity: The key to waterless celery growing is to maintain a consistently humid environment. Check the paper towels regularly and mist them with water whenever they start to feel dry.
* Provide Adequate Light: Celery needs light to grow, so make sure it’s getting enough. If it’s not getting enough natural light, supplement with a grow light.
* Be Patient: It might take a week or two before you start to see any signs of growth, so don’t get discouraged. Just keep providing the right conditions and your celery will eventually start to grow.
* Experiment: Don’t be afraid to experiment with different techniques and methods. Every environment is different, so what works for one person might not work for another.
Enjoy Your Homegrown Celery!
And there you have it! With a little bit of effort and patience, you can grow your own delicious, crunchy celery without ever having to water it. This is a fun and rewarding project that’s perfect for gardeners of all skill levels. So go ahead and give it a try – you might be surprised at how easy it is! Happy growing!
Conclusion
So, there you have it! The waterless celery growing method is more than just a gardening hack; it’s a game-changer for anyone looking to enjoy fresh, flavorful celery without the constant worry of watering. This innovative approach not only conserves precious water resources but also simplifies the growing process, making it accessible to even the most novice gardeners. Imagine the satisfaction of harvesting crisp, juicy celery stalks from your own backyard, knowing you’ve done so in an environmentally conscious way.
This method truly shines because it addresses several common gardening challenges. Forget about battling overwatering, underwatering, or the constant monitoring of soil moisture. With waterless celery growing, you’re essentially creating a self-sufficient ecosystem where the celery thrives on the stored moisture and nutrients within the stalk itself. This reduces the risk of root rot, fungal diseases, and other issues that often plague traditional celery cultivation.
But the benefits don’t stop there. The concentrated flavor of waterless-grown celery is often more intense and satisfying than its conventionally grown counterpart. This is because the plant is forced to focus its energy on developing flavor compounds rather than simply growing larger. The result is a celery that’s perfect for snacking, adding to salads, or using as a flavorful base for soups and stews.
Ready to take your celery game to the next level? Don’t be afraid to experiment with different varieties of celery to see which ones thrive best in your climate and growing conditions. Consider adding a layer of mulch around the base of the celery stalk to help retain moisture and suppress weeds. You can also try growing your waterless celery in a container, making it ideal for those with limited space.
Variations and Suggestions
* Flavor Infusion: Before planting the celery base, try soaking it in a diluted vegetable broth or a nutrient-rich seaweed solution for a boost of flavor and essential minerals.
* Companion Planting: Surround your waterless celery with companion plants like marigolds or basil to deter pests and attract beneficial insects.
* Succession Planting: Plant new celery bases every few weeks to ensure a continuous harvest throughout the growing season.
* Hydroponic Adaptation: While this method is waterless in the traditional sense, you can adapt it to a passive hydroponic system using a wicking material to draw moisture from a reservoir below.
We wholeheartedly encourage you to give this waterless celery growing technique a try. It’s a rewarding and sustainable way to enjoy fresh, delicious celery right from your own home. And once you’ve experienced the magic of waterless celery, we’d love to hear about your results! Share your photos, tips, and experiences with us in the comments below. Let’s build a community of water-wise gardeners who are passionate about growing their own food in a sustainable and innovative way. Your insights could inspire others to embrace this simple yet effective method and contribute to a greener, more flavorful future. So, grab a celery stalk, get planting, and let the waterless celery adventure begin!
FAQ
Q: What exactly is “waterless celery growing,” and how does it work?
A: Waterless celery growing is a method of cultivating celery by replanting the base of a harvested celery stalk in soil without the need for regular watering. The celery base contains enough stored moisture and nutrients to initiate regrowth. The plant draws upon these reserves to develop new roots and shoots, eventually producing a new celery stalk. This method relies on the celery’s natural ability to regenerate and eliminates the need for constant irrigation, making it a water-efficient and low-maintenance gardening technique. It’s a fantastic way to recycle your vegetable scraps and enjoy fresh celery from your own home.
Q: What type of celery is best suited for waterless growing?
A: Generally, any type of celery can be used for waterless growing, but some varieties may perform better than others. Look for celery stalks that are firm, healthy, and have a well-defined base. Organic celery is often preferred, as it hasn’t been treated with synthetic pesticides or herbicides. Experimenting with different varieties will help you determine which ones thrive best in your specific climate and growing conditions. Some gardeners have reported success with Pascal celery, as it tends to be more robust and resilient. Ultimately, the best celery for waterless growing is the one that you enjoy eating and that adapts well to your local environment.
Q: How long does it take for celery to regrow using the waterless method?
A: The time it takes for celery to regrow using the waterless method can vary depending on several factors, including the variety of celery, the climate, and the quality of the soil. Generally, you can expect to see new growth within 1-2 weeks. It may take several weeks or even a couple of months to harvest a fully grown celery stalk. Be patient and provide the celery with adequate sunlight and protection from extreme temperatures. Remember that waterless celery growing is a slower process than traditional celery cultivation, but the reduced water consumption and ease of maintenance make it well worth the wait.
Q: What kind of soil is best for waterless celery growing?
A: While the “waterless” aspect focuses on reduced watering, the soil still plays a crucial role in providing essential nutrients. A well-draining, nutrient-rich soil is ideal for waterless celery growing. A mixture of potting soil, compost, and perlite or vermiculite will provide the necessary drainage and aeration while also supplying the celery with the nutrients it needs to thrive. Avoid using heavy clay soils, as they can retain too much moisture and lead to root rot. Amending the soil with organic matter, such as compost or aged manure, will further enhance its fertility and improve its water-holding capacity.
Q: How much sunlight does waterless celery need?
A: Celery thrives in full sun to partial shade. Aim for at least 6 hours of direct sunlight per day for optimal growth. However, in hotter climates, providing some afternoon shade can prevent the celery from overheating and drying out. Monitor the celery closely and adjust its location as needed to ensure it receives the right amount of sunlight. If you’re growing your waterless celery indoors, place it near a sunny window or use a grow light to supplement natural sunlight.
Q: How do I know when to harvest my waterless-grown celery?
A: You can harvest your waterless-grown celery when the stalks have reached a desired size and thickness. The exact size will depend on your personal preference and the variety of celery you’re growing. A good rule of thumb is to harvest when the stalks are at least 6-8 inches tall and have a diameter of about 1 inch. To harvest, simply cut the stalks at the base of the plant, leaving the roots intact. This will allow the celery to continue to regrow and produce more stalks.
Q: Can I grow waterless celery indoors?
A: Yes, you can absolutely grow waterless celery indoors! This is a great option for those who live in colder climates or have limited outdoor space. To grow waterless celery indoors, choose a pot that is at least 6-8 inches in diameter and fill it with well-draining potting soil. Place the pot near a sunny window or use a grow light to provide adequate sunlight. Water sparingly, only when the soil feels dry to the touch. With proper care, you can enjoy fresh, homegrown celery year-round, regardless of the weather outside.
Q: What are some common problems I might encounter when growing waterless celery, and how can I fix them?
A: While waterless celery growing is generally low-maintenance, you may encounter a few common problems. One potential issue is pest infestations, such as aphids or spider mites. These pests can be controlled with insecticidal soap or neem oil. Another problem is fungal diseases, such as celery blight. To prevent fungal diseases, ensure good air circulation around the plants and avoid overwatering. If you notice any signs of disease, remove the affected leaves and treat the plant with a fungicide. Finally, nutrient deficiencies can also occur, leading to stunted growth or yellowing leaves. To address nutrient deficiencies, amend the soil with compost or use a balanced fertilizer.
Q: Can I use the same celery base multiple times for regrowth?
A: While it’s possible to get multiple regrowths from a single celery base, the subsequent stalks may be smaller and less vigorous than the first. The celery base’s stored nutrients will eventually deplete, limiting its ability to produce new growth. For best results, it’s recommended to use a fresh celery base for each planting. However, you can certainly experiment with regrowing the same base multiple times to see how it performs. Just be aware that the quality and quantity of the celery may decline with each successive regrowth.
Q: Is waterless celery growing truly “waterless”? Do I never need to water it?
A: The term “waterless” is a bit of a simplification. While the method significantly reduces the need for watering, it’s not entirely water-free. You’ll likely need to water the celery base initially after planting to help it establish roots. After that, you can significantly reduce watering frequency, only watering when the soil feels very dry to the touch. The key is to avoid overwatering, as this can lead to root rot. The celery base itself contains a significant amount of moisture, which it will use to fuel its regrowth. So, while you won’t be watering as frequently as with traditional celery cultivation


Leave a Comment