

Kailan Growing Tips: Your Guide to a Bountiful Harvest!
Have you ever dreamt of stepping into your backyard and harvesting fresh, vibrant kailan for a delicious stir-fry? I know I have! There’s something incredibly satisfying about growing your own food, and kailan, with its slightly sweet and earthy flavor, is a fantastic choice for any home gardener. But let’s be honest, sometimes getting those leafy greens to thrive can feel like a bit of a challenge. That’s where these DIY kailan growing tips come in!
Kailan, also known as Chinese broccoli, has been a staple in Asian cuisine for centuries. Its cultivation is deeply rooted in Chinese agricultural practices, where it’s prized not only for its taste but also for its nutritional value. It’s packed with vitamins and minerals, making it a healthy and delicious addition to your diet.
Many people struggle with growing kailan because they don’t know the specific needs of this wonderful vegetable. From choosing the right soil to understanding its watering requirements, there are a few key things you need to know to ensure a successful harvest. These DIY kailan growing tips will give you the knowledge and confidence to cultivate your own thriving kailan patch, even if you’re a complete beginner. So, grab your gardening gloves, and let’s get started on this exciting journey to fresh, homegrown kailan!
Growing Kailan: A DIY Guide to Delicious, Leafy Greens
Hey there, fellow gardening enthusiasts! I’m so excited to share my secrets to growing kailan, also known as Chinese kale, right in your own backyard (or even in containers!). This leafy green is packed with nutrients and has a delicious, slightly bitter flavor that’s perfect for stir-fries, soups, and salads. Trust me, once you taste homegrown kailan, you’ll never want to buy it from the store again!
This guide will walk you through everything you need to know, from choosing the right seeds to harvesting your bountiful crop. Let’s get started!
Choosing the Right Kailan Variety
Before you even think about planting, you need to decide which kailan variety is right for you. There are a few popular options, each with its own unique characteristics:
* Chinese Kale (Brassica oleracea var. alboglabra): This is the most common type of kailan. It has thick, glossy, dark green leaves and thick stems. It’s known for its slightly bitter flavor and excellent texture when cooked.
* White Flowering Kailan: This variety is similar to the regular Chinese kale but produces beautiful white flowers when it bolts (goes to seed). It’s still edible even after flowering, although the leaves may become a bit tougher.
* Kailan Hybrid Varieties: These are bred for specific traits like disease resistance, faster growth, or improved flavor. Look for varieties that are well-suited to your local climate.
I personally prefer the standard Chinese Kale because of its classic flavor and versatility. But feel free to experiment and find your favorite!
Getting Started: Planting Kailan
Now for the fun part: planting! You can start kailan from seeds or seedlings. I usually prefer starting from seeds because it’s more economical and allows me to choose from a wider variety of cultivars.
* Starting from Seeds:
1. Timing is Key: Kailan thrives in cooler weather, so the best time to plant is in early spring or late summer/early fall. Avoid planting during the hottest months of summer, as the heat can cause the plants to bolt prematurely. I usually start my seeds indoors about 4-6 weeks before the last expected frost in spring, or directly sow them in the garden in late summer.
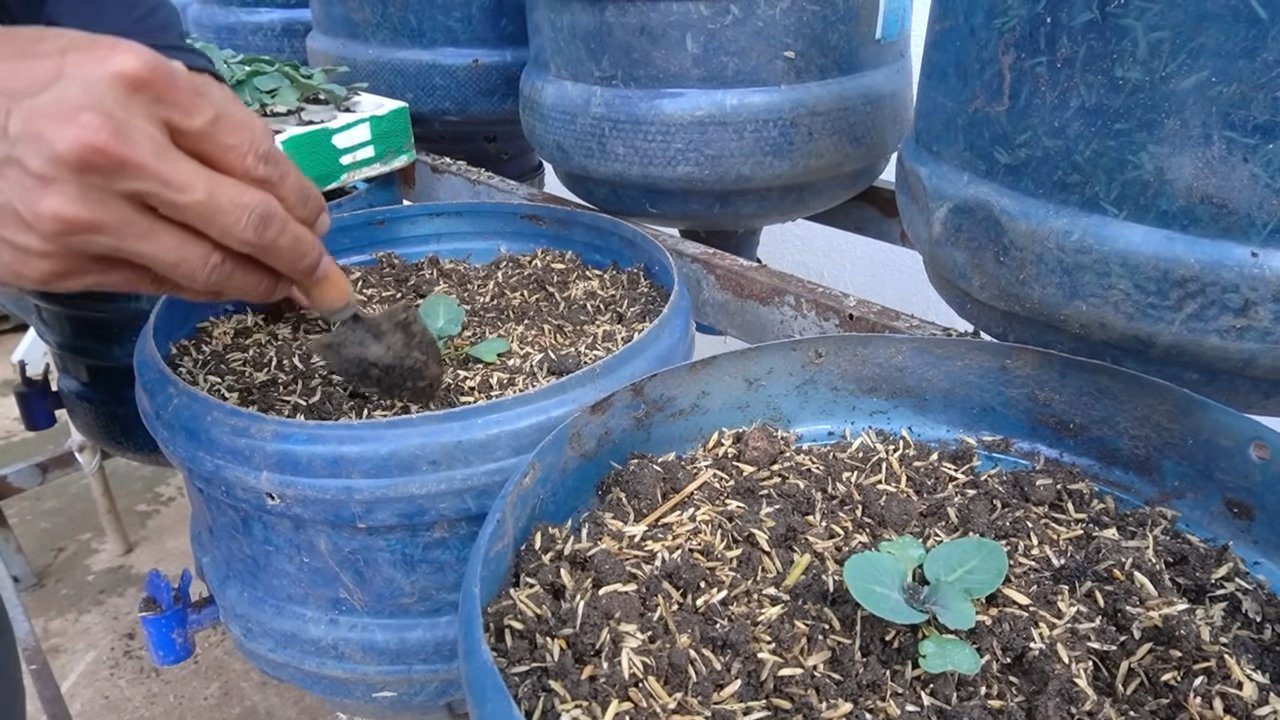
2. Seed Starting Mix: Use a high-quality seed starting mix that’s lightweight and well-draining. Avoid using garden soil, as it can be too heavy and may contain diseases.
3. Sowing the Seeds: Sow the seeds about 1/4 to 1/2 inch deep in small pots or seed trays. I usually sow 2-3 seeds per pot to increase the chances of germination.
4. Watering: Keep the soil consistently moist but not waterlogged. Use a spray bottle to gently water the seeds to avoid disturbing them.
5. Warmth and Light: Place the seed trays in a warm location (around 70-75°F) and provide plenty of light. If you don’t have a sunny windowsill, you can use a grow light.
6. Thinning: Once the seedlings emerge and have a few true leaves, thin them to one plant per pot. Choose the strongest, healthiest-looking seedling and snip off the others at the soil line.
* Starting from Seedlings:
1. Choosing Healthy Seedlings: When buying seedlings from a nursery, look for plants that are healthy, vigorous, and free from pests and diseases. Avoid plants that are leggy, yellowing, or have spots on their leaves.
2. Hardening Off: Before transplanting your seedlings into the garden, you need to harden them off. This process gradually acclimates the plants to outdoor conditions. Start by placing the seedlings outdoors in a sheltered location for a few hours each day, gradually increasing the amount of time they spend outside over the course of a week.
Transplanting Kailan into the Garden
Once your seedlings are ready (or you’ve hardened off your purchased seedlings), it’s time to transplant them into the garden.
1. Choosing the Right Location: Kailan needs at least 6 hours of sunlight per day. Choose a location that gets plenty of sun and has well-draining soil.
2. Preparing the Soil: Before planting, amend the soil with compost or other organic matter to improve its fertility and drainage. Kailan prefers slightly acidic soil with a pH of 6.0 to 7.0.
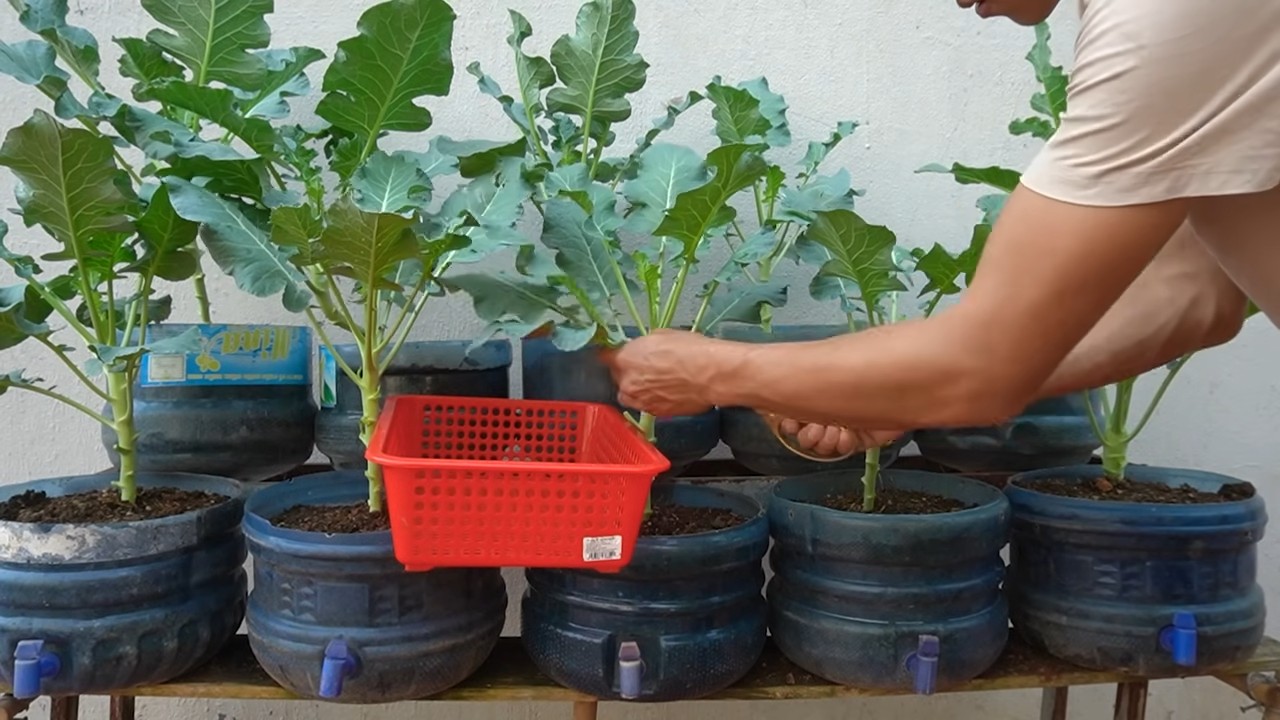
3. Spacing: Space the plants about 12-18 inches apart in rows that are 24-36 inches apart. This will give them enough room to grow and prevent overcrowding.
4. Planting: Dig a hole that’s slightly larger than the root ball of the seedling. Gently remove the seedling from its pot and place it in the hole. Backfill with soil and gently firm it around the base of the plant.
5. Watering: Water the plants thoroughly after transplanting. This will help them settle in and establish their roots.
Caring for Your Kailan Plants
Now that your kailan plants are in the ground, it’s important to provide them with the care they need to thrive.
* Watering: Kailan needs consistent moisture, especially during hot, dry weather. Water deeply whenever the top inch of soil feels dry to the touch. Avoid overwatering, as this can lead to root rot.
* Fertilizing: Fertilize your kailan plants every 2-3 weeks with a balanced fertilizer. You can use a liquid fertilizer or a slow-release granular fertilizer. Follow the instructions on the fertilizer package. I like to use a fish emulsion fertilizer, as it’s a natural and effective way to provide nutrients to my plants.
* Weeding: Keep the area around your kailan plants free of weeds. Weeds compete with the plants for water and nutrients. You can hand-pull weeds or use a hoe to cultivate the soil.
* Mulching: Apply a layer of mulch around your kailan plants to help retain moisture, suppress weeds, and regulate soil temperature. You can use organic mulches like straw, wood chips, or shredded leaves.
* Pest and Disease Control: Kailan is susceptible to a few common pests and diseases, including aphids, cabbage worms, and downy mildew.
* Aphids: These tiny insects suck the sap from plants, causing them to become weak and stunted. You can control aphids by spraying them with a strong stream of water, using insecticidal soap, or introducing beneficial insects like ladybugs.
* Cabbage Worms: These caterpillars feed on the leaves of kailan plants, leaving behind holes and droppings. You can control cabbage worms by hand-picking them off the plants, using Bacillus thuringiensis (Bt), or covering the plants with row covers.
* Downy Mildew: This fungal disease causes yellow spots on the upper surface of the leaves and a white, fuzzy growth on the underside. You can prevent downy mildew by providing good air circulation, avoiding overhead watering, and applying a fungicide if necessary.
I always try to use organic pest and disease control methods whenever possible. Prevention is key!
Harvesting Your Kailan
The moment you’ve been waiting for! You can start harvesting kailan leaves when they are about 6-8 inches long.
1. Harvesting Technique: Cut the outer leaves from the plant, leaving the inner leaves to continue growing. This will allow you to harvest kailan continuously for several weeks.
2. Timing: Harvest kailan in the morning, when the leaves are crisp and fresh.
3. Storage: Store kailan leaves in the refrigerator for up to a week. Wrap them in a damp paper towel and place them in a plastic bag.
Enjoying Your Homegrown Kailan
Now that you’ve harvested your kailan, it’s time to enjoy it! Kailan can be used in a variety of dishes, including stir-fries, soups, salads, and steamed dishes.
* Stir-Fries: Kailan is a classic ingredient in Chinese stir-fries. Simply stir-fry it with garlic, ginger, and your favorite protein and vegetables.
* Soups: Add kailan to soups for a boost of nutrients and flavor. It pairs well with chicken, pork, and vegetable broths.
* Salads: Young, tender kailan leaves can be used in salads. Massage the leaves with a little olive oil and lemon juice to soften them.
* Steamed Dishes: Steam kailan until it’s tender-crisp. Serve it with a drizzle of soy sauce or sesame oil.
I love to stir-fry my kailan with garlic, oyster sauce, and a little bit of chili. It’s a quick, easy, and delicious way to enjoy this nutritious vegetable.
Troubleshooting
Even with the best care, you might encounter some challenges when growing
Conclusion
So, there you have it! Mastering these simple yet effective DIY kailan growing tips can truly transform your gardening experience and bring a bounty of fresh, delicious greens right to your table. We’ve explored everything from optimizing soil conditions and providing the right nutrients to warding off pests and diseases with natural solutions. The beauty of these techniques lies in their accessibility and adaptability. You don’t need to be a seasoned gardener or invest in expensive equipment to see remarkable results.
Why is this DIY approach a must-try? Because it empowers you to take control of your food source, ensuring that you’re consuming kailan that is not only packed with nutrients but also free from harmful chemicals. It’s a sustainable and rewarding way to connect with nature and enjoy the fruits (or rather, the leaves!) of your labor. Plus, the satisfaction of harvesting your own homegrown kailan is simply unparalleled.
But the journey doesn’t end here! Feel free to experiment with different variations to suit your specific needs and preferences. For instance, if you live in a particularly hot climate, consider providing your kailan plants with some afternoon shade to prevent them from bolting prematurely. You could also try companion planting with herbs like rosemary or thyme to naturally repel pests. Another great variation is to experiment with different kailan varieties. There are so many to choose from, each with its own unique flavor and texture. From the curly leaves of Scotch kailan to the flat, dark green leaves of Tuscan kailan (also known as Lacinato or Dinosaur kailan), there’s a variety out there for everyone.
Don’t be afraid to get creative with your fertilizer choices too. While we’ve recommended compost tea and fish emulsion, you can also explore other organic options like worm castings or even homemade fermented plant juice. The key is to observe your plants closely and adjust your approach as needed.
We are confident that by implementing these DIY kailan growing tips, you’ll be well on your way to harvesting a plentiful supply of this nutritious and versatile vegetable. Remember, gardening is a learning process, so don’t be discouraged if you encounter a few challenges along the way. Embrace the opportunity to learn and grow, and most importantly, have fun!
We wholeheartedly encourage you to try these DIY kailan growing tips and share your experiences with us. Let us know what worked well for you, what challenges you faced, and any other tips or tricks you’ve discovered along the way. Your feedback is invaluable and will help us continue to refine and improve our recommendations. Share your photos and stories on social media using [Your Hashtag Here] and let’s build a community of thriving kailan growers! Happy gardening!
Frequently Asked Questions (FAQ)
What is the best time of year to plant kailan?
The best time to plant kailan depends on your local climate. In general, kailan is a cool-season crop, so it thrives in spring and fall. If you live in a region with mild winters, you may even be able to grow kailan year-round. For spring planting, start seeds indoors 6-8 weeks before the last expected frost. For fall planting, sow seeds directly into the garden in late summer or early fall. Pay attention to your local weather patterns and adjust your planting schedule accordingly.
How much sunlight does kailan need?
Kailan needs at least 6 hours of sunlight per day to thrive. However, in hotter climates, providing some afternoon shade can help prevent the plants from bolting (going to seed prematurely). If you’re growing kailan indoors, make sure to provide it with plenty of artificial light.
What kind of soil is best for growing kailan?
Kailan prefers well-drained soil that is rich in organic matter. A slightly acidic to neutral pH (6.0-7.5) is ideal. Before planting, amend your soil with compost or other organic matter to improve its fertility and drainage. You can also add a slow-release fertilizer to provide your plants with a steady supply of nutrients.
How often should I water kailan?
Kailan needs consistent moisture to thrive. Water deeply whenever the top inch of soil feels dry to the touch. Avoid overwatering, as this can lead to root rot. Mulching around your plants can help retain moisture and suppress weeds.
What are some common pests and diseases that affect kailan?
Common pests that affect kailan include aphids, cabbage worms, flea beetles, and slugs. Diseases that can affect kailan include clubroot, downy mildew, and black rot. To prevent pest and disease problems, practice good garden hygiene, such as removing plant debris and rotating crops. You can also use organic pest control methods, such as insecticidal soap or neem oil.
How do I harvest kailan?
You can begin harvesting kailan leaves when they are about 6-8 inches long. Harvest the outer leaves first, leaving the inner leaves to continue growing. You can harvest kailan leaves continuously throughout the growing season.
How do I store kailan?
Store kailan leaves in the refrigerator in a plastic bag or container. They will keep for about a week. You can also freeze kailan leaves for longer storage. To freeze kailan, blanch the leaves in boiling water for 2-3 minutes, then transfer them to an ice bath to stop the cooking process. Drain the leaves well and store them in freezer bags.
Can I grow kailan in containers?
Yes, kailan can be successfully grown in containers. Choose a container that is at least 12 inches deep and wide. Fill the container with a well-draining potting mix and follow the same growing tips as you would for kailan grown in the ground.
How can I prevent kailan from bolting?
Bolting is when a plant prematurely produces a flowering stem, often making the leaves bitter. To prevent kailan from bolting, provide it with consistent moisture, adequate sunlight, and protection from extreme temperatures. Choose bolt-resistant varieties and harvest leaves regularly to encourage continued leaf production.
What are some ways to use kailan in cooking?
Kailan is a versatile vegetable that can be used in a variety of dishes. It can be steamed, sautéed, stir-fried, or added to soups and stews. Kailan can also be eaten raw in salads or smoothies. Some popular kailan recipes include kailan chips, kailan salad with lemon vinaigrette, and kailan and sausage soup.
Is kailan a healthy vegetable?
Yes, kailan is an incredibly healthy vegetable. It is packed with vitamins, minerals, and antioxidants. Kailan is a good source of vitamins A, C, and K, as well as calcium, iron, and fiber. Eating kailan can help boost your immune system, improve your bone health, and protect against chronic diseases. Incorporating these DIY kailan growing tips will ensure you have a constant supply of this superfood.

Leave a Comment