

Growing kale from seed might seem daunting, but trust me, it’s one of the most rewarding experiences a home gardener can have! Imagine stepping outside your door and harvesting fresh, vibrant kale leaves for your morning smoothie or a delicious side dish. Forget those limp, overpriced bunches at the grocery store – we’re talking about homegrown goodness bursting with flavor and nutrients.
For centuries, kale has been a staple in diets around the world, from the hearty stews of Europe to the vibrant salads of the Mediterranean. Its resilience and nutritional power have made it a beloved crop, and now, you can easily cultivate it in your own backyard. But why should you bother with growing kale from seed yourself? Well, for starters, it’s incredibly cost-effective. Packets of kale seeds are inexpensive, and you’ll get a much larger yield compared to buying mature plants. Plus, you have complete control over the growing process, ensuring your kale is organic and free from harmful pesticides.
This DIY guide is packed with simple tricks and hacks to help you successfully grow kale from seed, even if you’re a complete beginner. I’ll walk you through everything from choosing the right seeds and preparing your soil to transplanting seedlings and protecting your precious kale from pests. Get ready to unleash your inner gardener and enjoy the satisfaction of harvesting your own delicious, homegrown kale!
Growing Kale From Seed: A Complete DIY Guide
Hey there, fellow gardening enthusiasts! I’m so excited to share my tried-and-true method for growing kale from seed. Kale is a nutritional powerhouse, super easy to grow, and incredibly versatile in the kitchen. Plus, starting from seed is way more economical than buying seedlings. Let’s dive in!
Why Grow Kale From Seed?
Before we get started, let’s quickly touch on why growing kale from seed is such a great idea:
* Cost-Effective: Seeds are significantly cheaper than buying established plants.
* Variety: You’ll have access to a wider range of kale varieties that might not be available as seedlings at your local nursery.
* Control: You have complete control over the growing process, from soil to fertilizer.
* Satisfaction: There’s nothing quite like the feeling of harvesting kale that you grew from a tiny seed!
Choosing Your Kale Variety
The first step is picking the right kale variety for your taste and climate. Here are a few popular options:
* Lacinato (Dinosaur Kale): This Italian heirloom has dark, bumpy leaves and a slightly sweeter flavor. It’s my personal favorite!
* Curly Kale: The classic kale with tightly curled leaves. It’s hardy and productive.
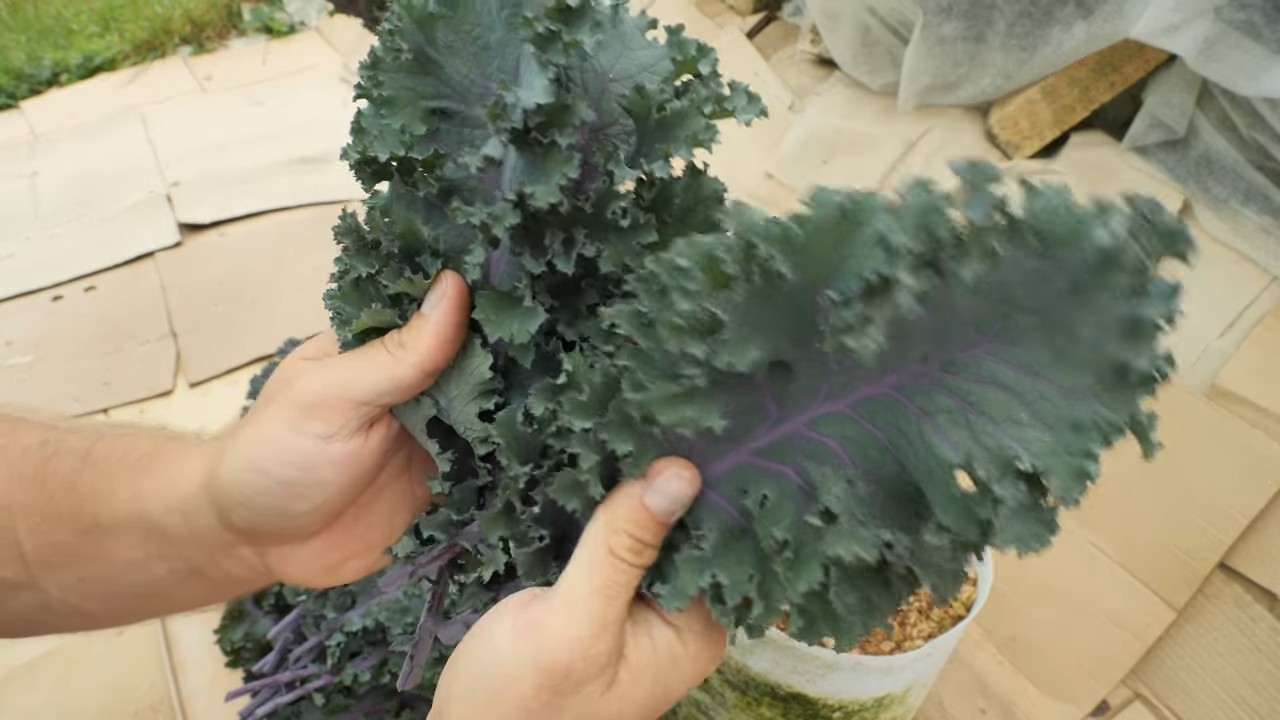
* Red Russian Kale: This variety has flat, fringed leaves with reddish-purple stems. It’s slightly milder in flavor.
* Redbor Kale: Known for its vibrant purple, deeply fringed leaves. It adds a beautiful pop of color to your garden.
Consider your local climate and growing season when making your choice. Some varieties are more heat-tolerant than others.
When to Start Kale Seeds
Timing is crucial for successful kale growing. Kale is a cool-season crop, meaning it thrives in cooler temperatures.
* For a Spring Harvest: Start seeds indoors 6-8 weeks before the last expected frost.
* For a Fall/Winter Harvest: Start seeds outdoors in mid-summer (July/August) for a fall or winter harvest. Kale actually tastes sweeter after a frost!
I usually start my kale seeds indoors in early spring and again in late summer for a continuous harvest.
Materials You’ll Need
Before we get our hands dirty, let’s gather all the necessary materials:
* Kale Seeds: Choose your favorite variety!
* Seed Starting Trays or Pots: I prefer using seed starting trays with individual cells.
* Seed Starting Mix: This is a lightweight, sterile mix specifically designed for seed germination. Don’t use garden soil!
* Watering Can or Spray Bottle: For gentle watering.
* Grow Lights (Optional): If you’re starting seeds indoors, grow lights will provide the necessary light for healthy growth.
* Heat Mat (Optional): A heat mat can speed up germination, especially in cooler climates.
* Labels and a Marker: To keep track of your different kale varieties.
* Small Trowel or Spoon: For transplanting seedlings.
* Fertilizer: A balanced organic fertilizer for feeding your kale plants.
Starting Kale Seeds Indoors
This is my preferred method for starting kale seeds, especially for a spring harvest.
Phase 1: Sowing the Seeds
1. Prepare the Seed Starting Trays: Fill each cell of your seed starting tray with seed starting mix. Gently tap the tray to settle the mix.
2. Moisten the Soil: Water the seed starting mix thoroughly until it’s evenly moist but not soggy.
3. Sow the Seeds: Make a small indentation (about ¼ inch deep) in the center of each cell. Place 2-3 kale seeds in each indentation. This increases the chances of at least one seed germinating.
4. Cover the Seeds: Gently cover the seeds with a thin layer of seed starting mix.
5. Water Again: Lightly water the surface of the soil to ensure good seed-to-soil contact.
6. Label the Trays: Label each tray with the kale variety and the date you sowed the seeds. This will help you keep track of everything.
Phase 2: Germination and Early Growth
1. Provide Warmth: Place the seed starting trays in a warm location. A heat mat can help maintain a consistent temperature of around 70-75°F (21-24°C), which is ideal for germination.
2. Maintain Moisture: Keep the seed starting mix consistently moist but not waterlogged. Check the moisture level daily and water as needed. I prefer using a spray bottle to avoid disturbing the seeds.
3. Provide Light: Once the seeds germinate (usually within 5-10 days), move the trays under grow lights. Position the lights a few inches above the seedlings and keep them on for 14-16 hours per day. If you don’t have grow lights, place the trays in a sunny window, but be aware that the seedlings may become leggy (tall and spindly) if they don’t receive enough light.
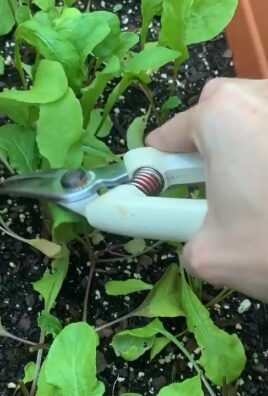
4. Thin the Seedlings: Once the seedlings have their first true leaves (the second set of leaves that appear after the initial seed leaves), thin them to one seedling per cell. Choose the strongest, healthiest-looking seedling and snip off the others at the soil line with small scissors. Don’t pull them out, as this can disturb the roots of the remaining seedling.
Phase 3: Hardening Off
Before transplanting your kale seedlings outdoors, you need to “harden them off.” This process gradually acclimates the seedlings to outdoor conditions, preventing shock.
1. Start Slowly: Begin by placing the seedlings outdoors in a sheltered location (e.g., a porch or patio) for just a few hours each day.
2. Increase Exposure: Gradually increase the amount of time the seedlings spend outdoors each day, exposing them to more sunlight and wind.
3. Monitor the Weather: Protect the seedlings from extreme weather conditions, such as frost, strong winds, or heavy rain.
4. After a Week or Two: After about a week or two of hardening off, the seedlings should be ready to be transplanted into the garden.
Direct Sowing Kale Seeds Outdoors
If you live in a climate with mild summers, you can also direct sow kale seeds outdoors.
1. Prepare the Soil: Choose a sunny location with well-drained soil. Amend the soil with compost or other organic matter to improve its fertility and drainage.
2. Sow the Seeds: Sow the seeds directly into the soil, spacing them about 1 inch apart and ¼ inch deep.
3. Water Gently: Water the soil gently to avoid washing away the seeds.
4. Keep Moist: Keep the soil consistently moist until the seeds germinate.
5. Thin the Seedlings: Once the seedlings have their first true leaves, thin them to the desired spacing (about 12-18 inches apart).
Transplanting Kale Seedlings
Whether you started your kale seeds indoors or direct sowed them, you’ll eventually need to transplant them to their final growing location.
1. Choose a Sunny Location: Kale needs at least 6 hours of sunlight per day.
2. Prepare the Soil: Amend the soil with compost or other organic matter. Kale prefers well-drained soil with a pH of 6.0-7.5.
3. Dig Holes: Dig holes that are slightly larger than the root balls of your seedlings. Space the holes 12-18 inches apart.
4. Gently Remove Seedlings: Carefully remove the seedlings from their pots or trays. Gently loosen the roots if they are tightly bound.
5. Plant the Seedlings: Place the seedlings in the holes and backfill with soil. Make sure the top of the root ball is level with the surrounding soil.
6. Water Thoroughly: Water the seedlings thoroughly after planting.
7. Mulch: Apply a layer of mulch around the plants to help retain moisture, suppress weeds, and regulate soil temperature. I like to use straw or wood chips.
Caring for Your Kale Plants
Once your kale plants are established, here’s how to keep them thriving:
* Watering: Water regularly, especially during dry periods. Kale needs consistent moisture to produce healthy leaves. Aim for about 1 inch of water per week.
* Fertilizing: Feed your kale plants with a balanced organic fertilizer every 4-6 weeks. You can also side-dress with compost.
* Weeding: Keep the area around your kale plants free of weeds. Weeds compete with kale for nutrients and water.
* Pest Control: Keep an eye out for common kale pests, such as aphids, cabbage worms, and flea beetles. You can control these pests with organic methods, such as insecticidal soap,

Conclusion
So, there you have it! Growing kale from seed isn’t just a cost-effective way to enjoy this nutritional powerhouse; it’s a deeply rewarding experience that connects you to the food you eat. From the tiny sprout emerging from the soil to the vibrant, leafy greens gracing your plate, every step of the process is a testament to the magic of nature and the satisfaction of self-sufficiency.
Why is this DIY trick a must-try? Because it empowers you to control the quality of your kale, ensuring it’s free from unwanted pesticides and grown with the love and care only you can provide. Store-bought kale, while convenient, often lacks the freshness and vibrancy of homegrown varieties. Plus, the sheer variety of kale available to the home gardener far surpasses what you’ll typically find in supermarkets.
Consider these suggestions and variations to personalize your kale-growing journey:
* Experiment with different kale varieties: From the classic curly kale to the Tuscan (lacinato) kale, also known as dinosaur kale, and the Russian Red kale with its beautiful purple veins, there’s a kale variety to suit every taste and garden aesthetic.
* Succession planting: Sow seeds every few weeks to ensure a continuous harvest throughout the growing season. This is especially useful if you’re a big kale consumer!
* Companion planting: Plant kale alongside beneficial companions like marigolds (to deter pests) or herbs like rosemary and thyme (to attract pollinators).
* Indoor starting for early harvests: If you live in a region with a short growing season, start your kale seeds indoors 6-8 weeks before the last expected frost. This will give you a head start and allow you to enjoy kale earlier in the year.
* Kale chips galore: Once your kale is ready for harvest, don’t limit yourself to salads and smoothies. Kale chips are a delicious and healthy snack that’s easy to make in the oven or air fryer. Experiment with different seasonings like garlic powder, paprika, or even a sprinkle of nutritional yeast for a cheesy flavor.
* Kale smoothies: Add kale to your favorite smoothie recipes for a nutritional boost. The mild flavor of kale blends well with fruits like bananas, berries, and mangoes.
* Kale in soups and stews: Kale is a hearty green that holds its shape well in soups and stews. Add it towards the end of cooking to prevent it from becoming too mushy.
We wholeheartedly encourage you to embark on this kale-growing adventure. It’s easier than you might think, and the rewards are immeasurable. Imagine the satisfaction of harvesting your own fresh, organic kale and knowing that you played a direct role in bringing it to your table.
Don’t be afraid to get your hands dirty and embrace the learning process. Every gardener, regardless of experience level, faces challenges along the way. The key is to persevere, learn from your mistakes, and celebrate your successes.
And most importantly, we want to hear about your experience! Share your kale-growing journey with us in the comments below. Tell us about your favorite varieties, your biggest challenges, and your most delicious kale recipes. Your insights and experiences will not only inspire others but also contribute to a vibrant community of kale enthusiasts. Let’s grow together!
FAQ
Frequently Asked Questions About Growing Kale From Seed
Q: How long does it take for kale seeds to germinate?
A: Kale seeds typically germinate within 5-10 days, provided the soil temperature is between 60-75°F (15-24°C). Keep the soil consistently moist during this period. Using a heat mat can help speed up germination, especially in cooler climates.
Q: What kind of soil is best for growing kale?
A: Kale thrives in well-drained soil that is rich in organic matter. Amend your garden soil with compost or aged manure before planting to improve its fertility and drainage. A slightly acidic to neutral soil pH (6.0-7.5) is ideal.
Q: How much sunlight does kale need?
A: Kale needs at least 6 hours of sunlight per day to grow well. However, it can tolerate partial shade, especially in hotter climates. If you’re growing kale indoors, provide it with supplemental lighting using grow lights.
Q: How often should I water my kale plants?
A: Water kale plants regularly, especially during dry periods. Aim to keep the soil consistently moist but not waterlogged. Mulching around the plants can help retain moisture and suppress weeds.
Q: What are some common pests and diseases that affect kale?
A: Common pests that affect kale include aphids, cabbage worms, flea beetles, and slugs. Diseases include clubroot, downy mildew, and black rot. Regularly inspect your plants for signs of pests or diseases and take appropriate action, such as using insecticidal soap or neem oil for pests, and ensuring good air circulation and proper drainage to prevent diseases. Crop rotation can also help prevent soil-borne diseases.
Q: When is the best time to harvest kale?
A: You can start harvesting kale leaves when they are about 4-6 inches long. Harvest the outer leaves first, leaving the inner leaves to continue growing. Kale is most flavorful after a light frost, as the cold temperatures convert starches into sugars.
Q: Can I grow kale in containers?
A: Yes, kale can be successfully grown in containers. Choose a container that is at least 12 inches deep and wide to provide enough room for the roots to grow. Use a high-quality potting mix and ensure the container has drainage holes.
Q: How do I prevent my kale from bolting (going to seed)?
A: Bolting is often triggered by hot weather or stress. To prevent bolting, provide your kale plants with adequate water and shade during hot periods. Choose bolt-resistant varieties and harvest regularly to encourage leaf production.
Q: Can I save seeds from my kale plants?
A: Yes, you can save seeds from your kale plants, but be aware that kale is cross-pollinated, so the seeds may not produce plants that are identical to the parent plant. To save seeds, allow a few plants to bolt and flower. Once the seed pods are dry and brown, harvest them and extract the seeds. Store the seeds in a cool, dry place.
Q: Is kale a good source of nutrients?
A: Absolutely! Kale is a nutritional powerhouse, packed with vitamins A, C, and K, as well as calcium, iron, and antioxidants. It’s a great addition to a healthy diet.
Leave a Comment