

Potato Growing Container: Unlock the secrets to bountiful harvests right in your backyard (or even on your balcony!) with this ultimate DIY guide. Forget acres of farmland; we’re bringing the potato patch to you, one container at a time. Have you ever dreamed of digging into the earth and unearthing a treasure trove of freshly grown potatoes? Well, dream no more! This article will show you how to create your very own potato growing container, regardless of your space or gardening experience.
The humble potato has a rich history, feeding civilizations for centuries. From its origins in the Andes Mountains to becoming a staple food worldwide, the potato’s resilience is truly remarkable. But you don’t need to be a seasoned farmer to tap into that resilience. In fact, growing potatoes in containers is a fantastic way to bypass common gardening challenges like poor soil or limited space.
Why should you embrace this DIY trick? Because everyone deserves the joy of harvesting their own food! Plus, store-bought potatoes simply can’t compare to the flavor of homegrown spuds. Imagine the satisfaction of serving a meal featuring potatoes you nurtured from tiny seed potatoes to delicious, earthy perfection. This guide will provide you with simple, step-by-step instructions, ensuring your success. Let’s get growing!
DIY Potato Growing Container: Bountiful Harvests in Small Spaces!
Hey there, fellow gardening enthusiasts! Are you dreaming of fresh, homegrown potatoes but short on space? Well, you’re in luck! I’m going to walk you through building your very own potato growing container. This method is perfect for patios, balconies, or even small yards. Get ready to enjoy a potato harvest that’ll make your taste buds sing!
What You’ll Need: The Potato Powerhouse Ingredients
Before we dive in, let’s gather our supplies. This is crucial for a smooth and enjoyable building experience. Trust me, having everything ready beforehand saves a ton of time and frustration.
* A Large Container: This is the heart of our potato growing operation. I recommend a container that’s at least 24 inches in diameter and 24 inches deep. A plastic trash can, a large storage bin, or even a repurposed barrel will work perfectly. Just make sure it’s food-grade plastic if you’re using a recycled container.
* Drill with Drill Bits: We’ll need this to create drainage holes in the bottom of the container.
* Potting Mix: This is different from garden soil! Potting mix is lighter and provides better drainage, which is essential for healthy potato growth. Look for a mix that’s specifically formulated for vegetables.
* Seed Potatoes: These are potatoes that have “eyes” (small sprouts) on them. You can purchase seed potatoes from a garden center or use organic potatoes from the grocery store that have started to sprout. Avoid using potatoes that have been treated with sprout inhibitors.
* Knife: For cutting the seed potatoes (if needed).
* Watering Can or Hose: To keep your potato plants hydrated.
* Optional:
* Compost: Adding compost to the potting mix will provide extra nutrients for your potatoes.
* Fertilizer: A slow-release fertilizer formulated for vegetables can give your potatoes an extra boost.
* Gloves: To keep your hands clean.
* Measuring Tape: To ensure accurate spacing.
Step-by-Step Instructions: Building Your Potato Paradise
Alright, let’s get our hands dirty! Follow these steps carefully, and you’ll have your potato growing container ready in no time.
1. Drill Drainage Holes: This is super important! Potatoes don’t like soggy feet. Using your drill, create several drainage holes in the bottom of your container. I usually go for about 6-8 holes, evenly spaced. Make sure the holes are large enough to allow water to drain freely.
2. Prepare Your Seed Potatoes: If your seed potatoes are small (about the size of a golf ball), you can plant them whole. If they’re larger, cut them into pieces, making sure each piece has at least one or two “eyes.” Let the cut pieces sit for a day or two to allow the cut surfaces to callous over. This helps prevent rot.
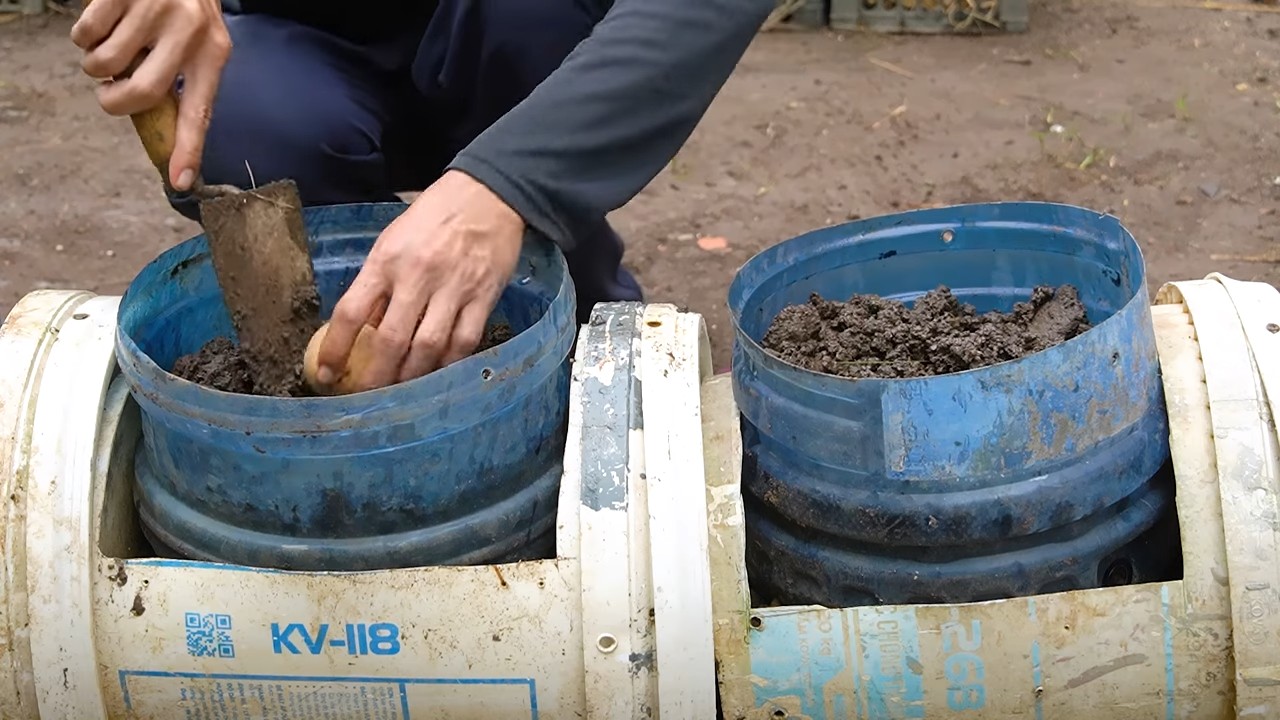
3. Initial Soil Layer: Add about 4-6 inches of potting mix to the bottom of your container. This will be the initial planting bed for your seed potatoes. If you’re using compost or fertilizer, mix it into the potting mix at this stage.
4. Plant the Seed Potatoes: Place the seed potato pieces (or whole potatoes) on top of the soil layer, with the “eyes” facing upwards. Space them about 8-10 inches apart. If you’re using a very large container, you can plant more potatoes, but make sure they have enough room to grow.
5. Cover with Soil: Cover the seed potatoes with another 4-6 inches of potting mix. Gently water the soil until it’s moist but not soggy.
6. Watering and Sunlight: Place your container in a sunny location that receives at least 6-8 hours of sunlight per day. Water regularly, keeping the soil consistently moist. Avoid overwatering, as this can lead to rot.
The “Hilling” Process: Encouraging More Potatoes!
This is where the magic happens! “Hilling” is the process of adding more soil to the container as the potato plants grow. This encourages the plants to produce more potatoes along the stems.
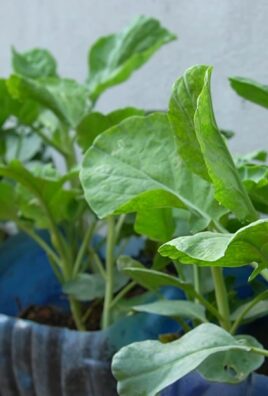
1. Wait for Growth: Once the potato plants have grown about 6-8 inches tall, it’s time to start hilling.
2. Add More Soil: Add another 4-6 inches of potting mix to the container, covering the stems of the plants, leaving only the top few leaves exposed.
3. Repeat the Process: Continue hilling every 2-3 weeks as the plants grow, until you reach the top of the container.
4. Water Regularly: Remember to water regularly, especially during hot weather.
Troubleshooting: Common Potato Problems and Solutions
Even with the best planning, sometimes things can go wrong. Here are a few common potato problems and how to fix them:
* Potato Blight: This is a fungal disease that can cause brown spots on the leaves and stems. To prevent blight, choose disease-resistant potato varieties and avoid overhead watering. If you see signs of blight, remove the affected leaves and spray the plants with a fungicide.
* Potato Beetles: These pesky insects can eat the leaves of your potato plants. Handpick the beetles and their larvae off the plants or spray them with an insecticide.
* Scab: This is a bacterial disease that causes rough, scabby patches on the potatoes. To prevent scab, avoid planting potatoes in alkaline soil and rotate your crops.
* Rot: Overwatering can lead to rot, which can destroy your potato crop. Make sure your container has good drainage and avoid overwatering.
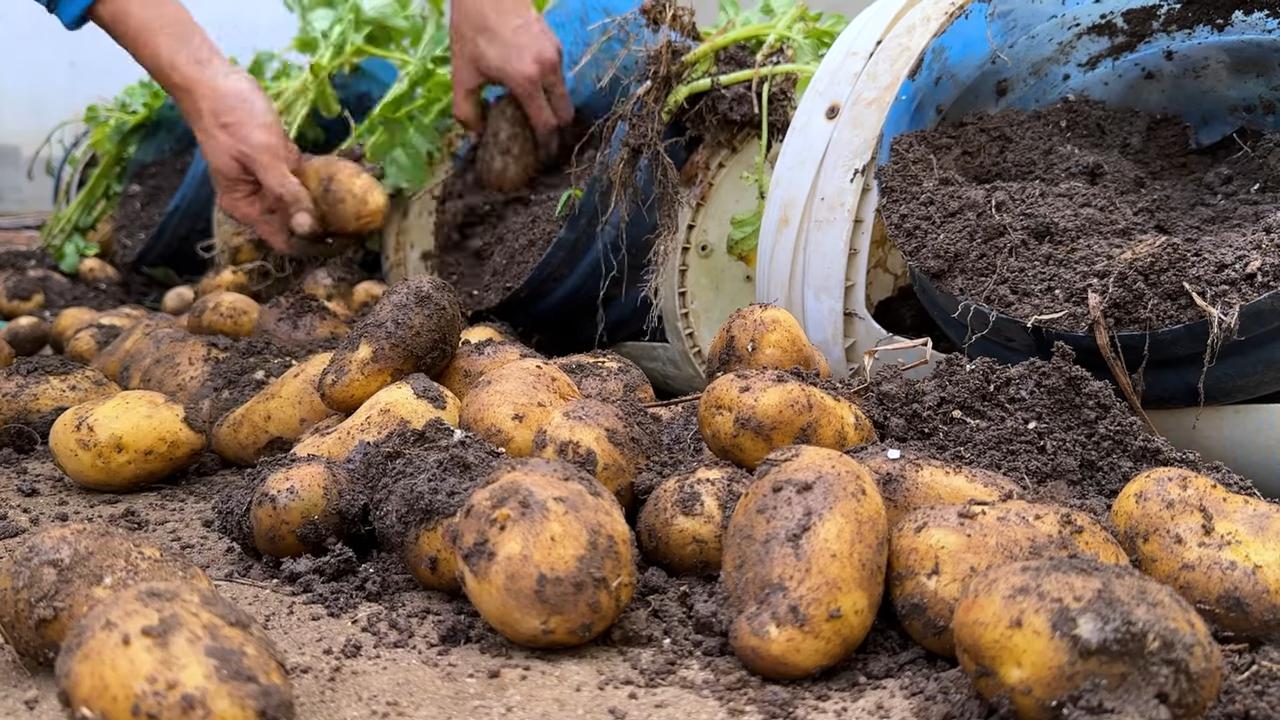
Harvest Time: Reaping the Rewards of Your Labor
After all your hard work, it’s finally time to harvest your potatoes! This is the most exciting part of the whole process.
1. When to Harvest: Potatoes are typically ready to harvest about 80-100 days after planting. The leaves of the plants will start to turn yellow and die back.
2. Harvesting: Stop watering the plants a week or two before harvesting. This will help the potatoes to dry out and cure. To harvest, gently tip the container over and carefully remove the potatoes from the soil.
3. Curing: Cure the potatoes by spreading them out in a cool, dry, and dark place for about a week. This will help them to develop a thicker skin and prevent rot.
4. Storage: Store the cured potatoes in a cool, dark, and dry place. They should last for several months.
Tips and Tricks for a Supercharged Potato Harvest
Want to take your potato growing game to the next level? Here are a few extra tips and tricks:
* Choose the Right Potato Variety: Different potato varieties have different growing requirements and yields. Do some research to find a variety that’s well-suited to your climate and growing conditions.
* Use a Potato Growing Bag: Potato growing bags are specifically designed for growing potatoes in containers. They have drainage holes and are made of breathable fabric, which helps to prevent rot.
* Add Worm Castings: Worm castings are a great source of nutrients for potato plants. Add a handful of worm castings to the potting mix when you plant the seed potatoes.
* Companion Planting: Plant companion plants, such as marigolds or basil, around your potato plants to deter pests.
* Rotate Your Crops: Avoid planting potatoes in the same container year after year. This can help to prevent soilborne diseases.
Enjoy Your Homegrown Potatoes!
There you have it! You’ve successfully built your own potato growing container and are well on your way to enjoying a bountiful harvest of fresh, homegrown potatoes. I hope you found this guide helpful and informative. Happy gardening! Now go forth and grow some amazing potatoes!
Conclusion
So, there you have it! Creating your own potato growing container is not just a fun weekend project; it’s a gateway to fresh, flavorful potatoes right from your backyard (or balcony!). We’ve walked you through the simple steps, highlighting how easy it is to repurpose materials and tailor the container to your specific needs and space.
Why is this a must-try? Because it offers a level of control and satisfaction you simply can’t get from store-bought potatoes. You know exactly what went into growing them – no mystery chemicals or long-distance transportation. Plus, the yield from even a single container can be surprisingly abundant, providing you with a steady supply of delicious potatoes for weeks.
But the benefits extend beyond just the harvest. This DIY project is incredibly rewarding. Watching those tiny sprouts emerge and gradually transform into a thriving potato plant is a truly magical experience. It’s a fantastic way to connect with nature, even in an urban environment, and a great educational opportunity for kids (and adults!) to learn about where their food comes from.
Don’t be afraid to experiment! Try different varieties of potatoes to see which ones thrive best in your container. Consider adding companion plants like marigolds or basil to deter pests and attract beneficial insects. You can also adjust the size and shape of your container to fit your available space. A smaller container might be perfect for a patio, while a larger one could be ideal for a backyard garden.
And speaking of variations, consider using different materials for your container. While we focused on using a plastic bin, you could also use a burlap sack, a large fabric pot, or even an old tire (just be sure to drill drainage holes!). Each material offers its own unique advantages and aesthetic appeal.
The key is to have fun and embrace the learning process. Don’t be discouraged if your first attempt isn’t perfect. Gardening is all about trial and error, and every mistake is an opportunity to learn and improve.
We are confident that once you taste the difference between homegrown potatoes and store-bought ones, you’ll be hooked. The flavor is simply unmatched – earthy, fresh, and bursting with natural goodness.
So, what are you waiting for? Gather your supplies, follow our simple instructions, and get ready to embark on your own potato-growing adventure. We can’t wait to hear about your experiences! Share your photos, tips, and tricks in the comments below. Let’s create a community of container potato growers and inspire others to discover the joys of homegrown food. Happy growing!
Frequently Asked Questions (FAQ)
What type of potatoes are best for growing in containers?
Generally, smaller varieties like fingerling potatoes or new potatoes tend to do well in containers. These varieties mature relatively quickly and don’t require as much space as larger potato types. However, you can successfully grow larger varieties like russets or Yukon Golds in containers, provided you use a sufficiently large container (at least 20 gallons) and provide adequate support for the plants. Experimenting with different varieties is part of the fun! Consider your local climate and growing season when making your selection. Seed potatoes are the best way to start, and you can often find them at local garden centers or online retailers.
How often should I water my potato growing container?
Watering frequency depends on several factors, including the size of your container, the type of soil you’re using, the weather conditions, and the stage of growth of your potato plants. As a general rule, you should water your potato container whenever the top inch of soil feels dry to the touch. During hot, dry weather, you may need to water daily, while during cooler, wetter periods, you may only need to water every few days. Avoid overwatering, as this can lead to root rot. Ensure your container has adequate drainage to prevent water from pooling at the bottom. A good way to check is to stick your finger about an inch into the soil. If it feels dry, it’s time to water.
What kind of soil should I use in my potato container?
Potatoes prefer well-draining, slightly acidic soil. A good potting mix specifically formulated for vegetables is ideal. You can also create your own mix by combining equal parts of compost, peat moss (or coconut coir), and perlite or vermiculite. Compost provides essential nutrients, peat moss (or coconut coir) helps retain moisture, and perlite or vermiculite improves drainage. Avoid using garden soil in your container, as it can be too heavy and compact, hindering root growth. The ideal pH range for potato growth is between 5.5 and 6.5. You can test the pH of your soil using a soil testing kit and amend it if necessary.
How much sunlight do potato plants need?
Potato plants need at least six hours of direct sunlight per day to thrive. Choose a location for your container that receives plenty of sunlight throughout the day. If you live in a particularly hot climate, you may want to provide some afternoon shade to prevent the plants from overheating. Insufficient sunlight can result in weak, leggy plants and reduced potato yields. If you don’t have a sunny spot outdoors, you can supplement with grow lights.
How do I know when my potatoes are ready to harvest?
The timing of your potato harvest will depend on the variety you’re growing and the desired size of the potatoes. Generally, new potatoes can be harvested about 70-80 days after planting, while larger potatoes may take 90-100 days. A good indicator that your potatoes are ready to harvest is when the foliage starts to turn yellow and die back. You can also gently dig around the base of the plant to check the size of the potatoes. If they’re the size you want, you can harvest them. To harvest, carefully tip the container over and gently remove the potatoes from the soil.
Can I reuse the soil from my potato container?
While you can technically reuse the soil from your potato container, it’s generally recommended to amend it with fresh compost and nutrients before replanting. Potatoes are heavy feeders and can deplete the soil of essential nutrients. Adding compost will replenish these nutrients and improve the soil’s structure. You should also consider rotating your crops to prevent the buildup of soilborne diseases. If you suspect that your soil may be contaminated with diseases or pests, it’s best to discard it and start with fresh soil.
What are some common pests and diseases that affect potato plants?
Some common pests that can affect potato plants include aphids, potato beetles, and flea beetles. Diseases include early blight, late blight, and potato scab. Regularly inspect your plants for signs of pests or diseases and take appropriate action if necessary. Organic pest control methods, such as insecticidal soap or neem oil, can be effective for controlling many pests. To prevent diseases, ensure good air circulation around your plants, avoid overwatering, and use disease-resistant potato varieties.
Can I grow potatoes in a container indoors?
Yes, you can grow potatoes in a container indoors, but it requires providing them with adequate light and ventilation. You’ll need a sunny windowsill or, more likely, a grow light to provide the necessary light. Ensure the container has good drainage and use a well-draining potting mix. Monitor the soil moisture and water as needed. Indoor potato plants may not produce as many potatoes as outdoor plants, but it’s still a fun and rewarding experience.
How do I “hill” my potatoes in a container?
“Hilling” potatoes involves gradually adding more soil to the container as the plants grow. This encourages the development of more potatoes along the stem. When the potato shoots emerge from the soil, add a few inches of soil to cover the lower part of the stems, leaving the top leaves exposed. Repeat this process every few weeks as the plants grow, until the container is nearly full. This technique maximizes potato production in a container.
What if my potato plants are flowering?
Flowering in potato plants is a natural process and doesn’t necessarily indicate anything negative. Some potato varieties flower more profusely than others. While the flowers themselves don’t directly produce potatoes, they are a sign that the plant is healthy and actively growing. You can remove the flowers if you prefer, but it’s not essential. Focus on providing the plants with adequate sunlight, water, and nutrients to ensure a good potato harvest.


Leave a Comment