

Grow Chili Peppers in Pots and ignite your culinary adventures! Have you ever dreamed of plucking fiery peppers straight from your own garden, ready to spice up your favorite dishes? Well, dream no more! This DIY guide is your passport to a vibrant, pepper-filled paradise, even if you only have a small balcony or patio.
The history of chili peppers is as rich and colorful as the peppers themselves. Originating in South America, these fiery fruits have been cultivated for thousands of years, adding zest and zing to cuisines worldwide. From ancient Aztec rituals to modern-day culinary masterpieces, chili peppers have always held a special place in our hearts (and stomachs!).
But why should you grow chili peppers in pots? Let’s face it, not everyone has acres of land for a sprawling garden. Container gardening offers a fantastic solution, allowing you to cultivate your favorite plants in a limited space. Plus, growing your own chili peppers means you have complete control over their growing conditions, ensuring they’re organic, healthy, and bursting with flavor. Imagine the satisfaction of harvesting your own peppers, knowing exactly where they came from and how they were grown. I’m excited to share these simple, effective tricks and hacks that will transform you into a chili pepper pro in no time!
Growing Fiery Chili Peppers in Pots: A DIY Guide for Spicy Success
Hey there, fellow chili enthusiast! Are you dreaming of adding a kick to your cooking with homegrown chili peppers? Well, you’ve come to the right place! Growing chili peppers in pots is surprisingly easy and rewarding, even if you don’t have a sprawling garden. I’m going to walk you through everything you need to know, from choosing the right pot to harvesting your fiery bounty. Let’s get started!
Choosing Your Chili Pepper Variety
First things first, let’s talk peppers! The world of chili peppers is vast and exciting, ranging from mild and sweet to face-meltingly hot. Consider your taste preferences and growing conditions when making your choice. Here are a few popular options:
* **Jalapeño:** A classic choice, offering a moderate heat and versatility in the kitchen.
* **Serrano:** A bit hotter than jalapeños, perfect for adding a zing to salsas and sauces.
* **Cayenne:** Known for its bright red color and medium heat, ideal for drying and making chili powder.
* **Habanero:** Brace yourself! These little guys pack a serious punch.
* **Thai Chili:** Small but mighty, these peppers are commonly used in Asian cuisine.
* **Bell Peppers:** If you are looking for no heat, bell peppers are a great option.
Remember to check the Scoville Heat Units (SHU) of each variety to get an idea of its heat level.
Gathering Your Supplies
Now that you’ve chosen your pepper, let’s gather the necessary supplies. Here’s what you’ll need:
* **Chili pepper seeds or seedlings:** You can start from seed or purchase seedlings from a local nursery.
* **Pots:** Choose pots that are at least 12 inches in diameter for smaller varieties and 18 inches or larger for larger varieties like bell peppers. Make sure they have drainage holes!
* **Potting mix:** Use a high-quality potting mix that drains well. Avoid using garden soil, as it can compact and hinder drainage.
* **Fertilizer:** A balanced fertilizer (e.g., 10-10-10) or a fertilizer specifically formulated for tomatoes and peppers will work well.
* **Watering can or hose:** For watering your plants.
* **Optional: Plant labels:** To keep track of your different pepper varieties.
* **Optional: Stakes or cages:** To support taller or bushier plants.
Step-by-Step Planting Guide
Alright, let’s get our hands dirty! Here’s how to plant your chili peppers in pots:
1. **Starting from Seed (Optional):**
* If you’re starting from seed, sow them indoors 6-8 weeks before the last expected frost.
* Fill a seed tray or small pots with seed-starting mix.
* Sow the seeds about 1/4 inch deep.
* Keep the soil moist and warm (around 75-80°F). A heat mat can be helpful.
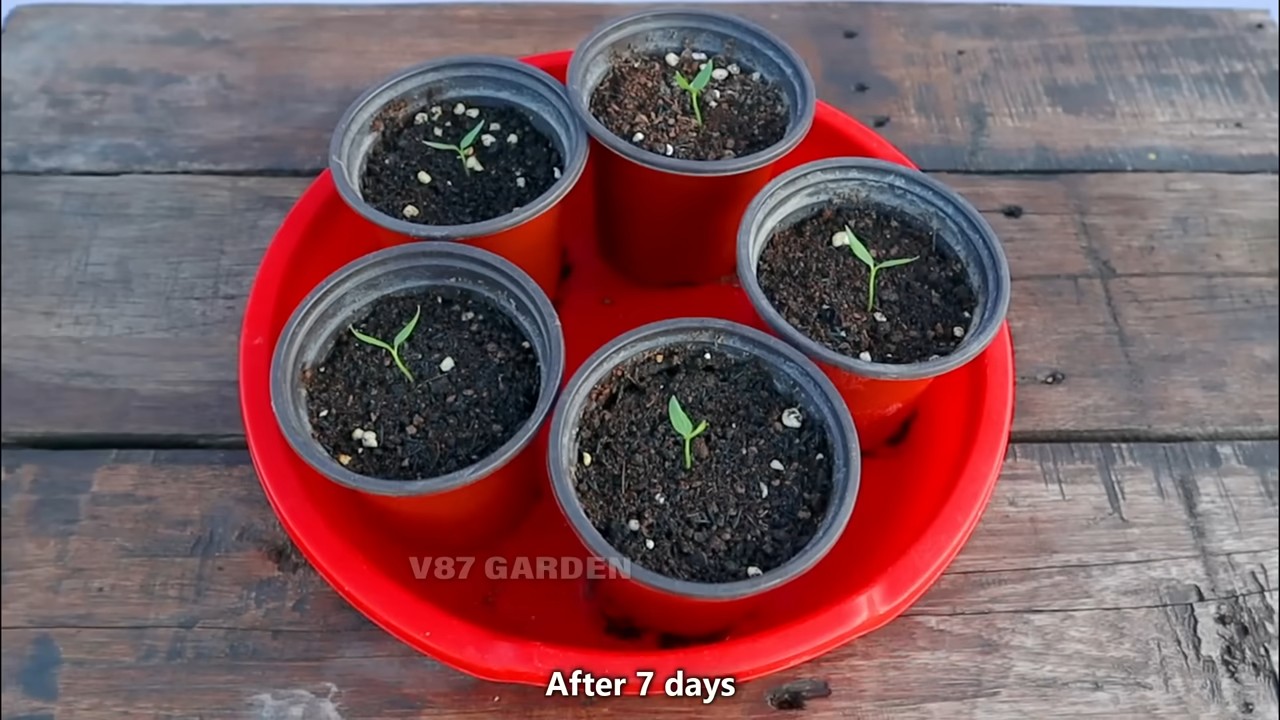
* Once the seedlings have a few sets of true leaves, transplant them into individual pots.
2. **Preparing the Pots:**
* Clean your pots thoroughly with soap and water.
* Place a layer of gravel or broken pottery at the bottom of each pot to improve drainage.
* Fill the pots with potting mix, leaving about an inch of space at the top.
3. **Planting the Seedlings:**
* Gently remove the seedlings from their containers.
* Loosen the roots slightly.
* Dig a hole in the potting mix that is large enough to accommodate the root ball.
* Place the seedling in the hole and backfill with potting mix.
* Gently firm the soil around the base of the plant.
4. **Watering:**
* Water the plants thoroughly after planting.
* Allow excess water to drain out of the drainage holes.
5. **Labeling (Optional):**
* Label each pot with the name of the pepper variety and the date of planting.
Caring for Your Chili Pepper Plants
Now that your chili peppers are planted, it’s time to provide them with the care they need to thrive.
1. **Sunlight:**
* Chili peppers need at least 6-8 hours of sunlight per day.
* Place your pots in a sunny location, such as a patio, balcony, or windowsill.
* If you don’t have enough natural sunlight, you can supplement with grow lights.
2. **Watering:**
* Water your chili pepper plants regularly, especially during hot, dry weather.
* Check the soil moisture by sticking your finger into the soil. If the top inch feels dry, it’s time to water.
* Avoid overwatering, as this can lead to root rot.
* Water deeply, allowing the water to reach the roots.
3. **Fertilizing:**
* Fertilize your chili pepper plants every 2-3 weeks with a balanced fertilizer or a fertilizer specifically formulated for tomatoes and peppers.
* Follow the instructions on the fertilizer package.
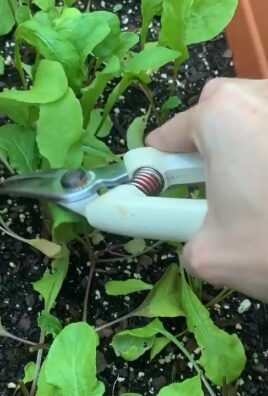
4. **Pruning (Optional):**
* Pruning can help to encourage bushier growth and increase fruit production.
* Pinch off the tips of the branches to promote branching.
* Remove any yellowing or dead leaves.
5. **Supporting (Optional):**
* Taller or bushier chili pepper plants may need support to prevent them from falling over.
* Use stakes or cages to support the plants.
6. **Pest and Disease Control:**
* Keep an eye out for pests and diseases. Common pests include aphids, spider mites, and whiteflies. Common diseases include powdery mildew and blossom end rot.
* If you notice any pests or diseases, take action immediately. You can use insecticidal soap, neem oil, or other organic pest control methods. For diseases, ensure good air circulation and avoid overhead watering.
7. **Pollination:**
* Chili peppers are self-pollinating, but you can help them along by gently shaking the plants or using a small brush to transfer pollen from one flower to another. This is especially helpful if you’re growing them indoors.
Harvesting Your Chili Peppers
The moment you’ve been waiting for! It’s time to harvest your chili peppers.
1. **When to Harvest:**
* The time to harvest depends on the variety of chili pepper and your personal preference.
* Most chili peppers will change color as they ripen, from green to red, yellow, or orange.
* You can harvest them when they reach their mature color and size.
* Some people prefer to harvest green chili peppers for a milder flavor.
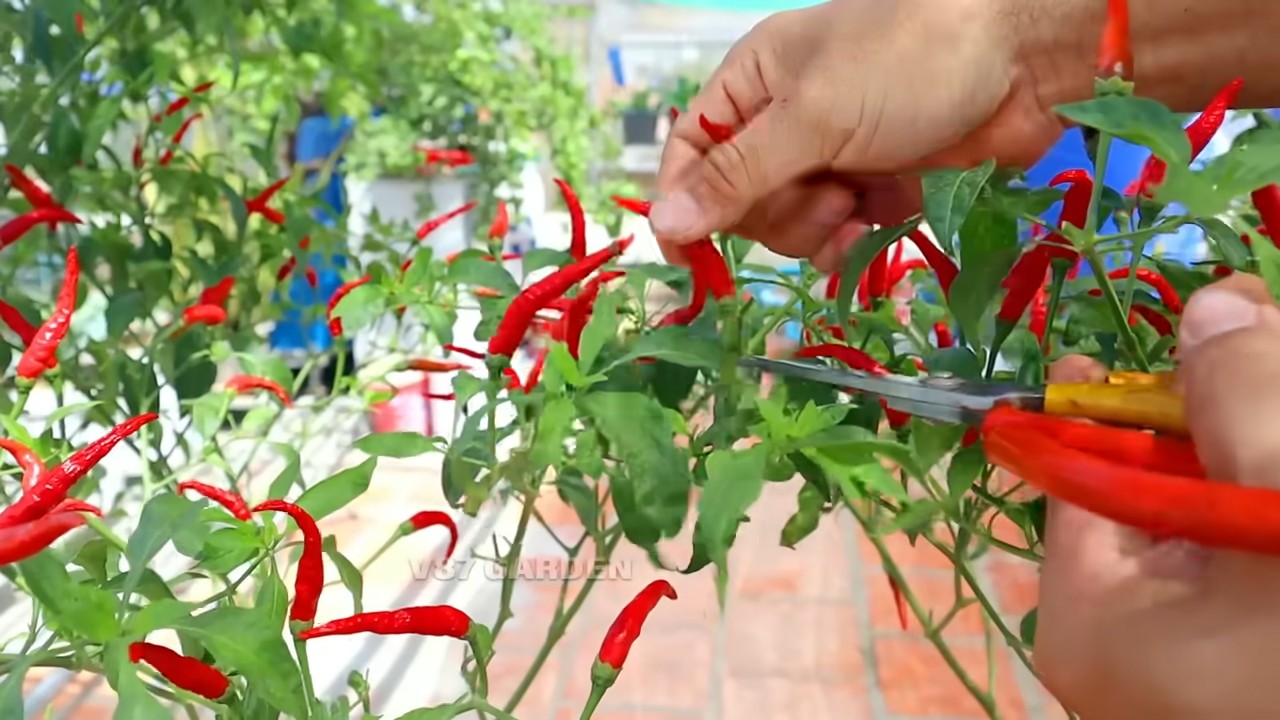
2. **How to Harvest:**
* Use scissors or pruning shears to cut the peppers from the plant.
* Leave a small stem attached to the pepper.
* Handle the peppers with care, as some varieties can be very hot.
* Wear gloves if you’re handling hot peppers to avoid skin irritation.
Enjoying Your Harvest
Congratulations! You’ve successfully grown chili peppers in pots. Now it’s time to enjoy your harvest.
* **Fresh:** Use your fresh chili peppers in salsas, sauces, stir-fries, and other dishes.
* **Dried:** Dry your chili peppers for long-term storage. You can dry them in a dehydrator, oven, or by hanging them in a warm, dry place.
* **Frozen:** Freeze your chili peppers for later use.
* **Pickled:** Pickle your chili peppers for a tangy and spicy treat.
* **Chili Oil:** Make your own chili oil for drizzling over noodles, eggs, and other dishes.
Troubleshooting Common Problems
Even with the best care, you may encounter some problems while growing chili peppers in pots. Here are a few common issues and how to address them:
* **Yellowing Leaves:** This can be caused by overwatering, underwatering, nutrient deficiencies, or pests. Check the soil moisture, fertilize regularly, and inspect for pests.
* **Blossom End Rot:** This is caused by a calcium deficiency. Ensure consistent watering and add calcium to the soil.
* **Lack of Fruit:** This can be caused by insufficient sunlight, poor pollination, or nutrient deficiencies. Provide adequate sunlight, hand-pollinate if necessary, and fertilize regularly.
* **Pests:** Identify the pest and use appropriate organic pest control methods.
Extra Tips for Success
Here are a few extra tips to help you grow the best chili peppers possible:
* **Choose the right pot size:** As mentioned earlier, the size of the pot is crucial. Too small, and the roots will become cramped, hindering growth.
* **Use a well-draining potting mix:** This is essential to prevent root rot.
*
Conclusion
So, there you have it! Growing chili peppers in pots isn’t just a gardening trend; it’s a gateway to fresh, flavorful heat right at your fingertips. We’ve walked through the essential steps, from selecting the perfect pot and soil to nurturing your plants and harvesting those fiery fruits. But why should you take the plunge and try this DIY project?
First and foremost, growing chili peppers in pots offers unparalleled convenience. Whether you have a sprawling garden or a tiny balcony, you can cultivate these vibrant plants. The portability of pots allows you to chase the sun, protect your peppers from unexpected frosts, and even bring them indoors during the colder months, extending your harvest season.
Beyond convenience, there’s the sheer satisfaction of nurturing a plant from seed (or seedling) to a bountiful harvest. Witnessing the transformation from tiny sprout to a plant laden with colorful peppers is incredibly rewarding. And let’s not forget the flavor! Homegrown chili peppers boast a freshness and intensity that you simply can’t find in store-bought varieties. Imagine the burst of flavor in your homemade salsa, the added kick to your stir-fries, or the subtle heat infused into your olive oil – all thanks to your own homegrown peppers.
But the beauty of growing chili peppers in pots lies in its adaptability. Feel free to experiment with different varieties. From the mild Anaheim to the scorching Ghost pepper, the possibilities are endless. Try different soil mixes to see what works best for your climate and growing conditions. Consider companion planting – basil, tomatoes, and carrots are all excellent companions for chili peppers.
And don’t be afraid to get creative with your pot selection. Terracotta pots offer excellent drainage, while plastic pots are lightweight and retain moisture. You can even repurpose old buckets or containers, adding a touch of rustic charm to your garden. Just ensure that your chosen pot has adequate drainage holes.
We encourage you to embark on this exciting gardening adventure. Growing chili peppers in pots is a relatively simple and incredibly rewarding experience. It’s a chance to connect with nature, cultivate your own food, and add a touch of spice to your life.
So, grab your pots, soil, and seeds, and get ready to grow some heat! We’re confident that you’ll be amazed by the results. And once you’ve harvested your first batch of peppers, we’d love to hear about your experience. Share your photos, tips, and favorite recipes in the comments below. Let’s create a community of chili pepper enthusiasts and inspire others to discover the joys of homegrown heat!
Frequently Asked Questions (FAQ)
What is the best type of pot for growing chili peppers?
The best type of pot for growing chili peppers depends on your specific needs and preferences. Terracotta pots are a popular choice due to their excellent drainage properties, which help prevent root rot. However, they can dry out quickly, especially in hot climates. Plastic pots are lightweight, retain moisture better, and are often more affordable. Fabric pots are another option, offering good drainage and aeration. Ultimately, the ideal pot size should be at least 5 gallons to provide ample space for the roots to develop. Ensure that any pot you choose has adequate drainage holes to prevent waterlogging.
How often should I water my chili pepper plants in pots?
Watering frequency depends on several factors, including the pot size, soil type, climate, and the plant’s growth stage. Generally, you should water your chili pepper plants when the top inch of soil feels dry to the touch. During hot, dry weather, you may need to water them daily, while in cooler, more humid conditions, watering every few days may suffice. Avoid overwatering, as this can lead to root rot. When you water, water deeply until water drains out of the drainage holes. This ensures that the entire root system is adequately hydrated.
What kind of soil is best for growing chili peppers in pots?
Chili peppers thrive in well-draining, nutrient-rich soil. A good potting mix should consist of a blend of peat moss, perlite, and vermiculite. You can also amend your potting mix with compost or aged manure to provide additional nutrients. Avoid using garden soil in pots, as it tends to compact and doesn’t drain well. The ideal pH level for chili peppers is between 6.0 and 7.0. You can test the pH of your soil using a soil testing kit and adjust it accordingly.
How much sunlight do chili pepper plants need?
Chili pepper plants require at least 6-8 hours of direct sunlight per day to thrive. If you’re growing your plants indoors, place them near a sunny window or use grow lights to supplement natural light. Insufficient sunlight can lead to leggy growth, reduced flowering, and smaller peppers. If you live in a hot climate, provide some afternoon shade to prevent the plants from overheating.
What are some common pests and diseases that affect chili pepper plants?
Common pests that affect chili pepper plants include aphids, spider mites, whiteflies, and thrips. These pests can suck the sap from the leaves, causing them to yellow and wilt. You can control these pests by spraying your plants with insecticidal soap or neem oil. Diseases that can affect chili pepper plants include fungal diseases like powdery mildew and blossom end rot. Powdery mildew appears as a white, powdery coating on the leaves, while blossom end rot causes the bottom of the peppers to turn black and rot. To prevent these diseases, ensure good air circulation around your plants, avoid overwatering, and provide adequate calcium to the soil.
When should I fertilize my chili pepper plants?
You should start fertilizing your chili pepper plants about two weeks after transplanting them into their pots. Use a balanced fertilizer with an NPK ratio of 10-10-10 or 14-14-14. Fertilize every 2-3 weeks during the growing season. Once the plants start flowering, switch to a fertilizer with a higher phosphorus content (e.g., 5-10-5) to promote fruit production. Avoid over-fertilizing, as this can lead to excessive foliage growth and reduced flowering.
How do I know when my chili peppers are ripe?
The color of the chili peppers will change as they ripen, depending on the variety. Most chili peppers start green and then turn red, yellow, orange, or brown when ripe. The peppers should also feel firm and slightly waxy to the touch. You can harvest your chili peppers when they have reached their mature color and size. Use pruning shears or scissors to cut the peppers from the plant, leaving a small stem attached.
Can I grow chili peppers indoors year-round?
Yes, you can grow chili peppers indoors year-round, provided you provide them with adequate light, warmth, and humidity. Place your plants near a sunny window or use grow lights to supplement natural light. Maintain a temperature of 70-80°F during the day and 60-70°F at night. Increase humidity by misting your plants regularly or placing them on a tray filled with pebbles and water.
What are some good companion plants for chili peppers?
Good companion plants for chili peppers include basil, tomatoes, carrots, onions, and garlic. Basil helps repel pests and improves the flavor of the peppers. Tomatoes provide shade and support for the chili pepper plants. Carrots attract beneficial insects that prey on pests. Onions and garlic deter pests and diseases.
How can I save seeds from my chili peppers?
To save seeds from your chili peppers, allow the peppers to fully ripen on the plant. Once they are ripe, cut them open and remove the seeds. Spread the seeds out on a paper towel and allow them to dry completely for several days. Once the seeds are dry, store them in an airtight container in a cool, dark place.

Leave a Comment