

Propagate chili peppers easily? Absolutely! Imagine turning one prized chili pepper plant into a thriving garden full of fiery flavor. It’s not just a dream; it’s a deliciously achievable reality with a few simple DIY tricks. For centuries, gardeners have shared secrets for multiplying their favorite plants, passing down knowledge through generations. While the exact origins of chili pepper propagation are intertwined with the history of agriculture itself, the desire to cultivate and share these spicy treasures is a tale as old as time.
But why bother with propagating chili peppers yourself? Well, for starters, it’s incredibly rewarding to nurture new life from something you already have. Plus, it’s a fantastic way to save money! Instead of buying new seedlings every year, you can create your own supply from your best-performing plants. More importantly, you can preserve unique varieties that might be hard to find commercially.
This DIY guide is your passport to a flourishing chili pepper patch. I’m going to show you some easy-to-follow methods that will have you propagating chili peppers like a pro in no time. Get ready to expand your garden and share the spicy goodness with friends and family!
Propagating Chili Peppers: A Simple DIY Guide
Hey there, fellow chili enthusiast! Ever wished you could magically multiply your favorite chili pepper plants? Well, you practically can! Propagating chili peppers is surprisingly easy, and I’m going to walk you through a couple of methods that I’ve found particularly successful. Get ready to expand your chili empire!
Method 1: Propagating from Cuttings
This method is fantastic because you’re essentially cloning your existing plant, ensuring you get the exact same pepper characteristics. Plus, it’s a great way to save a plant that’s struggling or to get a head start on the growing season.
What You’ll Need:
* A healthy chili pepper plant (the mother plant!)
* Sharp, clean pruning shears or a knife
* Rooting hormone (optional, but highly recommended)
* Small pots or containers
* Seed starting mix or well-draining potting soil
* A clear plastic bag or humidity dome (optional, but helpful)
* Water
Step-by-Step Instructions:
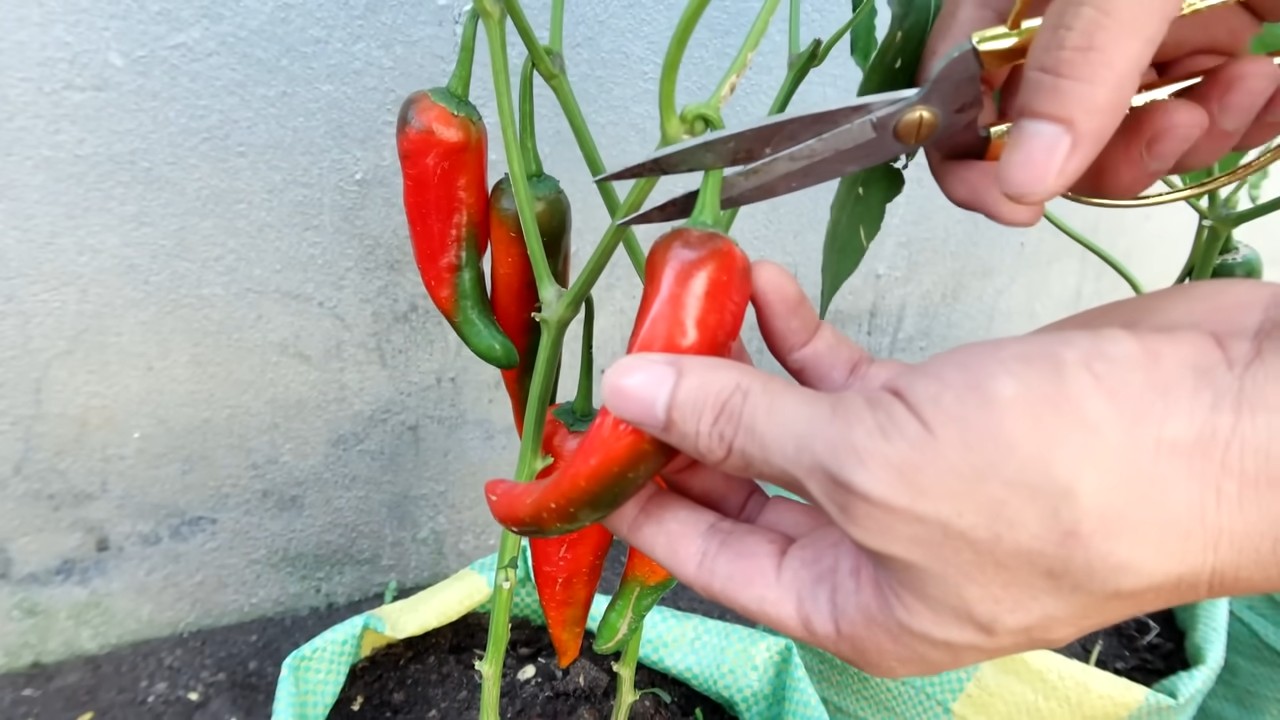
1. Selecting Your Cuttings: The key here is to choose healthy, non-flowering stems. Look for stems that are about 4-6 inches long and have several leaves. Avoid stems that are woody or have signs of disease. I usually aim for stems that are relatively new growth, as they tend to root more easily.
2. Taking the Cutting: Using your clean pruning shears or knife, make a clean cut just below a node (the point where a leaf grows from the stem). This is where roots are most likely to emerge. Make sure your cut is at a 45-degree angle; this increases the surface area for root development.
3. Preparing the Cutting: Now, gently remove the leaves from the bottom 1-2 inches of the stem. This prevents the leaves from rotting when they’re buried in the soil and encourages the plant to focus its energy on root production.
4. Applying Rooting Hormone (Optional but Recommended): This step can significantly increase your success rate. Dip the cut end of the stem into the rooting hormone powder or gel. Tap off any excess. Rooting hormone contains auxins, which are plant hormones that stimulate root growth. I’ve found that using rooting hormone speeds up the rooting process and results in stronger, healthier roots.
5. Planting the Cutting: Fill your small pot or container with seed starting mix or well-draining potting soil. Make a small hole in the center of the soil with your finger or a pencil. Gently insert the cutting into the hole, making sure the bottom 1-2 inches of the stem are buried. Lightly press the soil around the stem to secure it.
6. Watering and Humidity: Water the cutting thoroughly, but be careful not to overwater. The soil should be moist but not soggy. To create a humid environment, place a clear plastic bag over the pot or use a humidity dome. This helps to prevent the cutting from drying out before it can develop roots. Make sure the bag doesn’t touch the leaves, as this can lead to rot. You can prop the bag up with skewers or chopsticks if needed.
7. Providing Light and Warmth: Place the cutting in a warm, bright location, but avoid direct sunlight. Direct sunlight can scorch the leaves. A windowsill with indirect light is ideal. Maintain a temperature of around 70-75°F (21-24°C).
8. Monitoring and Watering: Check the cutting regularly to make sure the soil is still moist. Water as needed to keep the soil consistently damp, but avoid overwatering. Remove the plastic bag or humidity dome for a few hours each day to allow for air circulation and prevent mold growth.
9. Checking for Root Development: After a few weeks (usually 2-4), you can gently tug on the cutting to see if it has developed roots. If you feel resistance, that means roots have formed! You can also look for new growth on the plant, which is another sign that it’s rooting successfully.
10. Transplanting: Once the cutting has developed a good root system, you can transplant it into a larger pot or directly into your garden (if the weather is suitable). Be gentle when transplanting to avoid damaging the roots.
Method 2: Propagating from Seeds (Saving Seeds from Your Peppers)
This method is a bit more involved, but it’s incredibly rewarding to grow new plants from the seeds of your own peppers. Plus, it’s a great way to preserve your favorite varieties.
What You’ll Need:
* Ripe chili peppers from a healthy plant
* Paper towels
* A plate or tray
* Small pots or containers
* Seed starting mix or well-draining potting soil
* Water
* A warm, bright location
Step-by-Step Instructions:
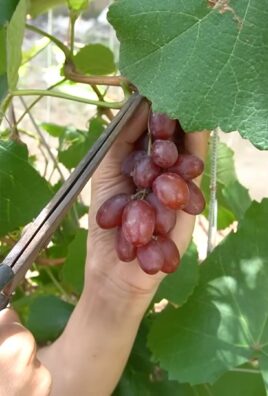
1. Selecting Your Peppers: Choose fully ripe chili peppers from a healthy plant. The peppers should be firm and have a vibrant color. Avoid peppers that are soft, wrinkled, or have signs of disease. I usually let my peppers ripen on the plant as long as possible to ensure the seeds are fully mature.
2. Extracting the Seeds: Carefully cut open the pepper and remove the seeds. You can use your fingers or a spoon to scoop them out. Be careful not to damage the seeds.
3. Cleaning the Seeds: Spread the seeds out on a paper towel and allow them to dry completely. This can take several days. Make sure the seeds are not touching each other, as this can lead to mold growth. I usually place the paper towel in a warm, dry location with good air circulation.
4. Testing Seed Viability (Optional): To test if your seeds are viable (able to germinate), you can perform a simple float test. Place the seeds in a glass of water. Seeds that sink are generally viable, while seeds that float are less likely to germinate. Discard the floating seeds.
5. Storing the Seeds (If Not Planting Immediately): If you’re not planning to plant the seeds right away, store them in an airtight container in a cool, dark, and dry place. Properly stored chili pepper seeds can remain viable for several years. I usually store mine in a resealable bag in the refrigerator.
6. Sowing the Seeds: Fill your small pots or containers with seed starting mix or well-draining potting soil. Moisten the soil thoroughly.
7. Planting the Seeds: Make a small hole in the center of the soil, about ¼ inch deep. Place 2-3 seeds in each hole. Cover the seeds with soil and gently press down. Planting multiple seeds increases the chances of at least one germinating.
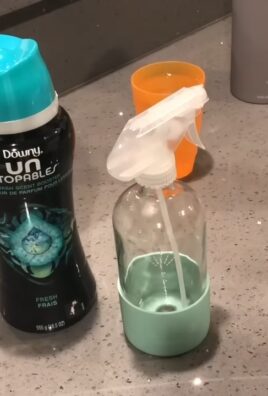
8. Watering and Humidity: Water the soil gently to avoid disturbing the seeds. You can use a spray bottle to mist the soil. To create a humid environment, cover the pots with a clear plastic bag or use a humidity dome.
9. Providing Light and Warmth: Place the pots in a warm, bright location. Chili pepper seeds need warmth to germinate. A temperature of around 80-85°F (27-29°C) is ideal. You can use a heat mat to provide bottom heat.
10. Monitoring and Watering: Check the soil regularly to make sure it’s still moist. Water as needed to keep the soil consistently damp, but avoid overwatering. Remove the plastic bag or humidity dome for a few hours each day to allow for air circulation.
11. Germination: Chili pepper seeds can take anywhere from 1-3 weeks to germinate, depending on the variety and the environmental conditions. Be patient!
12. Thinning Seedlings: Once the seedlings have emerged, thin them out to one seedling per pot. Choose the strongest, healthiest seedling and snip off the others at the soil line.
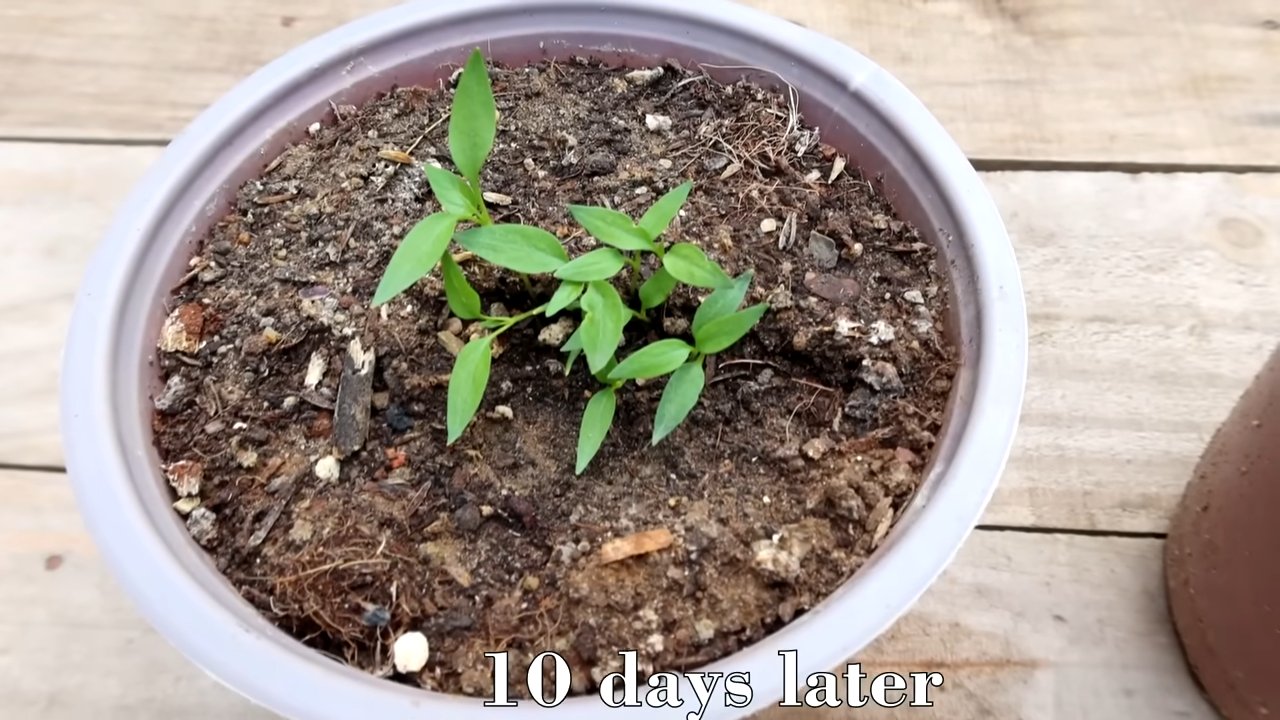
13. Providing Light: Once the seedlings have emerged, they need plenty of light. Place them in a sunny location or under grow lights.
14. Transplanting: Once the seedlings have developed several sets of true leaves (the leaves that look like miniature versions of the adult leaves), you can transplant them into larger pots or directly into your garden (if the weather is suitable).
Tips for Success
* Cleanliness is Key: Always use clean tools and pots to prevent the spread of disease.
* Don’t Overwater: Overwatering is a common mistake that can lead to root rot. Make sure the soil is well-draining and allow it to dry out slightly between waterings.
* Be Patient: Propagating chili peppers can take time. Don’t get discouraged if you don’t see results immediately.
* Experiment: Try different methods and techniques to see what works best for you.
* Record Your Results: Keep track of your successes and failures so you can learn from your mistakes.
Troubleshooting
* Cuttings Not Rooting: Make sure you’re using healthy cuttings, applying rooting hormone, and providing
Conclusion
So, there you have it! Propagating chili peppers easily from cuttings is not just a fun gardening experiment; it’s a game-changer for any chili enthusiast. Imagine having a continuous supply of your favorite fiery peppers, all grown from a single, cherished plant. No more relying solely on seeds, which can sometimes be unreliable or produce variations you didn’t expect. This method allows you to clone your best-performing plants, ensuring consistent flavor, heat level, and yield year after year.
This DIY trick is a must-try for several compelling reasons. First, it’s incredibly cost-effective. Instead of buying new seedlings every season, you can simply take cuttings from your existing plants. Second, it’s a fantastic way to preserve rare or heirloom varieties that might be difficult to find commercially. Third, it’s a rewarding experience that connects you more deeply with the growing process. Witnessing a tiny cutting transform into a thriving pepper plant is truly magical.
But the benefits don’t stop there. Propagating chili peppers easily gives you greater control over your garden. You can select cuttings from plants that are resistant to pests or diseases, ensuring a healthier and more productive crop. You can also experiment with different growing conditions, such as hydroponics or container gardening, to see what works best for your climate and preferences.
Looking for variations? Consider experimenting with different rooting mediums. While water propagation is a simple and effective method, you can also try using perlite, vermiculite, or a mixture of peat moss and sand. Some gardeners even swear by using rooting hormones to speed up the process. Another variation is to try propagating from different parts of the plant. While stem cuttings are the most common, you can also try taking cuttings from side shoots or even leaf nodes.
Don’t be afraid to get creative and adapt the technique to suit your own needs and resources. The key is to provide the cuttings with warmth, humidity, and plenty of light. With a little patience and care, you’ll be rewarded with a bountiful harvest of delicious chili peppers.
We wholeheartedly encourage you to try this DIY trick for propagating chili peppers easily. It’s a simple, affordable, and rewarding way to expand your garden and enjoy a continuous supply of your favorite peppers. Once you’ve given it a try, we’d love to hear about your experience. Share your tips, tricks, and photos in the comments below. Let’s build a community of chili pepper propagators and learn from each other’s successes and challenges. Happy growing!
Frequently Asked Questions (FAQ)
1. What is the best time of year to propagate chili peppers from cuttings?
The best time to propagate chili peppers from cuttings is typically during the active growing season, which is spring or early summer. During this time, the plants are actively producing new growth, and the cuttings are more likely to root successfully. However, you can propagate chili peppers from cuttings at other times of the year as well, as long as you provide them with the right conditions, such as warmth, humidity, and light. If you are propagating during the cooler months, you may need to use a heat mat or grow light to provide the cuttings with the warmth they need to root.
2. How long does it take for chili pepper cuttings to root?
The time it takes for chili pepper cuttings to root can vary depending on several factors, including the variety of chili pepper, the growing conditions, and the rooting method used. In general, you can expect to see roots forming within 2-4 weeks. However, some cuttings may root faster, while others may take longer. It’s important to be patient and monitor the cuttings regularly for signs of root growth. Once the roots are about an inch long, you can transplant the cuttings into pots or directly into the garden.
3. What type of chili pepper varieties are best suited for propagation from cuttings?
Most chili pepper varieties can be propagated from cuttings, but some varieties may be easier to root than others. In general, varieties with thicker stems and more vigorous growth tend to root more readily. Some popular varieties that are known to propagate well from cuttings include Jalapeño, Serrano, Cayenne, and Thai chili peppers. However, don’t be afraid to experiment with other varieties as well. With the right conditions and care, you can successfully propagate almost any chili pepper from cuttings.
4. Can I propagate chili peppers from cuttings taken from store-bought peppers?
While technically possible, propagating chili peppers from cuttings taken from store-bought peppers is generally not recommended. This is because store-bought peppers are often hybrids, which means that their offspring may not be true to type. In other words, the plants grown from cuttings taken from store-bought peppers may not produce peppers that are identical to the parent pepper. Additionally, store-bought peppers may have been treated with chemicals or pesticides that can inhibit rooting. If you want to propagate chili peppers from cuttings, it’s best to use cuttings taken from plants that you know are true to type and have not been treated with harmful chemicals.
5. What are some common problems encountered when propagating chili peppers from cuttings and how can I solve them?
Some common problems encountered when propagating chili peppers from cuttings include:
* **Rotting:** This is often caused by overwatering or poor drainage. To prevent rotting, make sure to use a well-draining rooting medium and avoid overwatering.
* **Lack of rooting:** This can be caused by a variety of factors, including insufficient light, warmth, or humidity. To encourage rooting, provide the cuttings with plenty of light, warmth, and humidity. You can also try using a rooting hormone to stimulate root growth.
* **Wilting:** This is often caused by dehydration. To prevent wilting, make sure to keep the cuttings well-hydrated by misting them regularly. You can also cover the cuttings with a plastic bag or dome to create a humid environment.
* **Pest or disease problems:** Cuttings can be susceptible to pests and diseases, especially if they are grown in a humid environment. To prevent pest and disease problems, inspect the cuttings regularly and treat them with appropriate pesticides or fungicides if necessary.
6. How do I care for chili pepper cuttings after they have rooted?
Once the chili pepper cuttings have rooted, it’s important to gradually acclimate them to their new environment. Start by exposing them to more light and less humidity over a period of several days. Once they are acclimated, you can transplant them into pots or directly into the garden. When transplanting, be sure to choose a well-draining soil and a sunny location. Water the plants regularly, but avoid overwatering. Fertilize them with a balanced fertilizer every few weeks to promote healthy growth. With proper care, your chili pepper cuttings will thrive and produce a bountiful harvest of delicious peppers.
7. Can I use this method to propagate other types of plants besides chili peppers?
Yes, the basic principles of propagating chili peppers easily from cuttings can be applied to many other types of plants. This method works particularly well for herbaceous plants with soft stems, such as tomatoes, herbs, and some ornamental plants. The key is to provide the cuttings with the right conditions, including warmth, humidity, and light. You may need to adjust the rooting medium and the rooting time depending on the specific plant species. Experimenting with different plants is a great way to expand your gardening skills and create a thriving garden.
Leave a Comment