

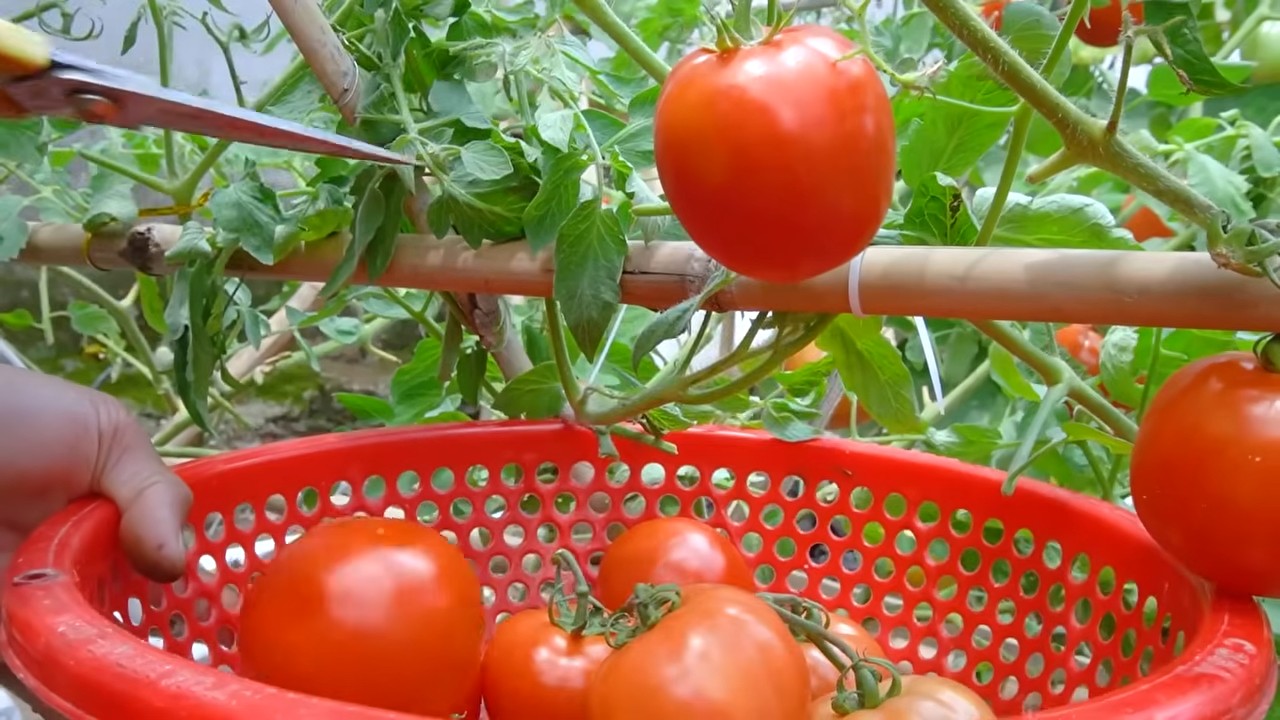
Tomato growing method – ever dreamt of plucking juicy, sun-ripened tomatoes straight from your own backyard? I know I have! There’s something incredibly satisfying about nurturing a plant from a tiny seed to a bountiful harvest. For centuries, tomatoes have held a special place in our hearts and cuisines, originating in South America and making their way across the globe to become a staple in gardens and kitchens worldwide. From vibrant sauces to refreshing salads, the possibilities are endless.
But let’s be honest, sometimes growing tomatoes can feel like a daunting task. Pests, diseases, and unpredictable weather can quickly turn your gardening dreams into a frustrating reality. That’s where this DIY guide comes in! I’m going to share some simple yet effective tricks and hacks that will help you master the tomato growing method, even if you’re a complete beginner.
Imagine enjoying the taste of homegrown tomatoes, bursting with flavor and free from harmful chemicals. This isn’t just about saving money; it’s about connecting with nature, enjoying the therapeutic benefits of gardening, and providing your family with healthy, delicious food. So, grab your gardening gloves, and let’s dive into these easy-to-follow tips that will transform your tomato growing experience!
DIY Upside-Down Tomato Planter: Grow Tomatoes Like a Pro!
Hey there, fellow gardening enthusiasts! I’m super excited to share one of my favorite DIY projects with you: building an upside-down tomato planter. Not only is it a fun and relatively easy project, but it’s also a fantastic way to grow tomatoes, especially if you’re short on space or dealing with poor soil. Trust me, once you see those juicy tomatoes dangling down, you’ll be hooked!
Why Upside-Down Tomato Planters?
Before we dive into the how-to, let’s quickly touch on why this method is so awesome:
* Space-Saving: Perfect for balconies, patios, or small yards. You only need a place to hang it!
* Pest Control: The elevated position can help deter ground-dwelling pests.
* Improved Air Circulation: Better airflow reduces the risk of fungal diseases.
* Easy Harvesting: No bending over! Just reach up and pluck those ripe tomatoes.
* Unique Aesthetic: Let’s be honest, it looks pretty cool!
Materials You’ll Need
Okay, let’s gather our supplies. Here’s what you’ll need to create your own upside-down tomato planter:
* A sturdy 5-gallon bucket: This will be our main container. Make sure it’s clean and has a strong handle.
* A utility knife or drill with a hole saw attachment: For cutting the hole in the bottom of the bucket.
* Landscape fabric or burlap: To line the bucket and prevent soil from falling out.
* Potting soil: A good quality potting mix is essential for healthy tomato growth.
* A healthy tomato seedling: Choose a variety that’s well-suited to your climate. Determinate or bush varieties tend to work best, but I’ve had success with smaller indeterminate varieties too.
* Water-absorbing polymers (optional): These help retain moisture in the soil, which is especially helpful in hot climates.
* Slow-release fertilizer (optional): To provide a steady supply of nutrients to your tomato plant.
* Gloves: To protect your hands.
* Measuring tape or ruler: For accurate measurements.
* Safety glasses: To protect your eyes when cutting.
* Heavy-duty chain or rope: For hanging the planter.
Step-by-Step Instructions: Building Your Upside-Down Tomato Planter
Alright, let’s get our hands dirty! Follow these steps to create your very own upside-down tomato planter:
1. Prepare the Bucket:
* First, clean the 5-gallon bucket thoroughly with soap and water. Rinse it well and let it dry completely.
* Next, measure the diameter of the root ball of your tomato seedling. You’ll want to cut a hole in the bottom of the bucket that’s slightly smaller than the root ball. This will help support the plant and prevent it from falling through. I usually aim for a hole that’s about 2-3 inches in diameter.
* Using your utility knife or drill with a hole saw attachment, carefully cut the hole in the center of the bottom of the bucket. If you’re using a utility knife, score the circle first and then gradually deepen the cut until you’ve gone all the way through. If you’re using a drill, make sure to wear safety glasses to protect your eyes from flying debris.
* Smooth the edges of the hole with sandpaper or a file to prevent them from damaging the tomato plant’s stem.
2. Line the Bucket:
* Cut a piece of landscape fabric or burlap that’s large enough to line the inside of the bucket. You’ll want it to extend a few inches over the top edge of the bucket.
* Place the fabric inside the bucket and press it against the sides.
* Use scissors to cut a hole in the fabric that aligns with the hole you cut in the bottom of the bucket.
* This lining will help prevent the soil from washing out of the bucket when you water it.
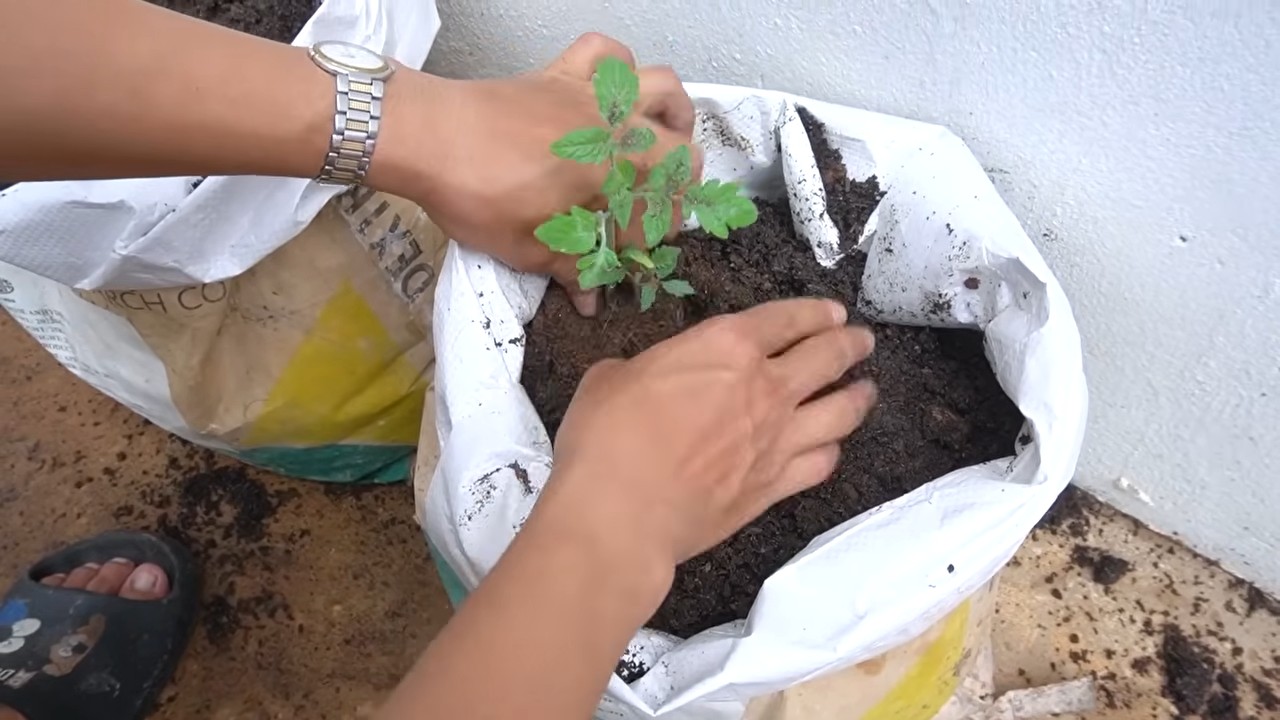
3. Plant the Tomato Seedling:
* Gently remove the tomato seedling from its container. Be careful not to damage the roots.
* Carefully feed the root ball of the tomato seedling through the hole in the bottom of the bucket. The leaves and stem of the plant should be hanging down below the bucket.
* Gently support the root ball from the inside of the bucket while you add potting soil around it.
4. Add Potting Soil:
* Slowly add potting soil to the bucket, filling it up to about an inch below the top edge.
* As you add the soil, gently pack it down around the tomato seedling’s roots. This will help to secure the plant in place and prevent air pockets from forming.
* If you’re using water-absorbing polymers, mix them into the potting soil before adding it to the bucket. Follow the instructions on the package for the correct amount to use.
* If you’re using slow-release fertilizer, sprinkle it over the top of the potting soil before adding the final layer.
5. Water Thoroughly:
* Once the bucket is filled with potting soil, water it thoroughly until water drains out of the hole in the bottom. This will help to settle the soil and ensure that the tomato seedling’s roots are well-hydrated.
6. Hang the Planter:
* Attach the heavy-duty chain or rope to the handle of the bucket. Make sure the chain or rope is strong enough to support the weight of the bucket when it’s full of soil and water.
* Find a sturdy place to hang the planter, such as a tree branch, a porch railing, or a hook in the ceiling.
* Hang the planter in a location that receives at least 6-8 hours of sunlight per day.
7. Ongoing Care:
* Water the tomato plant regularly, especially during hot, dry weather. Check the soil moisture by sticking your finger into the soil. If the soil feels dry to the touch, it’s time to water.
* Fertilize the tomato plant every few weeks with a balanced liquid fertilizer. Follow the instructions on the fertilizer package for the correct amount to use.
* Prune the tomato plant regularly to remove suckers (small shoots that grow between the main stem and the branches). This will help to improve air circulation and encourage the plant to produce more fruit.
* Monitor the tomato plant for pests and diseases. If you notice any problems, take action immediately to prevent them from spreading.
Troubleshooting Tips
Even with the best planning, sometimes things don’t go exactly as expected. Here are a few common issues and how to address them:
* Plant Falling Out: If your tomato plant starts to slip out of the hole, try adding more soil around the base of the stem from inside the bucket. You can also use a piece of cloth or foam to create a collar around the stem to provide extra support.
* Soil Drying Out Too Quickly: Upside-down planters can dry out faster than traditional planters. Make sure you’re watering regularly, and consider adding water-absorbing polymers to the soil. You can also try moving the planter to a slightly shadier location.
* Yellowing Leaves: Yellowing leaves can be a sign of overwatering, underwatering, or nutrient deficiency. Check the soil moisture and adjust your watering schedule accordingly. If the soil is consistently moist, you may be overwatering. If the soil is dry, you may be underwatering. If the leaves are yellowing all over, it could be a sign of nutrient deficiency. Try fertilizing the plant with a balanced liquid fertilizer.
* Pests: Keep an eye out for common tomato pests like aphids, whiteflies, and tomato hornworms. Treat infestations promptly with insecticidal soap or neem oil.
Choosing the Right Tomato Variety
While you can technically grow any tomato variety upside down, some are better suited for this method than others. Determinate or bush varieties tend to be more compact and manageable, making them a good choice for beginners. Smaller indeterminate varieties, like cherry tomatoes or grape tomatoes, can also work well. Avoid large, sprawling indeterminate varieties, as they may become too heavy and difficult to support.
Here are a few of my favorite tomato varieties for upside-down planters:
* Tumbler: A compact determinate variety that produces lots of small, sweet cherry tomatoes.
* Roma: A determinate variety that produces plum-shaped tomatoes that are perfect for making sauce.
* Patio: A compact determinate variety that produces medium-sized tomatoes.
* Cherry Falls: An indeterminate variety that produces cascading clusters of cherry tomatoes.
Hanging Considerations
The location where you hang your upside-down tomato planter is crucial for its success. Here are a few things to keep in mind:
* Sunlight: Tomatoes need at least 6-8
Conclusion
So, there you have it! This simple yet incredibly effective DIY tomato growing method is more than just a gardening hack; it’s a pathway to a bountiful harvest of juicy, flavorful tomatoes right in your own backyard (or balcony!). We’ve explored how to optimize your tomato plants’ growth, protect them from common diseases, and ultimately, enjoy the fruits (or rather, vegetables!) of your labor.
Why is this a must-try? Because it’s accessible, affordable, and yields impressive results. You don’t need to be a seasoned gardener with acres of land to implement this technique. Whether you’re a beginner with a small patio garden or an experienced grower looking to maximize your yield, this method is adaptable to your needs and resources. It simplifies the process, reduces the risk of common tomato plant problems, and empowers you to take control of your food source.
But the beauty of gardening lies in experimentation! Feel free to adapt this method to suit your specific environment and preferences. Consider these variations:
* Companion Planting: Enhance your tomato patch by planting basil, marigolds, or other companion plants alongside your tomatoes. These plants can deter pests, attract beneficial insects, and even improve the flavor of your tomatoes.
* Vertical Gardening: If space is limited, explore vertical gardening options like trellises or cages to support your tomato plants and maximize your growing area.
* Different Tomato Varieties: Experiment with different tomato varieties to discover your favorites. From juicy beefsteaks to sweet cherry tomatoes, the possibilities are endless!
* Soil Amendments: Tailor your soil amendments to your specific soil type. Conduct a soil test to determine any nutrient deficiencies and amend accordingly. Consider adding compost, aged manure, or other organic matter to improve soil fertility and drainage.
* Watering Techniques: While consistent watering is crucial, avoid overwatering, which can lead to root rot. Consider using a soaker hose or drip irrigation system to deliver water directly to the roots, minimizing water waste and reducing the risk of fungal diseases.
Ultimately, the best way to discover the full potential of this DIY tomato growing method is to try it yourself! We encourage you to embrace the process, get your hands dirty, and witness the magic of growing your own food.
And most importantly, we want to hear about your experience! Share your successes, challenges, and any variations you’ve tried in the comments below. Let’s create a community of tomato enthusiasts who are passionate about growing delicious, homegrown tomatoes. Your insights and experiences can inspire and help others on their gardening journey. Happy growing!
Frequently Asked Questions (FAQ)
What type of soil is best for this tomato growing method?
The ideal soil for tomatoes is well-draining, loamy soil that is rich in organic matter. Tomatoes prefer a slightly acidic soil pH, ideally between 6.0 and 6.8. Before planting, amend your soil with compost, aged manure, or other organic matter to improve its fertility, drainage, and water-holding capacity. If your soil is heavy clay, consider adding sand or perlite to improve drainage. If your soil is sandy, add organic matter to help it retain moisture and nutrients. A soil test can help you determine the specific nutrient deficiencies in your soil and guide your amendment choices.
How often should I water my tomato plants using this method?
Watering frequency depends on several factors, including the weather, soil type, and the size of your plants. Generally, tomato plants need about 1-2 inches of water per week. Water deeply and less frequently, rather than shallowly and often. This encourages deep root growth, which makes the plants more drought-tolerant. Check the soil moisture before watering. If the top inch of soil feels dry to the touch, it’s time to water. Avoid overwatering, as this can lead to root rot and other fungal diseases. During hot, dry weather, you may need to water more frequently.
How much sunlight do tomato plants need?
Tomato plants need at least 6-8 hours of direct sunlight per day to thrive. Choose a planting location that receives full sun throughout the day. If you live in a hot climate, some afternoon shade may be beneficial to prevent the plants from overheating. Insufficient sunlight can result in leggy plants, reduced fruit production, and poor fruit quality.
What are some common tomato plant diseases and how can I prevent them?
Common tomato plant diseases include early blight, late blight, Septoria leaf spot, and blossom end rot. To prevent these diseases, choose disease-resistant tomato varieties, provide good air circulation around the plants, avoid overhead watering, and mulch around the base of the plants to prevent soil from splashing onto the leaves. Remove any infected leaves promptly to prevent the disease from spreading. Blossom end rot is caused by a calcium deficiency, which can be prevented by ensuring that the soil is properly amended with calcium and that the plants are watered consistently.
When should I start fertilizing my tomato plants?
Start fertilizing your tomato plants about 2-3 weeks after transplanting them into the garden. Use a balanced fertilizer that is specifically formulated for tomatoes. Follow the instructions on the fertilizer package carefully. Avoid over-fertilizing, as this can lead to excessive foliage growth and reduced fruit production. Side-dress the plants with fertilizer every 4-6 weeks throughout the growing season.
How do I know when my tomatoes are ripe?
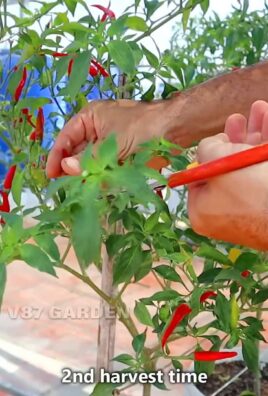
The color of the tomato will change from green to the color specified for the variety (red, yellow, orange, etc.). The tomato should also feel slightly soft to the touch. Gently twist the tomato from the vine. If it comes off easily, it’s ripe. If it requires a lot of force, it’s not quite ready.
Can I grow tomatoes in containers using this method?
Yes, you can absolutely grow tomatoes in containers using this method. Choose a large container that is at least 18 inches in diameter and depth. Use a high-quality potting mix that is well-draining. Provide adequate support for the plants, such as a stake or cage. Water and fertilize the plants regularly. Container-grown tomatoes may require more frequent watering and fertilizing than those grown in the ground.
What are some tips for dealing with pests on my tomato plants?
Common tomato plant pests include aphids, tomato hornworms, and whiteflies. Inspect your plants regularly for signs of pests. Handpick any pests that you find. Use insecticidal soap or neem oil to control infestations. Encourage beneficial insects, such as ladybugs and lacewings, to visit your garden. Companion planting with herbs like basil and marigolds can also help deter pests.
How can I improve the flavor of my homegrown tomatoes?
The flavor of your homegrown tomatoes is influenced by several factors, including the variety, soil quality, sunlight exposure, and watering practices. Choose tomato varieties that are known for their flavor. Amend your soil with compost and other organic matter to improve its fertility. Ensure that your plants receive at least 6-8 hours of direct sunlight per day. Water the plants consistently, but avoid overwatering. Allow the tomatoes to ripen fully on the vine for the best flavor.
What if I don’t have a garden? Can I still use this method?
Absolutely! This method is adaptable to various growing environments. If you don’t have a traditional garden, you can grow tomatoes in containers on a balcony, patio, or even indoors with sufficient sunlight or grow lights. The key is to provide the plants with the necessary sunlight, water, nutrients, and support. Vertical gardening techniques can also be used to maximize space in small areas.
Leave a Comment