

Self Watering Water Spinach: Imagine harvesting fresh, crisp water spinach right from your backyard, without the daily hassle of watering! Sounds like a dream, right? Well, it doesn’t have to be! This DIY guide will unlock the secrets to creating a self-watering system that will keep your water spinach thriving, even when you’re short on time or dealing with unpredictable weather.
Water spinach, also known as Ong Choy, has a rich history, deeply rooted in Asian cuisine and culture. For centuries, it’s been a staple in stir-fries, soups, and salads, prized for its delicious flavor and nutritional benefits. Traditionally, growing water spinach required consistent moisture, a challenge for many home gardeners. But what if I told you there’s a way to bypass that constant watering routine?
In today’s busy world, finding time for gardening can be tough. That’s where this self watering water spinach hack comes in! This DIY project is perfect for anyone who wants to enjoy fresh, homegrown produce but struggles with the demands of daily watering. Whether you’re a seasoned gardener or just starting out, this simple and effective method will empower you to cultivate a thriving water spinach patch with minimal effort. Get ready to ditch the watering can and embrace a more relaxed and rewarding gardening experience!
DIY Selbstbewässernder Wasserspinat-Topf: So geht’s!
Hallo liebe Gartenfreunde! Ich zeige euch heute, wie ihr ganz einfach einen selbstbewässernden Topf für euren Wasserspinat (Ong Choy) bauen könnt. Das ist super praktisch, besonders wenn ihr mal ein paar Tage nicht zu Hause seid oder einfach keine Lust habt, jeden Tag zu gießen. Wasserspinat liebt Feuchtigkeit, und mit diesem DIY-Topf wird er sich pudelwohl fühlen!
Was du brauchst:
* Zwei Plastiktöpfe (einer größer, einer kleiner – der kleinere muss in den größeren passen, mit etwas Platz dazwischen)
* Ein Stück Stoff (z.B. ein altes T-Shirt, Baumwollstoff oder Filz)
* Erde (am besten eine Mischung aus Blumenerde und Kompost)
* Wasserspinat-Samen oder Stecklinge
* Eine Schere oder ein Messer
* Optional: Kies oder Blähton zur Drainage
* Optional: Eine Bohrmaschine (wenn du keine Löcher in den Topf schneiden möchtest)
Schritt-für-Schritt Anleitung:
1. Den inneren Topf vorbereiten:
* Zuerst nehmen wir den kleineren Topf. Dieser wird unser Pflanztopf.
* Schneide oder bohre Löcher in den Boden des kleineren Topfes. Diese Löcher sind wichtig, damit das Wasser aus dem Reservoir nach oben zur Erde gelangen kann. Ich persönlich bevorzuge es, die Löcher zu schneiden, da es schneller geht. Aber sei vorsichtig, dass du dich nicht verletzt!
* Wenn du Kies oder Blähton zur Hand hast, kannst du eine dünne Schicht davon auf den Boden des inneren Topfes geben. Das verbessert die Drainage und verhindert, dass die Erde die Löcher verstopft.
2. Den Stoff-Docht vorbereiten:
* Jetzt kommt der Stoff ins Spiel. Schneide einen Streifen Stoff zu, der lang genug ist, um vom Boden des inneren Topfes bis zum Boden des äußeren Topfes zu reichen, wenn der innere Topf im äußeren steht. Der Stoff sollte auch breit genug sein, um gut Wasser aufzusaugen.
* Führe den Stoffstreifen durch eines der Löcher im Boden des inneren Topfes. Ein Teil des Stoffes sollte im Topf liegen, der Rest hängt nach unten heraus. Dieser Stoffstreifen wird unser Docht, der das Wasser nach oben zur Erde transportiert.
3. Den äußeren Topf vorbereiten:
* Der größere Topf wird unser Wasserreservoir. Hier müssen wir nichts weiter vorbereiten, außer ihn sauber zu machen, falls er schmutzig ist.
4. Den Topf zusammenbauen:
* Stelle den inneren Topf in den äußeren Topf. Achte darauf, dass der Stoffstreifen bis zum Boden des äußeren Topfes reicht.
* Fülle den äußeren Topf mit Wasser. Das Wasser sollte den Boden des inneren Topfes nicht berühren, sondern nur den Stoffstreifen.
5. Den inneren Topf befüllen:
* Jetzt füllen wir den inneren Topf mit Erde. Ich verwende am liebsten eine Mischung aus Blumenerde und Kompost, da das dem Wasserspinat alle wichtigen Nährstoffe gibt.
* Drücke die Erde leicht an.
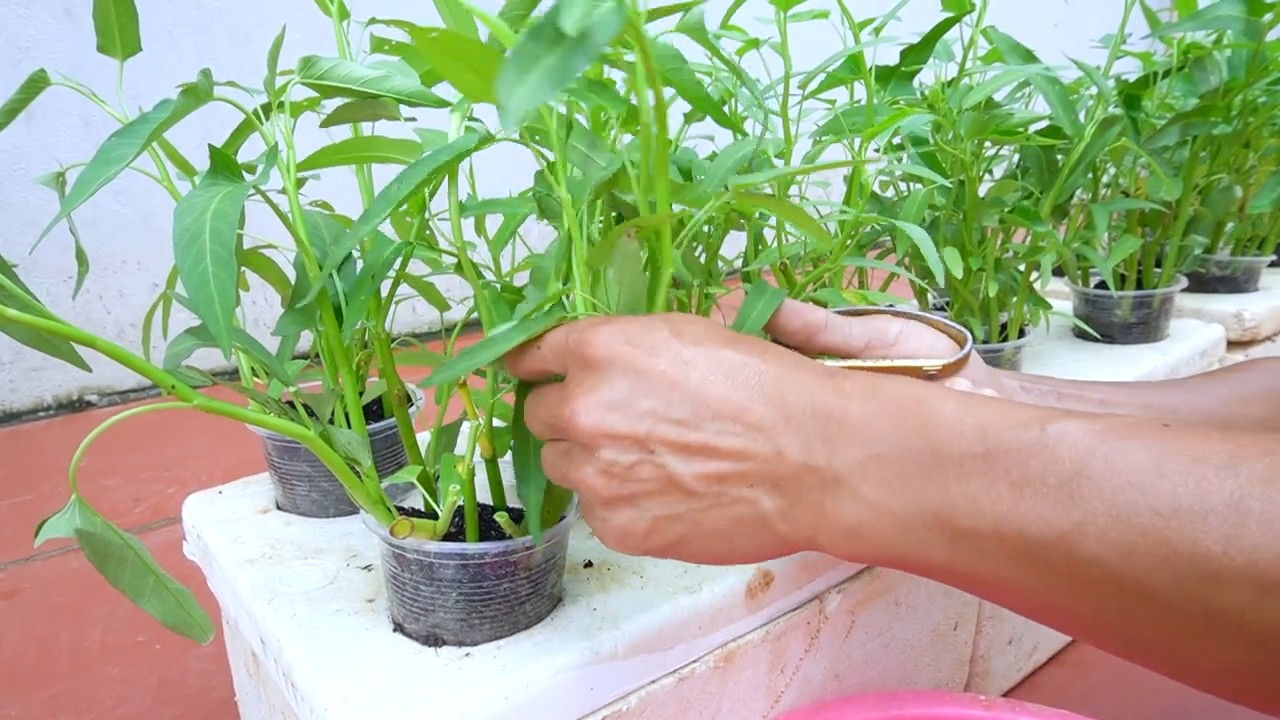
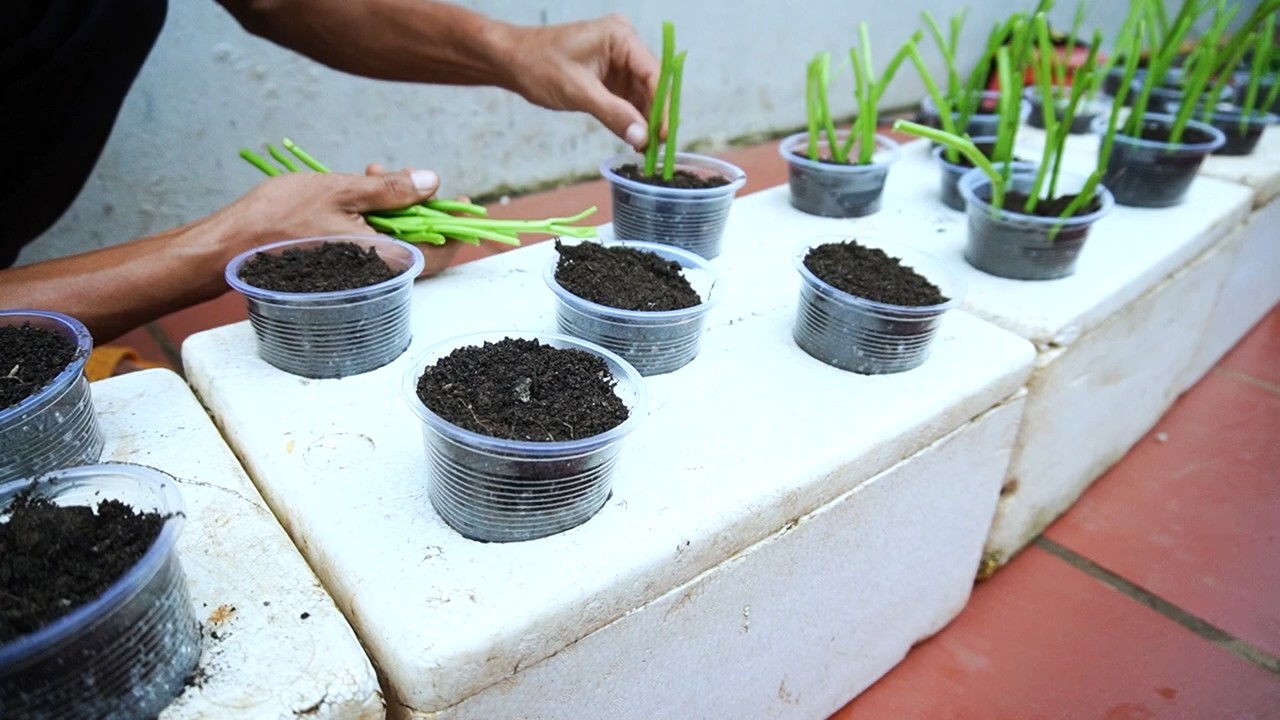
6. Den Wasserspinat pflanzen:
* Nun können wir den Wasserspinat pflanzen. Du kannst entweder Samen aussäen oder Stecklinge verwenden.
* Wenn du Samen verwendest, säe sie gemäß den Anweisungen auf der Samenpackung aus.
* Wenn du Stecklinge verwendest, stecke sie einfach in die Erde. Achte darauf, dass sie gut Kontakt zur Erde haben.
7. Angießen und pflegen:
* Gieße die Erde im inneren Topf einmal gründlich an. Danach musst du nur noch darauf achten, dass immer genügend Wasser im äußeren Topf ist. Der Stoff-Docht sorgt dafür, dass die Erde immer feucht genug ist.
* Stelle den Topf an einen sonnigen Standort. Wasserspinat liebt die Sonne!
* Dünge den Wasserspinat regelmäßig mit einem Flüssigdünger.
Zusätzliche Tipps und Tricks:
* Die richtige Stoffwahl: Baumwolle und Filz eignen sich am besten als Dochtmaterial, da sie gut Wasser aufsaugen und speichern können. Vermeide synthetische Stoffe, da diese das Wasser nicht so gut transportieren.
* Die Größe der Löcher: Die Löcher im inneren Topf sollten nicht zu groß sein, damit die Erde nicht herausfällt. Kleine Löcher reichen völlig aus.
* Die Wassermenge: Achte darauf, dass immer genügend Wasser im äußeren Topf ist. Der Wasserspiegel sollte jedoch nicht so hoch sein, dass die Erde im inneren Topf direkt im Wasser steht.
* Die richtige Erde: Verwende eine hochwertige Blumenerde, die gut Wasser speichert. Eine Mischung aus Blumenerde und Kompost ist ideal.
* Der Standort: Wasserspinat braucht viel Sonne. Stelle den Topf an einen sonnigen Standort, am besten auf einen Balkon oder eine Terrasse.
* Die Düngung: Dünge den Wasserspinat regelmäßig mit einem Flüssigdünger, um ein gesundes Wachstum zu fördern.
* Schutz vor Schädlingen: Kontrolliere den Wasserspinat regelmäßig auf Schädlinge. Bei Bedarf kannst du ihn mit einem biologischen Schädlingsbekämpfungsmittel behandeln.
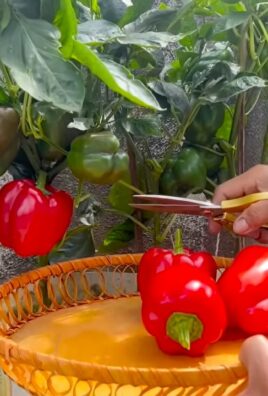
* Ernte: Du kannst den Wasserspinat ernten, sobald er eine Höhe von etwa 20-30 cm erreicht hat. Schneide die Stängel einfach ab. Der Wasserspinat wird immer wieder nachwachsen.
* Winterfest machen: Wasserspinat ist nicht winterhart. Wenn du ihn überwintern möchtest, musst du ihn ins Haus holen und an einen hellen und kühlen Ort stellen.
* Alternative Materialien: Anstelle von Plastiktöpfen kannst du auch andere wasserdichte Behälter verwenden, z.B. Eimer oder alte Farbeimer. Achte nur darauf, dass sie sauber sind.
* Mehrere Dochte: Bei größeren Töpfen kannst du auch mehrere Stoff-Dochte verwenden, um eine gleichmäßige Bewässerung zu gewährleisten.
* Drainage verbessern: Wenn du bemerkst, dass die Erde im inneren Topf zu nass ist, kannst du eine zusätzliche Schicht Kies oder Blähton auf den Boden des inneren Topfes geben.
* Algenbildung vermeiden: Um Algenbildung im Wasserreservoir zu vermeiden, kannst du etwas Holzkohle in das Wasser geben.
* Regelmäßige Kontrolle: Kontrolliere den Topf regelmäßig auf Schädlinge, Krankheiten und Algenbildung.
* Anpassung an die Umgebung: Beobachte deinen Wasserspinat genau und passe die Bewässerung und Düngung an die jeweiligen Bedingungen an.
H3: Probleme und Lösungen
Manchmal gibt es natürlich auch Probleme. Hier sind ein paar häufige Probleme und wie du sie lösen kannst:
* Problem: Die Erde ist zu trocken.
* Lösung: Überprüfe, ob der Stoff-Docht richtig funktioniert. Vielleicht ist er verstopft oder nicht lang genug. Fülle mehr Wasser in den äußeren Topf.
* Problem: Die Erde ist zu nass.
* Lösung: Reduziere die Wassermenge im äußeren Topf. Sorge für eine bessere Drainage im inneren Topf.
* Problem: Der Wasserspinat wächst nicht.
* Lösung: Stelle sicher, dass der Wasserspinat genügend Sonne bekommt. Dünge ihn regelmäßig. Überprüfe, ob er von Schädlingen befallen ist.
* Problem: Algenbildung im Wasserreservoir.
* Lösung: Reinige das Wasserreservoir regelmäßig. Gib etwas Holzkohle ins Wasser. Stelle den Topf an einen schattigeren Ort.
H3: Warum dieser DIY-Topf so toll ist
Dieser selbstbewässernde Topf ist nicht nur super praktisch, sondern auch umweltfreundlich. Du sparst Wasser, weil es nicht so schnell verdunstet, und du musst nicht so oft gießen. Außerdem kannst du alte Plastiktöpfe wiederverwenden und so Müll vermeiden. Und das Beste: Du hast immer frischen Wasserspinat zur Hand!
Ich hoffe, diese Anleitung hilft dir dabei, deinen eigenen selbstbewässernden Wasserspinat-Topf zu bauen. Viel Spaß beim Gärtnern! Und denk dran: Gärtnern ist nicht nur ein Hobby,
Conclusion
So, there you have it! Creating your own self-watering system for water spinach isn’t just a fun project; it’s a game-changer for anyone who loves fresh, homegrown greens but struggles with consistent watering. This simple DIY trick addresses the core need of water spinach – constant moisture – without demanding constant attention from you. Think of it as setting up a mini-ecosystem perfectly tailored to your leafy friend’s needs.
Why is this a must-try? Because it’s incredibly effective, surprisingly easy, and remarkably affordable. You’re essentially transforming readily available materials into a sustainable and efficient watering solution. No more worrying about underwatering leading to wilted, bitter leaves, or overwatering causing root rot. This self-watering system provides the perfect balance, ensuring your water spinach thrives.
Beyond the convenience, this method promotes healthier plant growth. The consistent moisture encourages strong root development, leading to more robust and productive plants. You’ll be amazed at the difference in the size, texture, and flavor of your homegrown water spinach compared to store-bought varieties. Plus, you’re reducing water waste by delivering moisture directly to the roots, minimizing evaporation and runoff.
Looking for variations? Consider experimenting with different container sizes to accommodate varying amounts of water spinach. For larger harvests, a larger container with a more substantial water reservoir will be ideal. You can also explore different wicking materials. While cotton rope is a reliable choice, you might try felt strips or even strips of old t-shirts. The key is to find a material that effectively draws water from the reservoir to the soil.
Another variation involves enriching the water reservoir with a diluted liquid fertilizer. This provides a slow-release nutrient boost to your water spinach, further enhancing its growth and productivity. Be sure to use a fertilizer specifically formulated for leafy greens and follow the instructions carefully to avoid over-fertilizing.
Don’t be afraid to get creative with the aesthetics of your self-watering system. Decorate the outer container with paint, mosaic tiles, or even repurposed materials to match your garden’s style. This is a chance to personalize your project and make it a visually appealing addition to your growing space.
We wholeheartedly encourage you to try this DIY self-watering trick for your water spinach. It’s a rewarding project that yields delicious results. Once you’ve set up your system and witnessed the flourishing growth of your water spinach, we’re confident you’ll be hooked.
And most importantly, we want to hear about your experience! Share your photos, tips, and variations in the comments below. Let’s build a community of water spinach enthusiasts and learn from each other’s successes. Your insights could inspire others to embark on their own self-watering adventures. So, grab your supplies, get your hands dirty, and prepare to enjoy a bountiful harvest of fresh, delicious water spinach, all thanks to this simple yet effective DIY solution. Let us know how this **self-watering** system works for you!
Frequently Asked Questions (FAQ)
What type of container is best for the water reservoir?
The best type of container for the water reservoir is one that is food-grade, opaque, and durable. Food-grade ensures that no harmful chemicals leach into the water and affect your water spinach. Opaque containers prevent algae growth, which can clog the wicking system and contaminate the water. Durable containers, like plastic buckets or sturdy storage bins, will withstand the weight of the water and soil and resist cracking or leaking. Avoid using clear containers unless you can cover them to block out light. You can also repurpose containers you already have, such as large yogurt tubs or plastic planters, as long as they meet the above criteria. Make sure to thoroughly clean any repurposed container before using it.
How often do I need to refill the water reservoir?
The frequency of refilling the water reservoir depends on several factors, including the size of the reservoir, the size of the water spinach plants, the weather conditions, and the type of soil used. In general, you should check the water level every few days, especially during hot and sunny weather when the plants will transpire more water. A good rule of thumb is to refill the reservoir when it is about one-third empty. You can also use a water level indicator, such as a clear tube attached to the reservoir, to easily monitor the water level. Over time, you’ll get a better sense of how quickly your water spinach consumes water and can adjust your refilling schedule accordingly.
What type of soil should I use for self-watering water spinach?
The ideal soil for self-watering water spinach is a well-draining potting mix that retains moisture. A mix of peat moss, perlite, and vermiculite is a good option. The peat moss helps retain moisture, while the perlite and vermiculite improve drainage and aeration. Avoid using heavy garden soil, as it can become compacted and waterlogged in a self-watering system, leading to root rot. You can also add some compost to the potting mix to provide additional nutrients to the plants. When filling the container, be sure to leave some space at the top for watering and to prevent the soil from overflowing.
Can I use this self-watering system for other plants besides water spinach?
Yes, this self-watering system can be adapted for other plants that require consistent moisture, such as herbs like basil and mint, leafy greens like lettuce and spinach, and even some flowering plants like impatiens and petunias. However, it’s important to consider the specific needs of each plant. Some plants prefer drier conditions and may not thrive in a constantly moist environment. Adjust the wicking system and the type of soil used to suit the needs of the specific plant. For example, plants that prefer drier conditions may benefit from a less absorbent wicking material or a soil mix with better drainage.
How do I prevent algae growth in the water reservoir?
Algae growth in the water reservoir can be prevented by using an opaque container that blocks out light. Algae need light to grow, so preventing light from reaching the water will inhibit their growth. You can also add a small amount of hydrogen peroxide to the water reservoir to kill any algae that may be present. Use a diluted solution of 3% hydrogen peroxide, about one tablespoon per gallon of water. Another option is to add a copper penny to the water reservoir. Copper is a natural algaecide and will help prevent algae growth. Be sure to use a penny minted before 1982, as these pennies contain a higher percentage of copper. Regularly cleaning the water reservoir can also help prevent algae buildup.
What if the wicking system isn’t working properly?
If the wicking system isn’t working properly, the soil may not be receiving enough water, and the plants may start to wilt. First, check to make sure that the wicking material is making good contact with both the water reservoir and the soil. The wicking material should be submerged in the water and buried deep enough in the soil to effectively draw water up. If the wicking material is dry, try soaking it in water before placing it in the system. This will help it to absorb water more readily. You can also try using a thicker wicking material or adding more wicks to increase the water flow. If the soil is compacted, it may be preventing the water from wicking properly. Loosen the soil around the wicks to improve water absorption. Finally, make sure that the water reservoir is not empty.
How do I fertilize my water spinach in a self-watering system?
Fertilizing water spinach in a self-watering system is best done by adding a diluted liquid fertilizer to the water reservoir. This allows the plants to absorb nutrients gradually as they draw water from the reservoir. Use a fertilizer specifically formulated for leafy greens and follow the instructions carefully to avoid over-fertilizing. A balanced fertilizer with a higher nitrogen content is ideal for promoting leafy growth. Avoid using granular fertilizers, as they can clog the wicking system and may not dissolve properly in the water. You can also add compost tea to the water reservoir for a natural source of nutrients. Be sure to monitor the plants for any signs of nutrient deficiencies, such as yellowing leaves, and adjust the fertilizer accordingly.
Can I move the self-watering system indoors during cold weather?
Yes, you can definitely move the self-watering system indoors during cold weather to protect your water spinach from frost and freezing temperatures. Water spinach is a tropical plant and prefers warm temperatures. When moving the system indoors, make sure to place it in a location that receives plenty of sunlight, such as near a south-facing window. If you don’t have enough natural light, you can supplement with grow lights. Also, be aware that indoor environments tend to be drier than outdoor environments, so you may need to refill the water reservoir more frequently. Monitor the plants closely for any signs of stress, such as wilting or leaf drop, and adjust the watering and lighting accordingly.
Leave a Comment