

Growing Sweet Melons Easily is a dream for many home gardeners, and I’m here to tell you it’s absolutely achievable! Imagine biting into a juicy, sun-ripened melon you nurtured from a tiny seed – the taste is simply unmatched. But let’s be honest, the path to melon mastery can sometimes feel like navigating a thorny vine. That’s where these DIY tricks and hacks come in!
Melons have a rich history, dating back to ancient Egypt and beyond, where they were prized for their sweetness and refreshing qualities. Cultivating them was a sign of prosperity and skill. While we may not be pharaohs, we can certainly channel their gardening prowess with a few clever techniques.
Why do you need these DIY tricks? Because let’s face it, store-bought melons often lack that intense sweetness and flavor we crave. Plus, growing sweet melons easily yourself allows you to control everything from the soil quality to the watering schedule, ensuring a healthy and delicious harvest. These hacks will help you overcome common challenges like pests, diseases, and inconsistent ripening, so you can enjoy the fruits (or rather, melons!) of your labor. Get ready to transform your garden into a melon oasis!
Süße Melonen einfach selbst anbauen: Mein DIY-Guide für Anfänger
Hallo liebe Gartenfreunde! Ich liebe den Geschmack von sonnengereiften, saftigen Melonen. Und was gibt es Schöneres, als diese Köstlichkeit selbst im eigenen Garten anzubauen? Viele denken, Melonenanbau sei kompliziert, aber ich verspreche euch, mit ein paar Tricks und Kniffen ist es gar nicht so schwer. In diesem Artikel zeige ich euch, wie ihr ganz einfach eure eigenen süßen Melonen ziehen könnt – auch wenn ihr absolute Gartenneulinge seid!
Was ihr für den Melonenanbau braucht
Bevor wir loslegen, hier eine Liste mit allem, was ihr benötigt:
* Melonensamen: Wählt eine Sorte, die für euer Klima geeignet ist. Wassermelonen, Honigmelonen oder Cantaloupe – die Auswahl ist riesig! Achtet auf die Angaben zur Reifezeit.
* Anzuchttöpfe oder -platten: Für die Voranzucht im Haus.
* Anzuchterde: Spezielle Erde für die Anzucht, die nährstoffarm und locker ist.
* Pflanzerde: Nährstoffreiche Erde für das Beet oder den Kübel.
* Kompost oder organischer Dünger: Zur Bodenverbesserung und Nährstoffversorgung.
* Gießkanne oder Gartenschlauch: Zum Bewässern.
* Mulchmaterial: Stroh, Holzhackschnitzel oder Folie, um den Boden warm zu halten und Unkraut zu unterdrücken.
* Rankhilfe (optional): Für kletternde Melonensorten oder um die Früchte vom Boden fernzuhalten.
* Gartenvlies (optional): Zum Schutz vor Kälte und Schädlingen in der Anzuchtphase.
* Geduld und Liebe: Das Wichtigste überhaupt!
Die Vorbereitung: So gelingt die Anzucht
Melonen brauchen viel Wärme, um zu keimen und zu wachsen. Deshalb ist die Voranzucht im Haus oder Gewächshaus ideal.
1. Aussaat: Füllt eure Anzuchttöpfe mit Anzuchterde. Legt pro Topf 1-2 Melonensamen etwa 2 cm tief in die Erde. Bedeckt die Samen leicht mit Erde und gießt sie vorsichtig an.
2. Standort: Stellt die Anzuchttöpfe an einen warmen, hellen Ort. Eine Fensterbank über der Heizung oder ein beheiztes Gewächshaus sind perfekt. Die ideale Keimtemperatur liegt bei 25-30°C.
3. Feuchtigkeit: Haltet die Erde gleichmäßig feucht, aber nicht nass. Am besten sprüht ihr die Erde regelmäßig mit einer Sprühflasche an.
4. Keimung: Nach etwa 1-2 Wochen sollten die ersten Keimlinge zu sehen sein. Sobald die Pflanzen 2-3 Blätter haben, könnt ihr sie in größere Töpfe umpflanzen.
5. Abhärten: Bevor ihr die Melonenpflanzen ins Freie setzt, solltet ihr sie langsam an die Bedingungen draußen gewöhnen. Stellt sie tagsüber für ein paar Stunden ins Freie und holt sie abends wieder rein.
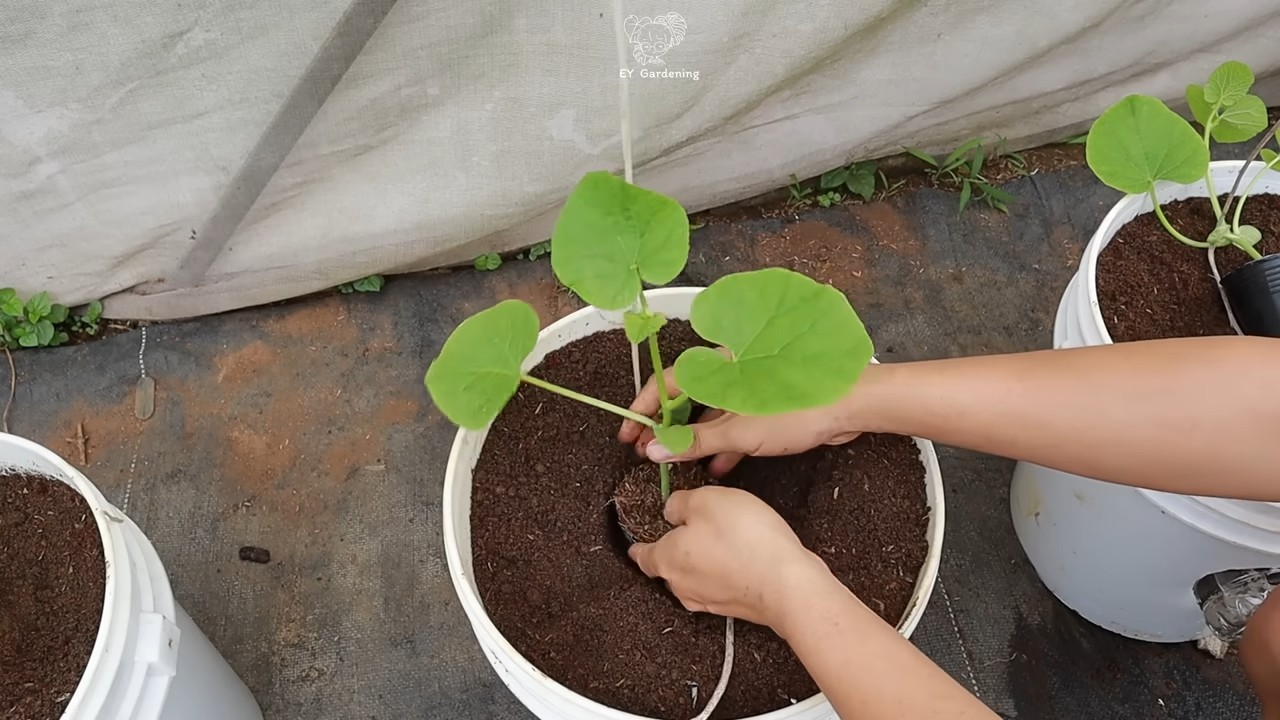
Das Auspflanzen: Der Umzug ins Beet oder den Kübel
Sobald keine Frostgefahr mehr besteht (in der Regel Mitte Mai nach den Eisheiligen), können die Melonenpflanzen ins Freie.
1. Standortwahl: Melonen lieben die Sonne! Wählt einen sonnigen, warmen und windgeschützten Standort. Der Boden sollte locker, durchlässig und nährstoffreich sein.
2. Bodenvorbereitung: Lockert den Boden gründlich auf und entfernt Unkraut. Mischt Kompost oder organischen Dünger unter die Erde, um sie mit Nährstoffen anzureichern.
3. Pflanzabstand: Melonen brauchen Platz! Plant etwa 80-100 cm Abstand zwischen den Pflanzen und 150-200 cm zwischen den Reihen.
4. Pflanzen: Grabt Pflanzlöcher, die etwas größer sind als die Wurzelballen der Melonenpflanzen. Setzt die Pflanzen vorsichtig ein und füllt die Löcher mit Erde auf. Drückt die Erde leicht an und gießt die Pflanzen gründlich an.
5. Mulchen: Bedeckt den Boden um die Melonenpflanzen mit Mulchmaterial. Das hält den Boden warm, speichert Feuchtigkeit und unterdrückt Unkraut.
Die Pflege: So bleiben eure Melonen gesund und glücklich
Melonen sind relativ pflegeleicht, aber ein paar Dinge solltet ihr beachten, um eine reiche Ernte zu erzielen.
1. Bewässerung: Melonen brauchen viel Wasser, besonders während der Fruchtbildung. Gießt regelmäßig und gründlich, aber vermeidet Staunässe. Am besten gießt ihr morgens, damit die Blätter bis zum Abend abtrocknen können.
2. Düngung: Düngt die Melonenpflanzen regelmäßig mit einem organischen Dünger oder Kompost. Das sorgt für eine gute Nährstoffversorgung und fördert das Wachstum und die Fruchtbildung.
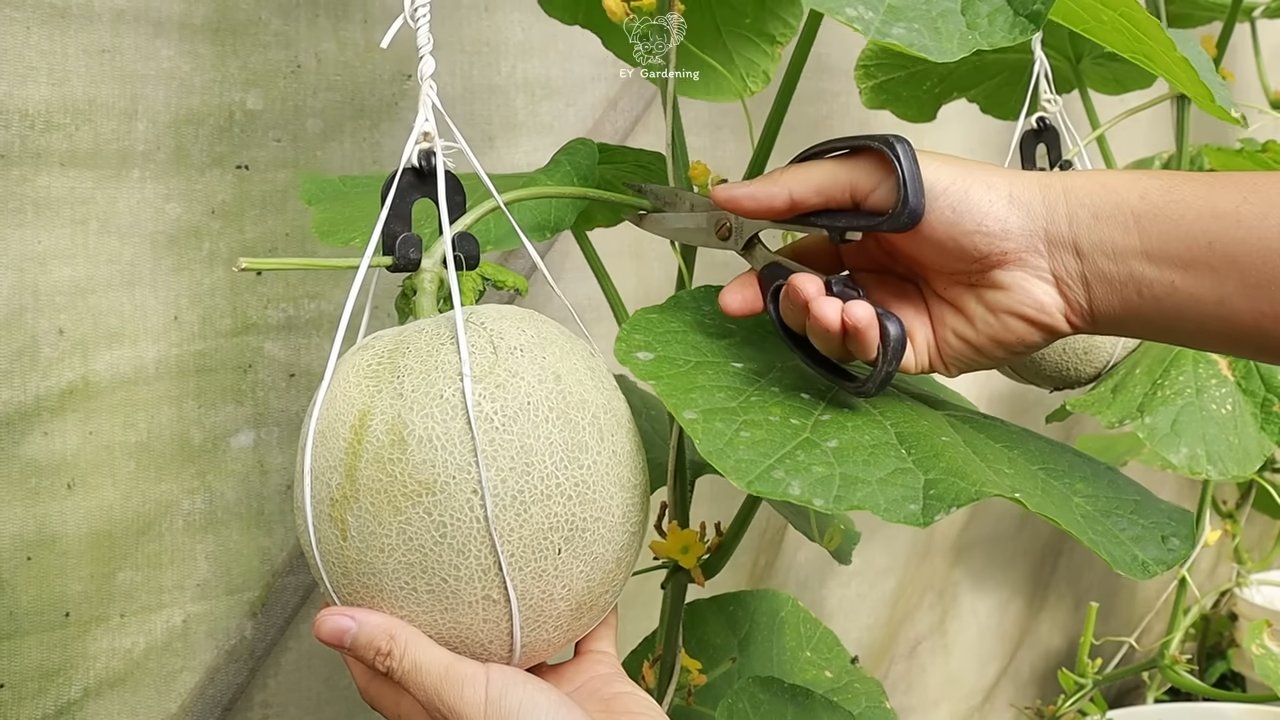
3. Rankhilfe: Wenn ihr kletternde Melonensorten anbaut oder die Früchte vom Boden fernhalten wollt, könnt ihr eine Rankhilfe verwenden. Das kann ein Zaun, ein Spalier oder ein selbstgebautes Gerüst sein.
4. Ausgeizen: Entfernt regelmäßig Seitentriebe, um die Pflanze zu entlasten und die Fruchtbildung zu fördern. Lasst pro Pflanze etwa 3-4 Früchte reifen.
5. Schutz vor Schädlingen und Krankheiten: Melonen können von verschiedenen Schädlingen und Krankheiten befallen werden. Kontrolliert die Pflanzen regelmäßig und entfernt befallene Blätter oder Früchte. Bei Bedarf könnt ihr biologische Pflanzenschutzmittel einsetzen.
Die Ernte: Der Lohn eurer Mühe
Die Erntezeit hängt von der Melonensorte und den Witterungsbedingungen ab. In der Regel sind Melonen etwa 80-100 Tage nach der Aussaat reif.
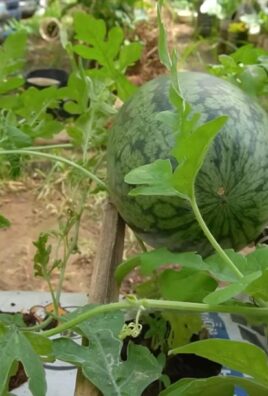
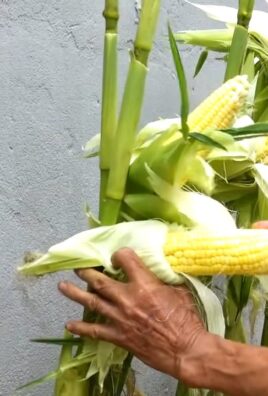
1. Reifezeichen: Es gibt verschiedene Anzeichen, an denen ihr erkennen könnt, ob eine Melone reif ist. Bei Wassermelonen klingt die Frucht hohl, wenn man darauf klopft. Bei Honigmelonen verströmt die Frucht einen süßen Duft. Bei Cantaloupe-Melonen löst sich der Stiel leicht von der Frucht.
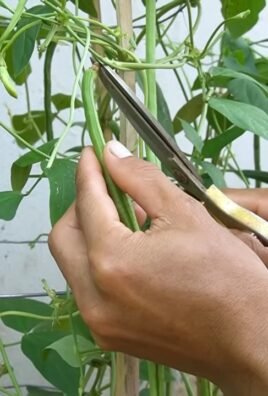
2. Ernte: Schneidet die reifen Melonen vorsichtig mit einem scharfen Messer vom Stiel ab.
3. Lagerung: Reife Melonen können im Kühlschrank einige Tage gelagert werden. Angeschnittene Melonen sollten in Frischhaltefolie eingewickelt werden.
Zusätzliche Tipps für den Melonenanbau
* Sortenwahl: Informiert euch vor der Aussaat über die verschiedenen Melonensorten und wählt eine Sorte, die für euer Klima und eure Platzverhältnisse geeignet ist.
* Bodenverbesserung: Melonen lieben einen lockeren, durchlässigen und nährstoffreichen Boden. Verbessert den Boden vor der Pflanzung mit Kompost oder organischem Dünger.
* Vliesabdeckung: In kühleren Regionen kann eine Vliesabdeckung die Melonenpflanzen vor Kälte und Schädlingen schützen.
* Bestäubung: Melonen sind auf die Bestäubung durch Bienen und andere Insekten angewiesen. Fördert die Bestäubung, indem ihr bienenfreundliche Pflanzen in der Nähe der Melonen anbaut.
* Sonnenbrand: In heißen Regionen können die Melonenfrüchte Sonnenbrand bekommen. Schützt die Früchte vor direkter Sonneneinstrahlung, indem ihr sie mit Blättern oder einem Tuch abdeckt.
Häufige Probleme und Lösungen
* Schlechte Keimung: Die Samen waren zu alt oder die Keimtemperatur war zu niedrig. Verwendet frische Samen und sorgt für eine ausreichend hohe Keimtemperatur.
* Gelbe Blätter: Die Pflanze hat zu wenig Nährstoffe oder zu viel Wasser bekommen. Düngt die Pflanze regelmäßig und achtet auf eine gute Drainage.
* Fruchtfäule: Die Früchte liegen auf feuchtem Boden und faulen. Legt die Früchte auf Stroh oder eine Rankhilfe, um sie vom Boden fernzuhalten.
* Schädlinge: Melonen können von verschiedenen Schädlingen befallen werden, wie z.B. Blattläusen, Schnecken oder Gurken
Conclusion
So, there you have it! Growing sweet melons doesn’t have to be a gamble. By implementing this simple yet effective DIY trick, you’re significantly increasing your chances of harvesting juicy, flavorful melons that will be the envy of your neighbors. We’ve demystified the process and provided you with a practical solution to common challenges like poor pollination and ground rot. This isn’t just about growing melons; it’s about cultivating a rewarding gardening experience and enjoying the fruits (or rather, melons!) of your labor.
This method, focusing on improved air circulation and support, is a game-changer. Think of it as giving your melons a little boost, a helping hand in their journey from tiny seedlings to delectable treats. The raised platform not only protects them from soilborne diseases but also allows for better sunlight exposure, crucial for developing that signature sweetness.
But don’t stop there! Feel free to experiment and adapt this DIY trick to your specific needs and preferences. For instance, if you’re growing smaller melon varieties like cantaloupe, you might consider using smaller, more compact supports. Or, if you live in a particularly windy area, you could add a small windbreak around your melon patch to provide extra protection. You could even try different materials for your supports – perhaps repurposed plastic crates or even sturdy wire mesh. The possibilities are endless!
Remember, gardening is all about learning and adapting. This DIY trick is a fantastic starting point, but the real magic happens when you personalize it to suit your unique environment and growing conditions.
We’re confident that this method will transform your melon-growing endeavors. Imagine biting into a perfectly ripe, homegrown melon, knowing that you played a crucial role in its success. That’s the satisfaction that awaits you!
So, what are you waiting for? Gather your materials, prepare your garden, and give this DIY trick a try. We’re eager to hear about your experiences! Share your photos, tips, and stories in the comments below. Let’s create a community of melon-growing enthusiasts and learn from each other’s successes (and even failures!). Let’s all learn how to **grow sweet melons** together! Happy gardening!
Frequently Asked Questions (FAQ)
What exactly is the DIY trick you’re referring to?
The DIY trick involves creating a raised platform or support system for your melons as they grow. This can be achieved using various materials like wooden pallets, plastic crates, or even a simple frame constructed from scrap wood. The key is to elevate the melons off the ground, promoting better air circulation and preventing them from sitting in damp soil. This helps to reduce the risk of fungal diseases and rot, which are common problems when growing melons directly on the ground.
Why is it so important to keep melons off the ground?
Melons are susceptible to several soilborne diseases, such as fungal infections and blossom-end rot. When melons sit directly on the ground, especially in humid conditions, they are more likely to come into contact with these pathogens. Additionally, the lack of air circulation around the fruit can create a moist environment that encourages fungal growth. By raising the melons off the ground, you’re creating a drier, more ventilated environment that is less conducive to disease. This also allows for more even ripening and prevents the underside of the melon from becoming discolored or rotting.
What kind of materials can I use to build the support?
The beauty of this DIY trick is its versatility. You can use a wide range of materials depending on what you have available and your budget. Some popular options include:
* **Wooden Pallets:** These are often free or inexpensive and provide a sturdy, ready-made platform. Just make sure they are clean and untreated with harmful chemicals.
* **Plastic Crates:** These are lightweight, durable, and easy to clean. They also provide good drainage.
* **Scrap Wood:** You can build a simple frame using scrap wood and cover it with wire mesh or burlap to create a supportive surface.
* **Stones or Bricks:** These can be used to create a small platform under each melon.
* **Wire Mesh:** Formed into a cradle and supported by stakes.
The best material will depend on the size of your melon variety and the resources you have on hand.
How high should the support be?
The height of the support doesn’t need to be excessive. A few inches off the ground is usually sufficient. The goal is simply to create enough space for air to circulate freely around the melon. Aim for a height of at least 4-6 inches. If you’re using a pallet, its existing height is usually adequate.
When should I put the melons on the support?
The best time to place the melons on the support is when they are still relatively small, about the size of a tennis ball or slightly larger. This will prevent them from developing flat spots or becoming misshapen from sitting on the ground. It also makes it easier to lift them onto the support without damaging the vine.
Will this trick work for all types of melons?
Yes, this DIY trick can be beneficial for growing most types of melons, including watermelon, cantaloupe, honeydew, and other varieties. However, the size and strength of the support may need to be adjusted depending on the size and weight of the melon. For larger watermelon varieties, you’ll need a sturdier support system than you would for smaller cantaloupes.
What if I don’t have space for a raised platform?
If you’re short on space, you can still implement this trick on a smaller scale. Instead of building a large platform, you can simply place individual melons on small supports like bricks or stones. You can also use a sling made from old pantyhose or burlap to support the melon and tie it to a trellis or stake.
How often should I water my melons?
Melons need consistent watering, especially during hot, dry weather. Water deeply and regularly, aiming to keep the soil consistently moist but not waterlogged. Avoid overhead watering, as this can increase the risk of fungal diseases. Drip irrigation is an excellent way to water melons efficiently and effectively. Reduce watering as the melons ripen to concentrate the sugars and enhance their flavor.
Are there any other tips for growing sweet melons?
Yes, here are a few additional tips for growing sweet melons:
* **Choose the right variety:** Select melon varieties that are known for their sweetness and flavor.
* **Provide plenty of sunlight:** Melons need at least 6-8 hours of direct sunlight per day.
* **Amend the soil:** Melons thrive in well-drained soil that is rich in organic matter. Amend the soil with compost or aged manure before planting.
* **Fertilize regularly:** Feed your melon plants with a balanced fertilizer throughout the growing season.
* **Protect from pests:** Keep an eye out for common melon pests like aphids, squash bugs, and cucumber beetles. Take steps to control these pests as needed.
* **Pollinate properly:** Ensure adequate pollination by attracting pollinators to your garden or hand-pollinating the flowers.
How do I know when my melon is ripe?
Determining when a melon is ripe can be tricky, but here are a few indicators:
* **The stem:** The stem should start to dry and crack near where it attaches to the melon.
* **The tendril:** The tendril closest to the melon should be brown and dry.
* **The sound:** When you thump the melon, it should sound hollow.
* **The color:** The color of the melon should change from green to a more yellowish or orange hue, depending on the variety.
* **The aroma:** A ripe melon will often have a sweet, fragrant aroma.
By paying attention to these signs, you can harvest your melons at their peak of ripeness and enjoy their full flavor potential. Remember, **grow sweet melons** by paying attention to these details!
Leave a Comment