

Growing Corn on Concrete? Sounds impossible, right? I thought so too, until I stumbled upon a revolutionary DIY trick that completely changed my perspective on urban gardening! Forget sprawling fields and acres of farmland; we’re bringing the taste of summer to the most unexpected places. This isn’t just about defying expectations; it’s about empowering you to cultivate your own food, regardless of your living situation.
For centuries, corn has been a staple crop, deeply woven into the fabric of countless cultures. From ancient civilizations in Mesoamerica, where corn held immense spiritual and nutritional significance, to its modern-day role as a global commodity, this versatile grain has nourished generations. But what if you don’t have access to traditional farmland? That’s where this incredible DIY hack comes in.
In today’s world, many of us are living in apartments, condos, or homes with limited outdoor space. The desire to connect with nature and grow our own food is stronger than ever, but the lack of a traditional garden can feel like a major obstacle. This DIY guide on growing corn on concrete will break down that barrier, providing you with a step-by-step approach to cultivating delicious, homegrown corn, even in the most unconventional environments. Imagine the satisfaction of harvesting your own sweet corn, knowing you created a thriving garden where others thought it impossible! Let’s get started and transform that concrete jungle into a personal cornfield!
Mais Anbauen auf Beton: Ein DIY-Projekt für den Urbanen Gärtner
Hey Leute! Habt ihr auch genug von langweiligen Betonflächen und dem Wunsch nach frischem, selbst angebautem Mais? Dann seid ihr hier genau richtig! Ich zeige euch, wie ihr auch ohne Garten Mais auf Beton zum Sprießen bringen könnt. Klingt verrückt? Ist es vielleicht ein bisschen, aber mit den richtigen Tricks und etwas Geduld klappt das! Lasst uns gemeinsam dieses ungewöhnliche DIY-Projekt angehen.
Was ihr braucht: Die Materialliste
Bevor wir loslegen, hier eine Liste aller Materialien, die ihr für euer Beton-Mais-Projekt benötigt:
* Große Pflanzgefäße: Wählt stabile, große Behälter mit Abflusslöchern. Je größer, desto besser, da Maispflanzen viel Platz für ihre Wurzeln brauchen. Denkt an Kübel, Mörtelwannen oder sogar recycelte Fässer.
* Hochwertige Pflanzerde: Mais ist ein Starkzehrer, also braucht er nährstoffreiche Erde. Mischt am besten Gartenerde mit Kompost und etwas Sand für eine gute Drainage.
* Maiskörner: Besorgt euch Saatmais. Achtet darauf, dass es sich um eine Sorte handelt, die für eure Klimazone geeignet ist.
* Dünger: Ein Langzeitdünger oder organischer Dünger wie Hornspäne ist ideal, um den Maispflanzen während des Wachstums ausreichend Nährstoffe zuzuführen.
* Mulch: Stroh, Holzhackschnitzel oder Rasenschnitt helfen, die Feuchtigkeit im Boden zu halten und Unkraut zu unterdrücken.
* Gießkanne oder Gartenschlauch: Für die regelmäßige Bewässerung.
* Pflanzschaufel: Zum Befüllen der Pflanzgefäße und zum Einsetzen der Maiskörner.
* Evtl. Rankhilfe: Je nach Maissorte kann eine Rankhilfe sinnvoll sein, um die Pflanzen zu stützen.
* Drainagematerial: Kies oder Tonscherben für den Boden der Pflanzgefäße, um Staunässe zu vermeiden.
Schritt-für-Schritt-Anleitung: So geht’s!
Jetzt geht’s ans Eingemachte! Folgt diesen Schritten, um euren Mais auf Beton zum Wachsen zu bringen:
1. Vorbereitung der Pflanzgefäße:
* Reinigt eure Pflanzgefäße gründlich.
* Legt eine Schicht Drainagematerial (Kies oder Tonscherben) auf den Boden der Gefäße. Das verhindert Staunässe, die Mais gar nicht mag.
* Füllt die Gefäße mit eurer vorbereiteten Pflanzerde. Lasst etwa 5-10 cm Platz bis zum Rand.
2. Aussaat der Maiskörner:
* Macht mit dem Finger oder einer kleinen Schaufel kleine Löcher in die Erde (ca. 3-5 cm tief).
* Legt in jedes Loch 2-3 Maiskörner. Das erhöht die Wahrscheinlichkeit, dass mindestens ein Korn keimt.
* Bedeckt die Löcher mit Erde und drückt sie leicht an.
3. Bewässerung und Standort:
* Gießt die Erde vorsichtig an, sodass sie gut durchfeuchtet ist, aber nicht durchnässt.
* Stellt die Pflanzgefäße an einen sonnigen Standort. Mais braucht mindestens 6-8 Stunden Sonne pro Tag, um optimal zu wachsen.
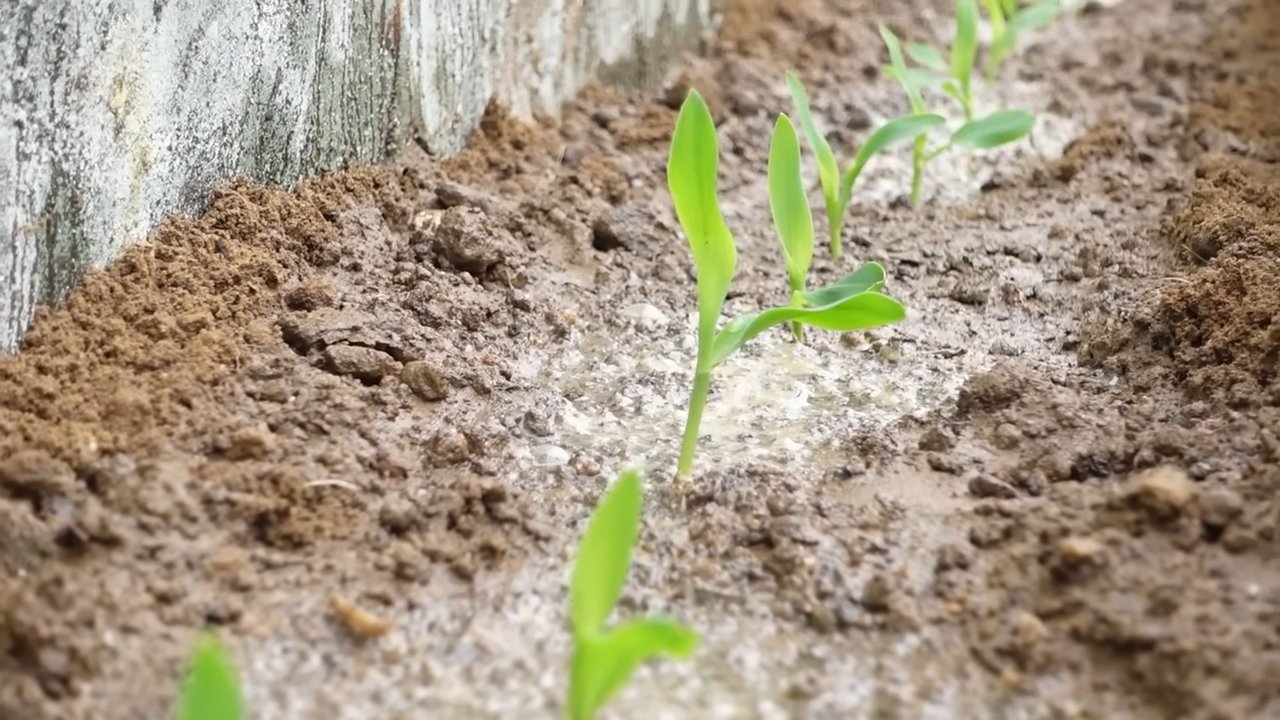
4. Pflege während der Keimung:
* Haltet die Erde feucht, aber vermeidet Staunässe.
* Nach etwa 7-14 Tagen sollten die ersten Keimlinge zu sehen sein.
* Wenn mehrere Keimlinge pro Loch aufgegangen sind, entfernt ihr die schwächsten, sodass nur der stärkste übrig bleibt.
5. Düngung:
* Sobald die Maispflanzen etwa 15-20 cm hoch sind, könnt ihr mit dem Düngen beginnen.
* Verwendet einen Langzeitdünger oder düngt regelmäßig mit einem organischen Dünger. Achtet auf die Dosierungsanleitung auf der Verpackung.
6. Bewässerung und Mulchen:
* Gießt die Maispflanzen regelmäßig, besonders an heißen Tagen. Die Erde sollte immer leicht feucht sein.
* Bringt eine Schicht Mulch um die Pflanzen herum auf. Das hält die Feuchtigkeit im Boden, unterdrückt Unkraut und schützt die Wurzeln vor extremen Temperaturen.
7. Rankhilfe (optional):
* Je nach Maissorte kann es sinnvoll sein, eine Rankhilfe anzubringen, um die Pflanzen zu stützen, besonders wenn sie hoch wachsen und Früchte tragen.
8. Schutz vor Schädlingen:
* Beobachtet eure Maispflanzen regelmäßig auf Schädlinge wie Schnecken oder Blattläuse.
* Bei Bedarf könnt ihr natürliche Schädlingsbekämpfungsmittel einsetzen.
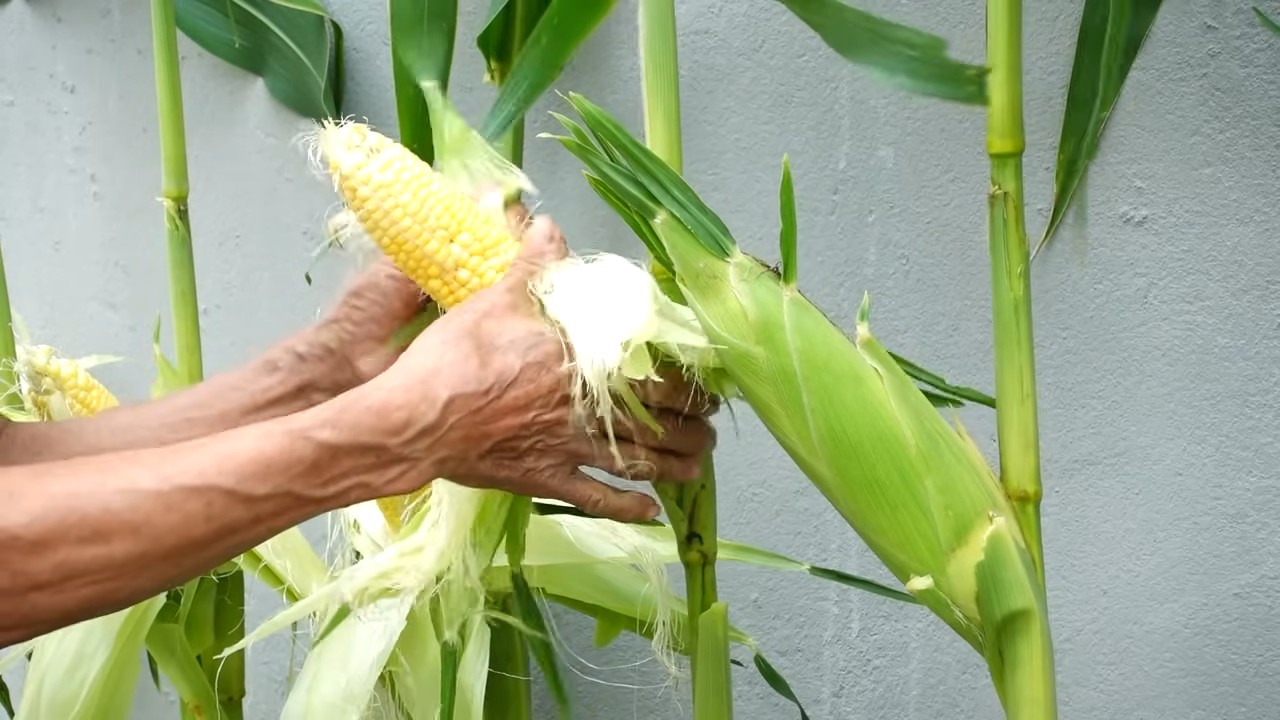
9. Ernte:
* Die Erntezeit hängt von der Maissorte ab. In der Regel sind die Maiskolben reif, wenn die Seidenfäden braun und trocken sind und die Kolben sich prall anfühlen.
* Brecht die Kolben vorsichtig von der Pflanze ab.
Zusätzliche Tipps und Tricks für den erfolgreichen Maisanbau auf Beton
* Die richtige Maissorte wählen: Nicht jede Maissorte ist für den Anbau in Pflanzgefäßen geeignet. Wählt Sorten, die nicht zu hoch wachsen und eine gute Standfestigkeit haben. Es gibt auch spezielle Sorten für den Anbau in Töpfen.
* Bestäubung: Mais ist windbestäubt. Wenn ihr nur wenige Pflanzen habt, kann es sinnvoll sein, die Bestäubung manuell zu unterstützen. Schüttelt dazu die Pflanzen leicht, wenn die männlichen Blüten (die Fahnen oben an der Pflanze) Pollen abgeben.
* Nachbarn: Mais ist ein geselliger Geselle und profitiert von der Nähe zu anderen Pflanzen. Gute Nachbarn sind zum Beispiel Bohnen, Kürbis oder Sonnenblumen.
* Bodenverbesserung: Mischt eurer Pflanzerde regelmäßig Kompost oder andere organische Materialien bei, um die Nährstoffversorgung zu verbessern.
* Geduld: Mais braucht Zeit zum Wachsen. Seid geduldig und gebt euren Pflanzen die nötige Pflege, dann werdet ihr mit einer reichen Ernte belohnt.
* Windschutz: Auf dem Balkon oder der Terrasse kann starker Wind ein Problem sein. Stellt die Pflanzgefäße an einen windgeschützten Ort oder verwendet eine Windschutzwand.
* Bewässerungssystem: Wenn ihr viel unterwegs seid, kann ein automatisches Bewässerungssystem eine große Hilfe sein.
* Schneckenabwehr: Schnecken lieben junge Maispflanzen. Schützt eure Pflanzen mit Schneckenkorn oder anderen natürlichen Abwehrmethoden.
* Sonnenstand beachten: Beobachtet den Sonnenstand auf eurem Balkon oder eurer Terrasse, um sicherzustellen, dass eure Maispflanzen ausreichend Sonne bekommen.
* Regelmäßige Kontrolle: Kontrolliert eure Pflanzen regelmäßig auf Schädlinge, Krankheiten und Nährstoffmangel. Je früher ihr Probleme erkennt, desto besser könnt ihr sie beheben.
Häufige Probleme und Lösungen
Auch beim Maisanbau auf Beton können Probleme auftreten. Hier sind einige häufige Probleme und wie ihr sie lösen könnt:
* Gelbe Blätter: Gelbe Blätter können ein Zeichen für Nährstoffmangel sein. Düngt eure Pflanzen mit einem geeigneten Dünger.
* Schädlinge: Bekämpft Schädlinge mit natürlichen Schädlingsbekämpfungsmitteln oder Insektiziden.
* Krankheiten: Entfernt befallene Blätter oder Pflanzen, um die Ausbreitung von Krankheiten zu verhindern.
* Staunässe: Sorgt für eine gute Drainage, um Staunässe zu vermeiden.
* Windbruch: Stützt eure Pflanzen mit Rankhilfen, um Windbruch zu verhindern.
* Schlechte Bestäubung: Unterstützt die Bestäubung manuell, indem ihr die Pflanzen schüttelt.
Die Ernte: Der Lohn eurer Mühe
Nach all der Arbeit und Pflege ist es endlich soweit: Die Ernte steht vor der Tür! Die Erntezeit hängt von der Maissorte ab, aber in der Regel sind die Maiskolben reif, wenn die Seidenfäden braun und trocken sind und die Kolben sich prall anfühlen.
Conclusion
So, there you have it! Growing corn on concrete might sound like an impossible feat, a gardening myth whispered only among the most daring of urban farmers. But as we’ve explored, with the right techniques and a little ingenuity, you can absolutely cultivate a thriving corn patch even without traditional soil. This DIY trick isn’t just about defying expectations; it’s about unlocking the potential of unused spaces, embracing sustainable practices, and enjoying the unparalleled satisfaction of harvesting your own homegrown corn, regardless of your environment.
Why is this a must-try? Because it opens up a world of possibilities for anyone with limited space or challenging soil conditions. Imagine transforming a barren patio, a neglected balcony, or even a rooftop into a vibrant, productive garden. This method allows you to control the growing environment, minimizing pests and diseases while maximizing yield. Plus, it’s a fantastic conversation starter!
But the beauty of this approach lies in its adaptability. Feel free to experiment with different container sizes to suit your space and desired corn variety. Consider adding companion plants like beans or squash to your containers to create a miniature Three Sisters garden. You can also adjust the nutrient solution based on the specific needs of your corn, monitoring its growth and making adjustments as necessary. For instance, if you notice yellowing leaves, it might indicate a nitrogen deficiency, which can be addressed with a nitrogen-rich fertilizer.
Don’t be afraid to get creative with your container design. Upcycle old buckets, repurpose plastic bins, or even build your own custom planters. Just ensure they have adequate drainage to prevent waterlogging. And remember, proper sunlight is crucial for corn growth, so choose a location that receives at least six to eight hours of direct sunlight per day.
We understand that venturing into uncharted gardening territory can be daunting. You might encounter challenges along the way, but don’t let that discourage you. Every gardening experience is a learning opportunity. Embrace the process, observe your plants closely, and adjust your approach as needed.
Ultimately, growing corn on concrete is more than just a gardening technique; it’s a testament to the power of human innovation and our ability to adapt to our surroundings. It’s a chance to connect with nature, even in the most urban of environments, and to experience the joy of nurturing life from seed to harvest.
We wholeheartedly encourage you to give this DIY trick a try. We are confident that you will be amazed by the results. And most importantly, we want to hear about your experiences! Share your successes, your challenges, and your creative adaptations with us. Post photos of your concrete corn patches, share your tips and tricks, and let’s build a community of urban corn growers who are pushing the boundaries of what’s possible. Let’s prove that with a little ingenuity, even the most unlikely spaces can become thriving gardens. So, grab your seeds, your containers, and your determination, and let’s get growing! Remember, successful **growing corn on concrete** is within your reach.
Frequently Asked Questions (FAQ)
What type of corn is best suited for growing on concrete?
The best corn varieties for container gardening, and therefore growing on concrete, are typically shorter, more compact varieties. Look for terms like “dwarf,” “mini,” or “early maturing” in the seed description. These varieties are less likely to topple over in containers and will mature more quickly, making them ideal for smaller spaces. Some popular choices include:
* ‘On Deck’ Corn: A very early maturing variety that produces small ears.
* ‘Golden Bantam’ Corn: A classic sweet corn variety that can be grown in containers.
* ‘Trinity’ Corn: A multi-colored ornamental corn that adds visual appeal to your garden.
* ‘Blue Jade’ Corn: A unique variety with blue kernels that can be used for flour or cornmeal.
Consider your local climate and growing season when selecting a variety. Choose varieties that are known to perform well in your region.
What size container do I need for growing corn on concrete?
Corn plants need ample space for their roots to develop. A minimum container size of 12 inches in diameter and 12 inches deep is recommended for dwarf varieties. Larger varieties may require containers that are 18 inches or more in diameter and depth. The larger the container, the more stable the plant will be and the more nutrients and water it will have access to.
Ensure that your containers have adequate drainage holes to prevent waterlogging, which can lead to root rot. You can also add a layer of gravel or pebbles to the bottom of the container to improve drainage.
What type of growing medium should I use?
Avoid using garden soil in containers, as it can become compacted and poorly drained. Instead, opt for a high-quality potting mix that is specifically formulated for container gardening. A good potting mix will be lightweight, well-draining, and rich in organic matter.
You can also create your own potting mix by combining equal parts of peat moss, perlite, and vermiculite. Adding compost to your potting mix will provide additional nutrients and improve drainage.
How often should I water my corn plants growing on concrete?
Corn plants are heavy drinkers, especially during hot weather. Water your plants deeply and regularly, ensuring that the soil is consistently moist but not waterlogged. Check the soil moisture level daily by sticking your finger into the soil. If the top inch of soil feels dry, it’s time to water.
The frequency of watering will depend on factors such as the weather, the size of the container, and the type of potting mix you are using. In general, you may need to water your corn plants daily or even twice a day during hot, dry periods.
What type of fertilizer should I use for growing corn on concrete?
Corn plants are heavy feeders and require a steady supply of nutrients to thrive. Use a balanced fertilizer with an NPK ratio of 10-10-10 or 14-14-14. Apply fertilizer according to the package instructions, typically every two to three weeks.
You can also supplement with organic fertilizers such as compost tea or fish emulsion. These fertilizers provide a slow-release source of nutrients and can help improve soil health.
How do I pollinate my corn plants growing on concrete?
Corn is wind-pollinated, meaning that the pollen from the tassels (male flowers) needs to be transferred to the silks (female flowers) by the wind. In a container garden, where plants are often more sheltered, you may need to hand-pollinate your corn plants to ensure proper pollination.
To hand-pollinate, gently shake the tassels over the silks, or use a small paintbrush to collect pollen from the tassels and transfer it to the silks. Repeat this process every day for several days to ensure that all of the silks are pollinated.
How do I protect my corn plants from pests and diseases when growing on concrete?
Container gardening can help minimize pest and disease problems, but it’s still important to monitor your plants regularly. Common corn pests include corn earworms, aphids, and spider mites. Diseases such as corn smut and leaf blight can also affect corn plants.
To prevent pest and disease problems, choose disease-resistant varieties, practice good sanitation, and avoid overwatering. If you do encounter pests or diseases, treat them promptly with organic pesticides or fungicides.
How long does it take to grow corn on concrete?
The time it takes to grow corn on concrete will depend on the variety you are growing, the climate, and the growing conditions. In general, it takes about 60 to 100 days from planting to harvest.
Check the seed packet for specific information on the maturity date of your chosen variety. You’ll know your corn is ready to harvest when the silks turn brown and dry, and the kernels are plump and milky.
Can I grow corn on concrete in a small space?
Yes, you can absolutely grow corn on concrete in a small space! Choose dwarf or mini varieties that are well-suited for container gardening. Use appropriately sized containers and provide adequate sunlight, water, and nutrients. With a little planning and effort, you can enjoy fresh, homegrown corn even in the most limited of spaces. The key is to optimize your **growing corn on concrete** setup for the available area.

Leave a Comment