

Bean plant bloom boost – that’s the secret weapon every home gardener needs in their arsenal! Are your bean plants looking a little… lackluster? Are you dreaming of overflowing baskets of fresh, homegrown beans but seeing more leaves than flowers? Don’t despair! I’m here to share some simple, yet incredibly effective, DIY tricks to coax your bean plants into a blooming frenzy.
For centuries, beans have been a staple crop in cultures around the world, providing essential nutrients and playing a vital role in sustainable agriculture. From the ancient Incas cultivating lima beans to the traditional three sisters planting method of Native American tribes, beans have always been a symbol of abundance and nourishment. But even with generations of knowledge, sometimes our modern gardens need a little extra help.
Let’s face it, store-bought fertilizers can be expensive and often contain harsh chemicals. That’s why I’m so excited to show you how to create your own natural and effective bean plant bloom boost solutions using ingredients you probably already have at home. These DIY hacks are not only budget-friendly and environmentally conscious, but they’ll also give you a deeper connection to your garden and the satisfaction of nurturing your plants with your own two hands. Get ready to transform your bean plants from leafy greens to blossoming beauties!
Bohnenpflanzen zum Blühen bringen: Mein ultimativer DIY-Booster
Ich liebe es, Bohnen in meinem Garten anzubauen! Aber manchmal sind sie etwas zögerlich, wenn es ums Blühen geht. Und ohne Blüten keine Bohnen, richtig? Deshalb habe ich im Laufe der Jahre einige Tricks und Kniffe gelernt, um meinen Bohnenpflanzen einen kleinen Schubs zu geben. Hier teile ich mein ultimatives DIY-Rezept für einen Blüh-Booster, der bei mir Wunder gewirkt hat. Keine Sorge, es ist super einfach und du hast wahrscheinlich schon die meisten Zutaten zu Hause!
Was du brauchst: Die Zutatenliste
* Eierschalen: Die Schalen von etwa 6 Eiern. Sie sind eine fantastische Kalziumquelle.
* Bananenschalen: Die Schalen von 2-3 Bananen. Sie sind reich an Kalium, was für die Blütenbildung unerlässlich ist.
* Kaffeesatz: Etwa 1 Tasse. Kaffeesatz liefert Stickstoff und andere wichtige Nährstoffe.
* Epsom-Salz (Bittersalz): 1 Esslöffel. Magnesium ist wichtig für die Photosynthese und die allgemeine Pflanzengesundheit.
* Wasser: 4 Liter (etwa 1 Gallone).
* Sprühflasche: Zum Auftragen des Boosters.
* Mixer oder Mörser und Stößel: Zum Zerkleinern der Zutaten.
* Eimer oder großer Behälter: Zum Mischen der Zutaten.
Warum diese Zutaten? Ein kurzer Blick auf die Vorteile
Bevor wir loslegen, möchte ich kurz erklären, warum ich diese Zutaten ausgewählt habe. Jede Zutat spielt eine wichtige Rolle bei der Förderung der Blütenbildung:
* Eierschalen: Kalzium stärkt die Zellwände der Pflanzen und hilft ihnen, Nährstoffe besser aufzunehmen. Es beugt auch Blütenendfäule vor, einem häufigen Problem bei Tomaten und Paprika, das aber auch Bohnen betreffen kann.
* Bananenschalen: Kalium ist entscheidend für die Blütenbildung und Fruchtentwicklung. Es hilft den Pflanzen, Zucker zu transportieren und Energie zu produzieren.
* Kaffeesatz: Stickstoff ist wichtig für das Wachstum, aber Kaffeesatz liefert auch andere wichtige Nährstoffe und verbessert die Bodenstruktur. Er kann auch helfen, Schädlinge abzuwehren.
* Epsom-Salz: Magnesium ist ein Schlüsselelement für die Photosynthese, den Prozess, bei dem Pflanzen Sonnenlicht in Energie umwandeln. Ein Magnesiummangel kann zu gelben Blättern und einer verminderten Blütenbildung führen.
Die Zubereitung: Schritt-für-Schritt-Anleitung
Jetzt geht’s ans Eingemachte! Folge diesen Schritten, um deinen eigenen Bohnenblüh-Booster herzustellen:
1. Eierschalen vorbereiten: Spüle die Eierschalen gründlich aus, um alle Eierreste zu entfernen. Lasse sie dann vollständig trocknen. Sobald sie trocken sind, zerbrich sie in kleine Stücke. Du kannst sie entweder mit einem Mörser und Stößel zerkleinern oder sie in einen Mixer geben und kurz pulsieren lassen, bis sie fein gemahlen sind. Je feiner sie sind, desto besser können sie sich im Wasser auflösen.
2. Bananenschalen vorbereiten: Schneide die Bananenschalen in kleine Stücke. Das hilft ihnen, schneller zu zersetzen und ihre Nährstoffe freizusetzen. Du kannst sie entweder frisch verwenden oder sie zuerst trocknen. Um sie zu trocknen, lege sie einfach für ein paar Tage in die Sonne oder verwende einen Dörrautomaten. Getrocknete Bananenschalen lassen sich leichter lagern und verwenden.
3. Zutaten mischen: Gib die zerkleinerten Eierschalen, die geschnittenen Bananenschalen und den Kaffeesatz in einen Eimer oder einen großen Behälter.
4. Wasser hinzufügen: Gieße 4 Liter Wasser über die Zutaten.
5. Epsom-Salz hinzufügen: Gib den Esslöffel Epsom-Salz hinzu.
6. Gut umrühren: Rühre die Mischung gründlich um, bis sich das Epsom-Salz vollständig aufgelöst hat.
7. Ziehen lassen: Lasse die Mischung mindestens 24 Stunden, idealerweise aber 48 Stunden ziehen. Rühre sie gelegentlich um. Dadurch haben die Zutaten Zeit, ihre Nährstoffe ins Wasser abzugeben.
8. Filtern (optional): Wenn du eine Sprühflasche verwendest, solltest du die Mischung vor dem Abfüllen filtern, um Verstopfungen zu vermeiden. Du kannst dafür ein feines Sieb oder ein Stück Mulltuch verwenden.
Die Anwendung: So gibst du deinen Bohnen den Booster
Jetzt kommt der spaßige Teil: das Anwenden des Boosters!
1. Verdünnen (optional): Obwohl der Booster in der Regel sicher in der oben genannten Konzentration ist, kannst du ihn bei empfindlichen Pflanzen oder bei sehr jungem Wachstum mit der gleichen Menge Wasser verdünnen.
2. Auftragen: Fülle den Booster in eine Sprühflasche. Sprühe die Blätter und Stängel deiner Bohnenpflanzen gründlich ein. Achte darauf, dass du auch die Unterseite der Blätter erreichst.
3. Gießen: Du kannst den Booster auch direkt in den Boden um die Bohnenpflanzen gießen.
4. Häufigkeit: Wende den Booster einmal pro Woche an, bis deine Bohnenpflanzen zu blühen beginnen. Sobald sie blühen, kannst du die Anwendung auf alle zwei Wochen reduzieren.
5. Beste Zeit: Die beste Zeit für die Anwendung ist am frühen Morgen oder am späten Nachmittag, wenn die Sonne nicht zu stark scheint. Das verhindert, dass die Blätter verbrennen.
Zusätzliche Tipps und Tricks für eine reiche Bohnenernte
Neben dem Blüh-Booster gibt es noch ein paar andere Dinge, die du tun kannst, um deine Bohnenernte zu maximieren:
* Sonnenschein: Bohnen brauchen mindestens 6 Stunden Sonnenlicht pro Tag. Stelle sicher, dass sie an einem sonnigen Standort gepflanzt sind.
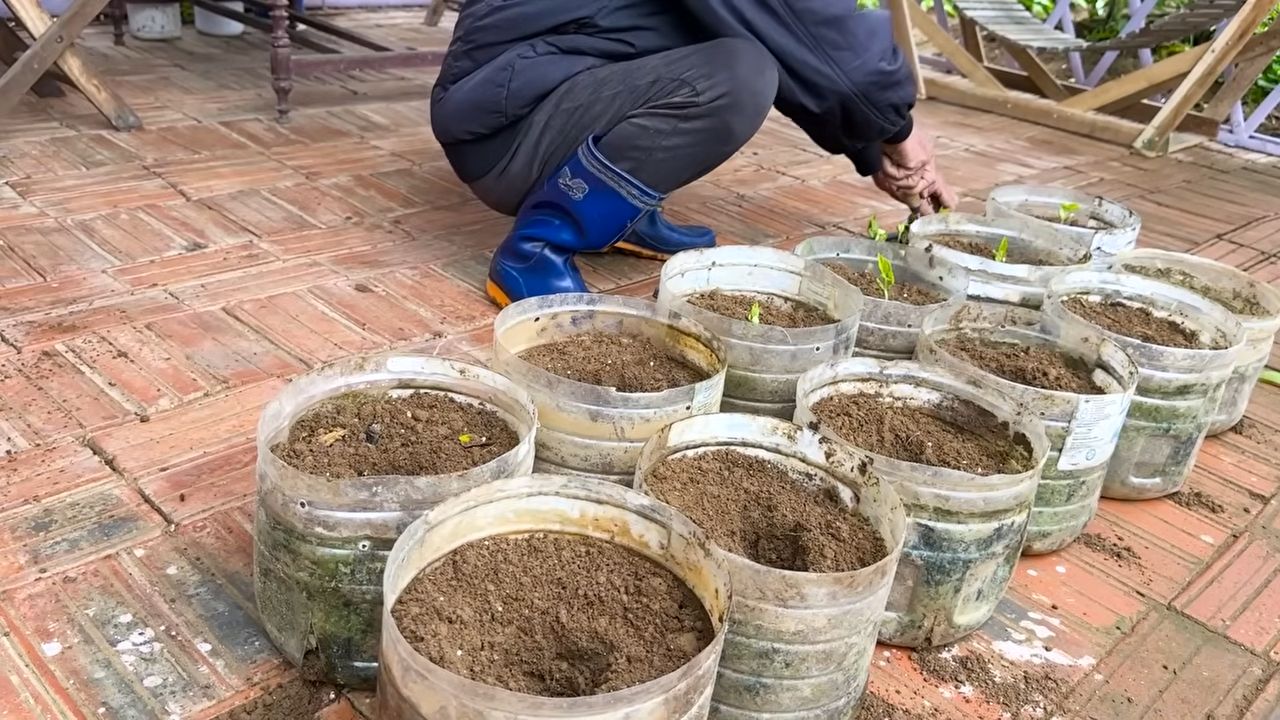
* Guter Boden: Bohnen bevorzugen gut durchlässigen Boden, der reich an organischen Stoffen ist. Verbessere deinen Boden vor dem Pflanzen mit Kompost oder gut verrottetem Mist.
* Regelmäßiges Gießen: Halte den Boden gleichmäßig feucht, aber nicht durchnässt. Gieße tief und selten, anstatt oft und oberflächlich.
* Rankhilfe: Kletterbohnen brauchen eine Rankhilfe, an der sie hochklettern können. Du kannst ein Spalier, einen Zaun oder ein Gestell verwenden.
* Schädlinge und Krankheiten: Achte auf Schädlinge wie Blattläuse und Bohnenkäfer. Behandle sie bei Bedarf mit einem organischen Insektizid. Achte auch auf Krankheiten wie Mehltau und Bohnenrost. Sorge für eine gute Luftzirkulation und vermeide es, die Blätter zu benetzen, um diese Probleme zu vermeiden.
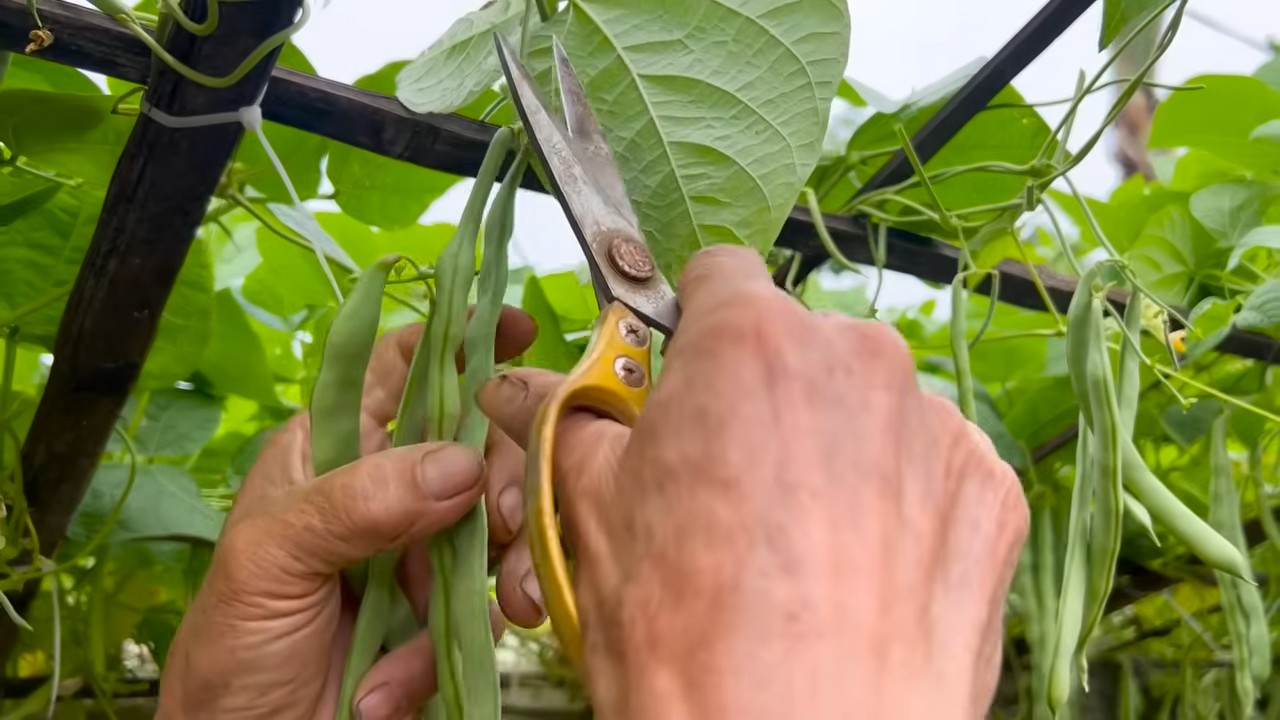
* Ernten: Ernte deine Bohnen regelmäßig, sobald sie reif sind. Das fördert die weitere Blütenbildung und verlängert die Erntezeit.
Lagerung des Boosters
Wenn du mehr Booster hergestellt hast, als du sofort benötigst, kannst du ihn im Kühlschrank aufbewahren. Er hält sich dort etwa eine Woche. Achte darauf, ihn vor der Verwendung gut umzurühren.
Meine Erfahrungen und abschließende Gedanken
Ich habe diesen Blüh-Booster seit Jahren verwendet und bin immer wieder erstaunt, wie gut er funktioniert. Meine Bohnenpflanzen sind gesünder, kräftiger und produzieren viel mehr Bohnen. Es ist eine einfache und kostengünstige Möglichkeit, deine Bohnenernte zu steigern.
Denk daran, dass jede Pflanze anders ist und es etwas Zeit dauern kann, bis du die perfekte Routine für deine Bohnen gefunden hast. Beobachte deine Pflanzen genau und passe deine Pflege entsprechend an.
Ich hoffe, dieser DIY-Blüh-Booster hilft dir, eine reiche Bohnenernte zu erzielen! Viel Spaß beim Gärtnern! Und vergiss nicht, deine Erfolge (und Misserfolge!) mit mir zu teilen. Ich lerne immer gerne dazu!
Conclusion
So, there you have it! This simple, yet incredibly effective, DIY trick for a bean plant bloom boost is a game-changer for any gardener, whether you’re a seasoned pro or just starting out. We’ve walked you through the process, highlighting the ease and accessibility of the ingredients, and explained the science behind why it works so well.
But why is this a must-try? Because it’s more than just a fertilizer; it’s a holistic approach to plant health. It’s about understanding your bean plants’ needs and providing them with the specific nutrients they crave during their crucial blooming phase. This translates to more abundant blossoms, which ultimately leads to a significantly larger and more satisfying bean harvest. Imagine the pride of serving up a dish made entirely from your own, bountifully grown beans!
Beyond the increased yield, this DIY bloom booster is also a sustainable and cost-effective alternative to commercially produced fertilizers. You’re reducing your reliance on synthetic chemicals and potentially saving money by utilizing ingredients you might already have in your kitchen or garden. It’s a win-win for your plants and your wallet.
Looking for variations? Absolutely! Consider adding a tablespoon of unsulfured molasses to the mixture for an extra boost of carbohydrates, which can further energize your plants and promote healthy growth. You could also experiment with different types of compost tea, such as worm casting tea, for a richer and more diverse nutrient profile. Remember to always observe your plants closely and adjust the recipe accordingly. If you notice any signs of nutrient burn (e.g., yellowing or browning leaves), dilute the mixture further.
This DIY bean plant bloom boost is not a one-size-fits-all solution, but rather a starting point for you to tailor to your specific bean variety and growing conditions. Don’t be afraid to experiment and find what works best for you. The key is to be observant, patient, and willing to learn from your experiences.
We are confident that this DIY trick will transform your bean-growing experience. But don’t just take our word for it! We wholeheartedly encourage you to give it a try and see the results for yourself. Witness the explosion of blossoms and the subsequent abundance of beans that await you.
And most importantly, we want to hear about your journey! Share your experiences, successes, and even challenges in the comments below. Let us know what variations you tried, what worked best for your bean plants, and any tips you have for fellow gardeners. Together, we can create a community of thriving bean growers and unlock the full potential of our gardens. So go ahead, get your hands dirty, and prepare to be amazed by the power of this simple, yet transformative, DIY bloom booster! Your bean plants will thank you for it.
Frequently Asked Questions (FAQ)
What exactly does this DIY bloom booster do for my bean plants?
This DIY bloom booster provides your bean plants with a concentrated dose of essential nutrients, particularly phosphorus and potassium, which are crucial for flower development and fruit production. Phosphorus promotes strong root growth and flower formation, while potassium helps with overall plant health, nutrient uptake, and disease resistance. By providing these nutrients in an easily accessible form, the bloom booster encourages your bean plants to produce more blossoms, leading to a larger and more abundant harvest. It essentially gives your plants the extra “oomph” they need to transition from vegetative growth to the reproductive stage.
How often should I apply this DIY bean plant bloom boost?
The frequency of application depends on several factors, including the type of bean plant, the growing conditions, and the overall health of your plants. As a general guideline, you can apply the bloom booster every 1-2 weeks during the blooming period. However, it’s crucial to observe your plants closely and adjust the frequency accordingly. If you notice any signs of nutrient burn (e.g., yellowing or browning leaves), reduce the frequency or dilute the mixture further. Conversely, if your plants seem to be responding well and are not showing any signs of stress, you can continue with the recommended frequency. Remember, it’s always better to err on the side of caution and start with a lower concentration or less frequent application.
Can I use this bloom booster on other types of plants besides bean plants?
While this DIY bloom booster is specifically formulated for bean plants, it can also be beneficial for other flowering plants that require phosphorus and potassium for bloom development. However, it’s important to consider the specific nutrient needs of each plant species and adjust the recipe accordingly. For example, some plants may be more sensitive to certain nutrients than others. It’s always a good idea to research the specific nutrient requirements of the plants you intend to use the bloom booster on and adjust the recipe or application frequency as needed. When in doubt, test the bloom booster on a small area of the plant first to ensure it doesn’t cause any adverse effects.
What if I don’t have all the ingredients listed in the recipe? Can I substitute anything?
While the specific combination of ingredients in the recipe is designed to provide a balanced nutrient profile, you can make some substitutions if necessary. For example, if you don’t have bone meal, you can substitute it with rock phosphate or another source of phosphorus. If you don’t have Epsom salts, you can omit it or substitute it with another source of magnesium. However, keep in mind that the effectiveness of the bloom booster may be affected by these substitutions. It’s always best to use the recommended ingredients whenever possible. If you do make substitutions, be sure to monitor your plants closely for any signs of nutrient deficiencies or imbalances.
My bean plants are not blooming at all. Will this DIY bloom booster help?
This DIY bloom booster can certainly help encourage your bean plants to bloom, but it’s important to first identify the underlying cause of the lack of blooming. Several factors can contribute to this issue, including insufficient sunlight, poor soil quality, inadequate watering, or nutrient deficiencies. Ensure that your bean plants are receiving at least 6-8 hours of direct sunlight per day and that the soil is well-draining and rich in organic matter. Water your plants regularly, but avoid overwatering, which can lead to root rot. If you suspect a nutrient deficiency, conduct a soil test to determine the specific nutrients that are lacking. In addition to addressing these underlying issues, the DIY bloom booster can provide your plants with the extra boost they need to initiate blooming.
Is this DIY bloom booster safe for organic gardening?
Yes, the ingredients used in this DIY bloom booster are generally considered safe for organic gardening, provided that you source them from reputable suppliers and ensure that they are not contaminated with synthetic chemicals. Bone meal, Epsom salts, and compost tea are all natural and organic materials that can be used to improve soil fertility and promote plant growth. However, it’s important to note that the term “organic” can have different meanings depending on the context. If you are certified organic, be sure to check with your certifying agency to ensure that the ingredients you are using comply with their standards.
How should I store the leftover DIY bloom booster?
Leftover DIY bloom booster can be stored in an airtight container in a cool, dark place for up to a week. However, it’s important to note that the effectiveness of the bloom booster may decrease over time as the nutrients begin to degrade. It’s best to use the bloom booster as soon as possible after preparing it. If you notice any signs of spoilage, such as a foul odor or discoloration, discard the bloom booster.
Can I use this bloom booster on seedlings or young bean plants?
It’s generally not recommended to use this DIY bloom booster on seedlings or young bean plants, as they are more sensitive to nutrient imbalances and can be easily damaged by over-fertilization. Seedlings and young plants typically require a lower concentration of nutrients than mature plants. Instead of using the bloom booster, focus on providing your seedlings and young plants with a balanced and gentle fertilizer that is specifically formulated for their needs. Once your bean plants have matured and are ready to bloom, you can then begin using the DIY bloom booster to encourage flower development.

Leave a Comment