

Fresh Herbs at Home: Imagine stepping into your kitchen and snipping fragrant basil for your pasta, or plucking vibrant mint for a refreshing summer drink, all without leaving your doorstep! That’s the magic of growing your own herbs, and it’s easier than you might think. For centuries, cultivating herbs has been a cornerstone of cultures worldwide, from ancient Egyptians using them for medicinal purposes to medieval monks tending herb gardens for culinary and healing arts.
But in today’s fast-paced world, the convenience of store-bought herbs often overshadows the joy and benefits of growing them yourself. Let’s be honest, those plastic-wrapped bunches can be expensive and often lack the intense flavor of freshly picked herbs. Plus, there’s something incredibly satisfying about nurturing a plant from seed to harvest.
That’s where these simple, yet effective, home gardening tricks and DIY projects come in. I’m going to share some of my favorite tips and hacks to help you create a thriving herb garden, no matter how much space you have. Whether you’re a seasoned gardener or a complete beginner, you’ll discover how to enjoy an abundance of fresh herbs at home, adding flavor, fragrance, and a touch of green to your life. Get ready to roll up your sleeves and let’s get growing!
Frische Kräuter zu Hause ziehen: Mein DIY-Garten für die Fensterbank
Ich liebe es, frische Kräuter zum Kochen zu verwenden. Der Geschmack ist einfach unvergleichlich! Aber ständig Kräuter im Supermarkt zu kaufen, ist teuer und oft sind sie schon nach kurzer Zeit welk. Deshalb habe ich mich entschieden, meinen eigenen kleinen Kräutergarten auf der Fensterbank anzulegen. Und ich kann euch sagen, es ist einfacher als man denkt! Hier zeige ich euch, wie ihr das auch schaffen könnt.
Was du brauchst:
* Samen oder Jungpflanzen: Wähle deine Lieblingskräuter! Basilikum, Petersilie, Schnittlauch, Thymian, Rosmarin, Minze – die Auswahl ist riesig. Ich empfehle, für den Anfang mit ein paar einfachen Sorten wie Basilikum und Petersilie zu starten.
* Pflanzgefäße: Töpfe, Kästen oder sogar recycelte Behälter wie Joghurtbecher oder Konservendosen (mit Löchern im Boden!) sind geeignet. Achte darauf, dass sie ausreichend groß sind, damit die Wurzeln Platz haben.
* Pflanzerde: Spezielle Kräutererde ist ideal, da sie die richtige Nährstoffzusammensetzung für Kräuter hat. Normale Blumenerde geht aber auch.
* Drainagematerial: Blähton, Kies oder Tonscherben helfen, Staunässe zu vermeiden.
* Gießkanne oder Sprühflasche: Zum Bewässern der Kräuter.
* Etiketten: Um die Kräuter zu beschriften, besonders wenn du verschiedene Sorten anbaust.
* (Optional) Anzuchtschalen oder -töpfe: Für die Voranzucht von Samen.
* (Optional) Mini-Gewächshaus: Beschleunigt die Keimung von Samen.
Schritt-für-Schritt-Anleitung:
1. Vorbereitung der Pflanzgefäße
1. Reinigung: Reinige die Pflanzgefäße gründlich mit warmem Wasser und Spülmittel. Das ist wichtig, um Krankheiten und Schädlinge zu vermeiden.
2. Drainage: Fülle eine Schicht Drainagematerial (Blähton, Kies oder Tonscherben) auf den Boden der Pflanzgefäße. Diese Schicht sorgt dafür, dass überschüssiges Wasser abfließen kann und die Wurzeln nicht faulen. Ich nehme immer Blähton, weil er leicht ist und gut Wasser speichert.
3. Erde einfüllen: Fülle die Pflanzgefäße mit Pflanzerde. Lass dabei etwa 2-3 cm Platz bis zum Rand. Die Erde sollte locker und luftig sein. Drücke sie nicht zu fest an.
2. Aussaat der Samen (oder Einpflanzen der Jungpflanzen)
Aussaat:
1. Samen verteilen: Verteile die Samen gleichmäßig auf der Erde. Achte darauf, dass sie nicht zu dicht liegen, da die Keimlinge sonst zu wenig Platz haben. Ich mache das immer mit den Fingerspitzen, um eine gleichmäßige Verteilung zu gewährleisten.
2. Leicht bedecken: Bedecke die Samen mit einer dünnen Schicht Erde (ca. 0,5 cm). Die meisten Kräuter sind Lichtkeimer, das heißt, sie brauchen Licht zum Keimen. Deshalb sollten sie nicht zu tief vergraben werden.
3. Angießen: Befeuchte die Erde vorsichtig mit einer Sprühflasche. Vermeide es, die Samen wegzuschwemmen. Die Erde sollte feucht, aber nicht nass sein.
4. (Optional) Mini-Gewächshaus: Stelle die Pflanzgefäße in ein Mini-Gewächshaus oder decke sie mit Frischhaltefolie ab. Das erhöht die Luftfeuchtigkeit und beschleunigt die Keimung. Achte darauf, die Folie regelmäßig zu lüften, um Schimmelbildung zu vermeiden.
Einpflanzen von Jungpflanzen:
1. Vorbereitung der Jungpflanzen: Nimm die Jungpflanzen vorsichtig aus ihren Töpfen. Lockere die Wurzeln etwas auf, indem du sie leicht auseinanderziehst.
2. Pflanzlöcher graben: Grabe in der Erde kleine Löcher, die groß genug sind, um die Wurzelballen der Jungpflanzen aufzunehmen.
3. Einsetzen der Jungpflanzen: Setze die Jungpflanzen in die Löcher und fülle die Löcher mit Erde auf. Drücke die Erde leicht an.
4. Angießen: Gieße die Jungpflanzen vorsichtig an.
3. Pflege der Kräuter
1. Standort: Stelle die Pflanzgefäße an einen hellen und sonnigen Standort. Kräuter brauchen viel Licht, um gut zu wachsen. Ein Südfenster ist ideal. Wenn du kein Südfenster hast, kannst du auch eine Pflanzenlampe verwenden.
2. Bewässerung: Gieße die Kräuter regelmäßig, aber nicht zu viel. Die Erde sollte immer leicht feucht sein, aber nicht nass. Vermeide Staunässe, da dies zu Wurzelfäule führen kann. Ich prüfe immer mit dem Finger, ob die Erde trocken ist, bevor ich gieße.
3. Düngung: Dünge die Kräuter regelmäßig mit einem organischen Kräuterdünger. Das sorgt für ein gesundes Wachstum und einen intensiven Geschmack. Ich dünge meine Kräuter alle zwei Wochen.
4. Ernte: Ernte die Kräuter regelmäßig, um das Wachstum anzuregen. Schneide die Stängel kurz über einem Blattknoten ab. Das fördert die Verzweigung und sorgt für eine buschigere Pflanze. Ich ernte meine Kräuter fast täglich, um sie frisch zum Kochen zu verwenden.
5. Schädlinge und Krankheiten: Kontrolliere die Kräuter regelmäßig auf Schädlinge und Krankheiten. Bei Befall kannst du natürliche Schädlingsbekämpfungsmittel verwenden, wie z.B. eine Lösung aus Wasser und Schmierseife.
Spezielle Tipps für verschiedene Kräuter:
* Basilikum: Basilikum ist sehr empfindlich gegen Kälte. Stelle ihn erst nach den Eisheiligen ins Freie. Er braucht viel Sonne und Wärme. Gieße ihn regelmäßig, aber vermeide Staunässe.
* Petersilie: Petersilie ist ein zweijähriges Kraut. Im ersten Jahr bildet sie Blätter, im zweiten Jahr blüht sie und stirbt ab. Du kannst die Blätter das ganze Jahr über ernten. Petersilie braucht einen halbschattigen Standort.
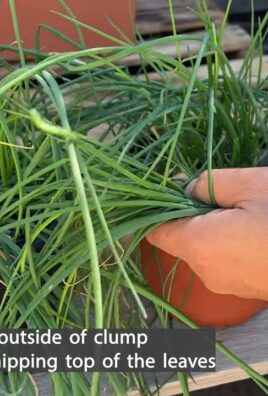
* Schnittlauch: Schnittlauch ist sehr pflegeleicht. Er kann im Topf oder im Garten angebaut werden. Schneide die Halme regelmäßig ab, um das Wachstum anzuregen. Schnittlauch blüht im Frühjahr. Die Blüten sind essbar und schmecken leicht nach Zwiebeln.
* Thymian: Thymian ist ein mediterranes Kraut. Er braucht viel Sonne und einen trockenen Standort. Gieße ihn nur mäßig. Thymian ist winterhart und kann im Garten überwintern.
* Rosmarin: Rosmarin ist ebenfalls ein mediterranes Kraut. Er braucht viel Sonne und einen trockenen Standort. Gieße ihn nur mäßig. Rosmarin ist nicht ganz winterhart und sollte im Winter geschützt werden.
* Minze: Minze ist sehr wuchsfreudig und kann sich schnell im Garten ausbreiten. Deshalb ist es ratsam, sie im Topf anzubauen. Minze braucht einen halbschattigen Standort und viel Wasser.
Häufige Fehler und wie man sie vermeidet:
* Zu viel gießen: Staunässe ist der häufigste Fehler beim Anbau von Kräutern. Achte darauf, dass die Erde gut abtrocknen kann, bevor du wieder gießt.
* Zu wenig Licht: Kräuter brauchen viel Licht, um gut zu wachsen. Stelle sie an einen hellen und sonnigen Standort.
* Falsche Erde: Verwende spezielle Kräutererde oder mische normale Blumenerde mit Sand, um sie durchlässiger zu machen.
* Nicht düngen: Kräuter brauchen Nährstoffe, um gut zu wachsen. Dünge sie regelmäßig mit einem organischen Kräuterdünger.
* Nicht ernten: Ernte die Kräuter regelmäßig, um das Wachstum anzuregen.
Zusätzliche Tipps und Tricks:
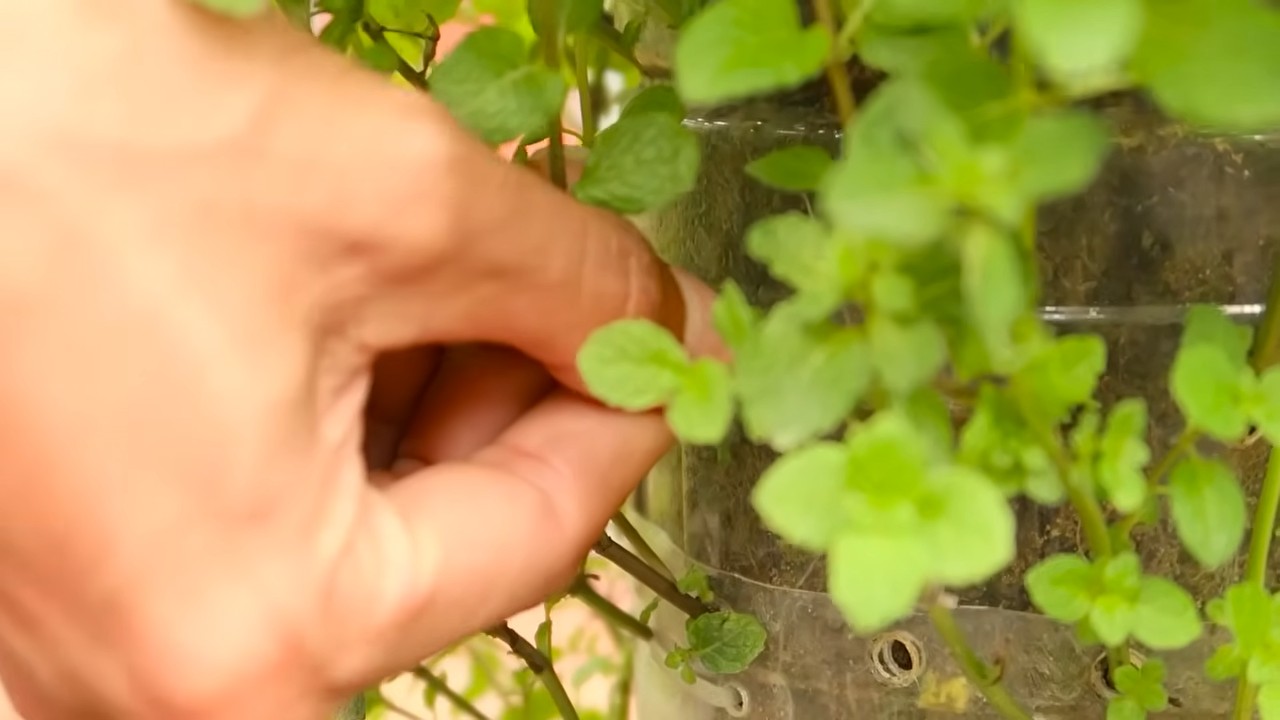
* Kräuter vermehren: Viele Kräuter lassen sich leicht durch Stecklinge vermehren. Schneide einfach einen Trieb ab und stelle ihn in Wasser. Nach einigen Wochen bilden sich Wurzeln und du kannst den Steckling in einen Topf pflanzen.
Conclusion
So, there you have it! Growing fresh herbs at home isn’t just a charming idea; it’s a game-changer for your culinary adventures and overall well-being. We’ve explored a simple, effective method that transforms even the smallest spaces into thriving herb gardens. Forget those wilted, overpriced bunches from the grocery store. Imagine stepping outside your door, or even just reaching for a windowsill, to snip the perfect sprig of basil for your pasta sauce, or a handful of mint for a refreshing mojito. The difference in flavor is simply astounding.
This DIY trick isn’t just about convenience; it’s about control. You know exactly what’s going into your herbs – no pesticides, no hidden chemicals, just pure, natural goodness. Plus, the act of nurturing these plants is incredibly therapeutic. There’s something deeply satisfying about watching a tiny seed sprout and flourish under your care.
But the benefits don’t stop there. Think about the money you’ll save by growing your own herbs. Over time, those small savings add up to a significant amount. And let’s not forget the environmental impact. By reducing your reliance on commercially grown herbs, you’re helping to minimize transportation emissions and support a more sustainable lifestyle.
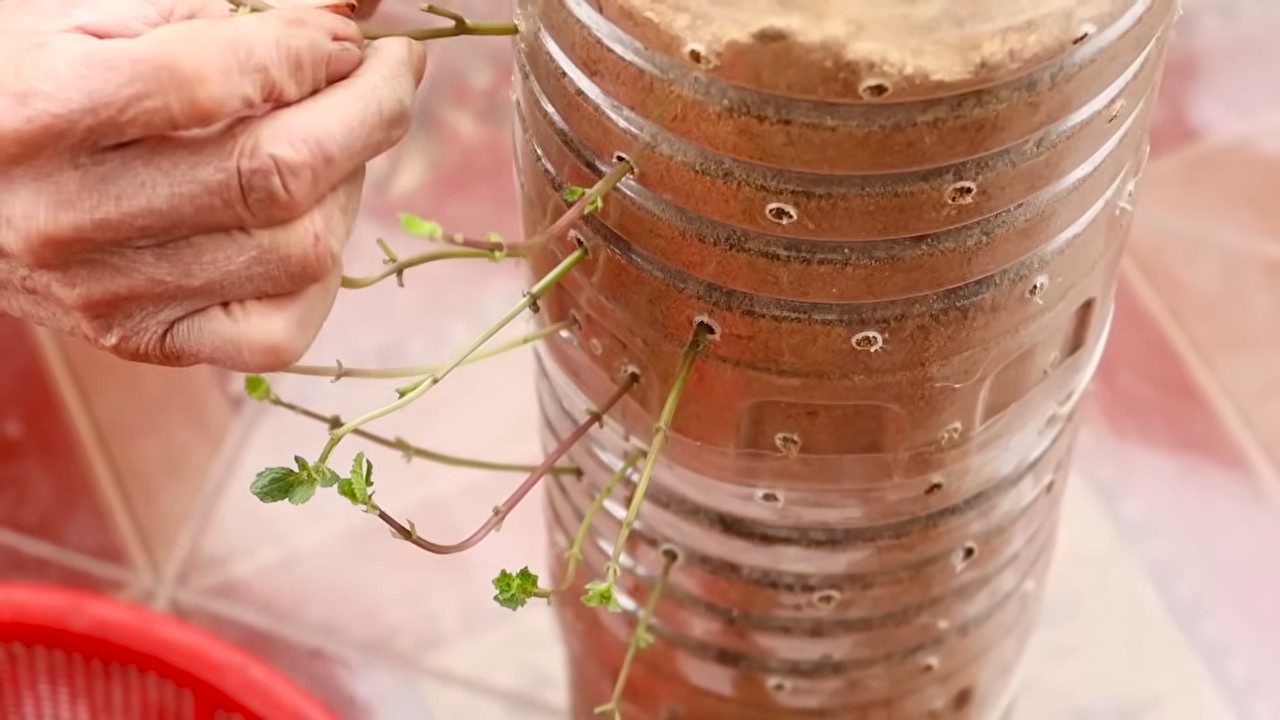
Ready to take your herb gardening to the next level? Consider experimenting with different types of containers. Terracotta pots are classic and allow for good drainage, but you can also use recycled materials like tin cans or plastic bottles for a more eco-friendly approach. Vertical gardens are another fantastic option for small spaces, allowing you to grow a variety of herbs in a compact area.
Don’t be afraid to get creative with your herb selection. While basil, mint, and parsley are popular choices, there are countless other herbs to explore. Try growing rosemary for its woody aroma and flavor, thyme for its earthy notes, or cilantro for its vibrant zest. Each herb offers a unique culinary experience, and experimenting with different combinations is part of the fun.
Remember, success with growing fresh herbs at home is all about providing the right conditions. Ensure your herbs receive plenty of sunlight, water them regularly, and fertilize them occasionally. Don’t be discouraged if you encounter a few challenges along the way. Gardening is a learning process, and every mistake is an opportunity to improve.
We’re confident that this DIY trick will transform the way you think about herbs. It’s a simple, affordable, and rewarding way to enhance your cooking, improve your health, and connect with nature. So, what are you waiting for? Grab some seeds, find a sunny spot, and start growing your own fresh herbs today!
We’d love to hear about your experiences! Share your photos, tips, and stories in the comments below. Let’s create a community of herb enthusiasts and inspire others to embrace the joys of growing their own food. Happy gardening!
Frequently Asked Questions (FAQ)
What are the easiest herbs to grow for beginners?
For those just starting out with growing fresh herbs at home, some of the easiest and most rewarding options include basil, mint, chives, parsley, and oregano. These herbs are relatively low-maintenance and can thrive in a variety of conditions. Basil is a culinary staple and adds a sweet, peppery flavor to many dishes. Mint is incredibly versatile and can be used in teas, cocktails, and desserts. Chives have a mild onion flavor and are perfect for garnishing soups and salads. Parsley is a classic herb that adds freshness to almost any dish. Oregano is a robust herb that’s essential for Italian and Mediterranean cuisine. These herbs are generally forgiving and can tolerate some neglect, making them ideal for beginner gardeners.
How much sunlight do herbs need?
Most herbs require at least six hours of sunlight per day to thrive. However, some herbs, like mint and parsley, can tolerate partial shade. If you’re growing herbs indoors, place them near a sunny window or use a grow light to supplement natural light. Insufficient sunlight can lead to leggy growth and reduced flavor. Observe your herbs closely and adjust their position as needed to ensure they’re receiving adequate light. A south-facing window is generally the best option for indoor herb gardens.
What kind of soil is best for growing herbs?
Herbs prefer well-draining soil that is rich in organic matter. A good potting mix specifically formulated for herbs is a great option. Avoid using heavy clay soil, as it can retain too much moisture and lead to root rot. You can also amend your soil with compost or other organic materials to improve drainage and fertility. Ensure that your containers have drainage holes to prevent waterlogging. The ideal pH for most herbs is between 6.0 and 7.0.
How often should I water my herbs?
The frequency of watering depends on several factors, including the type of herb, the size of the container, and the weather conditions. As a general rule, water your herbs when the top inch of soil feels dry to the touch. Avoid overwatering, as this can lead to root rot. During hot, dry weather, you may need to water your herbs more frequently. Check the soil moisture regularly and adjust your watering schedule accordingly. Using a moisture meter can help you determine when your herbs need water.
Do I need to fertilize my herbs?
While herbs don’t require heavy fertilization, they will benefit from occasional feeding. Use a balanced organic fertilizer or compost tea to provide essential nutrients. Avoid using synthetic fertilizers, as they can burn the roots and negatively impact the flavor of your herbs. Fertilize your herbs every few weeks during the growing season. Reduce or eliminate fertilization during the winter months when growth slows down.
How do I harvest herbs?
Harvesting herbs regularly encourages new growth and keeps your plants healthy. Use sharp scissors or pruning shears to snip off stems or leaves. Avoid removing more than one-third of the plant at a time. For leafy herbs like basil and mint, pinch off the top leaves to encourage bushier growth. For herbs like rosemary and thyme, cut stems back to just above a leaf node. Harvest herbs in the morning, after the dew has dried, for the best flavor.
How can I preserve my herbs?
If you have a surplus of herbs, there are several ways to preserve them for later use. Drying is a simple and effective method. You can air-dry herbs by hanging them upside down in a cool, dry place. You can also dry them in a dehydrator or oven. Freezing is another option. Chop the herbs and freeze them in ice cube trays with water or olive oil. You can also make herb-infused oils or vinegars.
What are some common problems with growing herbs and how can I fix them?
Some common problems with growing herbs include pests, diseases, and nutrient deficiencies. Pests like aphids and spider mites can be controlled with insecticidal soap or neem oil. Diseases like powdery mildew can be prevented by ensuring good air circulation and avoiding overwatering. Nutrient deficiencies can be addressed by fertilizing your herbs with a balanced organic fertilizer. Regularly inspect your herbs for signs of problems and take action promptly to prevent them from spreading.
Can I grow herbs indoors year-round?
Yes, you can grow herbs indoors year-round with proper care. Provide your herbs with adequate sunlight, water, and fertilizer. Choose a well-draining potting mix and ensure that your containers have drainage holes. Monitor your herbs for pests and diseases and take action promptly if you notice any problems. With a little attention, you can enjoy fresh herbs from your indoor garden all year long.
What are some creative ways to use fresh herbs?
Fresh herbs can be used in a wide variety of culinary applications. Add them to salads, soups, sauces, and stews. Use them to flavor meats, poultry, and fish. Make herb-infused oils and vinegars. Garnish cocktails and desserts with fresh herbs. You can also use herbs to make herbal teas and infusions. Get creative and experiment with different combinations to discover your favorite flavors. Fresh herbs can also be used for aromatherapy and in homemade beauty products.
Leave a Comment