

Watermelon growing tips free – who doesn’t love the sweet, juicy taste of a homegrown watermelon on a hot summer day? I know I do! But let’s be honest, growing these giants can seem a little intimidating. You might think you need acres of land and a green thumb blessed by the gardening gods. But what if I told you that with a few clever DIY tricks and hacks, you could be harvesting your own watermelons, even in a smaller space?
For centuries, watermelons have been a symbol of summer, abundance, and refreshment. Originating in Africa, they’ve spread across the globe, becoming a beloved treat in countless cultures. From picnics to festivals, watermelons represent joy and community. But beyond their deliciousness, they’re also packed with nutrients and hydration, making them a healthy and satisfying snack.
That’s why I’m so excited to share these watermelon growing tips free with you! In this article, we’ll dive into simple, effective DIY methods that will help you overcome common challenges and maximize your watermelon yield. Whether you’re dealing with limited space, pesky pests, or just want to ensure a sweeter, juicier harvest, I’ve got you covered. So, grab your gardening gloves, and let’s get ready to unlock the secrets to growing your own delicious watermelons this season!
Wassermelonen Anbauen: Mein DIY-Leitfaden für eine Reiche Ernte
Hallo liebe Gartenfreunde! Ich liebe Wassermelonen, und es gibt nichts Besseres, als eine saftige, selbst angebaute Melone an einem heißen Sommertag zu genießen. Ich habe über die Jahre viele Fehler gemacht, aber auch viel gelernt. Deshalb teile ich heute meine besten Tipps und Tricks mit euch, damit auch ihr eine reiche Wassermelonenernte einfahren könnt!
Die Vorbereitung: Der Schlüssel zum Erfolg
Bevor wir überhaupt an das Pflanzen denken, müssen wir sicherstellen, dass wir die richtigen Voraussetzungen schaffen. Das ist wirklich die halbe Miete!
* Die richtige Sorte wählen: Es gibt unzählige Wassermelonensorten, und nicht jede ist für jedes Klima geeignet. Informiert euch, welche Sorten in eurer Region gut gedeihen. Ich persönlich mag ‘Sugar Baby’ für kleinere Gärten, weil sie nicht so viel Platz braucht, oder ‘Crimson Sweet’ für ihren klassischen Geschmack.
* Der perfekte Standort: Wassermelonen lieben die Sonne! Sie brauchen mindestens 6-8 Stunden direkte Sonneneinstrahlung pro Tag. Achtet auch darauf, dass der Boden gut drainiert ist. Staunässe ist der Tod jeder Wassermelone.
* Boden vorbereiten: Wassermelonen sind Starkzehrer, das heißt, sie brauchen viele Nährstoffe. Ich bereite den Boden immer schon im Herbst vor, indem ich reichlich Kompost und gut verrotteten Mist einarbeite. Wenn ihr das nicht gemacht habt, könnt ihr das auch noch im Frühjahr tun, aber gebt dem Boden ein paar Wochen Zeit, sich zu setzen.
* Boden-pH-Wert: Wassermelonen bevorzugen einen leicht sauren Boden mit einem pH-Wert zwischen 6,0 und 6,8. Ihr könnt den pH-Wert mit einem Bodentest überprüfen und gegebenenfalls anpassen.
Aussaat und Anzucht: Der Start ins Melonen-Glück
Es gibt zwei Möglichkeiten, Wassermelonen anzubauen: direkt ins Beet säen oder sie vorziehen. Ich bevorzuge die Vorzucht, weil ich so einen Vorsprung habe und die Pflanzen widerstandsfähiger sind, wenn sie ins Freie kommen.
* Der richtige Zeitpunkt: Beginnt mit der Vorzucht etwa 4-6 Wochen vor dem letzten erwarteten Frost. Direktsaat ins Beet ist erst möglich, wenn der Boden sich auf mindestens 18°C erwärmt hat.
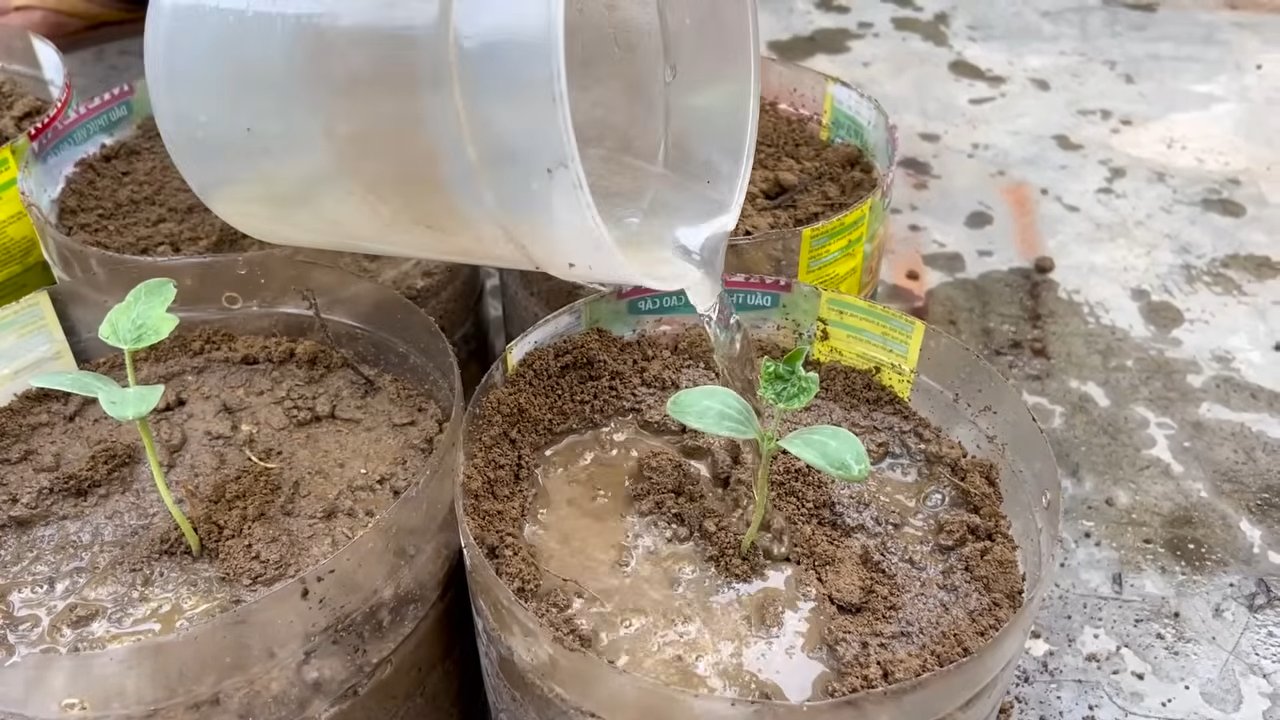
* Die Aussaat: Füllt kleine Töpfe oder Anzuchtschalen mit Anzuchterde. Legt 2-3 Samen pro Topf etwa 2 cm tief in die Erde. Gießt die Erde vorsichtig an und stellt die Töpfe an einen warmen, hellen Ort.
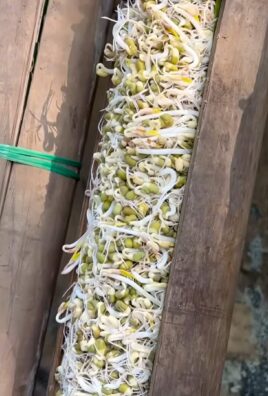
* Die Keimung: Bei einer Temperatur von 24-27°C keimen die Samen in der Regel innerhalb von 7-10 Tagen. Haltet die Erde feucht, aber nicht nass.
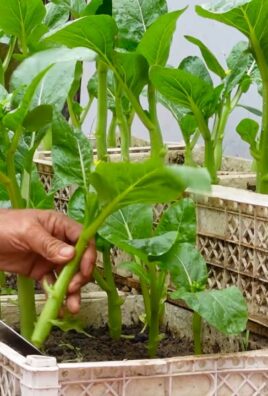
* Pikieren: Sobald die Sämlinge 2-3 echte Blätter haben, könnt ihr sie pikieren. Das bedeutet, dass ihr die schwächsten Pflanzen entfernt und die stärksten in größere Töpfe umpflanzt.
* Abhärten: Bevor ihr die Pflanzen ins Freie setzt, müsst ihr sie abhärten. Das bedeutet, dass ihr sie für ein paar Tage stundenweise nach draußen stellt, um sie an die Sonne und den Wind zu gewöhnen.
Das Auspflanzen: Endlich ins Beet!
Wenn die Frostgefahr vorbei ist und der Boden warm genug ist, können die Wassermelonen ins Beet gepflanzt werden.
* Der richtige Abstand: Wassermelonen brauchen viel Platz! Plant sie in einem Abstand von mindestens 1 Meter zwischen den Pflanzen und 2 Metern zwischen den Reihen.
* Das Pflanzloch: Grabt ein Pflanzloch, das etwas größer ist als der Wurzelballen der Pflanze. Gebt etwas Kompost oder organischen Dünger in das Pflanzloch.
* Das Einsetzen: Nehmt die Pflanze vorsichtig aus dem Topf und setzt sie in das Pflanzloch. Füllt das Loch mit Erde auf und drückt sie leicht an.
* Das Angießen: Gießt die Pflanzen gründlich an.
* Mulchen: Mulcht den Boden um die Pflanzen herum mit Stroh oder Holzhackschnitzeln. Das hilft, die Feuchtigkeit im Boden zu halten und Unkraut zu unterdrücken.
Die Pflege: Damit die Melonen wachsen und gedeihen
Die Pflege ist entscheidend für eine reiche Ernte. Hier sind meine wichtigsten Tipps:
* Gießen: Wassermelonen brauchen viel Wasser, besonders während der Fruchtbildung. Gießt sie regelmäßig, aber vermeidet Staunässe. Am besten gießt ihr morgens, damit die Blätter über den Tag abtrocknen können.
* Düngen: Düngt die Pflanzen regelmäßig mit einem organischen Dünger. Ich verwende gerne Komposttee oder verdünnte Brennnesseljauche.
* Unkraut jäten: Haltet das Beet unkrautfrei. Unkraut konkurriert mit den Wassermelonen um Nährstoffe und Wasser.
* Ranken leiten: Wassermelonenranken können sehr lang werden. Ihr könnt sie an einem Rankgitter oder Zaun leiten, um Platz zu sparen.
* Fruchtansatz fördern: Um den Fruchtansatz zu fördern, könnt ihr die weiblichen Blüten von Hand bestäuben. Die weiblichen Blüten erkennt man an dem kleinen Fruchtknoten unterhalb der Blüte. Nehmt einen Pinsel und übertragt Pollen von einer männlichen Blüte (ohne Fruchtknoten) auf die Narbe der weiblichen Blüte.
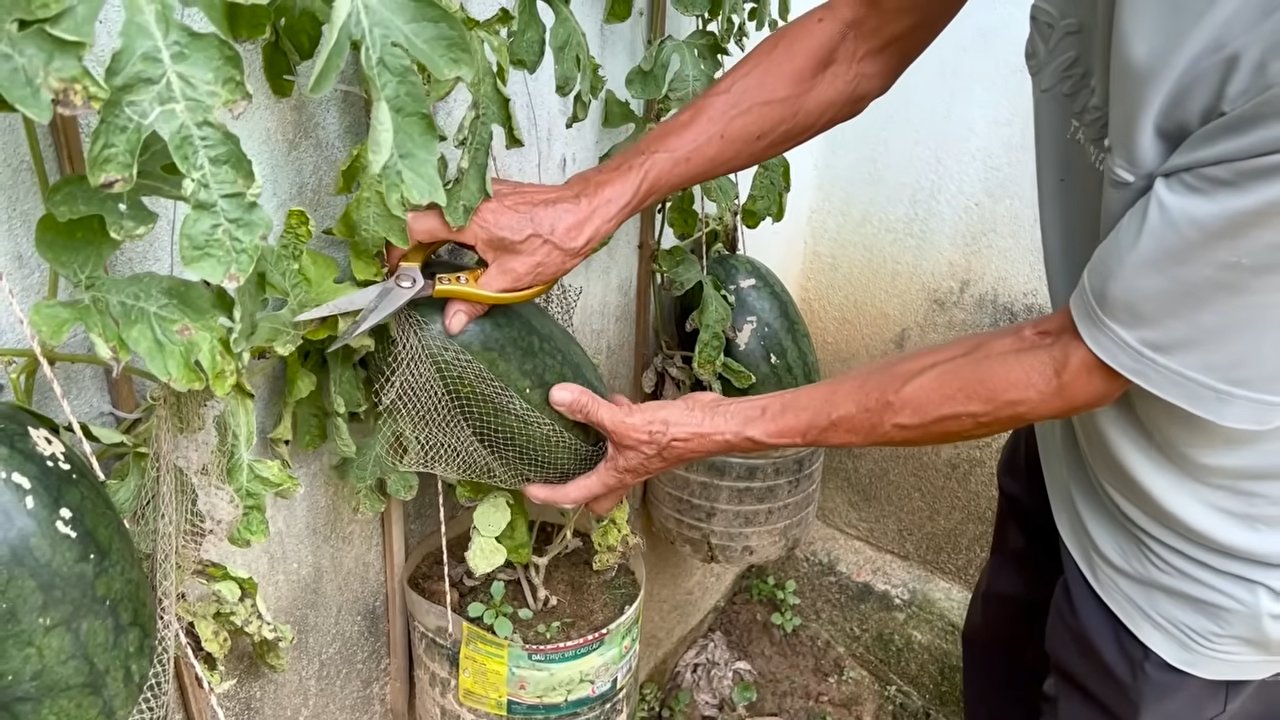
* Früchte schützen: Wenn die Früchte größer werden, könnt ihr sie mit Stroh oder Holzbrettchen unterlegen, um sie vor Bodenkontakt und Fäulnis zu schützen.
Schädlinge und Krankheiten: Was tun, wenn es Probleme gibt?
Auch Wassermelonen sind nicht vor Schädlingen und Krankheiten gefeit. Hier sind einige der häufigsten Probleme und wie ihr sie bekämpfen könnt:
* Blattläuse: Blattläuse saugen Pflanzensaft und können die Pflanzen schwächen. Ihr könnt sie mit einem Wasserstrahl abspritzen oder mit einer Seifenlauge behandeln.
* Echter Mehltau: Echter Mehltau ist eine Pilzkrankheit, die sich durch einen weißen, mehlartigen Belag auf den Blättern äußert. Entfernt befallene Blätter und behandelt die Pflanzen mit einem Fungizid.
* Falscher Mehltau: Falscher Mehltau ist eine weitere Pilzkrankheit, die sich durch gelbliche Flecken auf den Blättern äußert. Entfernt befallene Blätter und behandelt die Pflanzen mit einem Fungizid.
* Kürbisfliegen: Die Larven der Kürbisfliege bohren sich in die Früchte und können sie zerstören. Deckt die Pflanzen mit einem Insektenschutznetz ab oder verwendet Gelbtafeln, um die Fliegen abzufangen.
Die Ernte: Der Lohn der Mühe
Die Ernte ist der aufregendste Teil! Aber wie erkennt man, ob eine Wassermelone reif ist?
* Der Klopftest: Klopft auf die Melone. Eine reife Melone klingt hohl.
* Der Bodenfleck: Der Bodenfleck, die Stelle, an der die Melone auf dem Boden lag, sollte gelblich-cremefarben sein.
* Das Rankenblatt: Das Rankenblatt, das sich direkt an der Frucht befindet, sollte braun und trocken sein.
* Die Schale: Die Schale sollte sich nicht mehr leicht mit dem Fingernagel eindrücken lassen.
Wenn ihr euch unsicher seid, könnt ihr auch eine Melone anschneiden und probieren. Eine reife Wassermelone ist saftig, süß und hat eine intensive rote Farbe.
Zusätzliche Tipps für eine noch bessere Ernte
* Beschneiden: Das Beschneiden der Wassermelonenranken kann die Fruchtgröße und -qualität verbessern. Entfernt Seitentriebe, die keine Blüten oder Früchte tragen.
* Bewässerung optimieren: Vermeidet es, die Blätter beim Gießen zu benetzen, um Pilzkrankheiten vorzubeugen. Eine Tröpfchenbewässerung ist ideal.
* Bienen fördern
Conclusion
So, there you have it! Mastering these simple yet effective watermelon growing tips frees you from relying solely on store-bought fruit and empowers you to cultivate your own juicy, refreshing watermelons right in your backyard. This isn’t just about saving money; it’s about experiencing the unparalleled satisfaction of nurturing a plant from seed to harvest, knowing exactly what went into its growth, and enjoying the unmatched flavor of a homegrown watermelon.
The beauty of these tips lies in their adaptability. Whether you have a sprawling garden or a small patio, you can tailor these techniques to suit your space and resources. Consider experimenting with different watermelon varieties – from the classic crimson sweet to the smaller, personal-sized icebox watermelons. You could even try growing seedless varieties for added convenience.
Don’t be afraid to get creative with your growing methods. Vertical gardening techniques, such as training your watermelon vines up a trellis, can be a fantastic way to maximize space in smaller gardens. Companion planting, like interspersing basil or marigolds among your watermelon plants, can help deter pests and attract beneficial insects.
Remember, successful watermelon growing is a journey of learning and experimentation. Don’t be discouraged if your first attempt isn’t perfect. Every season brings new opportunities to refine your techniques and improve your yield. The key is to observe your plants closely, pay attention to their needs, and adapt your approach accordingly.
We wholeheartedly encourage you to embrace these watermelon growing tips and embark on your own watermelon-growing adventure. Imagine the joy of biting into a perfectly ripe, sun-warmed watermelon that you grew yourself! It’s an experience that’s both rewarding and delicious.
And most importantly, we want to hear about your experiences! Share your successes, your challenges, and any unique tips or tricks you discover along the way. Let’s create a community of watermelon enthusiasts who are passionate about sharing their knowledge and helping each other grow the best watermelons possible. Post your photos, stories, and questions in the comments section below. Let’s get growing!
Frequently Asked Questions (FAQ)
What are the most common mistakes people make when growing watermelons, and how can I avoid them?
One of the biggest mistakes is planting watermelons too early in the season. Watermelons are warm-weather crops and are highly susceptible to frost damage. Make sure the soil temperature has reached at least 70°F (21°C) before planting. Another common mistake is overcrowding the plants. Watermelons need plenty of space to spread out and develop properly. Follow the recommended spacing guidelines for your chosen variety. Insufficient watering is also a frequent issue. Watermelons need consistent moisture, especially during fruit development. Avoid letting the soil dry out completely. Finally, neglecting to provide adequate support for the growing fruit can lead to breakage. Use slings or supports to protect the melons as they mature.
How often should I water my watermelon plants?
Watermelon plants need consistent moisture, especially during hot weather and fruit development. Aim to water deeply at least once or twice a week, providing enough water to soak the soil down to a depth of several inches. The best time to water is early in the morning, which allows the foliage to dry before nightfall, reducing the risk of fungal diseases. Use a soaker hose or drip irrigation to deliver water directly to the roots, minimizing water loss through evaporation. Check the soil moisture regularly by sticking your finger into the soil. If the top inch or two feels dry, it’s time to water. During periods of heavy rain, you may need to reduce watering frequency.
What kind of fertilizer should I use for watermelons?
Watermelons benefit from a balanced fertilizer that provides essential nutrients for growth and fruit production. A fertilizer with an NPK ratio (nitrogen, phosphorus, potassium) of 10-10-10 or 14-14-14 is a good starting point. Apply the fertilizer according to the package instructions, typically at planting time and again when the vines begin to run. As the watermelons start to develop, switch to a fertilizer with a higher potassium content, such as 6-12-24, to promote fruit development and sweetness. You can also supplement with organic fertilizers like compost or well-rotted manure, which provide a slow-release source of nutrients and improve soil health. Avoid over-fertilizing, as this can lead to excessive foliage growth at the expense of fruit production.
How do I know when my watermelon is ripe?
Determining when a watermelon is ripe can be tricky, but there are several indicators to look for. First, check the tendril closest to the watermelon stem. When this tendril turns brown and dries out, it’s a sign that the watermelon is nearing maturity. Next, examine the underside of the watermelon where it rests on the ground. This spot, known as the ground spot, should turn from white to a creamy yellow color. Finally, give the watermelon a gentle thump. A ripe watermelon will produce a deep, hollow sound, while an unripe watermelon will sound dull and solid. With practice, you’ll develop an ear for the perfect watermelon thump.
What are some common pests and diseases that affect watermelons, and how can I control them?
Watermelons are susceptible to various pests and diseases, including aphids, squash bugs, vine borers, powdery mildew, and fusarium wilt. Aphids can be controlled with insecticidal soap or neem oil. Squash bugs can be handpicked or trapped under boards placed near the plants. Vine borers can be difficult to control, but wrapping the base of the stems with aluminum foil can help prevent them from laying eggs. Powdery mildew can be prevented by ensuring good air circulation and avoiding overhead watering. If powdery mildew does occur, treat it with a fungicide specifically labeled for use on watermelons. Fusarium wilt is a soilborne disease that can be prevented by planting resistant varieties and practicing crop rotation.
Can I grow watermelons in containers?
Yes, you can grow watermelons in containers, but it requires careful planning and attention. Choose a large container, at least 20 gallons in size, with good drainage. Use a high-quality potting mix that is well-draining and rich in organic matter. Select a compact or bush-type watermelon variety that is suitable for container growing. Provide adequate support for the vines and developing fruit. Water regularly and fertilize every two weeks with a balanced fertilizer. Place the container in a sunny location that receives at least 6-8 hours of direct sunlight per day. Container-grown watermelons may not produce as large or as many fruits as those grown in the ground, but they can still provide a rewarding harvest.
How can I improve the sweetness of my watermelons?
Several factors contribute to the sweetness of watermelons. First, choose a variety that is known for its sweetness. Provide adequate sunlight, as sunlight is essential for sugar production. Water consistently, but avoid overwatering, as this can dilute the sugars in the fruit. Fertilize with a potassium-rich fertilizer during fruit development to promote sweetness. Avoid harvesting the watermelon too early, as the sugar content increases as the fruit ripens. Finally, ensure that the soil is well-drained, as waterlogged soil can inhibit sugar production.
What is the best way to store watermelons after harvesting?
Whole watermelons can be stored at room temperature for about a week. For longer storage, refrigerate the watermelon at a temperature of 50-60°F (10-15°C). Once cut, wrap the watermelon tightly in plastic wrap or store it in an airtight container in the refrigerator. Cut watermelon should be consumed within a few days to maintain its freshness and flavor. Avoid storing watermelons near ethylene-producing fruits, such as bananas and apples, as this can accelerate ripening and spoilage.

Leave a Comment