

Grow Long Beans at Home
I’ve always loved the taste of freshly picked long beans, that vibrant green snap when you bite into them, the subtle sweetness… but the price at the grocery store? Let’s just say it often makes me wish I had a little patch of my own. That’s why I’m so excited to share these Grow Long Beans at Home tips and tricks with you! This isn’t just about saving money; it’s about connecting with nature, enjoying the satisfaction of growing your own food, and savoring the unparalleled flavor of homegrown vegetables.
The history of cultivating beans stretches back millennia, with evidence suggesting their domestication in the Americas thousands of years ago. Long beans, in particular, have been a staple in many Asian cuisines for centuries, prized for their versatility and deliciousness. Now, you can bring this rich culinary heritage into your own backyard or even your balcony!
Why Grow Your Own Long Beans?
Beyond the deliciousness, growing your own long beans offers numerous benefits. You control the quality, ensuring no pesticides or harmful chemicals are used. You can harvest them at their peak ripeness, guaranteeing the best possible flavor and texture. Plus, there’s something incredibly rewarding about nurturing a plant from seed to harvest. And let’s be honest, growing long beans at home is a fantastic way to add a touch of green to your living space, improving your mood and creating a calming atmosphere.
In this article, I’ll guide you through everything you need to know, from choosing the right seeds and preparing your soil to dealing with common pests and harvesting your bountiful crop. Get ready to embark on this rewarding journey of growing long beans at home and experience the joy of fresh, homegrown goodness!
Growing Long Beans at Home: A Complete Guide
I’ve always loved the taste of fresh, homegrown long beans. There’s nothing quite like it! And it turns out, growing them yourself isn’t as hard as you might think. Follow these steps and you’ll be enjoying your own delicious harvest in no time.
Phase 1: Planning and Preparation
- Choose your beans: Select a long bean variety suited to your climate. Check seed packets for information on days to maturity and ideal growing conditions. I personally love the ‘Kentucky Wonder’ variety for its prolific yield.
- Timing is key: Long beans need warm soil. Don’t plant them until all danger of frost has passed. Check your local frost dates to determine the best planting time. You can also start seeds indoors 6-8 weeks before the last expected frost for an earlier harvest.
- Select your location: Long beans need at least 6-8 hours of direct sunlight per day. Choose a sunny spot in your garden with well-drained soil. Avoid areas with strong winds.
- Prepare the soil: Long beans thrive in fertile, well-drained soil. Amend your soil with compost or other organic matter to improve its structure and nutrient content. A soil test can help determine if you need to add any specific nutrients.
- Gather your supplies: You’ll need bean seeds, gardening gloves, a trowel or garden spade, watering can, and possibly some stakes or trellis for support (depending on the variety).
Phase 2: Planting Your Beans
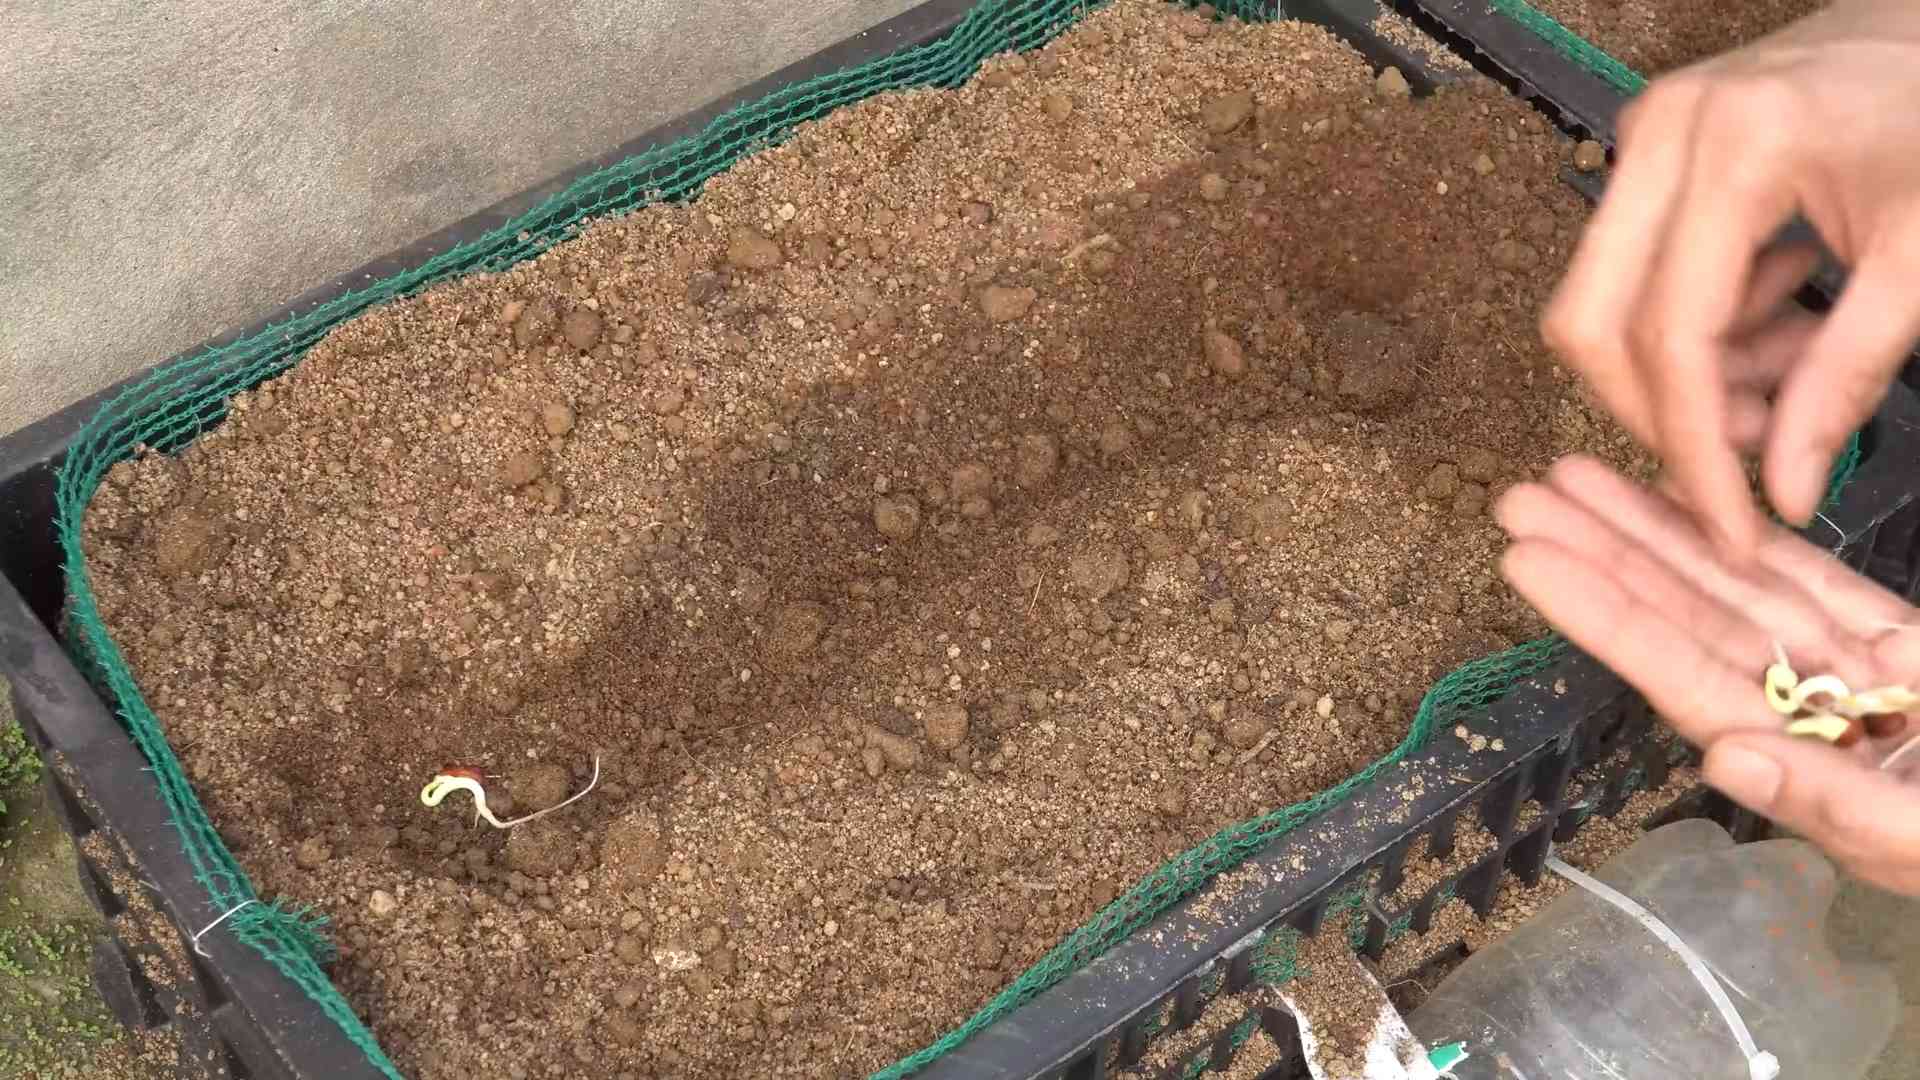
- Direct sowing: If you’re planting directly into the ground, sow seeds about 1 inch deep and 2-3 inches apart. Space rows 18-24 inches apart. I generally plant several seeds per hole, then thin to the strongest seedling once they germinate.
- Starting seeds indoors: If starting indoors, use seed starting mix and plant seeds about ½ inch deep in small pots or seed trays. Keep the soil moist but not soggy. Once seedlings have a few true leaves, transplant them outdoors after the last frost.
- Watering: Water deeply and regularly, especially during dry periods. Consistent moisture is crucial for healthy growth. Aim for about 1 inch of water per week, either from rainfall or supplemental watering.
- Mulching: Applying a layer of mulch around your plants helps retain moisture, suppress weeds, and regulate soil temperature. Straw, wood chips, or shredded leaves work well.
Phase 3: Ongoing Care and Maintenance
- Support system: Most long bean varieties benefit from a support system. You can use stakes, trellises, or even a simple fence to keep the plants upright and prevent the beans from sprawling on the ground. This improves air circulation and reduces the risk of diseases.
- Fertilizing: While long beans aren’t heavy feeders, a side dressing of compost or a balanced fertilizer can boost their growth and yield. Follow the instructions on the fertilizer package for application rates.
- Pest and disease control: Regularly inspect your plants for pests and diseases. Common problems include aphids, bean beetles, and fungal diseases. Use appropriate organic pest control methods if necessary. I often find that simply handpicking pests is sufficient.
- Weed control: Keep weeds under control to prevent competition for water and nutrients. Regular weeding, especially around the base of the plants, is essential.
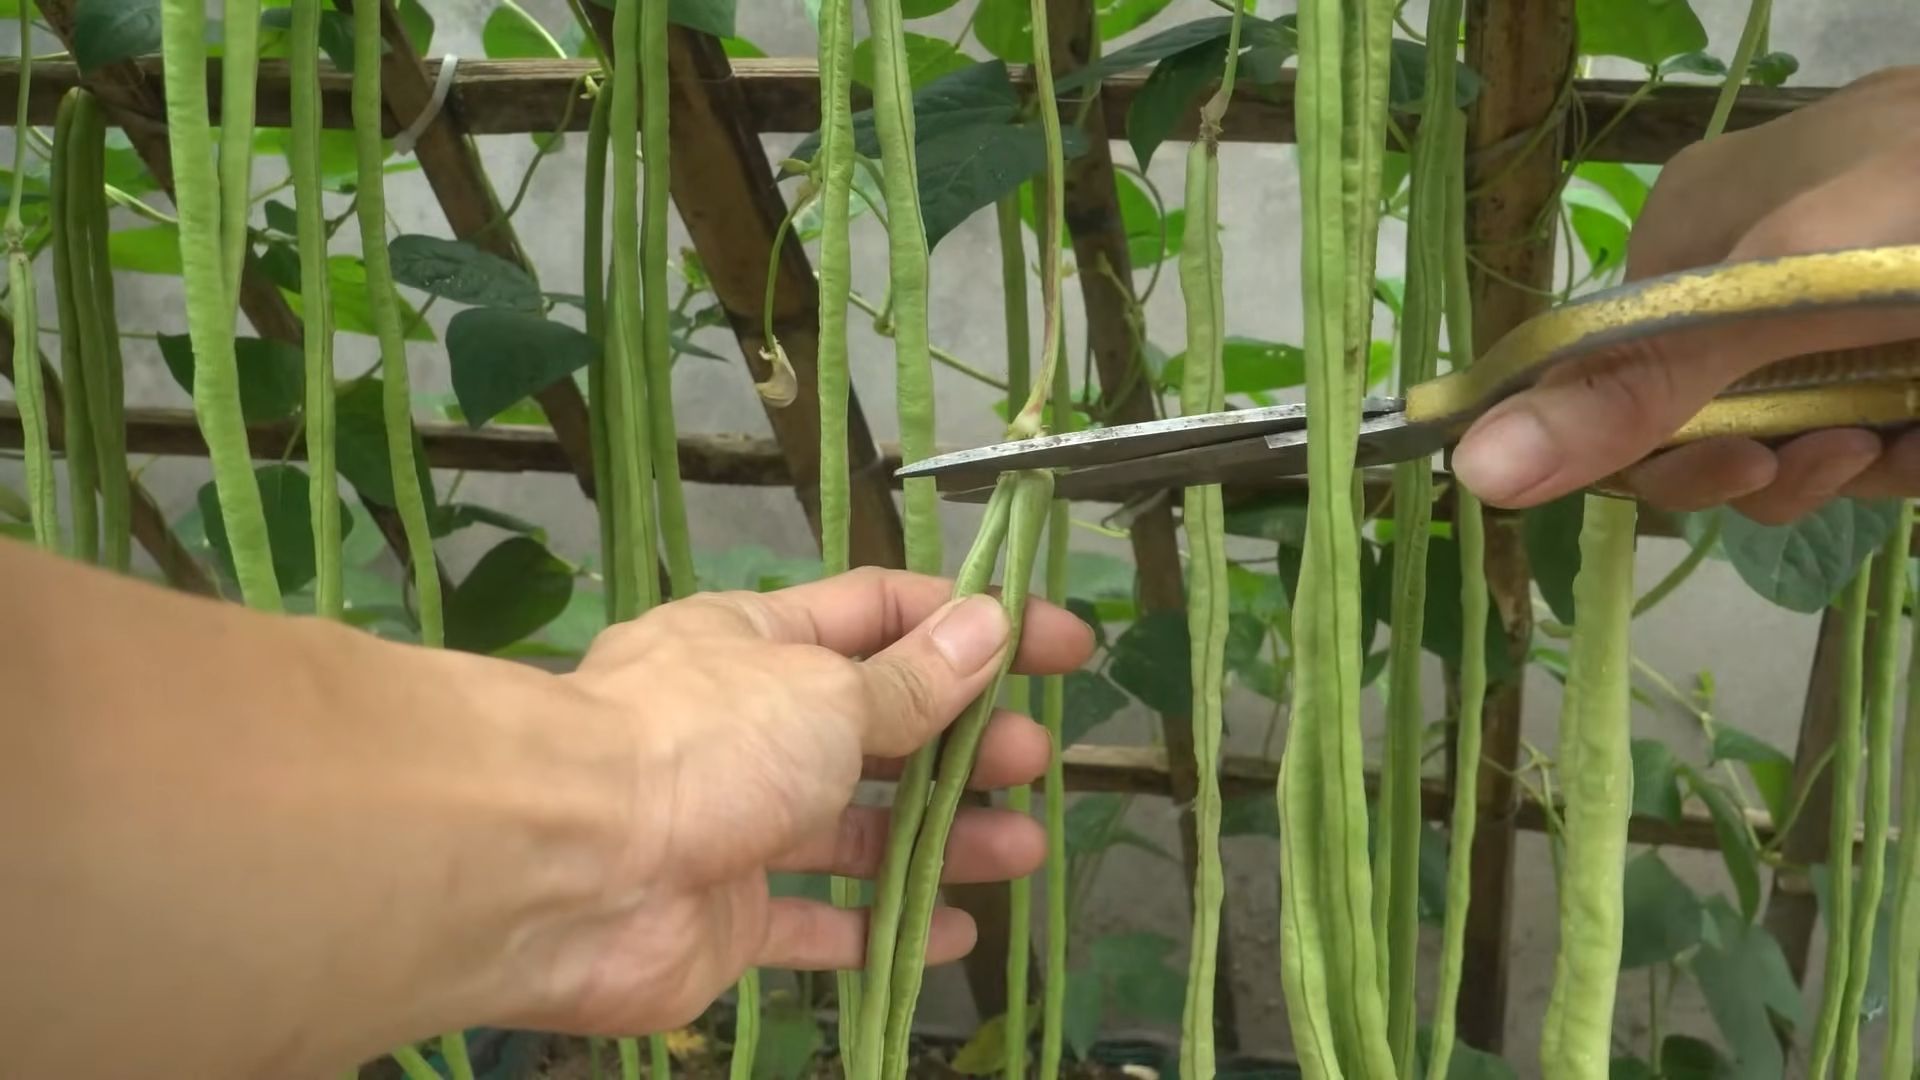
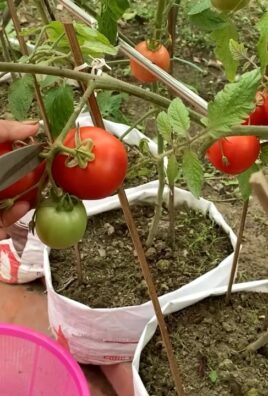
- Harvesting: Harvest long beans when they are young and tender, typically 6-8 weeks after planting. Pick beans regularly to encourage continued production. The beans should be firm and crisp to the touch. Don’t let them get too large or they’ll become tough and stringy.
Phase 4: Troubleshooting Common Problems
- Yellowing leaves: This can indicate nutrient deficiencies, overwatering, or underwatering. Check your watering schedule and consider a soil test to determine nutrient levels.
- Wilting plants: Wilting can be caused by drought stress, pests, or diseases. Check the soil moisture, inspect for pests, and look for signs of disease.
- Poor flowering or fruiting: This can be due to insufficient sunlight, nutrient deficiencies, or improper pollination. Ensure your plants receive adequate sunlight and consider supplementing with fertilizer or hand-pollinating if necessary.
- Bean beetles: These pests can damage the beans and plants. Handpick them or use an organic insecticide if necessary. I’ve found that row covers can help prevent infestations.
- Fungal diseases: Good air circulation and avoiding overhead watering can help prevent fungal diseases. If a disease develops, remove affected plants and consider using an organic fungicide.
Phase 5: Preserving Your Harvest
Once you’ve harvested a bounty of long beans, you’ll want to preserve them to enjoy throughout the year. Here are a few options:
- Freezing: Blanch the beans for a few minutes, then cool them quickly in ice water before freezing. This helps retain their color and texture.
- Canning: Canning is a great way to preserve long beans for long-term storage. Follow a tested recipe and ensure proper sterilization to prevent spoilage.
- Drying: String the beans together and hang them in a dry, well-ventilated area to dry. Once completely dry, store them in airtight containers.
Remember: Growing long beans is a rewarding experience. Don’t be discouraged if you encounter some challenges along the way. With a little patience and care, you’ll be enjoying a delicious harvest of homegrown long beans in no time!
Conclusion
So there you have it! Growing long beans at home is not only incredibly rewarding but also surprisingly simple. This DIY approach allows you to enjoy fresh, flavorful long beans throughout the growing season, free from pesticides and other potentially harmful chemicals. The satisfaction of harvesting your own homegrown produce is unparalleled, and the taste difference is truly remarkable. You’ll be amazed at the vibrant green color and the tender snap of your homegrown long beans, a far cry from the sometimes-lackluster supermarket varieties. This method, focusing on simple techniques and readily available materials, makes it accessible to even the most novice gardener. You’ll find yourself reaping the benefits of fresh, healthy long beans while simultaneously enjoying a deeply satisfying connection to nature. This DIY approach to growing long beans is a must-try for anyone looking to enhance their culinary experience and embrace a more sustainable lifestyle.
Beyond the basic method outlined, there are numerous exciting variations you can explore. Experiment with different varieties of long beans – some boast unique colors, shapes, or flavors. Consider companion planting; incorporating herbs like basil or marigolds near your bean plants can help deter pests and improve overall plant health. If space is limited, vertical gardening techniques, such as using trellises or stakes, can maximize your yield in a smaller area. For those with even less space, consider growing long beans in containers on a balcony or patio. The possibilities are endless! Don’t be afraid to get creative and adapt the techniques to suit your specific needs and environment. The key is to have fun and enjoy the process of nurturing your plants from seed to harvest.
We strongly encourage you to try this DIY method of growing long beans at home. Share your experience with us! Post pictures of your thriving plants and delicious harvests on social media using #GrowLongBeansAtHome. We’d love to see your success and learn from your experiences. Let’s build a community of home gardeners, sharing tips and tricks to ensure everyone can enjoy the bounty of their own homegrown long beans. Remember, even a small space can yield a significant harvest, bringing the freshness and flavor of homegrown produce to your table. So, grab some seeds, get your hands dirty, and embark on this rewarding gardening adventure. You won’t regret it!
Frequently Asked Questions
What type of soil is best for growing long beans?
Long beans thrive in well-drained, fertile soil with a slightly acidic to neutral pH (6.0-7.0). Amend heavy clay soils with compost or other organic matter to improve drainage and aeration. Sandy soils may benefit from the addition of organic matter to retain moisture. A soil test can help determine your soil’s pH and nutrient levels, allowing you to make necessary adjustments. Remember, healthy soil is the foundation for healthy plants.
How much sunlight do long beans need?
Long beans are sun-loving plants and require at least six to eight hours of direct sunlight per day to flourish. Choose a location in your garden that receives ample sunlight throughout the day. Insufficient sunlight can lead to poor growth, reduced flowering, and lower yields. Observe your garden’s sunlight patterns throughout the day to select the optimal planting location.
How often should I water my long beans?
Consistent watering is crucial for healthy long bean growth. Aim to keep the soil consistently moist but not waterlogged. Water deeply and less frequently rather than shallowly and often. The frequency of watering will depend on factors such as weather conditions, soil type, and the size of your plants. Check the soil moisture regularly by sticking your finger a couple of inches into the soil. If the soil feels dry, it’s time to water. Mulching around your plants can help retain soil moisture and reduce the frequency of watering.
What are some common pests and diseases that affect long beans?
Long beans can be susceptible to various pests and diseases, including aphids, bean beetles, and fungal diseases like anthracnose and downy mildew. Regularly inspect your plants for signs of pests or diseases. Implementing preventative measures, such as crop rotation, companion planting, and maintaining good garden hygiene, can help minimize the risk of infestations. If pests or diseases are detected, address them promptly using appropriate organic control methods. Early detection and intervention are key to preventing widespread damage.
When can I harvest my long beans?
Long beans are typically ready for harvest when they reach their desired length and are still tender. Harvesting regularly encourages continued production. Harvesting too late can result in tough, stringy beans. The best time to harvest is in the morning after the dew has dried. Use sharp scissors or pruning shears to cut the beans from the vine, leaving a short stem attached. Enjoy your fresh, homegrown long beans!
Can I save seeds from my homegrown long beans for next year?
Yes, you can save seeds from your homegrown long beans for planting the following year. Select the healthiest and most productive plants to collect seeds from. Allow the pods to fully mature on the plant until they turn dry and brown. Then, carefully open the pods and extract the seeds. Clean the seeds and allow them to dry completely before storing them in a cool, dry place in an airtight container. Properly stored seeds can maintain viability for several years. Saving your own seeds is a rewarding aspect of growing your own long beans and contributes to the sustainability of your gardening efforts. This DIY approach extends beyond just growing the beans, but also to propagating them for future harvests.
Leave a Comment