

Clean Tile Grout: Your Guide to Sparkling Floors and Happy Home
I love the feeling of walking into a bathroom or kitchen with sparkling clean tile. But let’s be honest, that gleaming grout? It’s often the first thing to show signs of wear and tear. That’s why I’m so excited to share my Clean Tile Grout secrets with you today! This isn’t just about aesthetics; it’s about creating a healthier, more hygienic home environment. Dirty grout can harbor bacteria and mildew, so keeping it clean is crucial for your family’s well-being.
For centuries, people have valued clean homes as a symbol of order and prosperity. While the methods have evolved, the desire for a sparkling clean space remains timeless. From ancient Roman mosaics to modern ceramic tiles, the challenge of maintaining grout has always been a part of home upkeep. But thankfully, we don’t need harsh chemicals or expensive professional cleaning services to achieve that pristine look. This article is packed with easy, DIY Clean Tile Grout techniques that will leave your floors looking brand new.
Why You Need These Clean Tile Grout Hacks
Whether you’re a seasoned DIY enthusiast or a complete beginner, these Clean Tile Grout tips are designed to be accessible and effective. You’ll discover simple solutions using common household items, saving you money and reducing your environmental impact. Imagine the satisfaction of transforming your tired-looking tiles into a sparkling centerpiece, all with minimal effort and expense. Let’s dive in and unlock the secrets to a cleaner, healthier, and more beautiful home!
Cleaning Tile Grout: A DIY Guide to Sparkling Floors
Grimy grout can make even the cleanest tile floor look dingy. But don’t despair! With a little elbow grease and the right tools, you can restore your grout to its former glory. This guide will walk you through the process, step-by-step.
Phase 1: Preparation is Key
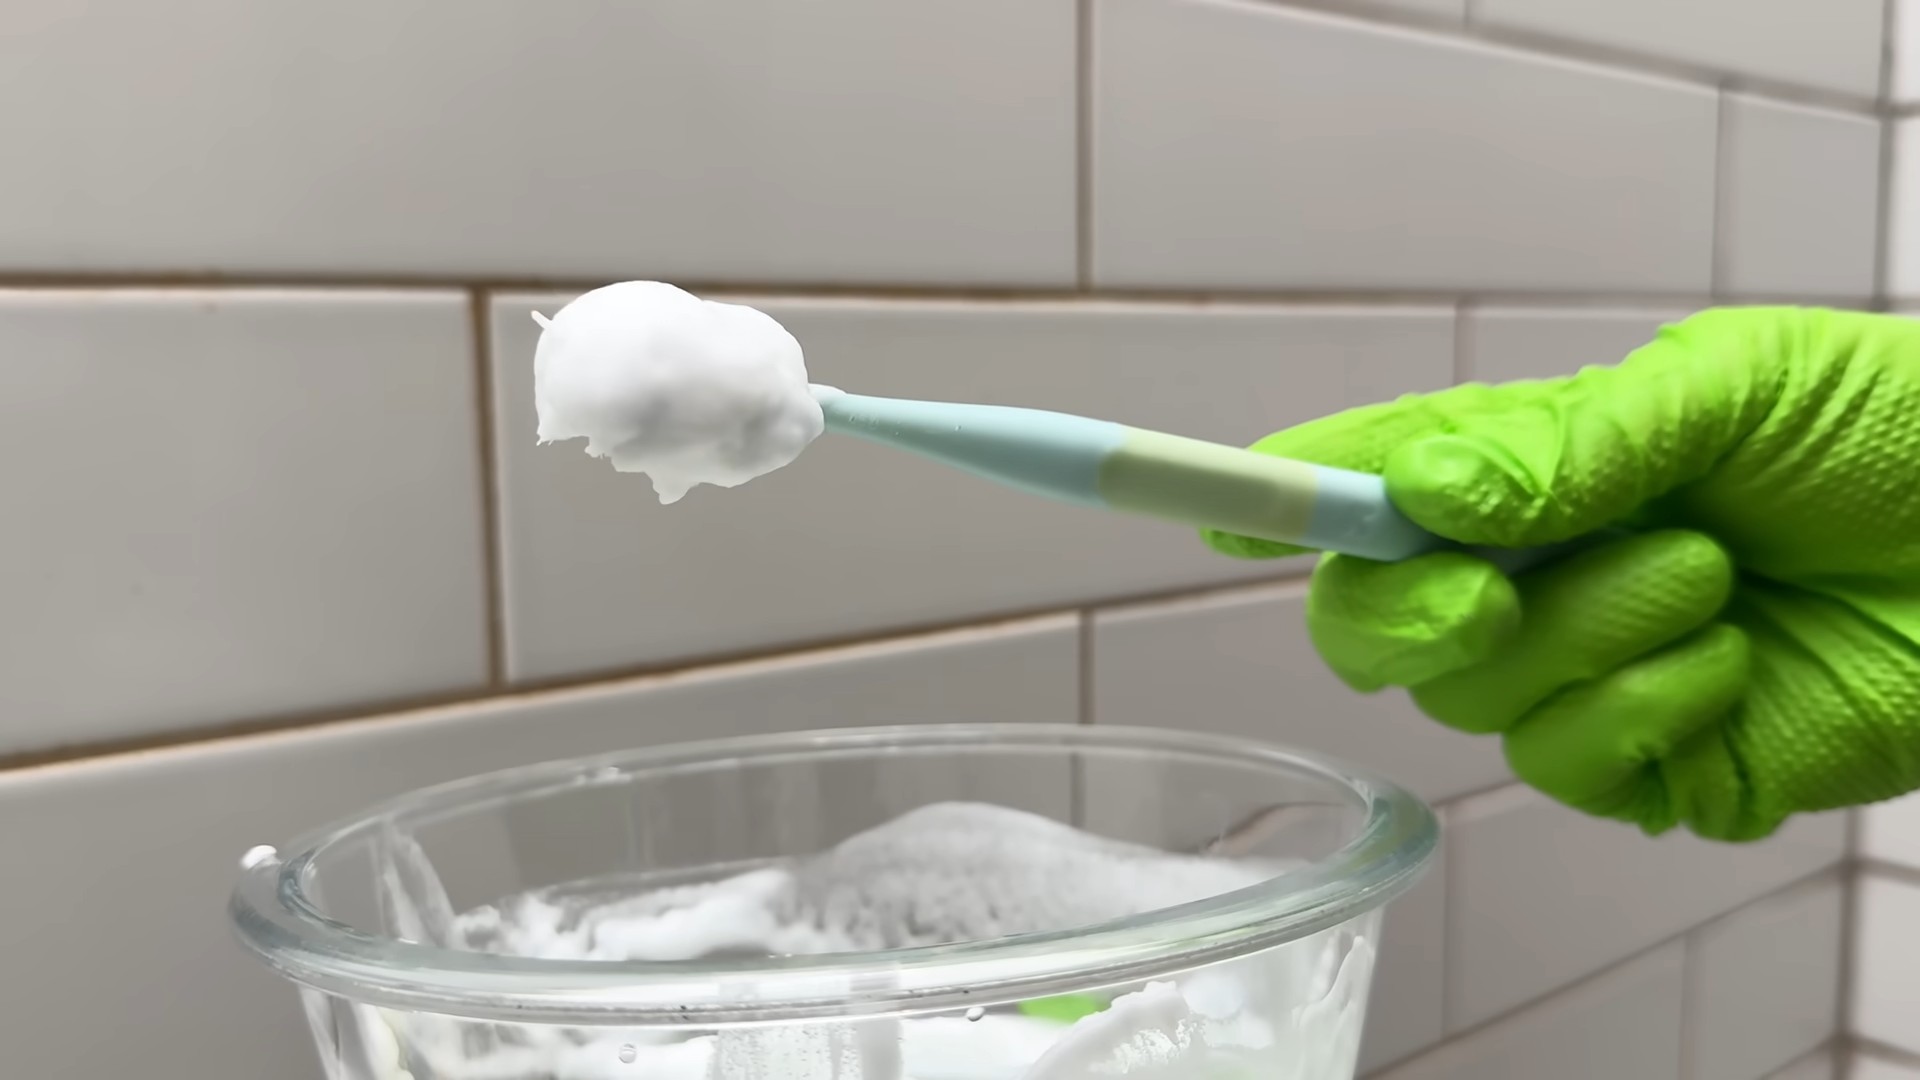
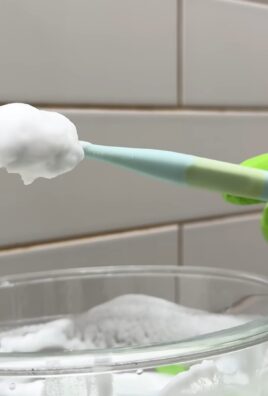
- Gather your supplies: You’ll need a stiff-bristled brush (an old toothbrush works great for detail work!), a grout cleaning solution (more on that below!), a bucket, microfiber cloths, rubber gloves, and a vacuum cleaner or broom.
- Protect yourself: Always wear rubber gloves to protect your hands from harsh chemicals. Consider eye protection as well, especially if you’re using stronger cleaning solutions.
- Clear the area: Remove any rugs, furniture, or other obstacles from the area you’ll be cleaning. This will give you ample space to work and prevent accidental damage.
- Pre-clean the surface: Sweep or vacuum the floor thoroughly to remove loose dirt, dust, and debris. This prevents you from grinding dirt further into the grout during the cleaning process. A good pre-clean makes the whole process much easier.
Phase 2: Choosing Your Cleaning Solution
The best cleaning solution depends on the severity of the grout stains and the type of tile you have. Here are a few options:
- Simple Solution (for light stains): A mixture of warm water and mild dish soap is often sufficient for lightly soiled grout. Mix a few drops of dish soap into a bucket of warm water.
- Baking Soda Paste (for moderate stains): Create a paste by mixing baking soda with a small amount of water. This is a gentle abrasive that can effectively lift stains.
- Commercial Grout Cleaner (for stubborn stains): Many effective commercial grout cleaners are available at home improvement stores. Always follow the manufacturer’s instructions carefully, paying close attention to safety precautions and ventilation.
- Oxygen Bleach (for mildew and tough stains): Oxygen bleach is a powerful yet relatively safe option for removing mildew and stubborn stains. Follow the product instructions carefully, as it may require a longer soaking time.
Important Note: Always test your chosen cleaning solution on a small, inconspicuous area of your grout first to ensure it doesn’t damage your tile.
Phase 3: The Cleaning Process
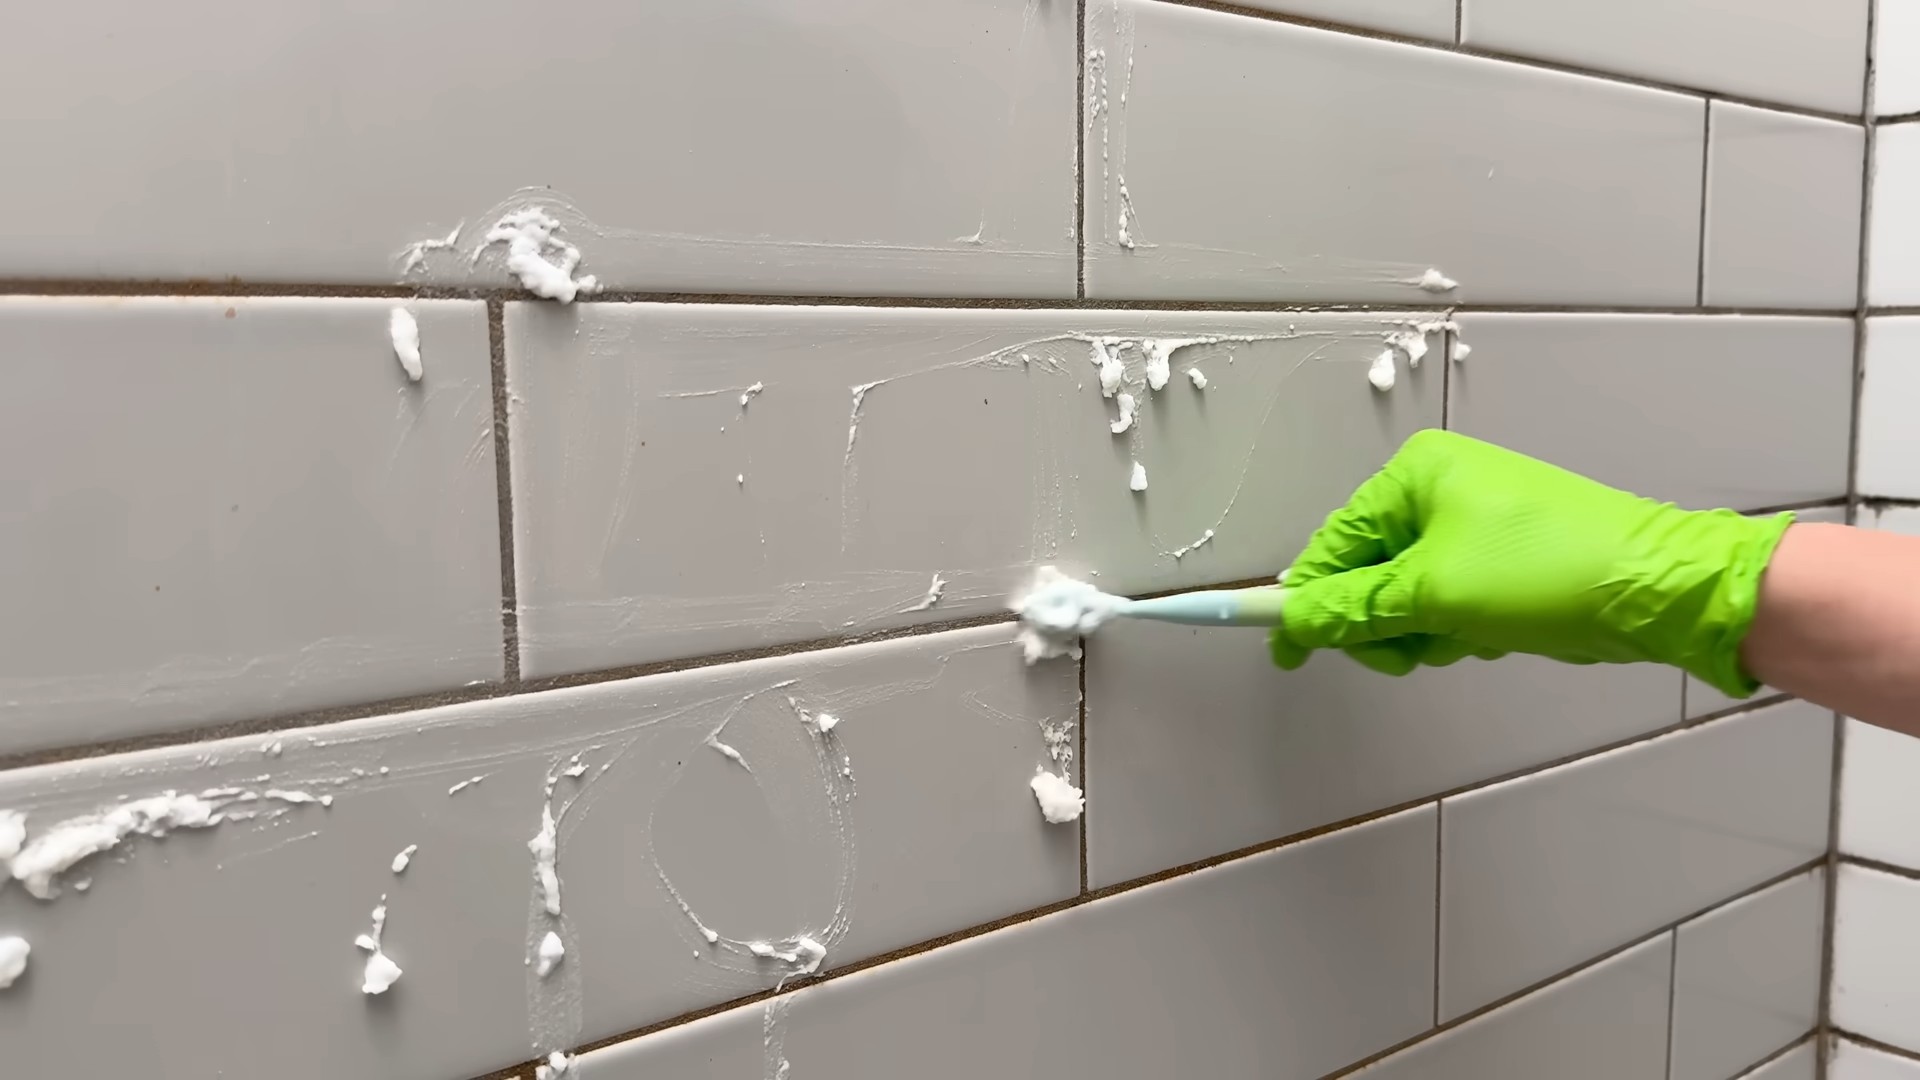
- Apply the cleaning solution: Using your chosen cleaning solution, apply it liberally to the grout lines. For paste solutions, apply directly to the grout with a brush or sponge. For liquid solutions, you can use a spray bottle for easier application.
- Scrub the grout: Using your stiff-bristled brush, scrub the grout lines vigorously. Pay close attention to areas with heavy staining. For really stubborn stains, you may need to let the cleaning solution sit for a few minutes to allow it to penetrate the grout.
- Rinse thoroughly: Once you’ve scrubbed the entire area, rinse the grout thoroughly with clean water. Use a damp microfiber cloth or sponge to wipe away any remaining cleaning solution and loosened dirt. You might need to repeat this step several times, especially if you used a paste cleaner.
- Dry the floor: Use clean, dry microfiber cloths to dry the floor completely. This prevents water spots and ensures the grout is completely clean.
Phase 4: Addressing Specific Problems
Dealing with Mildew
Mildew is a common problem in grout, especially in damp areas. If you notice mildew, you’ll need a stronger cleaning solution, such as oxygen bleach or a commercial mildew remover. Always follow the manufacturer’s instructions carefully. Proper ventilation is crucial when working with bleach-based products.
Handling Heavily Stained Grout
For heavily stained grout, you may need to repeat the cleaning process several times or try a stronger cleaning solution. Consider using a grout brush with a more aggressive bristle for stubborn stains. In extreme cases, you may need to consider professional grout cleaning or even grout replacement.
Phase 5: Post-Cleaning Maintenance
- Regular cleaning: To prevent future buildup, sweep or vacuum your tile floor regularly. Wipe up spills immediately to prevent staining.
- Periodic deep cleaning: Repeat the deep cleaning process every few months, or as needed, to maintain the cleanliness of your grout.
- Grout sealant: Consider applying a grout sealant after cleaning. This will help protect the grout from future stains and moisture damage. Follow the manufacturer’s instructions carefully when applying the sealant.
With a little effort and the right techniques, you can achieve sparkling clean grout and enjoy the beauty of your tile floors for years to come!
Conclusion
So there you have it! Our guide to achieving sparkling clean tile grout. This DIY method offers a powerful and effective solution to a common household cleaning challenge. Forget expensive, harsh chemical cleaners and embrace the simplicity and satisfaction of a homemade solution. This clean tile grout method is a must-try because it’s budget-friendly, environmentally conscious, and delivers truly impressive results. You’ll be amazed at how easily you can restore the pristine look of your tiled surfaces, whether it’s your bathroom floor, kitchen backsplash, or shower walls. The difference is truly transformative, bringing a fresh and renewed feeling to your entire space.
Beyond the basic recipe, there are countless ways to personalize this cleaning method to suit your specific needs and preferences. For particularly stubborn grout stains, consider pre-treating the area with a paste of baking soda and water, allowing it to sit for 15-20 minutes before applying the cleaning solution. If you’re dealing with mildew or mold, adding a few drops of tea tree oil to the mixture can provide extra antifungal power. For those who prefer a more fragrant experience, experiment with adding a few drops of your favorite essential oils, such as lemon or lavender, to the cleaning solution. Remember to always test any new additions on a small, inconspicuous area first to ensure they don’t damage your tiles or grout. You can also adjust the consistency of the paste; a thicker paste is ideal for scrubbing heavily soiled grout, while a thinner solution works well for general cleaning. Don’t be afraid to experiment and find the perfect balance for your cleaning needs. The beauty of this DIY method lies in its adaptability.
Ultimately, the satisfaction of achieving sparkling clean tile grout without resorting to harsh chemicals is unparalleled. It’s a small act that yields significant results, enhancing the overall aesthetic appeal of your home and providing a sense of accomplishment. We strongly encourage you to try this clean tile grout method and experience the difference for yourself. Share your before-and-after photos with us on social media – we’d love to see your sparkling clean results! Let us know what variations you tried and what worked best for you. Your feedback will inspire others and help us continue to refine this simple yet effective cleaning technique. Join the community of DIY enthusiasts who are rediscovering the joy of clean, beautiful homes, one tile at a time. Don’t hesitate – give it a try today and transform your tiled surfaces!
Frequently Asked Questions
What types of grout can this method be used on?
This method is generally safe for most types of grout, including ceramic, porcelain, and natural stone grout. However, it’s always recommended to test a small, inconspicuous area first to ensure it doesn’t damage or discolor your grout. Avoid using this method on particularly delicate or antique grout without prior testing and research. Always check the manufacturer’s recommendations for cleaning your specific grout type.
How often should I clean my grout using this method?
The frequency of cleaning depends on the amount of foot traffic and general wear and tear your tiled surfaces experience. For high-traffic areas, you might need to clean your grout every few weeks. For less frequently used areas, cleaning every few months might suffice. Regular cleaning will prevent dirt and grime from building up, making future cleaning sessions much easier. Regular maintenance is key to keeping your grout looking its best.
What if my grout is severely stained or discolored?
For severely stained or discolored grout, you may need to repeat the cleaning process or pre-treat the grout with a baking soda paste before applying the cleaning solution. In some cases, particularly stubborn stains might require more aggressive cleaning methods, such as a grout brush with stiff bristles. If the stains persist after multiple attempts, you may consider professional grout cleaning services. However, this DIY method is a great starting point for tackling most common grout stains.
Can I use this method on all types of tiles?
While this method is generally safe for most tile types, it’s crucial to test a small, inconspicuous area first. Some delicate or porous tiles might be susceptible to damage from the cleaning solution. Always refer to the manufacturer’s cleaning instructions for your specific tile type to avoid any potential damage. This precaution ensures the longevity and beauty of your tiles.
Are there any safety precautions I should take?
Always wear gloves to protect your hands from the cleaning solution. Ensure adequate ventilation in the area you’re cleaning to avoid inhaling any fumes. Keep the cleaning solution out of reach of children and pets. If you experience any skin irritation, rinse the affected area thoroughly with water and discontinue use. Following these simple safety precautions will ensure a safe and effective cleaning experience.
What should I do if I accidentally get the cleaning solution on my tiles?
Don’t panic! The cleaning solution is generally safe for most tiles, but it’s best to rinse the area immediately with clean water to prevent any potential staining or discoloration. If you notice any discoloration, consult the manufacturer’s instructions for your specific tile type. Quick action minimizes the risk of any lasting damage.
Can I use this method on grout in a shower or bathtub?
Yes, this method is suitable for cleaning grout in showers and bathtubs. However, ensure the area is well-ventilated to prevent mold and mildew growth. After cleaning, allow the area to dry completely to prevent future mold and mildew issues. Regular cleaning is especially important in high-moisture areas like showers and bathtubs.
What if my grout is cracked or damaged?
If your grout is cracked or damaged, this cleaning method might not be sufficient. Cracked or damaged grout can harbor dirt and grime, making it difficult to clean effectively. In such cases, you might need to consider repairing or replacing the damaged grout. Addressing underlying issues is crucial for maintaining the overall cleanliness and aesthetic appeal of your tiled surfaces. This DIY method is best suited for cleaning cleanable grout.

Leave a Comment