

Grow Spring Radishes and unlock the secrets to a vibrant, homegrown harvest! Have you ever dreamed of plucking crisp, peppery radishes straight from your garden, adding a zesty kick to your salads and snacks? I know I have! For centuries, these humble root vegetables have been a staple in gardens around the world, dating back to ancient civilizations who valued them for their quick growth and nutritional benefits. From the bustling markets of Europe to the serene gardens of Asia, radishes have proven their versatility and resilience.
But let’s face it, sometimes gardening can feel a little daunting, right? That’s where these simple, yet effective, DIY tricks come in. I’m here to share my favorite hacks for ensuring a bountiful radish crop, even if you’re a beginner gardener. Imagine the satisfaction of serving up a dish featuring radishes you nurtured from seed to table. Not only will you enjoy the fresh, delicious flavor, but you’ll also be saving money and reducing your reliance on store-bought produce. Plus, growing your own food is incredibly rewarding and a fantastic way to connect with nature. So, let’s dive in and discover how easy it is to grow spring radishes with these clever DIY solutions!
Grow Your Own Spring Radishes: A Beginner’s Guide
Hey there, fellow gardening enthusiasts! Ready to add a little zing to your salads and a pop of color to your garden? Let’s talk radishes! These little guys are super easy to grow, especially in the spring, and you can harvest them in just a few weeks. Seriously, it’s one of the most rewarding and fastest gardening projects you can tackle. I’m going to walk you through everything you need to know to grow your own delicious spring radishes.
What You’ll Need
Before we get our hands dirty, let’s gather our supplies. Here’s a checklist of everything you’ll need:
* Radish Seeds: Choose your favorite variety! There are tons of options, from the classic red globe to colorful French Breakfast and even black Spanish radishes.
* Well-Draining Soil: Radishes aren’t picky, but they do need soil that drains well. Amend heavy clay soil with compost or other organic matter.
* Gardening Gloves: Protect those precious hands!
* Hand Trowel or Garden Fork: For preparing the soil and planting seeds.
* Watering Can or Hose: To keep your radishes happy and hydrated.
* Fertilizer (Optional): A balanced fertilizer can give your radishes a boost, but it’s not always necessary.
* Row Covers (Optional): To protect your seedlings from pests and frost.
* A sunny spot: Radishes need at least 6 hours of sunlight per day.
Preparing the Soil
Radishes thrive in loose, well-drained soil. This is crucial because compacted soil can lead to misshapen or stunted radishes. I’ve learned this the hard way!
1. Choose Your Location: Select a spot in your garden that gets at least six hours of sunlight each day. Radishes can tolerate some shade, but they’ll grow best in full sun.
2. Clear the Area: Remove any rocks, weeds, or debris from the planting area. Weeds compete with radishes for nutrients and water, so it’s important to get rid of them before planting.
3. Loosen the Soil: Use a garden fork or hand trowel to loosen the soil to a depth of at least six inches. Break up any large clumps of soil and remove any rocks or roots.
4. Amend the Soil (If Necessary): If your soil is heavy clay or sandy, amend it with compost or other organic matter. This will improve drainage and provide your radishes with the nutrients they need. I usually add a generous amount of compost to my radish beds.
5. Level the Soil: Use a rake to level the soil surface. This will make it easier to plant your radish seeds at the correct depth.
Planting the Radish Seeds
Now for the fun part – planting! Radishes are direct-sown, meaning you plant the seeds directly into the garden.
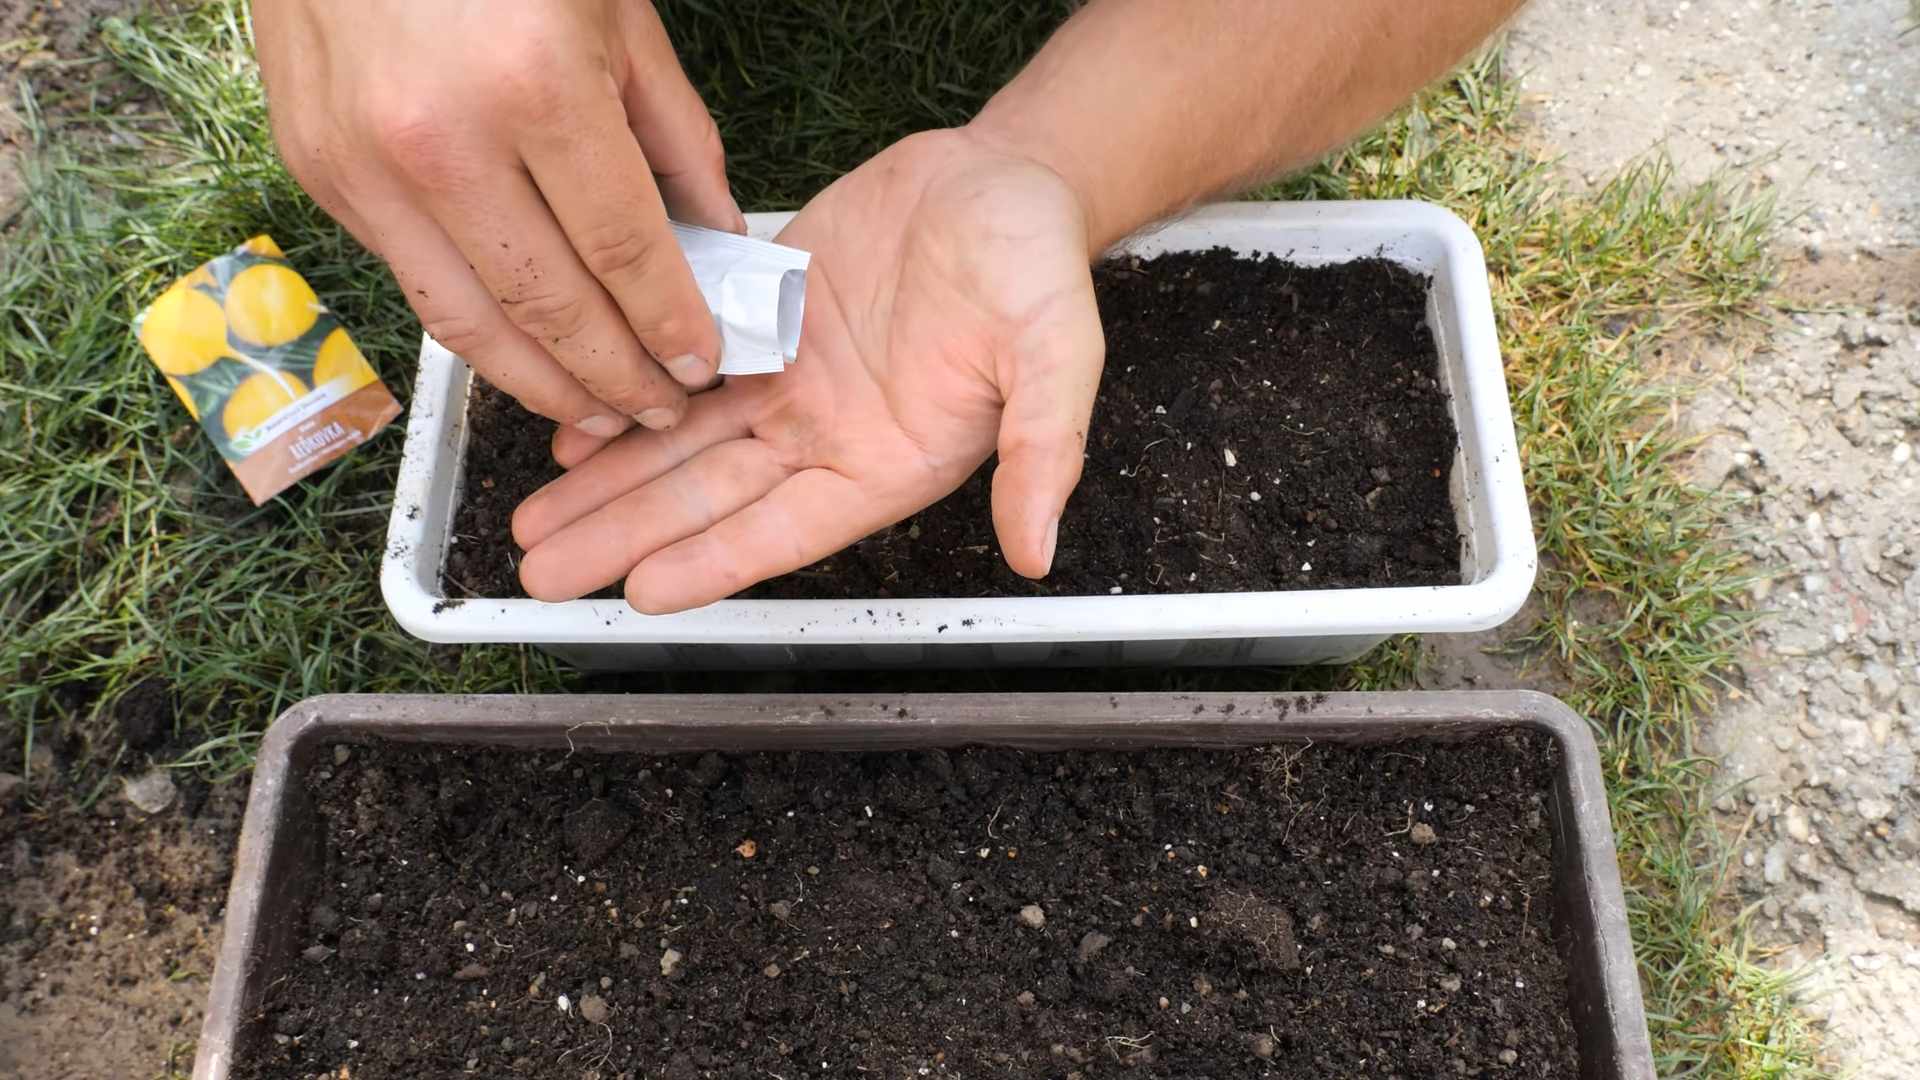
1. Create Furrows: Use your finger or a hand trowel to create shallow furrows in the soil. The furrows should be about ½ inch deep and spaced about 1 inch apart.
2. Sow the Seeds: Sprinkle the radish seeds evenly into the furrows. Don’t overcrowd the seeds, as this can lead to smaller radishes. Aim for about ½ inch spacing between seeds.
3. Cover the Seeds: Gently cover the seeds with soil.
4. Water Gently: Water the soil gently with a watering can or hose. Be careful not to wash away the seeds.
5. Label Your Rows: It’s always a good idea to label your rows so you know what you’ve planted. I use plant markers or even just write on a popsicle stick.
Caring for Your Radishes
Radishes are relatively low-maintenance, but they do need regular watering and thinning.
1. Water Regularly: Keep the soil consistently moist, but not waterlogged. Radishes need about 1 inch of water per week. Water more frequently during hot, dry weather.
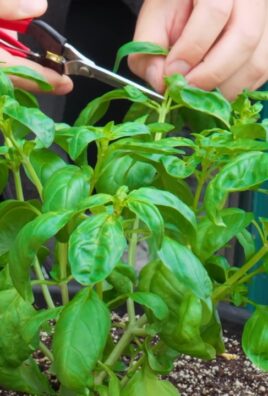
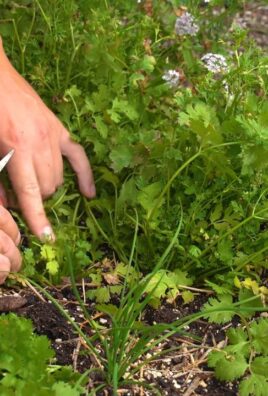
2. Thin Seedlings: Once the seedlings emerge (usually within a few days), thin them to about 1 inch apart. This will give the radishes enough room to grow. Use small scissors to snip off the extra seedlings at the soil line. Don’t pull them out, as this can disturb the roots of the remaining seedlings.
3. Weed Regularly: Keep the area around your radishes free of weeds. Weeds compete with radishes for nutrients and water.
4. Fertilize (Optional): If your soil is poor, you can fertilize your radishes with a balanced fertilizer. Follow the instructions on the fertilizer package. I usually don’t fertilize my radishes unless they look like they’re struggling.
5. Protect from Pests (Optional): Radishes can be susceptible to pests such as flea beetles and root maggots. Cover your seedlings with row covers to protect them from pests. You can also use organic pest control methods such as neem oil or insecticidal soap.
Harvesting Your Radishes
The best part! Radishes are ready to harvest in as little as three weeks, depending on the variety.
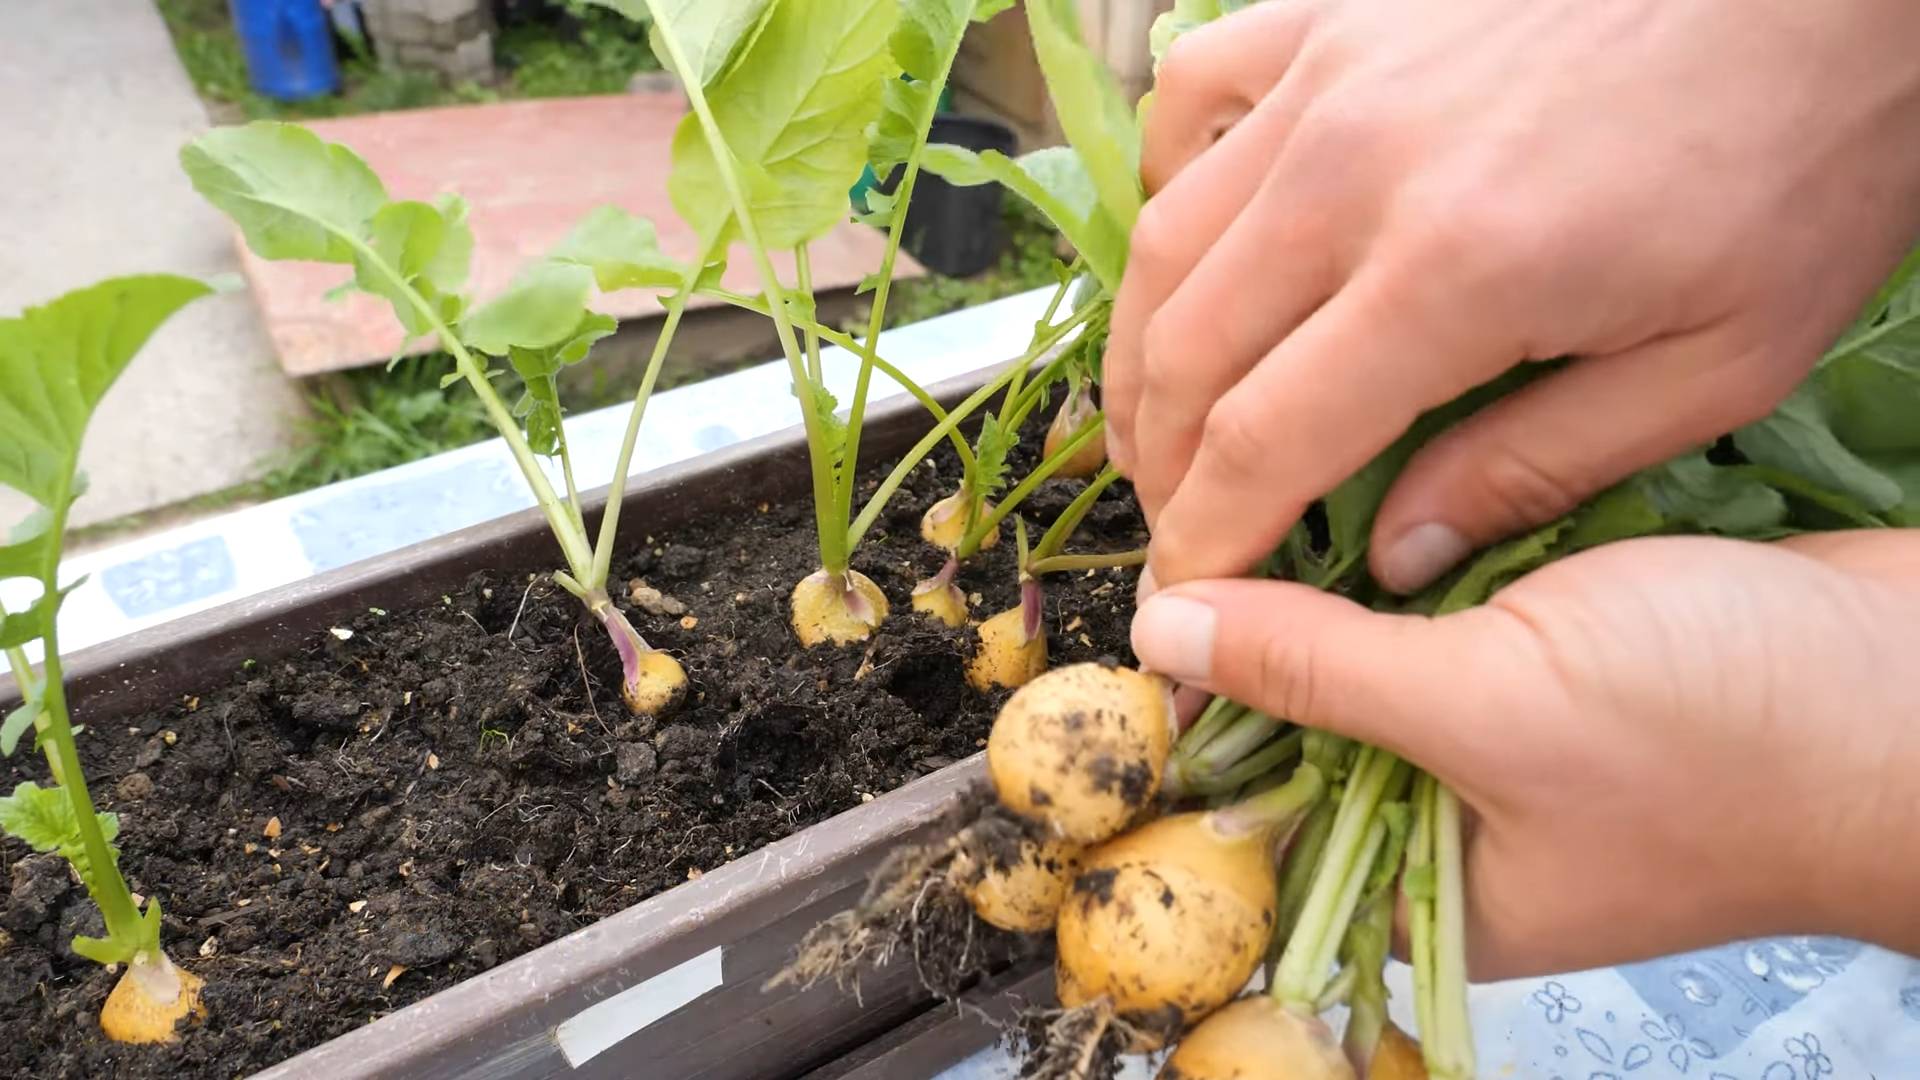
1. Check for Maturity: Radishes are ready to harvest when the roots are about 1 inch in diameter. You can gently brush away the soil around the base of the plant to check the size of the root.
2. Harvest Carefully: Gently pull the radishes from the soil. If the soil is dry, you may need to loosen it with a garden fork or hand trowel.
3. Wash and Store: Wash the radishes thoroughly and remove the tops. Store the radishes in the refrigerator in a plastic bag or container. They’ll keep for about a week.
Troubleshooting
Even with the best planning, sometimes things don’t go exactly as expected. Here are a few common radish problems and how to solve them:
* Radishes are too small: This is usually caused by overcrowding or lack of water. Thin your seedlings to 1 inch apart and make sure to water regularly.
* Radishes are cracked: This is usually caused by inconsistent watering. Keep the soil consistently moist, but not waterlogged.
* Radishes are pithy (spongy): This is usually caused by letting the radishes get too big before harvesting. Harvest your radishes when they are about 1 inch in diameter.
* Radishes are bitter: This can be caused by hot weather or lack of water. Water regularly and provide some shade during the hottest part of the day.
* Pests: Flea beetles can chew holes in the leaves of radishes. Cover your seedlings with row covers to protect them from pests. Root maggots can tunnel into the roots of radishes. Rotate your crops to prevent root maggots.
Succession Planting
To enjoy a continuous harvest of radishes, practice succession planting. This means planting a new batch of seeds every two weeks. This way, you’ll always have fresh radishes to enjoy. I usually plant a small row of radishes every other week throughout the spring and fall.
Choosing the Right Variety
There are so many different types of radishes to choose from! Here are a few of my favorites:
* Cherry Belle: A classic red globe radish that’s easy to grow and has a mild flavor.
* French Breakfast: A long, slender radish with a mild, slightly sweet flavor.
* Easter Egg: A mix of colorful radishes in shades of red, pink, purple, and white.
* Black Spanish: A large, black radish with a pungent flavor.
* Watermelon Radish: A large, round radish with a green exterior and a pink interior. It has a mild, slightly sweet flavor.
Radish Recipes
Now that you’ve grown your own radishes, it’s time to enjoy them! Here are a few of my favorite radish recipes:
* Radish and Butter Sandwiches: A classic French snack. Simply spread butter on a slice of bread and top with thinly sliced radishes and a sprinkle of sea salt.
* Radish Salad: Combine thinly sliced radishes with other vegetables such as cucumbers, carrots, and lettuce. Dress with a vinaigrette.
* Roasted Radishes: Toss radishes with olive oil, salt, and pepper and roast in the oven until tender.
* Radish Greens Pesto: Don’t throw away the radish greens! They can be used to make a delicious pesto.
* Radish Salsa: Finely chop radishes and combine them with other ingredients such as tomatoes, onions, cilantro, and lime juice.
Enjoy Your Harvest!
Growing radishes is a fun and rewarding experience. With a little bit of effort, you can enjoy fresh, delicious radishes from your own garden. So get out there and start planting! I promise, you won’t regret it. Happy gardening!
Conclusion
So, there you have it! Growing spring radishes doesn’t have to be a trip to the grocery store. With a little planning and effort, you can enjoy crisp, peppery radishes straight from your own garden. This DIY approach is a must-try for several compelling reasons. First, you gain complete control over the growing process, ensuring your radishes are free from unwanted pesticides and chemicals. Second, the taste of homegrown radishes is simply unparalleled – fresher, more vibrant, and bursting with flavor compared to store-bought varieties. Third, it’s incredibly rewarding to nurture something from seed to table, connecting you with nature and providing a sense of accomplishment.
But the benefits don’t stop there. Growing your own spring radishes is also a cost-effective way to enjoy this delicious vegetable. A single packet of radish seeds can yield a bountiful harvest, far exceeding the quantity you’d get for the same price at the supermarket. Plus, it’s a sustainable practice that reduces your carbon footprint by minimizing transportation and packaging.
Now, let’s talk about variations. While the basic method we’ve outlined is foolproof, feel free to experiment! Try different radish varieties, such as French Breakfast, Cherry Belle, or Watermelon radishes, each offering a unique flavor profile and appearance. You can also explore companion planting, pairing your radishes with other vegetables like carrots, lettuce, or spinach to create a mutually beneficial ecosystem in your garden. Consider succession planting, sowing new seeds every week or two, to ensure a continuous harvest throughout the spring season. For those with limited space, container gardening is an excellent option. Radishes thrive in pots or raised beds, making them perfect for balconies, patios, or small gardens.
Don’t be afraid to get your hands dirty and embrace the learning process. Gardening is all about experimentation and discovery. You might encounter challenges along the way, but that’s part of the fun. The satisfaction of harvesting your own fresh, flavorful radishes will make it all worthwhile.
We wholeheartedly encourage you to try this DIY trick and experience the joy of growing your own spring radishes. It’s a simple, rewarding, and sustainable way to add fresh, healthy vegetables to your diet. Once you’ve tasted the difference between homegrown and store-bought radishes, you’ll never go back!
And most importantly, we want to hear about your experience! Share your tips, tricks, and triumphs in the comments below. Let us know what varieties you tried, what challenges you faced, and what you learned along the way. Your feedback will not only help other readers but also contribute to a thriving community of home gardeners. So, grab your seeds, get planting, and let’s grow some amazing spring radishes together!
Frequently Asked Questions (FAQ)
What is the best time to plant spring radishes?
The ideal time to plant spring radishes is as soon as the soil can be worked in early spring. This is typically 4-6 weeks before the last expected frost. Radishes prefer cool weather and will bolt (go to seed) in hot temperatures, so timing is crucial. In warmer climates, you can also plant radishes in the fall for a winter harvest. Check your local frost dates to determine the optimal planting window for your region.
How much sunlight do radishes need?
Radishes need at least 6 hours of direct sunlight per day to thrive. While they can tolerate partial shade, especially in hotter climates, insufficient sunlight can result in leggy growth and smaller roots. Choose a sunny location in your garden or on your balcony for your radish patch. If you’re growing radishes indoors, consider using grow lights to supplement natural sunlight.
What kind of soil is best for growing radishes?
Radishes prefer loose, well-drained soil that is rich in organic matter. Heavy clay soil can hinder root development and result in misshapen radishes. Amend your soil with compost or other organic materials to improve drainage and fertility. A slightly acidic to neutral soil pH (around 6.0 to 7.0) is ideal. You can test your soil pH with a home testing kit or send a sample to your local agricultural extension office for analysis.
How often should I water radishes?
Radishes need consistent moisture to grow quickly and develop crisp, flavorful roots. Water deeply and regularly, especially during dry periods. Aim to keep the soil consistently moist but not waterlogged. Overwatering can lead to root rot, while underwatering can cause the radishes to become tough and bitter. A good rule of thumb is to water when the top inch of soil feels dry to the touch.
How long does it take for radishes to mature?
One of the great things about radishes is their quick growth rate. Most varieties mature in just 20-30 days from planting. This makes them an excellent choice for impatient gardeners or those looking for a quick harvest. Check the seed packet for the specific maturity time of the variety you’re growing.
What are some common pests and diseases that affect radishes?
Radishes are generally pest-resistant, but they can be susceptible to certain problems, including flea beetles, root maggots, and aphids. Flea beetles can create small holes in the leaves, while root maggots can damage the roots. Aphids can suck the sap from the plants, weakening them. To prevent these pests, consider using row covers or insecticidal soap. Diseases like damping-off and white rust can also affect radishes. Ensure good air circulation and avoid overwatering to prevent these diseases.
Can I eat the radish greens?
Yes! Radish greens are edible and nutritious. They have a peppery flavor similar to the roots and can be used in salads, stir-fries, or soups. Harvest the greens when they are young and tender for the best flavor. Avoid eating greens from radishes that have been treated with pesticides.
How do I know when radishes are ready to harvest?
Radishes are ready to harvest when the roots reach the size specified on the seed packet. Gently brush away the soil around the base of the plant to check the size of the root. If they are the right size, pull them up carefully. Overripe radishes can become woody and bitter, so it’s best to harvest them promptly.
What is succession planting and why should I do it?
Succession planting is the practice of sowing new seeds every week or two to ensure a continuous harvest. This is particularly beneficial for fast-growing crops like radishes. By succession planting, you can enjoy a steady supply of fresh radishes throughout the spring season, rather than having them all mature at once.
How do I store radishes after harvesting?
To store radishes, remove the greens and wash the roots thoroughly. Place the radishes in a plastic bag or container with a damp paper towel and store them in the refrigerator. They should keep for up to two weeks. The greens can be stored separately in a plastic bag in the refrigerator for a few days.
Leave a Comment