

Growing Bok Choy Indoors might seem like a challenge, but trust me, it’s totally achievable and incredibly rewarding! Imagine fresh, crisp bok choy right at your fingertips, ready to add a vibrant crunch to your stir-fries or a healthy boost to your salads, all without stepping foot outside. For centuries, cultivating vegetables in small spaces has been a necessity for many cultures, from rooftop gardens in bustling cities to windowsill herbs in cozy apartments. This tradition continues today, driven by a desire for fresh, locally sourced food and a connection to nature, even within the confines of our homes.
But why should you bother growing bok choy indoors? Well, think about it: no more relying on questionable supermarket produce, no more battling unpredictable weather, and a whole lot more control over what you’re eating. Plus, it’s a fantastic way to add a touch of green to your living space and a satisfying hobby to pick up. I’m going to share some simple, effective DIY tricks and hacks that will have you harvesting your own delicious bok choy in no time. Let’s get started and unlock the secrets to successfully growing bok choy indoors!
Growing Bok Choy Indoors: A Beginner’s Guide
Hey there, fellow plant enthusiasts! Ever thought about growing your own fresh, crisp bok choy right in your kitchen? It’s easier than you might think, and trust me, nothing beats the flavor of homegrown veggies. I’ve been growing bok choy indoors for a while now, and I’m excited to share my secrets with you. Let’s get started!
What You’ll Need
Before we dive into the nitty-gritty, let’s gather our supplies. Here’s a checklist of everything you’ll need to successfully grow bok choy indoors:
* Bok Choy Seeds: Choose a variety that’s well-suited for indoor growing. Dwarf varieties are often a great choice.
* Seed Starting Tray or Small Pots: These will be used to germinate your seeds.
* Seed Starting Mix: A light, well-draining mix is crucial for successful germination.
* Larger Pots (at least 6 inches in diameter): Once your seedlings are big enough, they’ll need to be transplanted into larger pots.
* Potting Soil: A good quality potting mix that retains moisture but also drains well.
* Grow Lights: Bok choy needs plenty of light, especially indoors. LED grow lights are energy-efficient and work wonders.
* Watering Can or Spray Bottle: For gentle watering.
* Fertilizer: A balanced liquid fertilizer to feed your bok choy.
* Spray Bottle (for pest control): Filled with water or a mild insecticidal soap solution.
* Well-ventilated space: Good air circulation is important to prevent diseases.
Phase 1: Starting Your Bok Choy Seeds
This is where the magic begins! Getting your seeds to sprout is the first step towards a bountiful harvest.
1. Prepare Your Seed Starting Tray: Fill your seed starting tray or small pots with seed starting mix. Gently pat it down to remove any air pockets.
2. Sow the Seeds: Make small indentations (about ¼ inch deep) in the soil. Place 2-3 seeds in each indentation. This increases your chances of at least one seed germinating.
3. Cover the Seeds: Lightly cover the seeds with more seed starting mix.
4. Water Gently: Use a spray bottle to mist the soil thoroughly. You want the soil to be moist, but not soggy.
5. Provide Warmth and Light: Place the tray in a warm location (around 65-75°F or 18-24°C). If you don’t have a naturally warm spot, you can use a heat mat designed for seed starting. Position your grow lights about 2-4 inches above the tray.
6. Maintain Moisture: Keep the soil consistently moist by misting it regularly. Don’t let it dry out!
7. Wait for Germination: Bok choy seeds typically germinate within 5-10 days. Be patient!
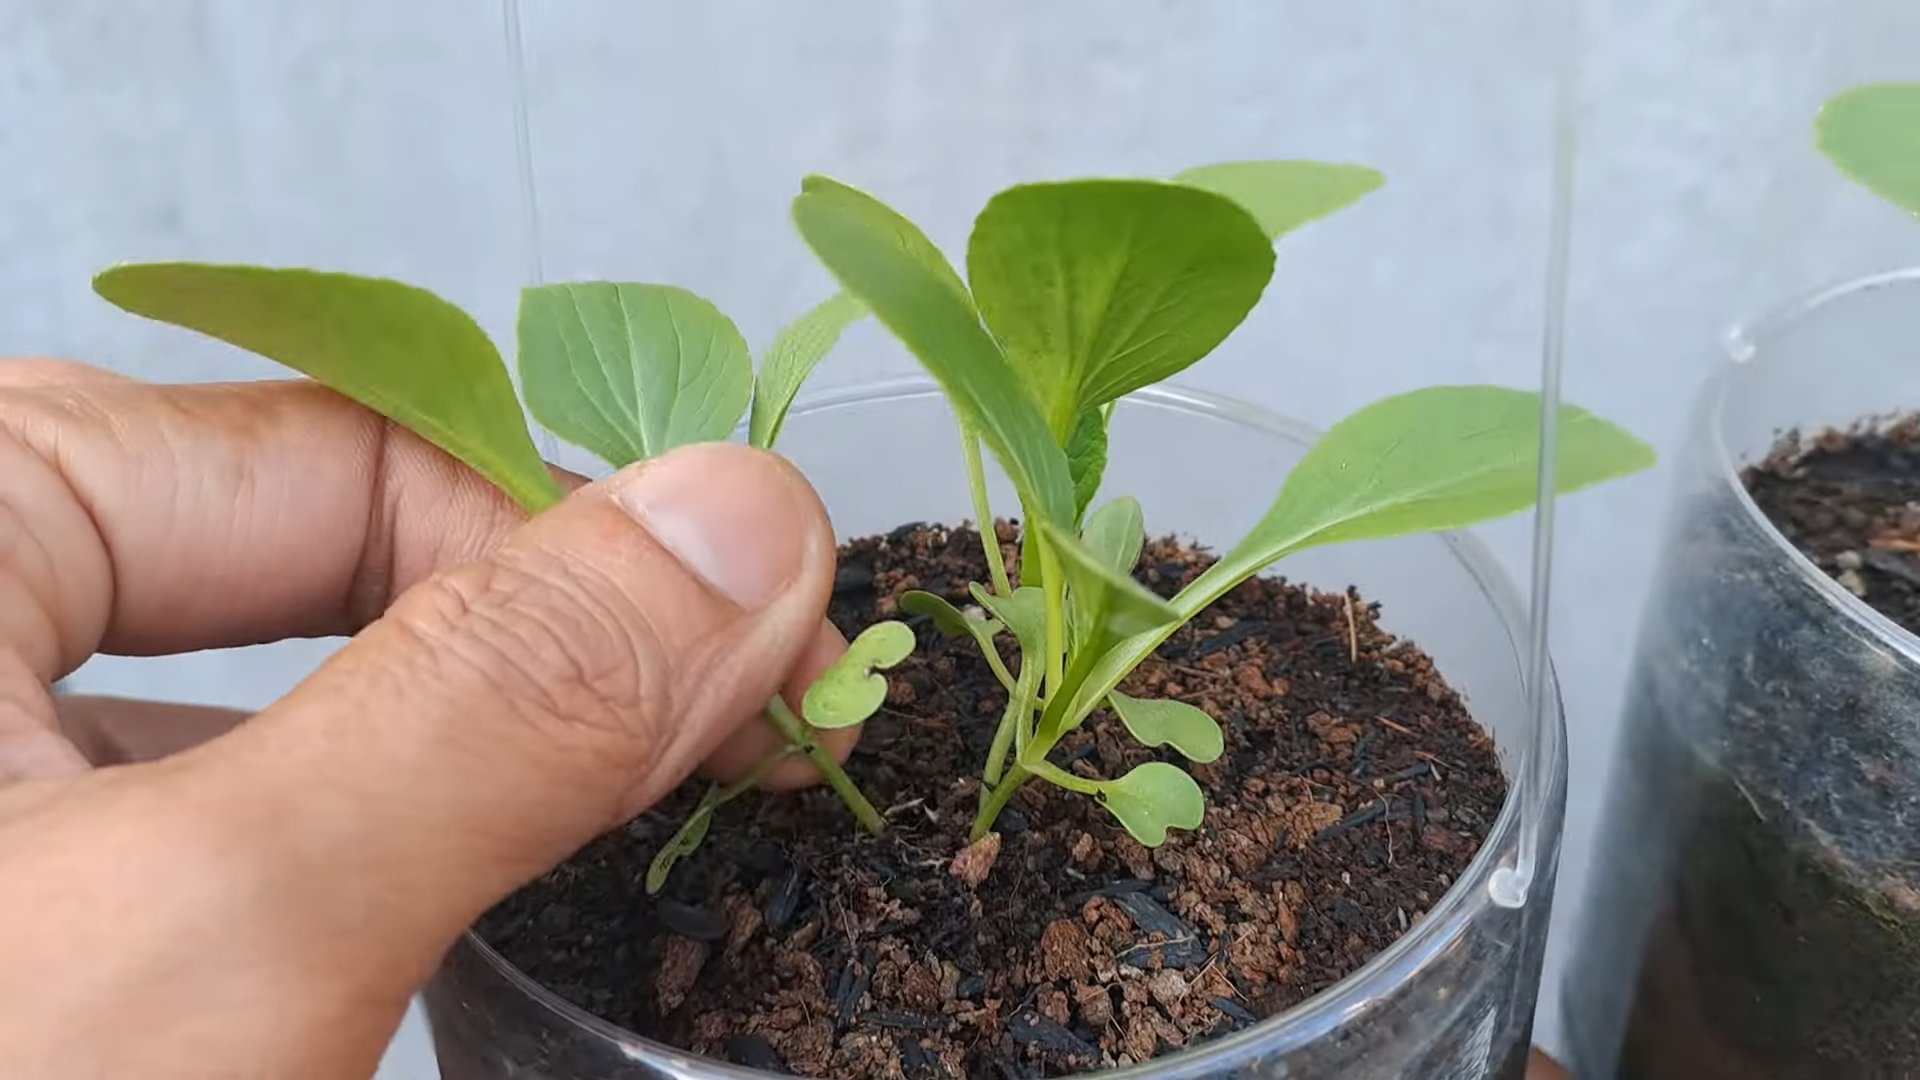
Phase 2: Transplanting Your Seedlings
Once your seedlings have developed a few true leaves (the leaves that appear after the initial seed leaves), it’s time to transplant them into larger pots.
1. Prepare Your Larger Pots: Fill your larger pots (at least 6 inches in diameter) with potting soil.
2. Gently Remove Seedlings: Carefully remove the seedlings from the seed starting tray. Try to keep as much of the root system intact as possible. If you planted multiple seeds in one cell, choose the strongest seedling and gently separate it from the others.
3. Plant the Seedlings: Make a hole in the potting soil large enough to accommodate the seedling’s root ball. Place the seedling in the hole and gently backfill with soil.
4. Water Thoroughly: Water the newly transplanted seedlings thoroughly.
5. Provide Light and Air Circulation: Place the pots under your grow lights. Ensure good air circulation to prevent fungal diseases. A small fan can help with this.
Phase 3: Caring for Your Bok Choy
Now that your bok choy is happily growing in its new home, it’s time to provide the care it needs to thrive.
1. Light: Bok choy needs at least 6 hours of direct light per day. If you’re using grow lights, keep them on for 12-14 hours a day. Adjust the height of the lights as your plants grow, keeping them a few inches above the foliage.
2. Watering: Water your bok choy regularly, keeping the soil consistently moist but not waterlogged. Check the soil moisture by sticking your finger about an inch into the soil. If it feels dry, it’s time to water.
3. Fertilizing: Feed your bok choy with a balanced liquid fertilizer every 2-3 weeks. Follow the instructions on the fertilizer packaging.
4. Temperature: Bok choy prefers cooler temperatures, ideally between 55-75°F (13-24°C). Avoid placing your plants near heat sources.
5. Air Circulation: Good air circulation is essential to prevent fungal diseases. Use a small fan to circulate the air around your plants.
6. Pest Control: Keep an eye out for pests like aphids and cabbage worms. If you spot any, spray your plants with water or a mild insecticidal soap solution. You can also handpick the pests off the plants.
7. Support: As your bok choy grows, it may need some support to prevent it from flopping over. You can use small stakes or tomato cages to provide support.
Troubleshooting Common Problems
Even with the best care, you might encounter some challenges along the way. Here are some common problems and how to address them:
* Yellowing Leaves: This could be a sign of overwatering, underwatering, or nutrient deficiency. Check the soil moisture and adjust your watering accordingly. If the soil is consistently moist, you may be overwatering. If it’s dry, you may be underwatering. If the problem persists, try fertilizing your plants.
* Leggy Growth: This means your plants are not getting enough light. Move them closer to your grow lights or increase the amount of time the lights are on.
* Pests: As mentioned earlier, keep an eye out for pests and take action promptly.
* Bolting: Bolting is when the plant starts to produce flowers prematurely. This can happen if the temperature is too high or if the plant is stressed. Try to keep the temperature cool and provide consistent care.
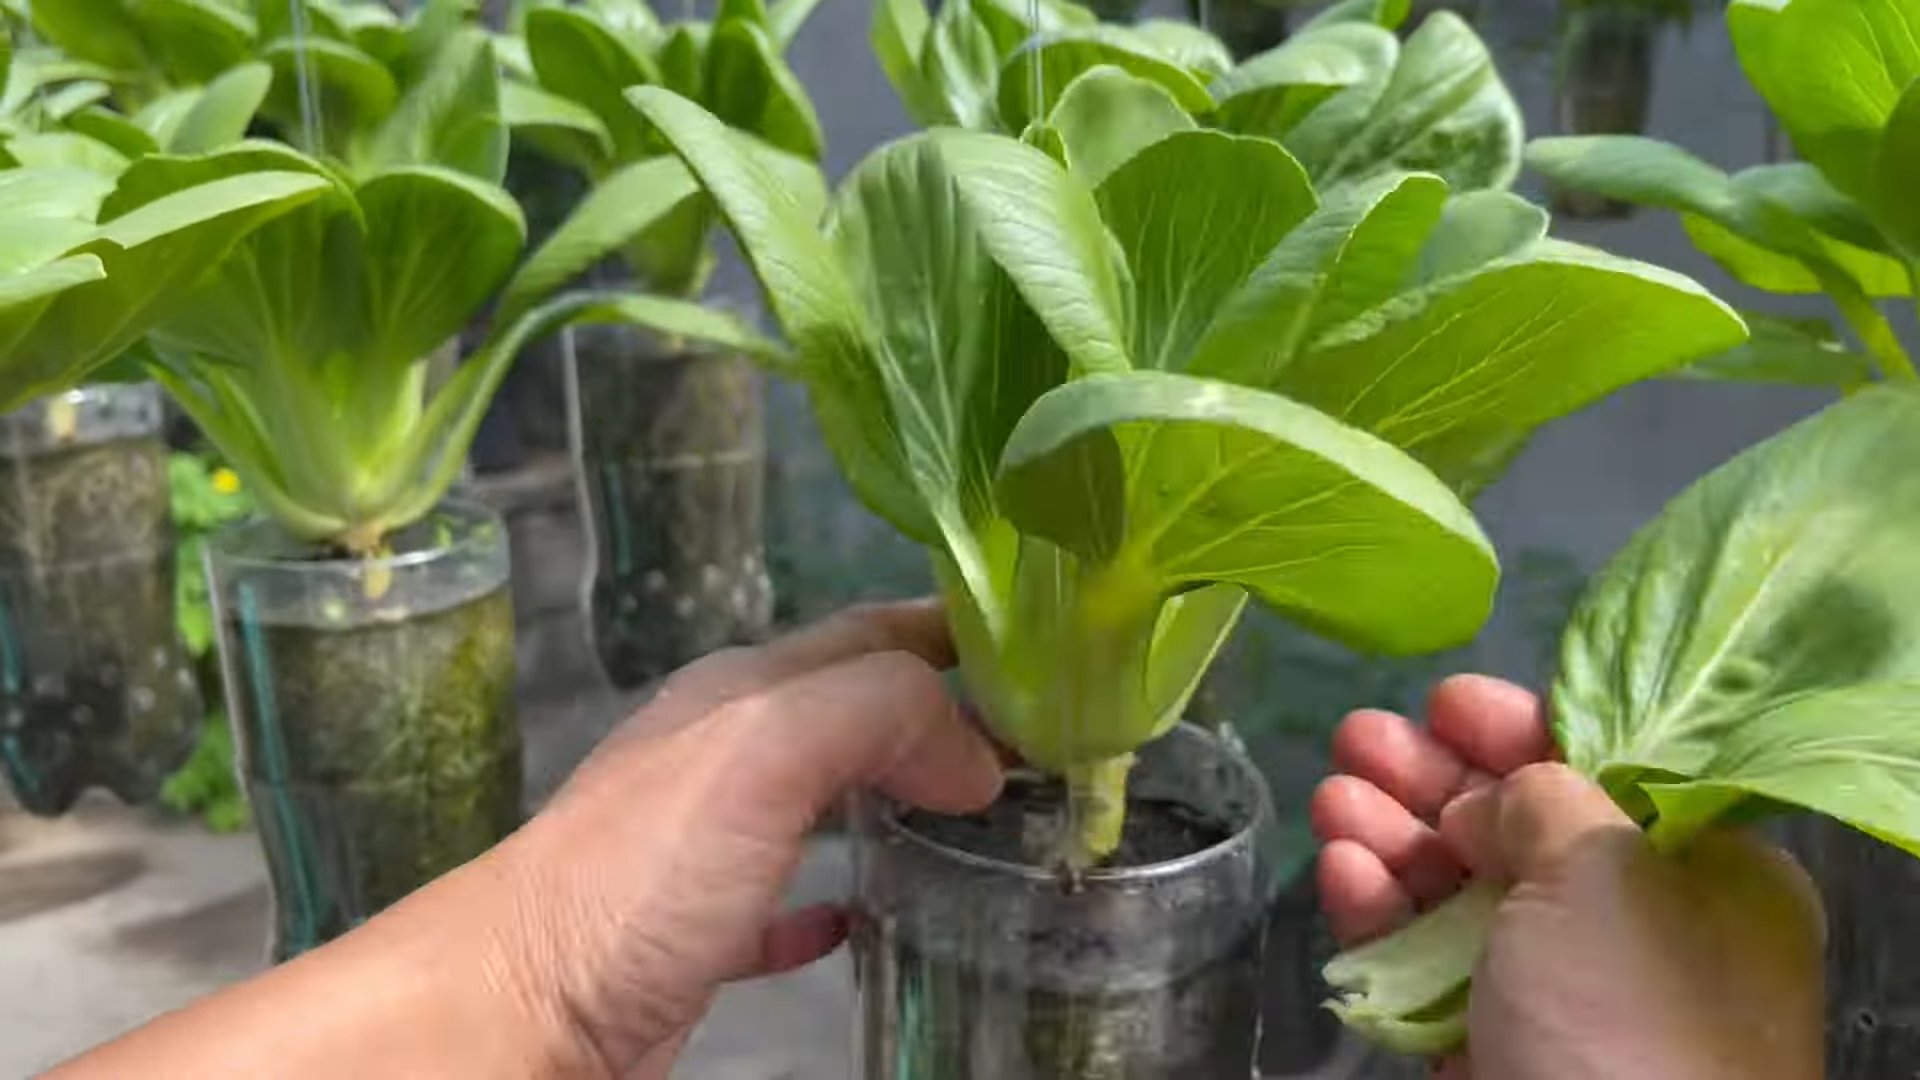
Harvesting Your Bok Choy
The best part! You can start harvesting your bok choy when the leaves are about 6-8 inches long.
1. Harvest Individual Leaves: You can harvest individual leaves as needed, starting with the outer leaves. This will allow the plant to continue producing new leaves.
2. Harvest the Entire Plant: Alternatively, you can harvest the entire plant by cutting it off at the base.
3. Wash and Enjoy: Wash your harvested bok choy thoroughly and enjoy it in salads, stir-fries, soups, or any other dish you like!
Choosing the Right Bok Choy Variety for Indoors
Not all bok choy varieties are created equal, especially when it comes to indoor growing. Here are a few of my favorite dwarf varieties that thrive in containers:
* ‘Toy Choy’: This is a very popular dwarf variety that’s known for its compact size and mild flavor. It’s perfect for small spaces.
* ‘Mei Qing Choi’: Another excellent dwarf variety with light green leaves and a slightly sweet taste. It’s very productive and easy to grow.
* ‘Joi Choi’: While not a true dwarf, ‘Joi Choi’ is a relatively compact variety that does well in containers. It has dark green leaves and a crisp texture.
When choosing a variety, consider the size of your growing space and your personal taste preferences.
Optimizing Your Indoor Growing Environment
To maximize your bok choy harvest, it’s important to create an optimal growing environment. Here are a few tips:
* Humidity: Bok choy prefers moderate humidity levels. If your indoor environment is too dry, you can increase the humidity by using a humidifier or placing a tray of water near your plants.
* Airflow: As mentioned earlier, good air circulation is crucial for preventing fungal diseases. Use a small fan to circulate the air around your plants.
* Cleanliness: Keep your growing area clean and free of debris. This will help prevent pests and diseases.
* Potting Mix: Use a high-quality potting mix that’s specifically designed for container gardening. Avoid using garden soil, as it can be too heavy and may contain pests or diseases.
Extending Your Harvest
Want to enjoy fresh bok choy for as long as possible? Here are a few tips for extending your harvest:
*
Conclusion
So, there you have it! Growing Bok Choy indoors is not only achievable but also incredibly rewarding. This DIY trick transforms your windowsill or spare room into a miniature, edible garden, providing you with fresh, crisp greens right at your fingertips. Forget those wilted, overpriced bunches at the grocery store; imagine the satisfaction of harvesting your own vibrant Bok Choy, knowing exactly where it came from and how it was grown.
Why is this a must-try? Because it’s simple, sustainable, and surprisingly effective. Even if you consider yourself a gardening novice, the steps outlined above are easy to follow and require minimal equipment. Plus, growing your own food, even on a small scale, connects you to the natural world and reduces your reliance on industrial agriculture. It’s a win-win!
But the beauty of this DIY project lies in its adaptability. Feel free to experiment with different varieties of Bok Choy. Baby Bok Choy is particularly well-suited for indoor growing due to its smaller size and faster maturation. You can also try different types of containers. While we recommended pots, you could also use repurposed plastic containers or even a hydroponic setup for a more advanced approach.
Consider companion planting as well. Herbs like basil or chives can thrive alongside your Bok Choy, potentially deterring pests and adding extra flavor to your culinary creations. Just be sure to research which plants are compatible and provide adequate space for each to grow.
Don’t be afraid to adjust the lighting based on your specific environment. If you live in a particularly dark area, consider investing in a grow light to supplement natural sunlight. Conversely, if your Bok Choy seems to be getting too much sun, move it to a slightly shadier location or use a sheer curtain to diffuse the light.
The key to success with this DIY trick is observation and adaptation. Pay close attention to your Bok Choy plants. Are the leaves turning yellow? Are they wilting? Are there any signs of pests? By carefully monitoring your plants and making adjustments as needed, you’ll be well on your way to a bountiful harvest.
We wholeheartedly encourage you to give growing Bok Choy indoors a try. It’s a fun, educational, and ultimately delicious experience. And once you’ve mastered the basics, you can expand your indoor garden to include other vegetables and herbs. The possibilities are endless!
Most importantly, we want to hear about your experiences! Share your photos, tips, and challenges in the comments section below. Let’s create a community of indoor gardeners and learn from each other. What varieties of Bok Choy did you try? What challenges did you encounter, and how did you overcome them? Your insights could be invaluable to other readers. So, grab your seeds, get your hands dirty, and embark on this exciting journey of growing Bok Choy indoors. You won’t regret it!
Frequently Asked Questions (FAQ)
What kind of soil is best for growing Bok Choy indoors?
The ideal soil for growing Bok Choy indoors is a well-draining potting mix that is rich in organic matter. Avoid using garden soil, as it can be too heavy and may contain pests or diseases. Look for a potting mix specifically formulated for vegetables or herbs. You can also amend a general-purpose potting mix with compost or other organic materials to improve its fertility and drainage. A slightly acidic to neutral pH (around 6.0 to 7.0) is preferred.
How much sunlight does Bok Choy need when grown indoors?
Bok Choy thrives in bright, indirect sunlight. Aim for at least 6 hours of sunlight per day. If you don’t have a sunny windowsill, you can supplement with grow lights. LED grow lights are a good option as they are energy-efficient and produce minimal heat. Position the grow lights about 6-12 inches above the plants. Rotate your Bok Choy plants regularly to ensure even light exposure on all sides.
How often should I water my indoor Bok Choy plants?
Water your Bok Choy plants regularly, keeping the soil consistently moist but not waterlogged. Check the soil moisture by sticking your finger about an inch deep. If the soil feels dry, it’s time to water. Water deeply, allowing excess water to drain out of the bottom of the pot. Avoid overhead watering, as this can promote fungal diseases. Water in the morning to allow the foliage to dry before nightfall.
What are some common pests and diseases that affect indoor Bok Choy?
Common pests that can affect indoor Bok Choy include aphids, spider mites, and whiteflies. Regularly inspect your plants for signs of infestation, such as small insects, webbing, or sticky residue. Treat infestations promptly with insecticidal soap or neem oil. Fungal diseases, such as powdery mildew, can also be a problem in humid environments. Ensure good air circulation around your plants and avoid overhead watering to prevent fungal diseases. If you notice signs of disease, remove affected leaves and treat with a fungicide.
How long does it take to harvest Bok Choy grown indoors?
The time it takes to harvest Bok Choy grown indoors depends on the variety and growing conditions. Baby Bok Choy can be harvested in as little as 30-40 days, while larger varieties may take 45-60 days. You can harvest the entire plant at once or harvest individual leaves as needed. To harvest individual leaves, start with the outer leaves and work your way inwards.
Can I grow Bok Choy from seed indoors, or should I start with seedlings?
You can grow Bok Choy from seed indoors. Starting from seed allows you to choose from a wider variety of cultivars. Sow seeds directly into your pots or start them in seed trays and transplant them later. Keep the soil moist and warm until the seeds germinate, which usually takes about 5-7 days. Alternatively, you can purchase Bok Choy seedlings from a garden center or nursery.
What are some signs that my Bok Choy plants are not doing well?
Several signs can indicate that your Bok Choy plants are not thriving. Yellowing leaves can indicate overwatering, underwatering, or nutrient deficiencies. Wilting leaves can also be a sign of underwatering or root rot. Leggy growth (tall, spindly plants) can indicate insufficient light. Stunted growth can be caused by nutrient deficiencies or pest infestations. Carefully observe your plants and adjust your care accordingly.
How do I fertilize my indoor Bok Choy plants?
Fertilize your indoor Bok Choy plants every 2-3 weeks with a balanced liquid fertilizer. Follow the instructions on the fertilizer label. You can also use a slow-release fertilizer at planting time. Avoid over-fertilizing, as this can lead to excessive foliage growth and reduced flavor.
Can I grow Bok Choy indoors year-round?
Yes, you can grow Bok Choy indoors year-round, provided you provide adequate light, water, and nutrients. Bok Choy prefers cooler temperatures, so avoid placing your plants near heat sources.
What are some creative ways to use my homegrown Bok Choy?
Your homegrown Bok Choy can be used in a variety of dishes. It’s delicious stir-fried, steamed, or added to soups and stews. You can also use it in salads or as a side dish. Experiment with different recipes and enjoy the fresh, crisp flavor of your homegrown Bok Choy.
Leave a Comment