

Grow Watermelons Indoors? Absolutely! Imagine sinking your teeth into a juicy, homegrown watermelon in the dead of winter. Sounds like a dream, right? Well, it doesn’t have to be! For centuries, humans have been pushing the boundaries of agriculture, experimenting with techniques to cultivate their favorite fruits and vegetables in less-than-ideal conditions. From ancient Roman greenhouses to modern-day hydroponics, the desire to control our food source has always been a driving force.
But why bother with the hassle of growing watermelons indoors? Well, for many of us, space is a premium. Maybe you live in an apartment with a tiny balcony, or perhaps your outdoor garden is plagued by pests and unpredictable weather. That’s where these DIY tricks come in! I’m going to show you how to grow watermelons indoors, regardless of your outdoor limitations. This guide will provide you with simple, effective strategies to create the perfect indoor watermelon oasis. Get ready to enjoy the sweet taste of summer, all year round!
Growing Watermelons Indoors: Your DIY Guide for a Sweet Harvest
Hey everyone! Are you also tired of long winters and short summers? Me too! That’s why I decided to take the problem into my own hands and simply grow watermelons indoors. Yes, you heard that right! While it’s a bit more effort than in the garden, with the right preparation and some patience, you can soon be enjoying your own juicy watermelons. Let’s get started!
What you need: The Materials List
Before we start, we’ll obviously need the right equipment. Here is a list of things you should get:
- Watermelon seeds: It’s best to choose a variety that is suitable for growing in pots. “Sugar Baby” or “Bush Sugar Baby” are good options.
- Large pots: Watermelons need space! A pot with a capacity of at least 50 liters (about 13 gallons) is ideal.
- High-quality potting soil: A well-draining soil is important to prevent waterlogging.
- Seed starting mix: For starting the seeds.
- Grow lights: Watermelons need a lot of light, especially when growing indoors.
- Fertilizer: A balanced fertilizer for vegetables is perfect.
- Trellis/Support: Watermelon plants like to vine, so they need something to hold onto.
- Spray bottle: For moistening the soil.
- Thermometer: To keep an eye on the temperature.
- Moisture meter: To monitor the moisture level of the soil.
- Fan: For good air circulation.
- Paintbrush: For pollinating the flowers.
- Patience: The most important thing of all!
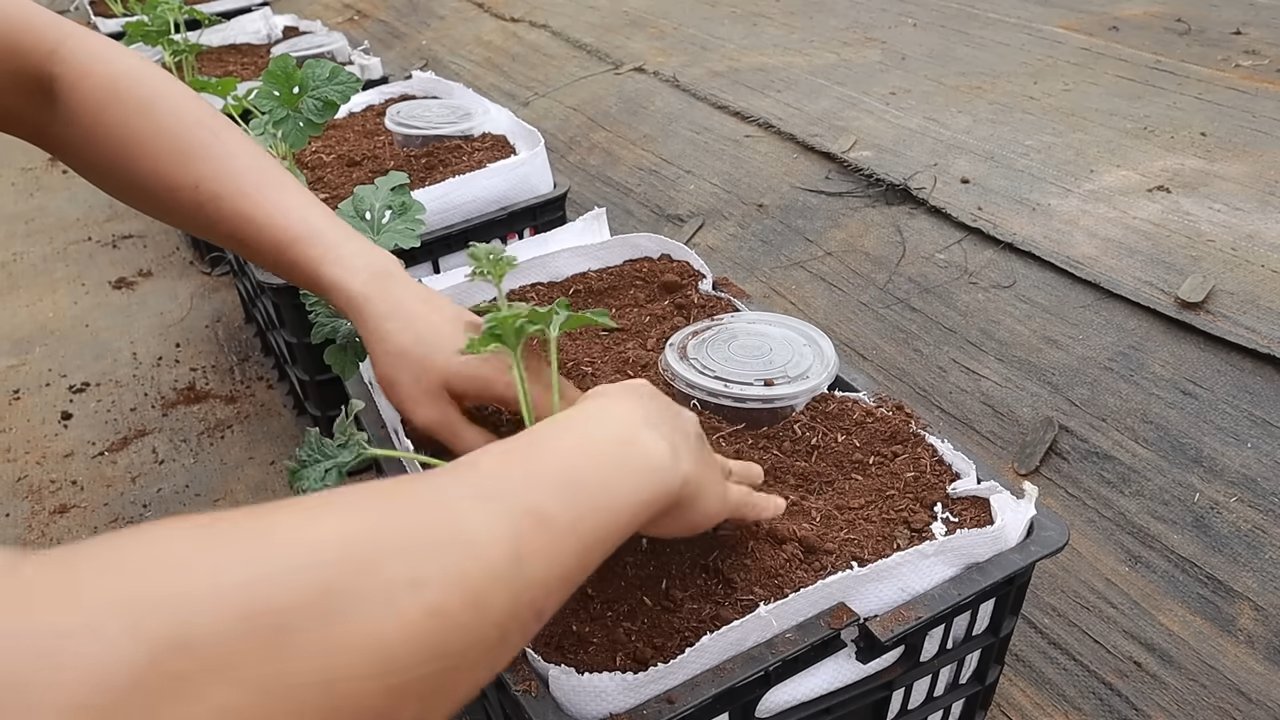
Phase 1: Starting the Seeds
Starting the seeds is the first step to success. Here, I’ll show you how to get the seeds to germinate properly:
- Prepare the seeds: Place the seeds in lukewarm water for 24 hours. This helps to speed up germination.
- Fill starter pots: Fill small starter pots with seed starting mix.
- Sow the seeds: Press the seeds about 1-2 cm (0.5-1 inch) deep into the soil.
- Water: Gently moisten the soil with a spray bottle. It should be damp, but not wet.
- Keep them warm: Place the starter pots in a warm place (approx. 25-28°C / 77-82°F). A heating mat can be very helpful here.
- Cover: Cover the pots with plastic wrap or a mini-greenhouse to keep the humidity high.
- Ventilate: Briefly air out the pots daily to prevent mold growth.
- Wait: After about 5-10 days, the first seedlings should be visible.
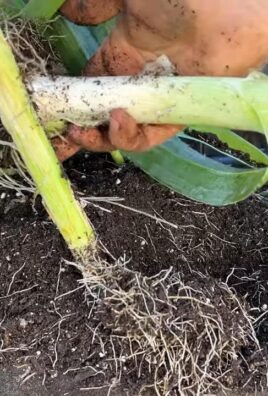
Phase 2: Transplanting into Larger Pots
Once the seedlings have a few leaves, it’s time to transplant them into larger pots.
- Prepare large pots: Fill the large pots with high-quality potting soil.
- Dig planting holes: In each pot, dig a hole large enough for the root ball of the seedlings.
- Carefully remove seedlings: Gently take the seedlings out of the starter pots. Be careful not to damage the roots.
- Plant: Place the seedlings in the planting holes and fill the pots with soil.
- Water in: Water the plants thoroughly.
- Install support: Place a trellis or support in the pot so the plant has something to hold onto.
Phase 3: Proper Care
Proper care is crucial for a successful harvest. Here are a few tips:
- Light: Watermelons need a lot of light. Place the pots in a bright spot or use grow lights. The lights should be on for about 14-16 hours a day.
- Temperature: The ideal temperature is between 20 and 30°C (68-86°F). Avoid extreme temperature fluctuations.
- Watering: Water the plants regularly, but avoid waterlogging. The soil should always be slightly moist.
- Fertilizing: Fertilize the plants every two weeks with a balanced fertilizer for vegetables.
- Air circulation: Ensure good air circulation to prevent mold growth. A fan can be very helpful here.
- Pollination: Since you are growing the watermelons indoors, you will have to pollinate the flowers yourself. Use a small paintbrush to transfer pollen from the male flowers to the female flowers. You can identify male flowers because they only have a stem, while female flowers have a small baby fruit (ovary) below the blossom.
- Pruning: Regularly remove side shoots to concentrate the plant’s energy on fruit production.
- Pests and diseases: Keep an eye out for pests and diseases. If necessary, you can use organic pesticides.
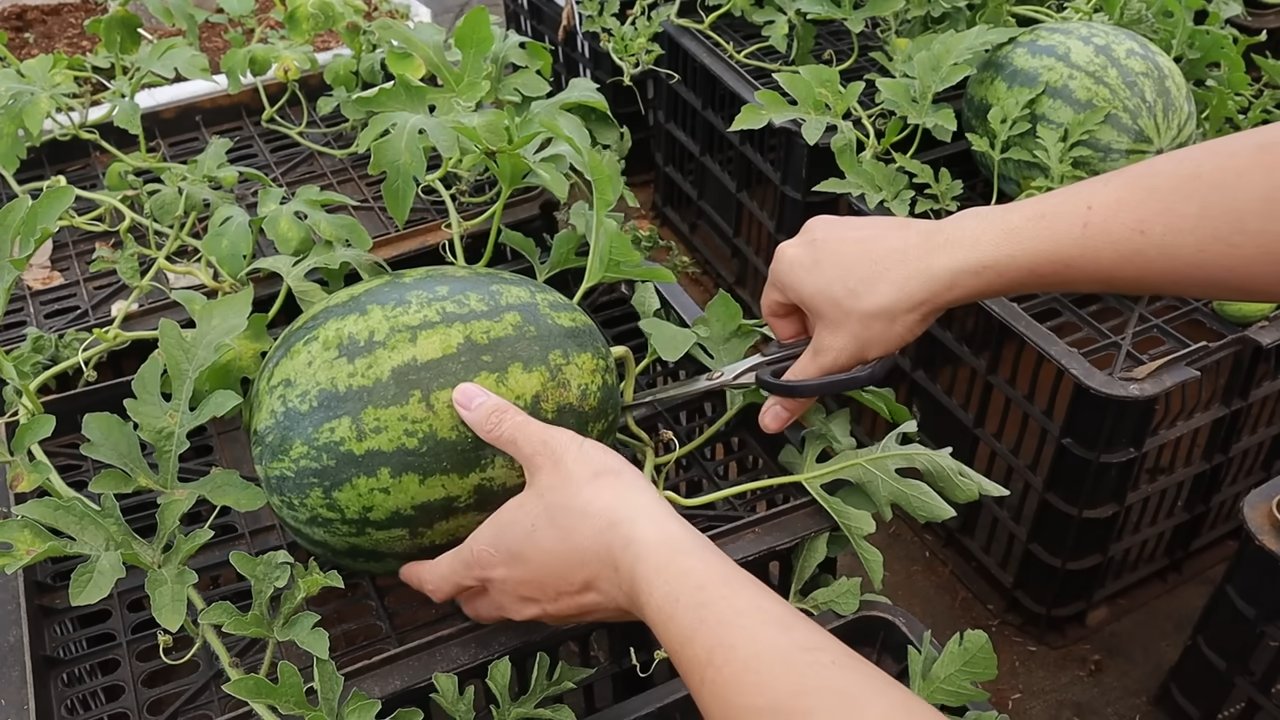
Phase 4: The Harvest
After about 80-100 days, the watermelons should be ripe. Here are a few signs that it’s time to harvest:
- Thump test: Knock on the watermelon. If it sounds hollow, it’s ripe.
- Color change: The underside of the watermelon, where it rests on the ground, should have changed from white to yellowish.
- Dry stem: The tendril closest to where the watermelon connects to the vine should be dry and brown.
Carefully cut the watermelon from the stem and enjoy your homegrown, juicy watermelon!
Additional Tips and Tricks
- Variety selection: Research different watermelon varieties carefully and choose one that is suitable for growing in pots.
- Soil quality: Pay attention to good soil quality. You can improve the soil with compost or other organic materials.
- Watering: It’s best to water the plants in the morning so the leaves can dry during the day.
- Pests: Check the plants regularly for pests. If necessary, you can use organic pesticides.
- Patience: Growing watermelons indoors requires patience. Don’t be discouraged if it doesn’t work out on the first try.
Common Problems and Solutions
- Yellow leaves: Yellow leaves can be a sign of a nutrient deficiency. Fertilize the plants with a balanced fertilizer.
- Mold: Mold can develop due to high humidity. Ensure good air circulation and ventilate the plants regularly.
- No fruit: If the plants are not producing fruit, it could be due to a lack of pollination. Pollinate the flowers yourself with a paintbrush.
- Pests: Pests can weaken the plants and affect the harvest. Check the plants regularly and use organic pesticides if necessary.
I hope this guide helps you grow your own watermelons indoors. It’s an exciting project, and the reward is a delicious, homegrown watermelon. Good luck and have fun gardening
Conclusion
Growing watermelons indoors might seem like a far-fetched dream, but as we’ve explored, it’s entirely achievable with the right approach and a little dedication. This DIY trick isn’t just about saving money; it’s about experiencing the sheer joy of nurturing a plant from seed to fruit, regardless of your geographical limitations or the season. Imagine the satisfaction of biting into a juicy, homegrown watermelon in the dead of winter, a testament to your gardening prowess and ingenuity.
This method offers a level of control over the growing environment that outdoor gardening simply can’t match. You can meticulously manage temperature, humidity, and light exposure, creating the perfect conditions for your watermelon vines to thrive. This is particularly beneficial for those living in areas with short growing seasons or unpredictable weather patterns. Plus, growing indoors significantly reduces the risk of pests and diseases that can plague outdoor watermelon crops.
But the benefits extend beyond just convenience and control. Growing your own food, even something as seemingly extravagant as a watermelon, connects you to the natural world in a profound way. It fosters a deeper appreciation for the effort and resources that go into producing the food we eat. It’s a rewarding and educational experience for the whole family, teaching valuable lessons about plant life cycles, environmental stewardship, and the importance of sustainable practices.
Don’t be afraid to experiment with different watermelon varieties to find the ones that best suit your indoor growing conditions and personal preferences. Bush varieties, like ‘Bush Sugar Baby’ or ‘Golden Midget,’ are particularly well-suited for container gardening due to their compact size. You can also explore different training techniques, such as vertical gardening, to maximize space and encourage healthy fruit development. Consider using a trellis or other support structure to guide the vines upwards, preventing them from sprawling across the floor.
Furthermore, consider supplementing your artificial lighting with natural sunlight whenever possible. Even a few hours of direct sunlight each day can significantly boost plant growth and fruit production. And don’t forget the importance of proper pollination. If you’re not seeing fruit set, you may need to hand-pollinate the female flowers using a small paintbrush.
We encourage you to embrace this DIY trick and embark on your own indoor watermelon growing adventure. It’s a challenging but ultimately rewarding endeavor that will not only provide you with delicious, homegrown fruit but also deepen your connection to the natural world. Share your experiences with us! We’d love to hear about your successes, challenges, and any innovative techniques you discover along the way. Let’s build a community of indoor watermelon enthusiasts and inspire others to try their hand at this unique and fulfilling gardening project. So, grab your seeds, prepare your containers, and get ready to experience the sweet taste of success with your very own indoor-grown **watermelons**.
Frequently Asked Questions (FAQ)
1. What are the best watermelon varieties to grow indoors?
The best watermelon varieties for indoor growing are typically bush or dwarf varieties, as they require less space and are better suited for container gardening. Some popular choices include:
* **Bush Sugar Baby:** A compact variety that produces small, sweet watermelons.
* **Golden Midget:** A small, yellow-fleshed watermelon that matures quickly.
* **Tiger Baby:** A small, striped watermelon with a sweet, crisp flesh.
* **Patio Baby:** A very compact variety specifically bred for container gardening.
When selecting a variety, consider the size of your growing space, the amount of light available, and your personal taste preferences. Read seed descriptions carefully to ensure that the variety you choose is suitable for indoor growing.
2. How much light do indoor watermelons need?
Watermelons require a significant amount of light to thrive and produce fruit. Ideally, they need at least 6-8 hours of direct sunlight per day. If you don’t have access to enough natural sunlight, you’ll need to supplement with artificial lighting.
High-intensity grow lights, such as LED or HID lights, are the most effective for growing watermelons indoors. Choose a light that emits a full spectrum of light, including both blue and red wavelengths, to support both vegetative growth and fruit production. Position the lights close enough to the plants to provide adequate illumination, but not so close that they burn the leaves.
3. What size container do I need for growing watermelons indoors?
The size of the container will depend on the variety of watermelon you’re growing. Bush varieties can be grown in containers as small as 15-20 gallons, while larger varieties may require containers of 25 gallons or more.
Choose a container that is wide and deep enough to accommodate the watermelon’s root system. Make sure the container has drainage holes to prevent waterlogging. You can also use a fabric pot, which allows for better air circulation and drainage.
4. How often should I water my indoor watermelons?
Watermelons need consistent moisture, especially during hot weather and when they are fruiting. Water deeply whenever the top inch of soil feels dry to the touch. Avoid overwatering, as this can lead to root rot.
The frequency of watering will depend on factors such as the size of the container, the type of soil, and the temperature and humidity of your growing environment. Check the soil moisture regularly and adjust your watering schedule accordingly.
5. How do I pollinate my indoor watermelons?
Watermelons are not self-pollinating, so you’ll need to hand-pollinate the female flowers if you’re growing them indoors. Female flowers have a small, immature watermelon at the base of the flower, while male flowers do not.
To hand-pollinate, use a small paintbrush to collect pollen from the male flowers and transfer it to the female flowers. Gently brush the pollen onto the stigma (the sticky part in the center of the female flower). It’s best to pollinate in the morning, when the flowers are open and the pollen is fresh. You may need to repeat the pollination process for several days to ensure successful fruit set.
6. What kind of fertilizer should I use for indoor watermelons?
Watermelons are heavy feeders and require a nutrient-rich soil to thrive. Use a balanced fertilizer with a ratio of 10-10-10 or 14-14-14. You can also use a fertilizer specifically formulated for fruiting plants.
Fertilize your watermelons every 2-3 weeks during the growing season. Follow the instructions on the fertilizer label carefully. Avoid over-fertilizing, as this can damage the plants.
7. How long does it take to grow a watermelon indoors?
The time it takes to grow a watermelon indoors will depend on the variety, the growing conditions, and your level of care. Generally, it takes about 70-90 days from planting to harvest.
Keep in mind that indoor watermelons may take longer to mature than outdoor watermelons due to the controlled environment. Be patient and monitor your plants closely.
8. How do I know when my indoor watermelon is ripe?
There are several signs that indicate a watermelon is ripe:
* The tendril closest to the fruit will turn brown and dry.
* The spot on the bottom of the watermelon (where it rested on the ground) will turn from white to yellow.
* The watermelon will sound hollow when you thump it.
These are general guidelines, and the best way to determine ripeness is to taste a small piece of the watermelon. If it’s sweet and juicy, it’s ready to harvest.
9. Can I grow watermelons indoors year-round?
Yes, you can grow watermelons indoors year-round, provided you have the right growing conditions. You’ll need to provide adequate light, temperature, and humidity, as well as consistent watering and fertilization.
Growing watermelons indoors during the winter months may require more effort and attention, as the plants will need supplemental lighting and heating. However, with proper care, you can enjoy fresh, homegrown watermelons any time of year.
10. What are some common problems when growing watermelons indoors and how can I fix them?
Some common problems when growing watermelons indoors include:
* **Lack of pollination:** Hand-pollinate the female flowers as described above.
* **Pests:** Monitor your plants regularly for pests such as aphids, spider mites, and whiteflies. Treat infestations with insecticidal soap or neem oil.
* **Diseases:** Prevent fungal diseases by providing good air circulation and avoiding overwatering. Treat infected plants with a fungicide.
* **Nutrient deficiencies:** Fertilize your plants regularly with a balanced fertilizer.
* **Lack of light:** Provide adequate light, either natural or artificial.
By addressing these common problems promptly, you can ensure a successful indoor watermelon growing experience.

Leave a Comment