

Grow Microgreens at Home: Ever dreamt of having a tiny, vibrant garden bursting with flavor right on your kitchen counter? Imagine snipping fresh, nutrient-packed greens to add a zesty kick to your salads, sandwiches, and smoothies – all without stepping foot outside! Well, dream no more, because this DIY guide is your ticket to becoming a microgreen maestro!
The practice of growing microgreens isn’t new. In fact, it has roots in the culinary traditions of the Far East, where chefs have long prized these tiny powerhouses for their intense flavors and delicate textures. Now, this trend has blossomed into a global phenomenon, and for good reason.
In today’s fast-paced world, we’re all looking for ways to eat healthier and connect with our food. Grow Microgreens at Home offers the perfect solution. It’s a quick, easy, and incredibly rewarding way to add a burst of vitamins, minerals, and antioxidants to your diet. Plus, it’s a fantastic project for anyone, regardless of gardening experience. I’m excited to show you how to cultivate your own thriving microgreen garden, even if you have limited space or a black thumb! Let’s get started and unlock the secrets to growing these delicious and nutritious little plants!
Grow Your Own Microgreens: A Beginner’s Guide
Hey there, fellow plant enthusiasts! Ever wanted to add a burst of fresh flavor and nutrients to your meals without a trip to the grocery store? Well, you’re in the right place! I’m going to walk you through the super simple process of growing your own microgreens at home. Trust me, it’s easier than you think, and the rewards are delicious!
What are Microgreens Anyway?
Before we dive in, let’s quickly cover what microgreens actually are. They’re basically baby versions of vegetables and herbs, harvested just a week or two after germination. Think of them as the super-powered offspring of sprouts and mature greens. They’re packed with flavor, vitamins, and minerals, and they look absolutely gorgeous as a garnish.
Why Grow Your Own?
Honestly, the reasons are endless!
* Freshness: You can’t beat the taste of freshly harvested microgreens.
* Cost-Effective: Buying microgreens at the store can be pricey. Growing your own is much cheaper in the long run.
* Nutrient-Rich: Microgreens are incredibly nutritious, often containing higher levels of vitamins and minerals than their mature counterparts.
* Convenience: Having a constant supply of fresh greens right in your kitchen is incredibly convenient.
* Fun and Rewarding: It’s a fun and educational project, especially if you have kids.
* Year-Round Growing: You can grow microgreens indoors any time of year, regardless of the weather outside.
* Sustainable: Reduce your carbon footprint by growing your own food.
Choosing Your Seeds
The first step to microgreen success is selecting the right seeds. Not all seeds are created equal, and some are better suited for microgreen production than others.
* Look for “Microgreen Seeds” or “Sprouting Seeds”: These are specifically tested for germination rates and safety. Avoid using seeds that are treated with fungicides or other chemicals.
* Popular Choices: Some of my favorite microgreens to grow include:
* Radish (spicy and quick to grow)
* Broccoli (mild and nutritious)
* Sunflower (nutty and crunchy)
* Pea shoots (sweet and tender)
* Arugula (peppery and flavorful)
* Mustard (spicy and vibrant)
* Kale (earthy and nutritious)
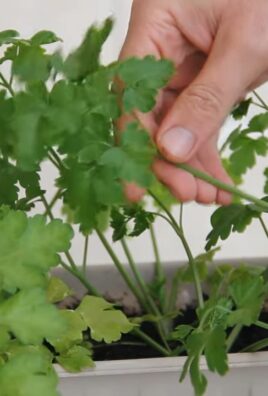
* Cilantro (citrusy and aromatic)
* Beet (earthy and colorful)
* Seed Density: Keep in mind that different seeds require different densities. Larger seeds like sunflower and pea shoots need more space than smaller seeds like radish and broccoli.
Gathering Your Supplies
Now, let’s gather everything you’ll need to get started. The good news is, you probably already have most of these items at home!
* Growing Trays: You’ll need two trays – one with drainage holes and one without. The tray with drainage holes will hold your growing medium and seeds, while the tray without will act as a water reservoir. You can find these at most garden centers or online. I often reuse plastic takeout containers for this!
* Growing Medium: You have a few options here:
* Seed Starting Mix: This is a lightweight, sterile mix that’s perfect for microgreens.
* Coco Coir: A sustainable alternative to peat moss, coco coir is made from coconut husks and provides excellent drainage and aeration.
* Hemp Mat: These mats are biodegradable and provide a clean, easy-to-use growing surface.
* Spray Bottle: You’ll need a spray bottle to keep your seeds and seedlings moist.
* Seeds: Of course! Choose your favorite microgreen seeds.
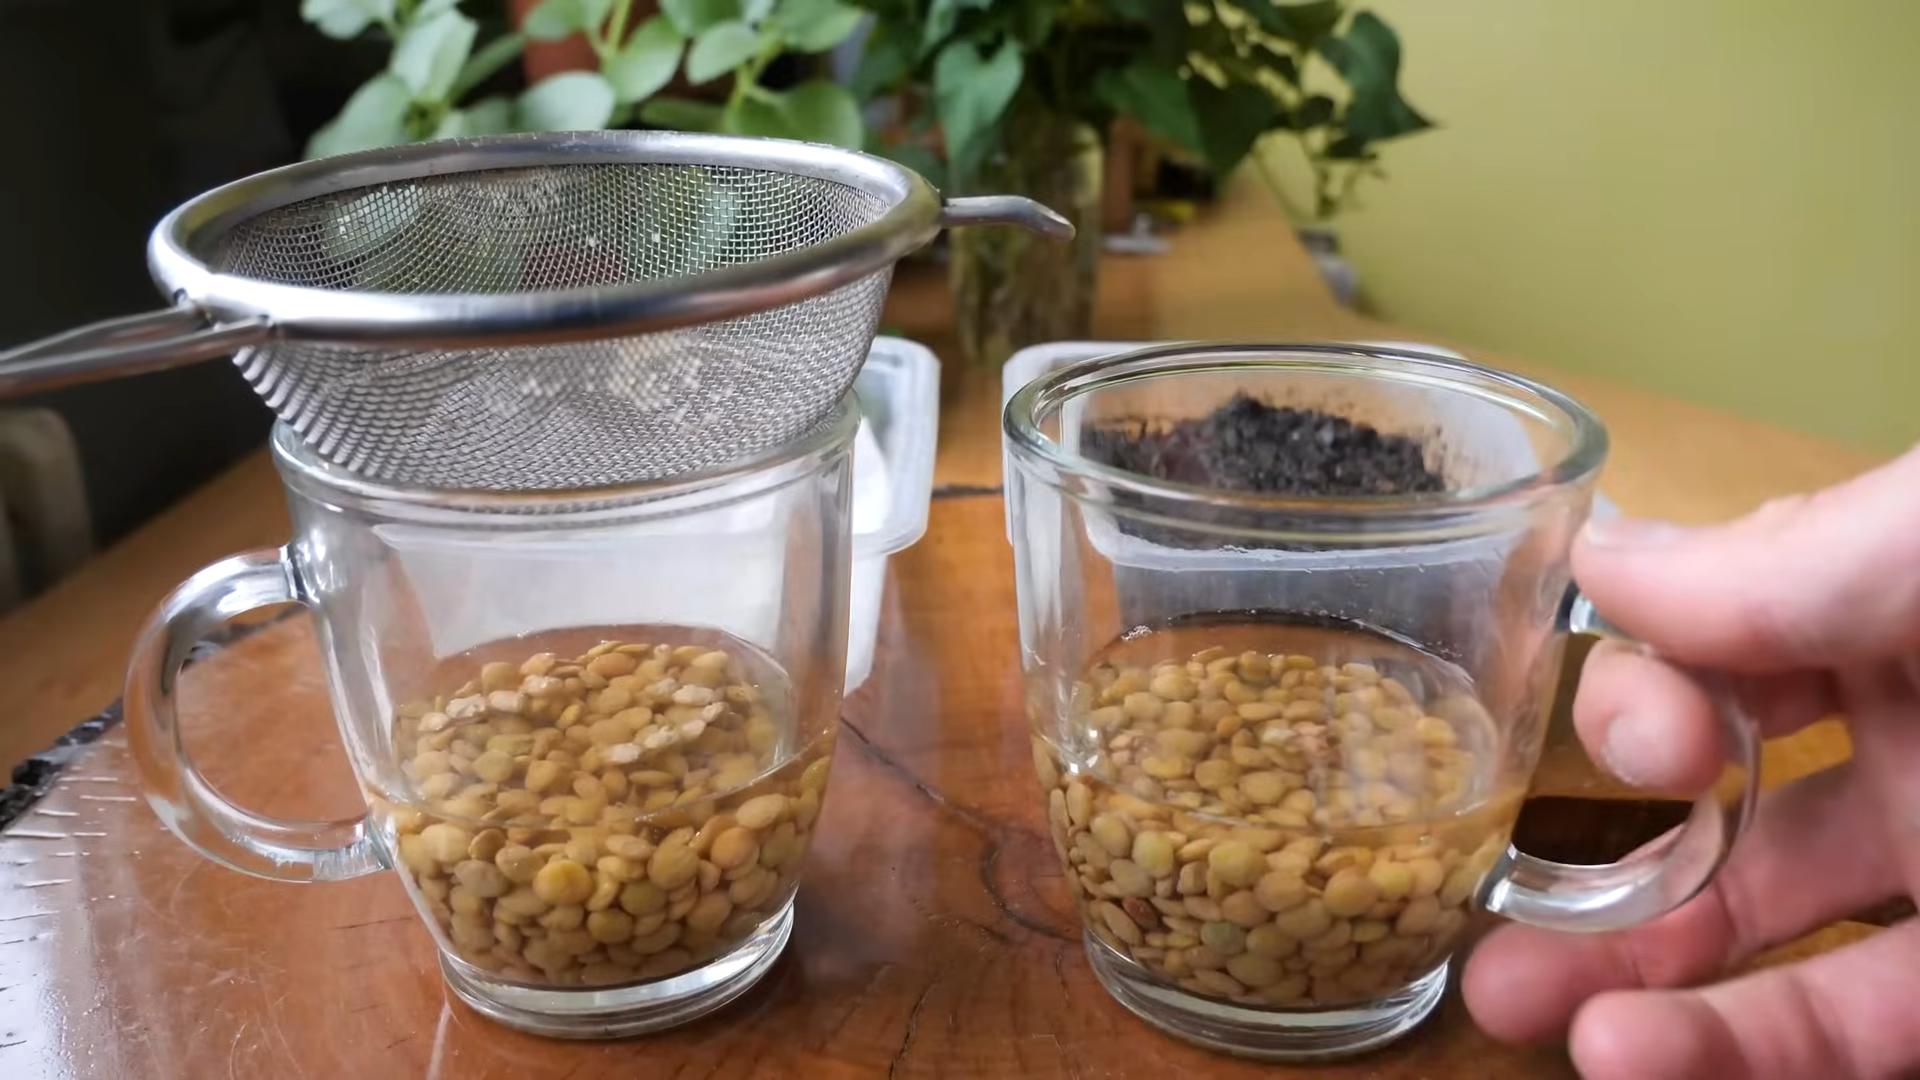
* Water: Use filtered or tap water that’s been left out for a day to allow chlorine to dissipate.
* Weight (Optional): A small weight, like a book or a brick wrapped in plastic, can help ensure even germination.
* Light Source: While microgreens can grow with indirect sunlight, a grow light will give you the best results, especially during the winter months. A simple fluorescent shop light works great.
Step-by-Step Instructions: Planting Your Microgreens
Alright, let’s get our hands dirty! Here’s a step-by-step guide to planting your microgreens:
1. Prepare Your Growing Tray:
* Place the tray with drainage holes inside the tray without drainage holes. This will create a self-watering system.
2. Add Growing Medium:
* Moisten your growing medium with water until it’s damp but not soggy. You should be able to squeeze it without water dripping out.
* Fill the tray with drainage holes with about 1-2 inches of moistened growing medium. Gently level the surface.
3. Sow Your Seeds:
* Sprinkle your seeds evenly over the surface of the growing medium. Don’t overcrowd them, but aim for a dense covering. Refer to seed packet instructions for specific seeding rates.
4. Mist the Seeds:
* Gently mist the seeds with water using your spray bottle. You want to make sure they’re thoroughly moistened.
5. Cover and Weigh (Optional):
* Cover the tray with a lid or another tray to create a dark, humid environment. This will encourage germination.
* Place a small weight on top of the cover to ensure good seed-to-soil contact. This is especially helpful for larger seeds like sunflower and pea shoots.
6. Germination Phase:
* Place the tray in a dark, warm place (around 70-75°F or 21-24°C).
* Mist the seeds with water 1-2 times per day, or as needed, to keep them moist. Don’t let them dry out!
* Check for germination after 2-3 days.
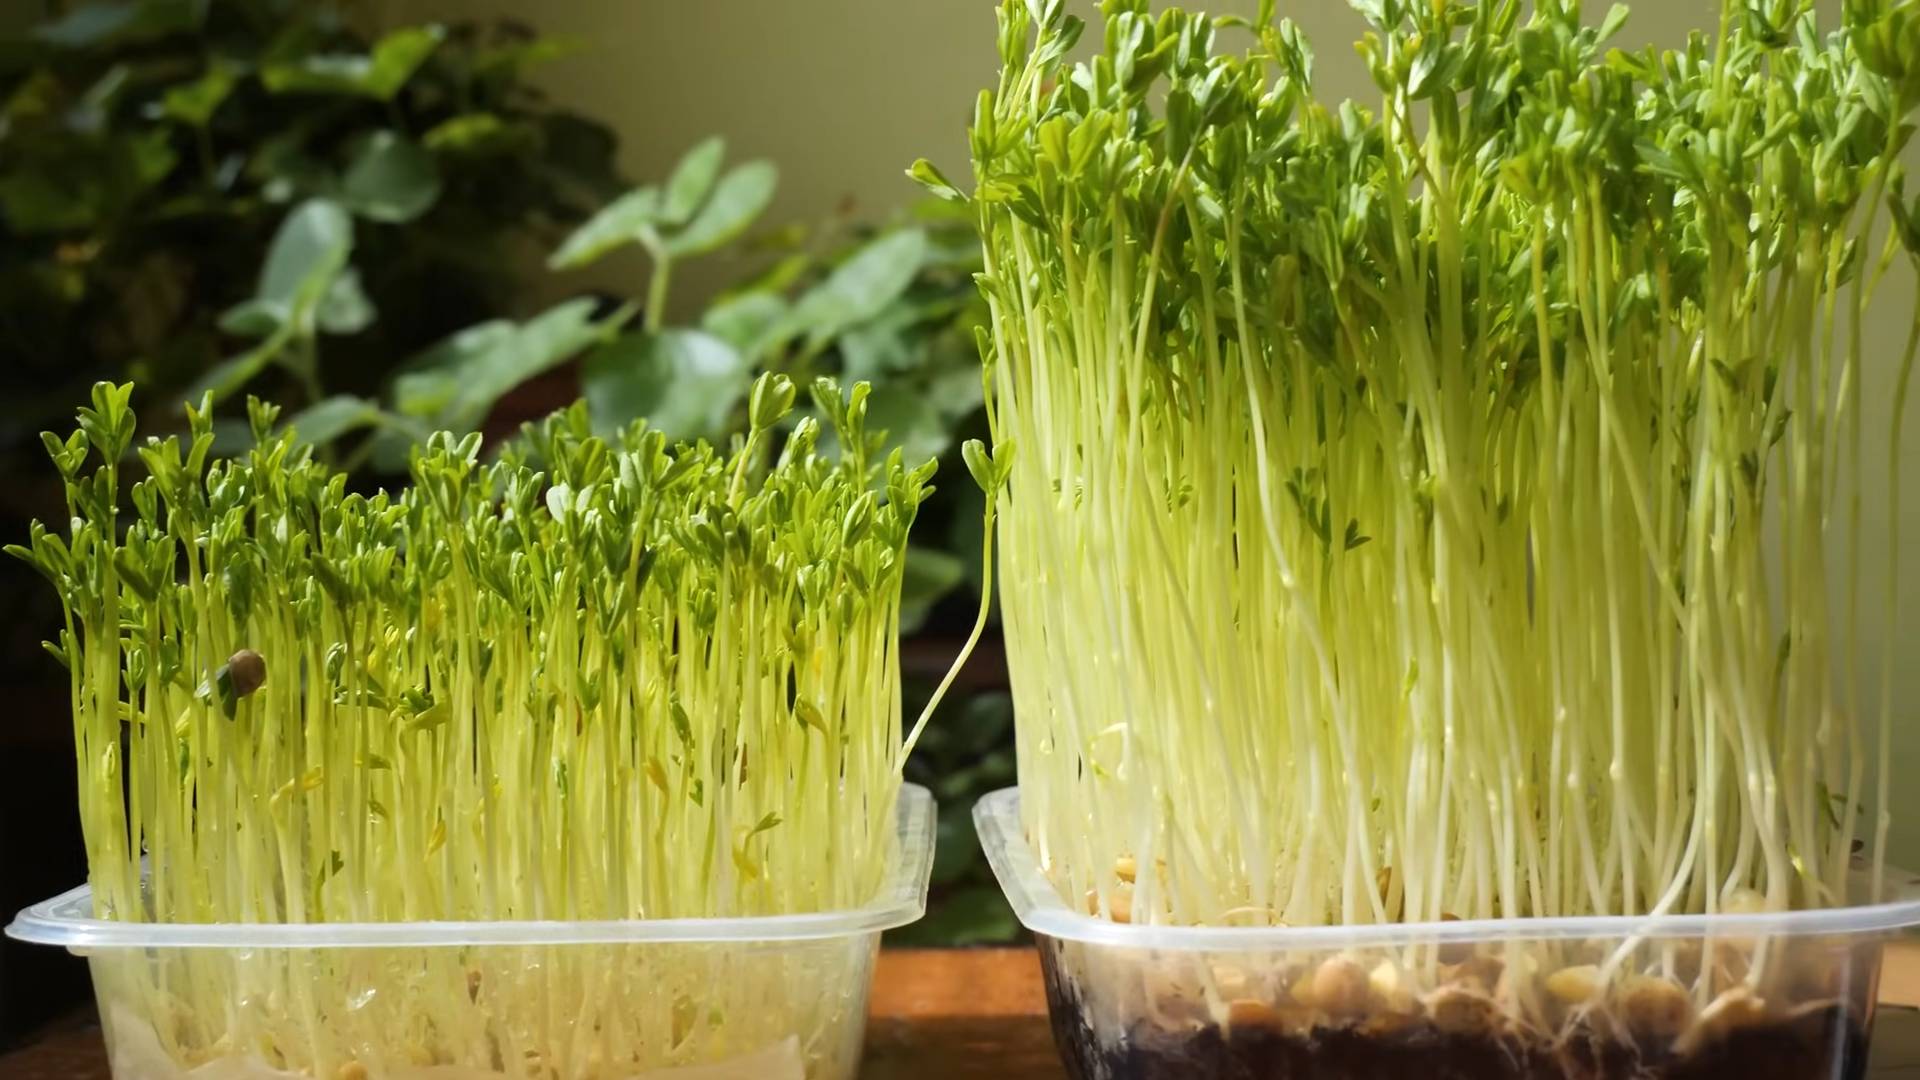
Light and Growing Phase
Once your seeds have germinated, it’s time to introduce them to light!
1. Remove the Cover and Weight:
* Once you see tiny sprouts emerging, remove the cover and weight.
2. Introduce Light:
* Place the tray under a grow light or in a location with bright, indirect sunlight. If using a grow light, position it a few inches above the seedlings.
3. Watering:
* Continue to mist the seedlings with water 1-2 times per day, or as needed. You can also water from the bottom by pouring water into the tray without drainage holes. The growing medium will absorb the water through the drainage holes.
* Avoid overwatering, as this can lead to mold and other problems.
4. Monitor Growth:
* Watch your microgreens grow! They should start to develop their first true leaves within a few days.
* Rotate the tray regularly to ensure even growth.
Harvesting Your Microgreens
The best part! Harvesting your microgreens is quick and easy.
1. Harvest Time:
* Your microgreens are ready to harvest when they have developed their first true leaves (the second set of leaves after the initial seed leaves). This usually takes about 7-14 days, depending on the variety.
2. Harvesting Technique:
* Use sharp scissors or a knife to cut the microgreens just above the soil line.
3. Washing (Optional):
* Gently wash the microgreens in cool water to remove any soil or debris.
4. Drying:
* Pat the microgreens dry with a paper towel or spin them in a salad spinner.
5. Storage:
* Store your harvested microgreens in an airtight container in the refrigerator. They should last for about a week.
Troubleshooting Tips
Even with the best intentions, things can sometimes go wrong. Here are a few common problems and how to fix them:
* Mold: If you see mold growing on your microgreens, it’s usually a sign of overwatering or poor air circulation.
* Solution: Reduce watering, improve air circulation by using a small fan, and remove any affected areas.
* Leggy Growth: If your microgreens are tall and spindly, they’re probably not getting enough light.
* Solution: Move them to a brighter location or use a grow light.
* Uneven Germination: If some seeds germinate while others don’t, it could be due to uneven watering or temperature.
* Solution: Make sure the growing medium is evenly moist and the temperature is consistent.
* Slow Growth: If your microgreens are growing slowly, they may need more nutrients.
* Solution: You can add a diluted liquid fertilizer to the water.
Enjoying
Conclusion
So, there you have it! Growing microgreens at home is not only incredibly simple and rewarding, but it’s also a fantastic way to boost your nutritional intake and add a burst of fresh flavor to your meals. Forget those expensive, pre-packaged containers from the grocery store – with just a few basic supplies and a little bit of patience, you can cultivate your own vibrant, nutrient-packed microgreens right on your windowsill.
This DIY trick is a must-try for several reasons. First and foremost, it puts you in control of what you’re eating. You know exactly where your food is coming from and what’s gone into growing it – no pesticides, no hidden additives, just pure, wholesome goodness. Secondly, it’s incredibly cost-effective. The initial investment in seeds and growing trays is minimal, and you’ll quickly recoup your expenses by avoiding those pricey store-bought options. Finally, it’s a genuinely satisfying experience. Watching those tiny seeds sprout and transform into a lush carpet of microgreens is a small miracle that you can witness every day.
But the best part is the versatility! Experiment with different types of seeds to discover your favorite flavor combinations. Try spicy radish microgreens, sweet pea shoots, or earthy broccoli sprouts. You can even create your own custom blends to perfectly complement your favorite dishes. Consider using different growing mediums, like coconut coir or hemp mats, to see which works best for you. For a fun variation, try growing your microgreens in repurposed containers like yogurt cups or plastic takeout containers – just be sure to add drainage holes!
Don’t be afraid to get creative and personalize your microgreen growing experience. The possibilities are endless!
We wholeheartedly encourage you to give this DIY trick a try. It’s a simple, affordable, and incredibly rewarding way to add fresh, healthy greens to your diet. Once you experience the joy of harvesting your own homegrown microgreens, you’ll never go back to buying them at the store again.
And most importantly, we want to hear about your experience! Share your photos, tips, and favorite microgreen varieties in the comments below. Let’s build a community of home microgreen growers and inspire others to discover the magic of this simple, sustainable practice. Let us know what kind of seeds you used, what challenges you faced, and what delicious dishes you created with your homegrown harvest. Your insights could be invaluable to other aspiring microgreen enthusiasts. So, grab your seeds, get your hands dirty, and start growing your own delicious and nutritious microgreens today! We can’t wait to see what you create!
Frequently Asked Questions (FAQ)
What exactly are microgreens?
Microgreens are essentially young vegetable greens that are harvested just after the cotyledon leaves (the first leaves that emerge from the seed) have developed, and often after the first true leaves have appeared. They are larger than sprouts but smaller than baby greens, typically measuring 1-3 inches in height. Microgreens are packed with nutrients and offer a concentrated burst of flavor, making them a popular addition to salads, sandwiches, soups, and other dishes. They are not the same as sprouts, which are germinated seeds eaten whole, including the root, stem, and seed. Microgreens are cut above the soil line, so you only consume the stem and leaves.
What types of seeds can I use to grow microgreens?
The possibilities are vast! Some of the most popular and easy-to-grow microgreens include:
* Radish: Spicy and peppery
* Broccoli: Mild and earthy
* Pea shoots: Sweet and tender
* Sunflower: Nutty and crunchy
* Mustard: Pungent and flavorful
* Arugula: Peppery and slightly bitter
* Beet: Earthy and vibrant
* Kale: Mild and nutritious
* Cilantro: Fresh and citrusy
You can also experiment with other vegetable, herb, and even some flower seeds. Just be sure to use seeds that are specifically intended for sprouting or microgreen production, as these are typically untreated and safe for consumption. Avoid using seeds that have been treated with fungicides or other chemicals.
What kind of growing medium should I use?
Several options work well for growing microgreens. Here are a few popular choices:
* Potting soil: A standard potting mix is a reliable and readily available option.
* Coconut coir: A sustainable and absorbent medium made from coconut husks.
* Hemp mats: Biodegradable mats that provide excellent drainage and aeration.
* Paper towels: A simple and inexpensive option for small-scale growing.
Regardless of the medium you choose, make sure it’s clean, well-draining, and free from any contaminants.
How much light do microgreens need?
Microgreens need plenty of light to thrive. Ideally, they should receive at least 6-8 hours of direct sunlight per day. If you don’t have a sunny windowsill, you can supplement with artificial lighting, such as a grow light or fluorescent lamp. Position the light source a few inches above the microgreens and keep it on for 12-16 hours per day. Insufficient light can lead to leggy, pale microgreens.
How often should I water my microgreens?
Keep the growing medium consistently moist, but not soggy. Water your microgreens once or twice a day, depending on the humidity and temperature. The best way to water is to mist them gently with a spray bottle. Avoid overwatering, as this can lead to mold and fungal growth.
How long does it take for microgreens to grow?
The growing time varies depending on the type of seed, but most microgreens are ready to harvest in 7-14 days. You’ll know they’re ready when the cotyledon leaves are fully developed and the first true leaves have emerged.
How do I harvest microgreens?
Harvest your microgreens by snipping them off just above the soil line with a pair of scissors or kitchen shears. Wash them gently before using them in your favorite dishes.
How long do microgreens last after harvesting?
Microgreens are best consumed fresh, but they can be stored in the refrigerator for up to a week. To prolong their shelf life, wrap them loosely in a paper towel and store them in a sealed container.
Can I reuse the growing medium?
It’s generally not recommended to reuse the growing medium for microgreens, as it can harbor bacteria and fungi. It’s best to start with fresh medium each time.
Are there any risks associated with growing microgreens at home?
The main risk is contamination with bacteria, such as E. coli or Salmonella. To minimize this risk, use clean seeds, growing medium, and equipment. Wash your hands thoroughly before handling the seeds and microgreens. Avoid overwatering, as this can create a breeding ground for bacteria. If you notice any signs of mold or fungal growth, discard the affected microgreens immediately. By following these simple precautions, you can safely enjoy the benefits of growing your own microgreens at home.

Leave a Comment