

Grow Basil Kitchen Garden dreams are within your reach, even if you think you have a black thumb! Have you ever walked past a vibrant Italian restaurant, inhaling the intoxicating aroma of fresh basil, and wished you could recreate that magic at home? Or perhaps you’ve spent a fortune on sad, wilted supermarket basil, only to have it turn brown within days? I know I have! For centuries, basil has been more than just a culinary herb; it’s been a symbol of love, good fortune, and even protection in various cultures. From ancient Greece, where it was associated with royalty, to India, where it’s considered a sacred plant, basil boasts a rich and fascinating history.
But beyond its historical significance, growing your own basil is simply practical. Store-bought basil is expensive and often lacks the robust flavor of homegrown varieties. Plus, who wants to keep running to the store every time a recipe calls for a few fresh leaves? That’s where these simple, effective DIY tricks come in. I’m going to share some easy-to-follow tips and hacks that will help you grow basil kitchen garden successfully, no matter your experience level. Imagine having a constant supply of fragrant, flavorful basil right at your fingertips, ready to elevate your pasta sauces, salads, and pesto to a whole new level. Let’s ditch the store-bought stuff and unlock the secrets to a thriving basil garden, right in your own kitchen!
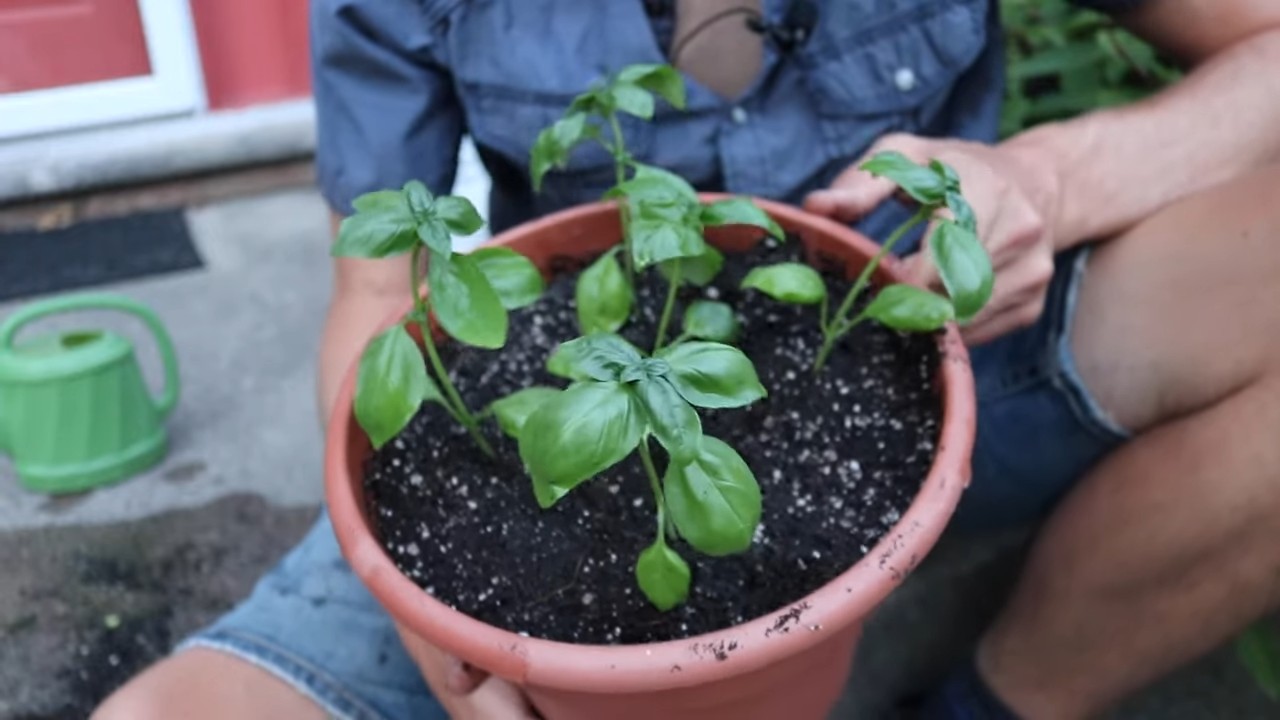
Your Own Basil Kitchen Garden: It’s This Easy!
I love fresh basil! Whether in pesto, on pizza, or simply as a topping for salads – the scent and taste are simply unbeatable. And the best part: you no longer have to buy it at the supermarket; you can easily grow it yourself in your kitchen. Sound complicated? Don’t worry, I’ll show you how it’s done! This DIY kitchen garden is super easy to set up and will provide you with fresh basil all year round.
What you need:
- Basil seeds or a basil plant: Seeds are cheaper, but it takes longer until you can harvest. A plant is quicker, but a bit more expensive. I recommend starting with seeds to experience the whole process.
- Starter pots or small flower pots: Biodegradable ones are best, so you can easily transplant them later.
- Seed-starting mix: This is low in nutrients and loose, ideal for the germination of the seeds.
- Potting soil: For later, when the seedlings are larger.
- A spray bottle: For moistening the soil.
- A sunny spot: Basil loves the sun! A windowsill is perfect.
- (Optional) A small seed-starting station with a lid: Helps to retain moisture and speed up germination.
- (Optional) A grow light: If you don’t have enough sunlight.
Sowing the Basil Seeds (or Preparing the Plant)
If you’re starting with seeds, this section is important. If you have a plant, you can jump straight to “Caring for Your Basil.”
- Prepare the starter pots: Fill the starter pots with seed-starting mix. Press the soil down lightly, but not too firmly. It should remain loose and airy.
- Sow the seeds: Sprinkle the basil seeds evenly over the soil. They are very small, so be careful not to sow them too densely. I usually sprinkle 2-3 seeds per pot.
- Cover the seeds: Cover the seeds with a thin layer of seed-starting mix. About 0.5 cm (0.2 inches) is sufficient.
- Water: Gently moisten the soil with the spray bottle. The soil should be damp, but not wet. Avoid washing the seeds away.
- Cover (optional): If you have a seed-starting station with a lid, place the pots inside and close the lid. This creates a warm, humid climate that promotes germination. Alternatively, you can cover the pots with plastic wrap. Just don’t forget to ventilate regularly to prevent mold.
- Location: Place the pots in a warm and bright location. A windowsill is ideal. Avoid direct sunlight, as the young seedlings can get burned.
- Patience: Now it’s time to wait! Basil seeds usually germinate within 7-14 days. Keep the soil moist, but not wet.
Pricking Out the Basil Seedlings
As soon as the basil seedlings have developed their first true leaves (besides the initial seed leaves), it’s time to prick them out. This means transplanting them into larger pots so they have more space to grow.
- Prepare the flower pots: Fill the flower pots with potting soil. Press the soil down lightly.
- Careful removal: Gently lift the basil seedlings out of the starter pots. It’s best to use a dibber or a small spoon. Be careful not to damage the roots. If several seedlings have grown in one pot, gently separate them from each other.
- Placing in the flower pots: Place the basil seedlings into the prepared flower pots. The roots should be completely covered with soil.
- Watering: Water the seedlings gently.
- Location: Place the flower pots in a sunny spot.
Caring for Your Basil
Proper care is crucial for a healthy and productive basil kitchen garden.
- Watering: Basil needs regular water, but waterlogging should be avoided. The soil should always be slightly moist. I usually water my basil plants every 2-3 days, depending on the weather. Check the soil before you water. If it feels dry, it’s time to water.
- Fertilizing: Basil is a heavy feeder and needs regular nutrients. I fertilize my plants every 2-3 weeks with an organic liquid fertilizer. You can also use compost tea.
- Pruning: Regular cutting promotes growth and prevents the basil from flowering. When basil flowers, it loses its aroma. Cut the shoot tips just above a leaf node. This will cause the plant to branch out and become bushier. You can, of course, use the cut leaves immediately!
- Location: Basil loves the sun! Place your plants in a sunny spot, preferably a south-facing windowsill. If you don’t have enough sunlight, you can use a grow light.
- Pests: Basil is relatively resistant to pests, but occasionally aphids may appear. You can rinse them off with a jet of water or spray them with a mild soap solution.
- Repotting: When the plant becomes too large for its pot, you should transplant it into a larger one.
Harvesting Your Basil
The best part comes at the end: the harvest!
- When to harvest: You can harvest basil as soon as the plant has enough leaves. It’s best to harvest in the morning when the leaves are still full of essential oils.
- How to harvest: Cut the shoot tips just above a leaf node. This will cause the plant to branch out and become bushier. You can also pick individual leaves.
- Use: Use the fresh basil immediately in your favorite dishes. You can also dry or freeze it to make it last longer.
Additional Tips and Tricks
- Variety: There are many different basil varieties, each with its own taste and aroma. Try different types to find your favorite. I love lemon basil and Thai basil!
- Propagating basil: You can also propagate basil from cuttings. Cut off a shoot and place it in a glass of water. After a few days, roots will form, and you can plant the cutting in a pot.
- Basil in winter: You can also grow basil in winter. Place the plants in a bright spot and use a grow light if necessary. Make sure the temperature is not too low.
- Basil as an insect repellent: Basil repels mosquitoes and other insects. Place a few basil plants on your terrace or balcony.
I hope this guide helps you create your own basil kitchen garden. It’s really easier than you think, and it’s worth it! Happy gardening and enjoy your meal

Conclusion
So, there you have it! Cultivating your own thriving basil kitchen garden is not only achievable, but it’s also incredibly rewarding. Forget those sad, wilted bunches from the grocery store. Imagine stepping into your kitchen and snipping fresh, fragrant basil leaves whenever you need them. The difference in flavor between store-bought and homegrown basil is truly remarkable – a vibrant, peppery burst that elevates any dish.
This DIY trick is a must-try for several reasons. First and foremost, it puts you in control. You know exactly what’s going into your basil – no pesticides, no questionable growing practices. You’re nurturing a plant from seed (or cutting!) to table, and that connection to your food is incredibly satisfying. Secondly, it’s cost-effective. A packet of basil seeds is far cheaper than constantly buying fresh basil, especially if you use the propagation method. Over time, you’ll save money and have a constant supply of this culinary staple. Thirdly, it’s a fantastic way to add a touch of green to your home, even if you don’t have a large garden. A small pot of basil on a windowsill can brighten up any space and bring a little bit of nature indoors.
But the benefits don’t stop there. Growing your own basil allows you to experiment with different varieties. Try Genovese basil for classic Italian dishes, Thai basil for Asian-inspired cuisine, or lemon basil for a citrusy twist. You can even grow purple basil for a beautiful and flavorful addition to salads. The possibilities are endless!
Don’t be afraid to experiment! Consider using different types of containers, from terracotta pots to repurposed jars. You can also try companion planting, placing your basil near tomatoes or peppers to help deter pests. If you live in a colder climate, you can easily move your basil indoors during the winter months to ensure a year-round supply.
We’ve covered the basics, but remember that gardening is a journey of learning and discovery. Pay attention to your basil plants, observe how they respond to different conditions, and adjust your care accordingly. The more you interact with your plants, the better you’ll understand their needs.
We are confident that you can successfully grow your own basil kitchen garden. It’s a simple, rewarding, and delicious way to connect with nature and enhance your culinary creations. So, grab some seeds, find a sunny spot, and get started!
We’d love to hear about your experiences! Share your photos, tips, and questions in the comments below. Let’s create a community of basil-loving gardeners and inspire each other to grow the best basil possible. What are you waiting for? Start your basil kitchen garden today!
Frequently Asked Questions (FAQ)
What kind of soil is best for growing basil?
Basil thrives in well-draining soil that is rich in organic matter. A good potting mix specifically formulated for herbs is ideal. You can also amend regular potting soil with compost or aged manure to improve its fertility and drainage. Avoid heavy clay soils, as they can retain too much moisture and lead to root rot. The ideal pH level for basil is between 6.0 and 7.5, which is slightly acidic to neutral.
How much sunlight does basil need?
Basil needs at least 6-8 hours of direct sunlight per day to thrive. A sunny windowsill facing south or west is usually sufficient for indoor basil plants. If you don’t have enough natural light, you can supplement with a grow light. Insufficient sunlight can lead to leggy growth and reduced flavor.
How often should I water my basil plant?
Water your basil plant when the top inch of soil feels dry to the touch. Avoid overwatering, as this can lead to root rot. Basil prefers consistently moist soil, but not soggy. During hot weather, you may need to water more frequently. Check the soil moisture regularly and adjust your watering schedule accordingly. When watering, water at the base of the plant to avoid wetting the leaves, which can encourage fungal diseases.
How do I harvest basil leaves?
The best way to harvest basil leaves is to pinch or cut them off just above a leaf node (the point where leaves grow from the stem). This encourages the plant to branch out and produce more leaves. Avoid removing more than one-third of the plant’s leaves at a time, as this can stress the plant. You can harvest basil leaves throughout the growing season, from early summer until the first frost. Regular harvesting will also help to prevent the plant from flowering, which can reduce the flavor of the leaves.
Why is my basil plant turning yellow?
Yellowing leaves on a basil plant can be caused by several factors, including overwatering, underwatering, nutrient deficiencies, or pests. Check the soil moisture to ensure that you are not overwatering or underwatering. If the soil is consistently wet, allow it to dry out slightly before watering again. If the soil is dry, water thoroughly. You can also fertilize your basil plant with a balanced liquid fertilizer to address any nutrient deficiencies. Inspect the plant for pests, such as aphids or spider mites, and treat accordingly.
Can I grow basil from cuttings?
Yes, you can easily propagate basil from cuttings. Take a 4-6 inch cutting from a healthy basil plant, removing the lower leaves. Place the cutting in a glass of water, making sure that the lower nodes are submerged. Change the water every few days. Within a week or two, roots should begin to form. Once the roots are about an inch long, you can transplant the cutting into a pot filled with well-draining potting mix. Keep the soil moist until the plant is established.
How do I prevent my basil plant from flowering?
Flowering can reduce the flavor of basil leaves, so it’s best to prevent it if you want to maximize your harvest. To prevent flowering, regularly pinch off the flower buds as soon as they appear. This will encourage the plant to focus its energy on producing more leaves.
What are some common pests and diseases that affect basil?
Common pests that affect basil include aphids, spider mites, and whiteflies. These pests can be controlled with insecticidal soap or neem oil. Common diseases that affect basil include fungal diseases such as downy mildew and powdery mildew. These diseases can be prevented by providing good air circulation and avoiding overhead watering. If your basil plant develops a fungal disease, remove the affected leaves and treat with a fungicide.
Can I grow basil indoors year-round?
Yes, you can grow basil indoors year-round if you provide it with enough light and warmth. Place your basil plant in a sunny windowsill or under a grow light. Keep the temperature between 65 and 80 degrees Fahrenheit. Water regularly and fertilize as needed. With proper care, you can enjoy fresh basil leaves all year long.
What are some creative ways to use my homegrown basil?
Beyond the classic pesto and tomato sauce, there are countless ways to use your homegrown basil. Add it to salads, sandwiches, and soups. Use it to flavor olive oil or vinegar. Make basil-infused lemonade or cocktails. Dry or freeze basil leaves for later use. Experiment with different basil varieties to discover new flavors and culinary possibilities. The only limit is your imagination!
Leave a Comment