

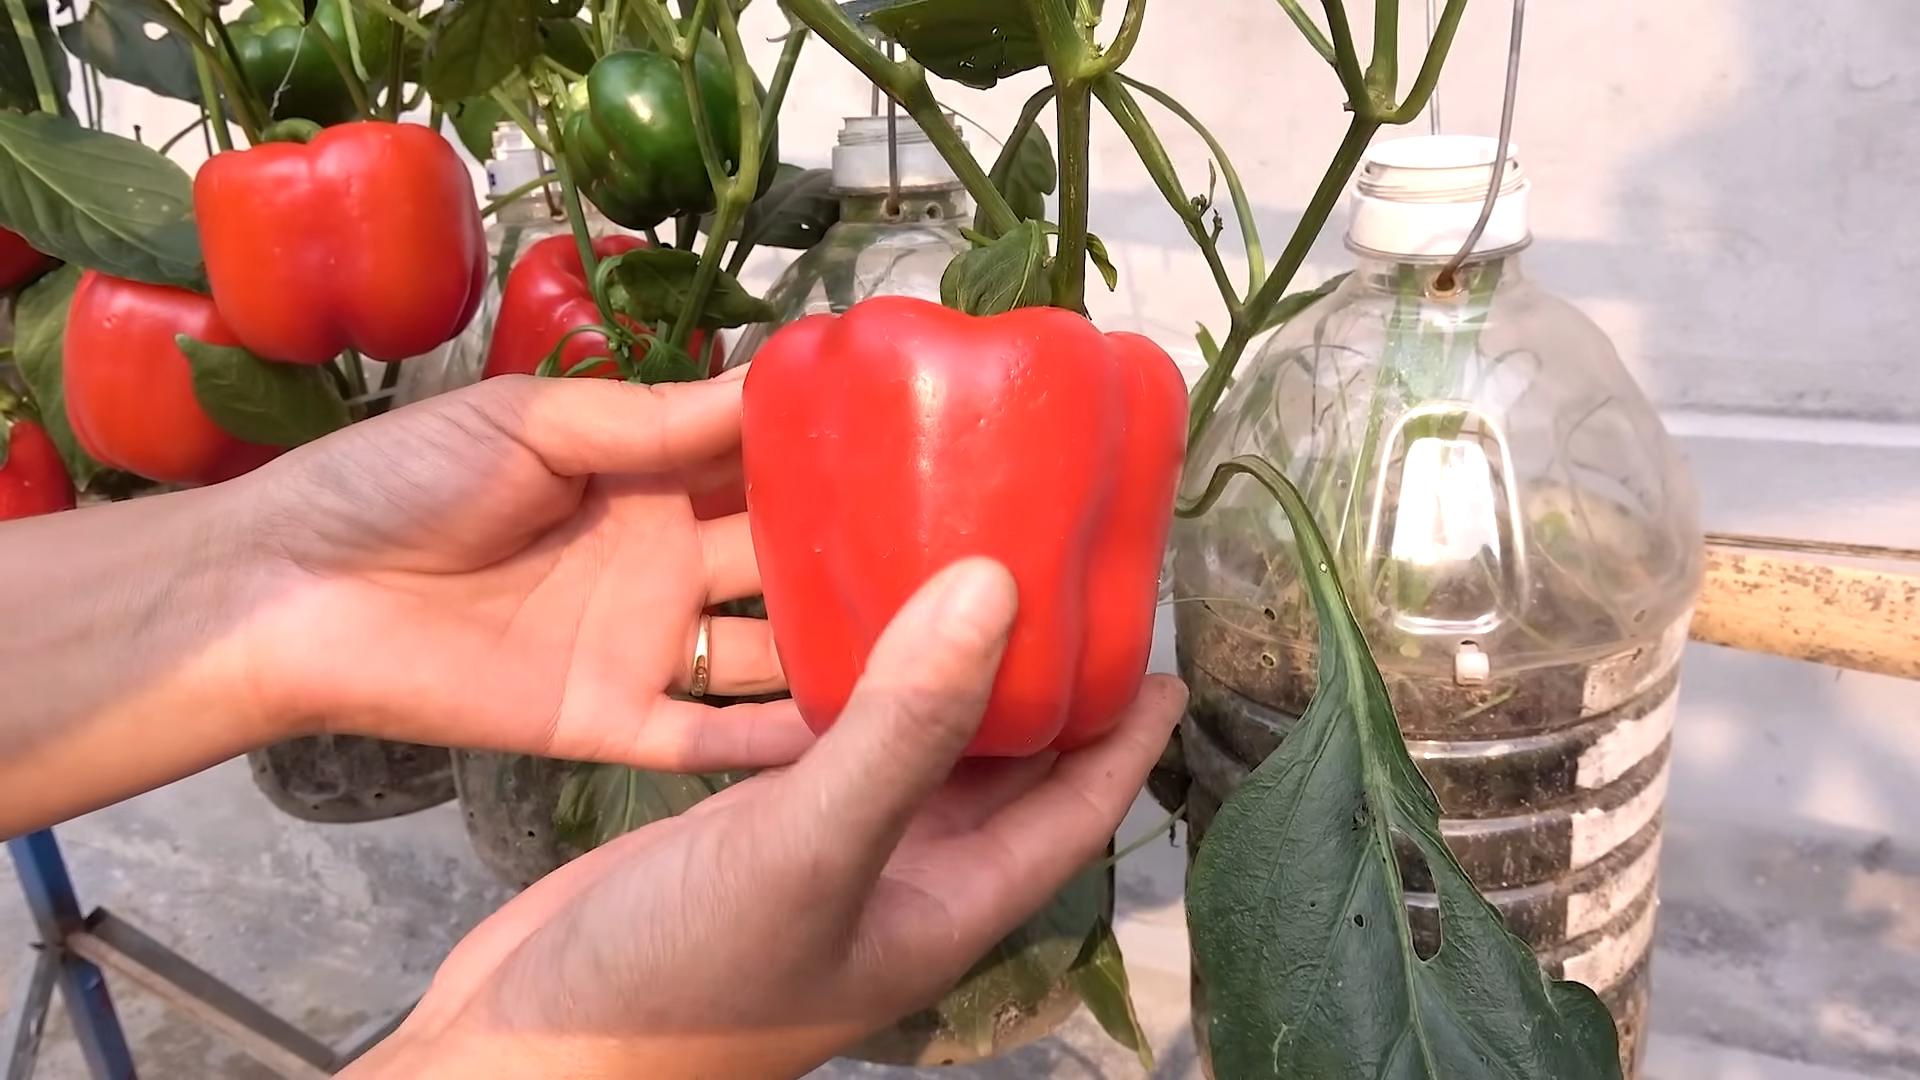
Grow Peppers at Home and unlock a world of flavor right outside your door! Imagine plucking a vibrant, sun-ripened bell pepper or a fiery jalapeño straight from your garden, ready to spice up your next meal. Forget those bland, store-bought peppers – with a few simple tricks and a little DIY magic, you can cultivate a thriving pepper patch, no matter the size of your space.
For centuries, peppers have been cherished across cultures, from the ancient civilizations of South America, where they originated, to the bustling markets of Asia, where they add zest to countless dishes. The humble pepper has journeyed across continents, becoming an indispensable ingredient in cuisines worldwide. But you don’t need to be a seasoned farmer to enjoy the fruits (or should I say, vegetables!) of your labor.
In today’s world, where we’re increasingly conscious of where our food comes from, growing your own peppers offers a fantastic way to connect with nature, reduce your carbon footprint, and ensure you’re eating fresh, healthy produce. Plus, let’s be honest, there’s something incredibly satisfying about nurturing a plant from seed to harvest. This DIY guide is packed with easy-to-follow tips and tricks to help you grow peppers at home successfully, even if you’re a complete beginner. So, grab your gardening gloves, and let’s get started!
Growing Peppers Like a Pro: My DIY Guide to a Bountiful Harvest
Okay, pepper lovers, gather ’round! I’m going to walk you through everything I’ve learned about growing peppers at home, from seed to salsa (or whatever delicious concoction you’re planning!). This isn’t just a quick overview; we’re diving deep to ensure you get the best possible yield. Get ready to get your hands dirty!
Choosing Your Pepper Varieties
First things first, what kind of peppers do you want to grow? Sweet bell peppers? Fiery habaneros? Something in between? The possibilities are endless! Here’s a little breakdown to help you decide:
* Sweet Peppers: These are your bell peppers (red, yellow, orange, green), banana peppers, and pimientos. They’re mild and great for stuffing, salads, or roasting.
* Mildly Spicy Peppers: Think jalapeños, poblanos, and Anaheim peppers. They add a little kick without being overwhelming. Perfect for nachos or chili.
* Hot Peppers: Now we’re talking! This category includes serranos, cayenne peppers, and Thai peppers. Use these sparingly if you’re sensitive to heat.
* Super-Hot Peppers: Handle with care! We’re talking habaneros, scotch bonnets, ghost peppers, and Carolina reapers. These are for the serious chiliheads out there.
Once you’ve chosen your varieties, it’s time to get your seeds! You can buy seeds online, at your local garden center, or even save seeds from peppers you’ve bought at the store (though the results might be a little unpredictable with store-bought peppers).
Starting Your Pepper Seeds Indoors
Peppers need a long growing season, so starting them indoors is crucial, especially if you live in a cooler climate. I usually start my seeds about 8-10 weeks before the last expected frost.
1. Gather Your Supplies: You’ll need:
* Pepper seeds
* Seed starting trays or small pots
* Seed starting mix (this is different from regular potting soil; it’s lighter and drains better)
* A spray bottle filled with water
* A heat mat (optional, but highly recommended)
* A grow light (also optional, but it will give you stronger seedlings)
2. Prepare Your Seed Starting Trays: Fill each cell of your seed starting tray (or each small pot) with seed starting mix. Gently tap the tray to settle the soil.
3. Sow Your Seeds: Make a small indentation (about 1/4 inch deep) in the center of each cell. Drop 1-2 seeds into each indentation. Cover the seeds with a thin layer of seed starting mix.
4. Water Gently: Use your spray bottle to gently moisten the soil. You don’t want to soak it, just dampen it.
5. Provide Warmth: Place your seed starting tray on a heat mat. Peppers germinate best at temperatures between 80-85°F (27-29°C).
6. Provide Light: If you’re using a grow light, position it a few inches above the seed starting tray. If you’re not using a grow light, place the tray in a sunny window.
7. Keep the Soil Moist: Check the soil daily and mist it with water whenever it feels dry to the touch.
8. Wait Patiently: Pepper seeds can take anywhere from 7-21 days to germinate, so be patient!
9. Thin Your Seedlings: Once your seedlings have emerged and have a couple of sets of true leaves (the leaves that look like miniature pepper leaves), thin them out so that only one seedling remains in each cell. Choose the strongest, healthiest-looking seedling and snip off the others at the soil line.
Transplanting Your Pepper Seedlings
Once the danger of frost has passed and your pepper seedlings are about 6-8 inches tall, it’s time to transplant them outdoors.
1. Harden Off Your Seedlings: This is a crucial step! You can’t just take your seedlings from the cozy indoors and plop them into the harsh outdoor environment. You need to gradually acclimate them to the sun, wind, and temperature changes. Start by placing your seedlings outdoors in a sheltered location for an hour or two each day, gradually increasing the amount of time they spend outside over the course of a week or two.
2. Choose a Sunny Location: Peppers need at least 6-8 hours of sunlight per day. Choose a location in your garden that gets plenty of sun.
3. Prepare the Soil: Peppers prefer well-drained soil that is rich in organic matter. Amend your soil with compost or well-rotted manure before planting.
4. Dig Your Holes: Dig holes that are slightly larger than the root balls of your seedlings. Space the holes about 18-24 inches apart, depending on the variety of pepper you’re growing. Larger varieties will need more space.
5. Transplant Your Seedlings: Gently remove your seedlings from their seed starting trays or pots. Loosen the roots slightly and place the seedlings in the holes. Backfill the holes with soil and gently firm the soil around the base of the plants.
6. Water Thoroughly: Water your newly transplanted seedlings thoroughly.
7. Mulch: Apply a layer of mulch around your pepper plants to help retain moisture, suppress weeds, and regulate soil temperature. I like to use straw or shredded leaves.
Caring for Your Pepper Plants
Now that your pepper plants are in the ground, it’s time to give them the care they need to thrive.
1. Watering: Peppers need consistent moisture, especially during hot, dry weather. Water deeply whenever the top inch of soil feels dry to the touch. Avoid overhead watering, as this can lead to fungal diseases.
2. Fertilizing: Peppers are heavy feeders, so they need regular fertilization. Use a balanced fertilizer (e.g., 10-10-10) every few weeks. You can also use organic fertilizers like compost tea or fish emulsion.
3. Pruning: Pruning isn’t strictly necessary, but it can help improve air circulation and encourage bushier growth. You can prune off any suckers (small shoots that grow from the base of the plant) or any yellowing or diseased leaves.
4. Support: As your pepper plants grow, they may need support to prevent them from toppling over, especially if they’re loaded with fruit. You can use stakes, cages, or trellises to support your plants.
5. Pest and Disease Control: Keep an eye out for pests like aphids, flea beetles, and spider mites. You can control these pests with insecticidal soap or neem oil. Also, watch out for diseases like blossom end rot (caused by calcium deficiency) and fungal diseases. Ensure good air circulation and avoid overhead watering to prevent fungal diseases.
Dealing with Common Pepper Problems
Even with the best care, you might encounter some problems along the way. Here are a few common issues and how to address them:
* Blossom End Rot: This is a common problem in peppers (and tomatoes). It’s caused by a calcium deficiency, which can be due to inconsistent watering or poor soil. To prevent blossom end rot, ensure consistent watering and amend your soil with calcium-rich amendments like bone meal or crushed eggshells.
* Aphids: These tiny pests can suck the sap from your pepper plants, causing them to weaken and become distorted. You can control aphids with insecticidal soap or neem oil.
* Flea Beetles: These tiny beetles can chew small holes in the leaves of your pepper plants. You can control flea beetles with row covers or by spraying your plants with neem oil.
* Sunscald: This occurs when peppers are exposed to too much direct sunlight, causing them to develop white or tan patches. To prevent sunscald, provide some shade for your pepper plants during the hottest part of the day.
Harvesting Your Peppers
The moment you’ve been waiting for! It’s time to harvest your peppers!
1. Know When to Pick: The timing of your harvest will depend on the variety of pepper you’re growing and your personal preference. Sweet peppers are usually harvested when they’re fully colored and firm to the touch. Hot peppers can be harvested when they’re green or when they’ve turned their mature color (usually red, orange, or yellow).
2. Use Pruning Shears or a Knife: Don’t just yank the peppers off the plant! This can damage the plant. Use pruning shears or a knife to cut the peppers from the stem.
3. Handle with Care: Peppers are delicate, so handle them with care to avoid bruising them.
4. Enjoy Your Harvest! Use your peppers fresh, or preserve them by pickling, drying, or freezing.
Saving Pepper Seeds for Next Year
If you

Conclusion
So, there you have it! Growing peppers at home, from seed to table, is not only achievable but incredibly rewarding. We’ve walked you through the process, highlighting the key steps and offering insights to ensure your success. But why should you embark on this pepper-growing adventure?
Firstly, the taste. Store-bought peppers simply can’t compare to the vibrant, fresh flavor of homegrown varieties. Imagine biting into a sun-ripened bell pepper, bursting with sweetness, or adding a fiery kick to your dishes with a chili pepper you nurtured yourself. The difference is undeniable.
Secondly, control. When you grow your own peppers, you have complete control over what goes into them. No harmful pesticides, no artificial fertilizers – just pure, natural goodness. This is especially important if you’re health-conscious or have dietary restrictions.
Thirdly, variety. The world of peppers is vast and diverse, offering a spectrum of flavors, colors, and heat levels. Growing your own allows you to explore these options, cultivating unique varieties that you might never find in a grocery store. Think about growing those rare Scotch Bonnets or the sweet and mild Shishito peppers.
But the benefits extend beyond the tangible. Gardening, in general, is a therapeutic activity, offering a chance to connect with nature, relieve stress, and cultivate patience. Watching your pepper plants grow from tiny seedlings to mature, fruit-bearing specimens is a deeply satisfying experience.
Ready to take your pepper growing to the next level? Consider these variations:
* **Hydroponic Peppers:** For those with limited space or a desire for faster growth, hydroponics offers a soil-less alternative.
* **Container Gardening:** If you don’t have a garden, don’t worry! Peppers thrive in containers, making them perfect for balconies, patios, or even indoor spaces with sufficient sunlight.
* **Grafting:** Experiment with grafting different pepper varieties onto a single rootstock to create unique combinations of flavor and heat.
* **Pepper Powders and Sauces:** Once you have a bountiful harvest, explore the world of homemade pepper powders and sauces. This is a great way to preserve your peppers and enjoy their flavor year-round.
Growing peppers at home is more than just a gardening project; it’s an investment in flavor, health, and well-being. It’s a chance to connect with nature, learn new skills, and enjoy the fruits (or rather, peppers) of your labor.
So, what are you waiting for? Grab some seeds, prepare your soil, and get ready to embark on your pepper-growing journey. We’re confident that you’ll be amazed by the results.
We encourage you to try this DIY trick and share your experiences with us! Let us know what varieties you’re growing, what challenges you’ve faced, and what successes you’ve celebrated. Share your photos, tips, and tricks in the comments below. Together, we can create a community of passionate pepper growers, sharing knowledge and inspiring each other to cultivate the best peppers possible. Happy growing!
Frequently Asked Questions (FAQ)
What is the best time to start growing peppers from seed?
The ideal time to start growing peppers from seed depends on your climate and the specific pepper variety. Generally, you should start seeds indoors 6-8 weeks before the last expected frost. This allows the seedlings to develop a strong root system before being transplanted outdoors. Check your local frost dates and the seed packet instructions for specific recommendations. If you live in a warmer climate with a longer growing season, you can start seeds later.
What type of soil is best for growing peppers?
Peppers thrive in well-draining, fertile soil with a slightly acidic pH (around 6.0-6.8). Amend your soil with compost or other organic matter to improve drainage and nutrient content. Avoid heavy clay soils, as they can become waterlogged and inhibit root growth. If you’re growing peppers in containers, use a high-quality potting mix specifically formulated for vegetables.
How much sunlight do peppers need?
Peppers require at least 6-8 hours of direct sunlight per day to thrive. Choose a sunny location in your garden or on your patio where your pepper plants will receive ample sunlight. If you’re growing peppers indoors, use grow lights to supplement natural sunlight, especially during the winter months. Insufficient sunlight can lead to leggy growth, reduced fruit production, and smaller peppers.
How often should I water my pepper plants?
Water your pepper plants regularly, especially during hot, dry weather. The soil should be consistently moist but not waterlogged. Check the soil moisture by sticking your finger about an inch deep. If the soil feels dry, it’s time to water. Avoid overhead watering, as this can promote fungal diseases. Instead, water at the base of the plant. During periods of heavy rain, you may need to reduce watering frequency.
What are some common pests and diseases that affect pepper plants?
Pepper plants can be susceptible to various pests and diseases, including aphids, spider mites, whiteflies, blossom-end rot, and fungal diseases. Regularly inspect your plants for signs of infestation or disease. Use organic pest control methods, such as insecticidal soap or neem oil, to control pests. Ensure good air circulation around your plants to prevent fungal diseases. Blossom-end rot is caused by calcium deficiency, so amend your soil with calcium or use a calcium-rich fertilizer.
How do I fertilize my pepper plants?
Fertilize your pepper plants regularly throughout the growing season. Use a balanced fertilizer with equal amounts of nitrogen, phosphorus, and potassium during the early stages of growth. Once the plants start to flower and produce fruit, switch to a fertilizer with a higher phosphorus content to promote fruit development. Avoid over-fertilizing, as this can lead to excessive foliage growth and reduced fruit production. Follow the fertilizer instructions carefully.
When should I harvest my peppers?
The timing of pepper harvest depends on the variety and your desired level of ripeness. Bell peppers are typically harvested when they are fully colored and firm to the touch. Chili peppers can be harvested at various stages of ripeness, depending on your preference for heat level. Use pruning shears or a sharp knife to cut the peppers from the plant, leaving a small stem attached.
How can I increase the heat level of my chili peppers?
Several factors can influence the heat level of chili peppers, including genetics, growing conditions, and stress. To increase the heat level, ensure your plants receive plenty of sunlight and water. Avoid over-fertilizing, as this can reduce heat levels. Some growers believe that stressing the plants slightly by withholding water can increase heat levels, but this should be done carefully to avoid damaging the plants.
Can I grow peppers indoors?
Yes, you can grow peppers indoors, but it requires providing them with adequate sunlight or grow lights. Choose a sunny window or use grow lights to provide at least 6-8 hours of light per day. Use a well-draining potting mix and water regularly. Container size is also important; choose a pot that is at least 12 inches in diameter. Consider using self-pollinating pepper varieties, as indoor plants may not be pollinated by insects.
How do I save seeds from my pepper plants?
Saving seeds from your pepper plants is a great way to preserve your favorite varieties and ensure a continuous supply of seeds for future growing seasons. Choose ripe, healthy peppers from disease-free plants. Cut the peppers open and remove the seeds. Spread the seeds out on a paper towel to dry completely. Once the seeds are dry, store them in an airtight container in a cool, dark, and dry place. Label the container with the pepper variety and the date.
Leave a Comment