

Indoor Mint Garden: Imagine stepping into your kitchen and snipping fresh, fragrant mint leaves for your tea, mojito, or even a delicious salad. Sounds dreamy, right? Well, it doesn’t have to be just a dream! For centuries, mint has been cherished not only for its refreshing flavor but also for its medicinal properties. From ancient Egyptians using it in religious ceremonies to Romans flavoring their sauces, mint has a rich and vibrant history.
But let’s be honest, who has the space for a sprawling outdoor herb garden? That’s where the magic of an indoor mint garden comes in! I’m going to show you some simple, effective DIY tricks and hacks to cultivate your own thriving mint patch right on your windowsill.
In today’s busy world, having fresh herbs readily available can be a game-changer. No more last-minute grocery store runs or settling for dried-out, flavorless substitutes. Plus, growing your own mint is incredibly rewarding and a fantastic way to add a touch of green to your indoor space. So, grab your gardening gloves (or not, it’s that easy!), and let’s dive into the wonderful world of indoor mint gardening!
Creating Your Own Thriving Indoor Mint Garden
Hey there, fellow plant enthusiasts! I’m so excited to share my guide to creating a flourishing indoor mint garden. Mint is incredibly versatile – perfect for teas, cocktails, cooking, and even just adding a fresh scent to your home. Plus, it’s surprisingly easy to grow indoors, even if you don’t have a green thumb (yet!). Let’s dive in!
Choosing Your Mint Varieties
Before we get started, let’s talk about mint varieties. There’s more than just your standard peppermint and spearmint! Exploring different types can add a lot of flavor and interest to your garden. Here are a few of my favorites:
* Peppermint: The classic, with a strong, cool flavor. Great for teas and desserts.
* Spearmint: Milder and sweeter than peppermint, perfect for mojitos and savory dishes.
* Chocolate Mint: Yes, you read that right! It has a subtle chocolate aroma and flavor. Delicious in desserts and drinks.
* Apple Mint: A fruity, slightly fuzzy variety with a gentle apple scent.
* Orange Mint: A citrusy twist on mint, ideal for adding a bright flavor to your recipes.
You can choose just one variety or mix and match – it’s totally up to you! Just remember that mint is a vigorous grower, so it’s best to keep different varieties in separate pots to prevent them from taking over each other.
Gathering Your Supplies
Okay, now that we’ve chosen our mint varieties, let’s gather the supplies we’ll need. Here’s a checklist:
* Pots: Choose pots that are at least 6 inches in diameter. Good drainage is crucial, so make sure they have drainage holes. Terracotta or plastic pots both work well.
* Potting Mix: Use a high-quality potting mix that’s well-draining. Avoid using garden soil, as it can compact and not provide enough aeration for your mint.
* Mint Seeds or Starter Plants: You can start from seeds, but I find it much easier to use starter plants from a local nursery or garden center.
* Watering Can: A watering can with a long spout will help you water your mint gently and evenly.
* Grow Lights (Optional): If you don’t have a sunny windowsill, grow lights can provide the necessary light for your mint to thrive.
* Scissors or Pruning Shears: For harvesting and pruning your mint.
* Spray Bottle: For misting your mint to increase humidity.
* Fertilizer (Optional): A balanced liquid fertilizer can help your mint grow strong and healthy.
Planting Your Mint
Alright, let’s get our hands dirty! Here’s how to plant your mint:
1. Prepare the Pots: Fill your pots with potting mix, leaving about an inch of space at the top.
2. Planting Starter Plants: Gently remove the mint plants from their nursery containers. Loosen the roots slightly with your fingers. Dig a small hole in the potting mix and place the mint plant in the hole. Make sure the top of the root ball is level with the surface of the soil. Fill in around the plant with potting mix and gently press down to secure it.
3. Planting from Seeds (If Applicable): If you’re starting from seeds, sprinkle them evenly over the surface of the potting mix. Cover them with a very thin layer of soil. Gently water the soil to moisten it.
4. Water Thoroughly: Water the newly planted mint thoroughly until water drains out of the drainage holes. This will help settle the soil and encourage root growth.
5. Label Your Pots: If you’re planting multiple varieties, label each pot so you know which is which.
Providing the Right Environment
Mint needs the right environment to thrive indoors. Here’s what to keep in mind:
* Light: Mint needs at least 6 hours of sunlight per day. A sunny windowsill facing south or east is ideal. If you don’t have enough natural light, use grow lights to supplement.
* Watering: Keep the soil consistently moist, but not soggy. Water when the top inch of soil feels dry to the touch. Avoid overwatering, as this can lead to root rot.
* Humidity: Mint prefers a humid environment. You can increase humidity by misting your mint plants regularly with a spray bottle, placing a tray of water near the plants, or using a humidifier.
* Temperature: Mint prefers temperatures between 65°F and 75°F (18°C and 24°C). Avoid placing your mint plants near drafts or heat sources.
* Fertilizing: Feed your mint plants with a balanced liquid fertilizer every 2-4 weeks during the growing season (spring and summer). Follow the instructions on the fertilizer label.
Pruning and Harvesting Your Mint
Pruning and harvesting are essential for keeping your mint plants healthy and productive. Here’s what you need to know:
* Pruning: Prune your mint regularly to encourage bushier growth. Pinch off the tips of the stems to promote branching. Remove any yellow or brown leaves.
* Harvesting: You can start harvesting mint leaves as soon as the plants are a few inches tall. Simply snip off the stems with scissors or pruning shears. Harvest regularly to encourage new growth.
* Harvesting for Drying: If you want to dry your mint for later use, harvest the stems in the morning after the dew has dried. Tie the stems together in small bundles and hang them upside down in a cool, dry, and well-ventilated place. Once the leaves are completely dry, crumble them and store them in an airtight container.
Troubleshooting Common Problems
Even with the best care, you might encounter some problems with your indoor mint garden. Here are a few common issues and how to address them:
* Yellowing Leaves: This can be caused by overwatering, underwatering, or nutrient deficiencies. Check the soil moisture and adjust your watering accordingly. If the problem persists, try fertilizing your mint plants.
* Brown Spots on Leaves: This can be caused by fungal diseases. Remove any affected leaves and improve air circulation around the plants. You can also try using a fungicide.
* Pests: Mint can be susceptible to pests like aphids, spider mites, and whiteflies. Inspect your plants regularly for signs of pests. If you find any, try spraying them with insecticidal soap or neem oil.
* Leggy Growth: This is usually caused by insufficient light. Move your mint plants to a sunnier location or use grow lights.
* Slow Growth: This can be caused by a variety of factors, including poor soil, insufficient light, or nutrient deficiencies. Make sure your mint plants are getting enough light, water, and fertilizer.
Propagating Your Mint
Mint is incredibly easy to propagate, which means you can create new plants from cuttings. Here’s how:
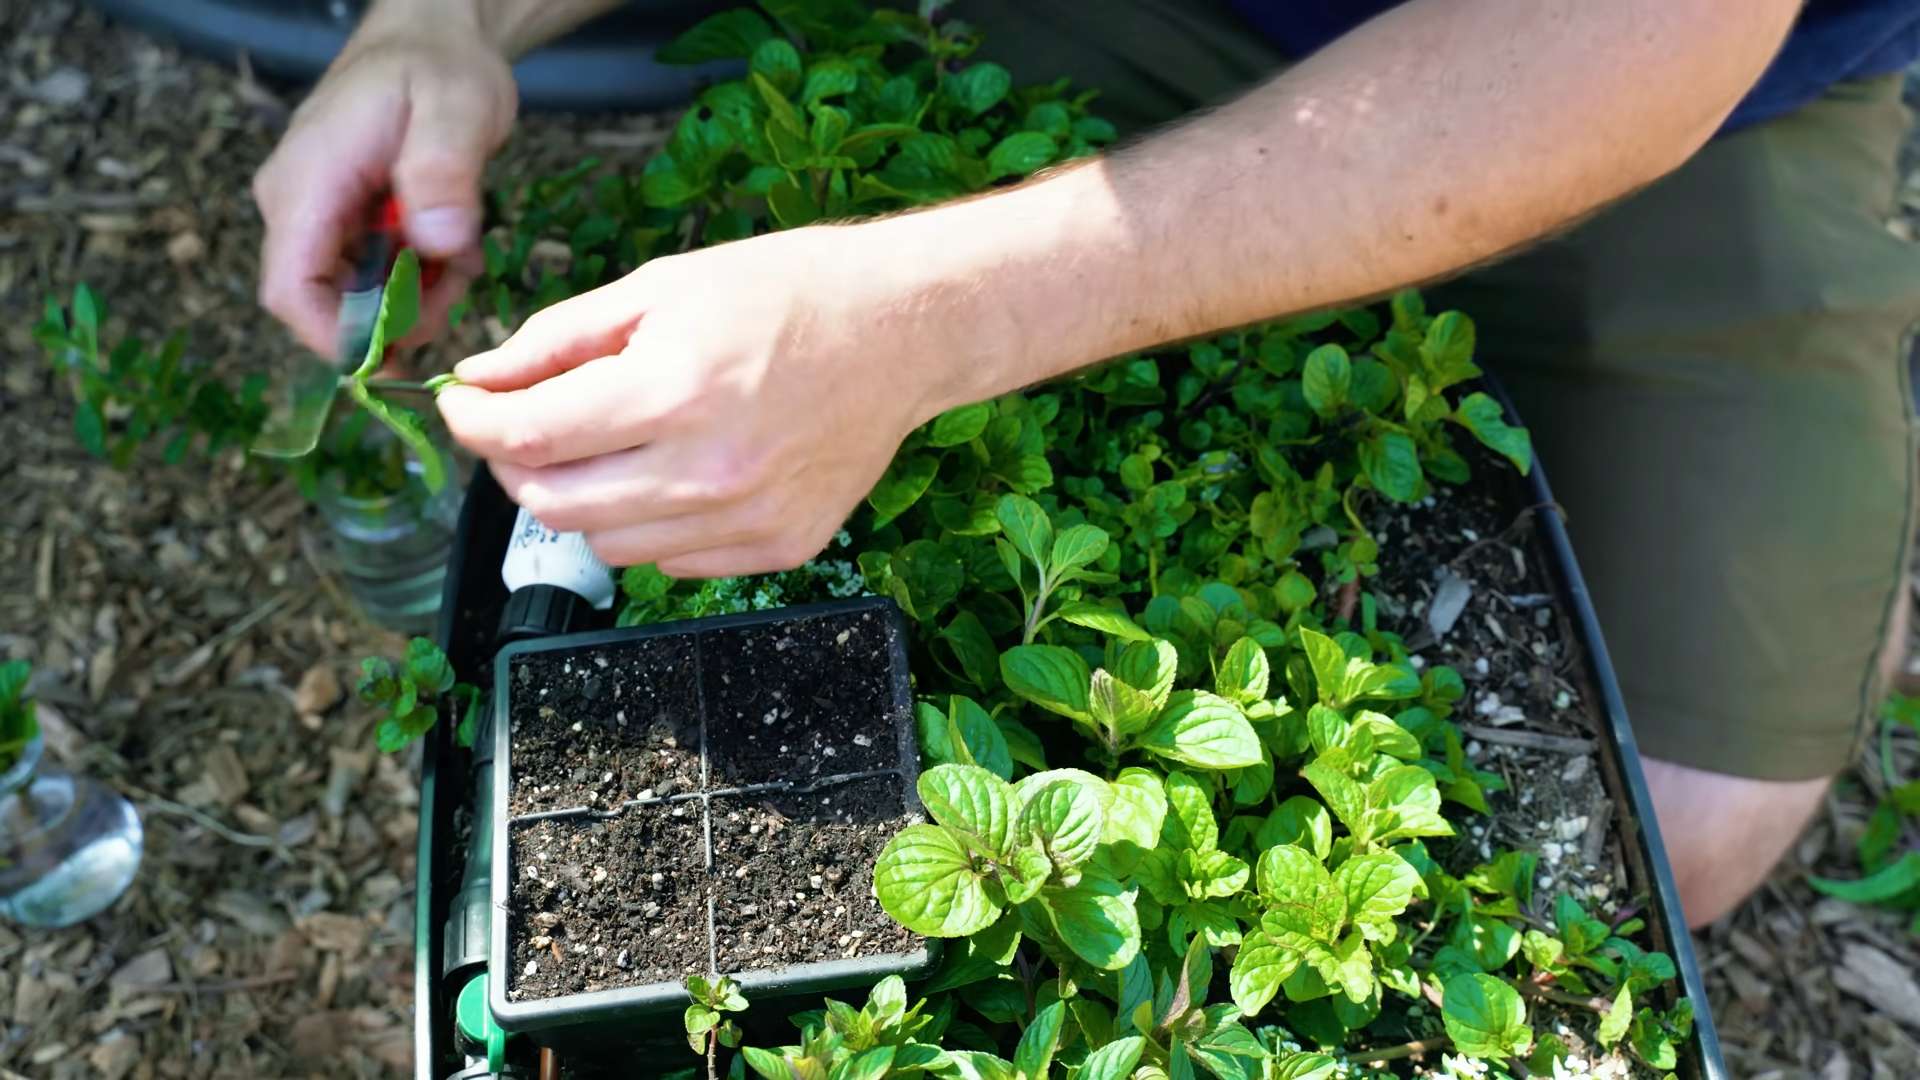
1. Take Cuttings: Cut a 4-6 inch stem from a healthy mint plant. Remove the leaves from the bottom inch of the stem.
2. Rooting in Water: Place the cutting in a glass of water, making sure the bottom inch of the stem is submerged. Place the glass in a bright, indirect light location.
3. Wait for Roots: Change the water every few days. After a week or two, you should see roots starting to grow.
4. Plant the Cutting: Once the roots are about an inch long, you can plant the cutting in a pot filled with potting mix. Water thoroughly.
Enjoying Your Homegrown Mint
Now for the best part – enjoying the fruits (or rather, leaves!) of your labor. Here are just a few ways to use your homegrown mint:
* Tea: Steep fresh mint leaves in hot water for a refreshing and soothing tea.
* Cocktails: Add mint to mojitos, mint juleps, and other cocktails.
* Cooking: Use mint in salads, sauces, and other savory dishes. It pairs especially well with lamb and peas.
* Desserts: Add mint to chocolate desserts, ice cream, and fruit salads.
* Garnish: Use mint as a garnish for drinks and dishes.
* Aromatic: Simply rub a few mint leaves between your fingers to release their fragrance and freshen up your home.
Maintaining Your Mint Garden Long-Term
To keep your indoor mint garden thriving for years to come, here are a few tips:
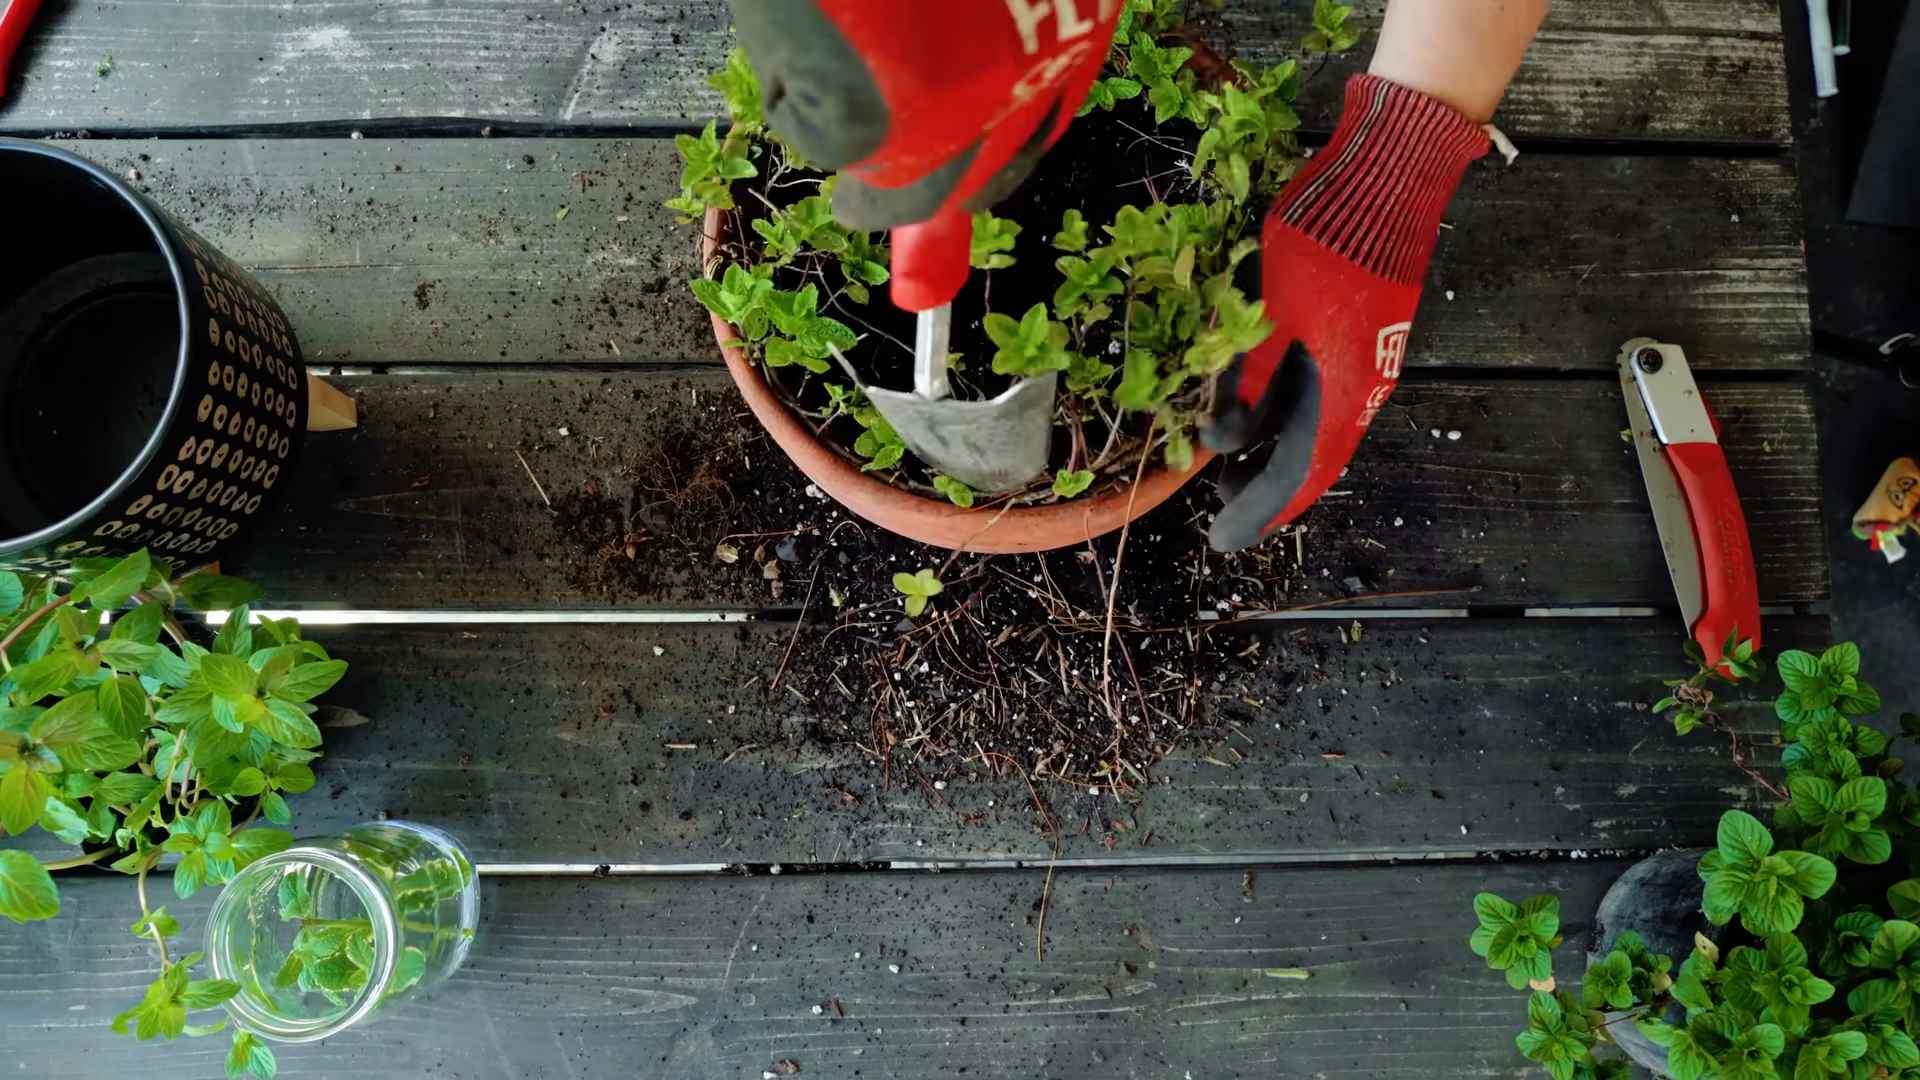
* Repotting: Repot your mint plants every year or two to refresh the soil and provide more space for the roots to grow.
* Dividing: If your mint plants become too crowded, you can divide them into smaller clumps and repot them.
* Pest Control: Continue to inspect your plants regularly for pests and take action as needed.
* Regular Harvesting: Keep harvesting your
Conclusion
So, there you have it! Creating your own indoor mint garden isn’t just a fun project; it’s a gateway to fresher flavors, a greener home, and a more sustainable lifestyle. Forget those sad, wilted bunches of mint from the grocery store. With a little effort, you can have a thriving supply of this fragrant herb right at your fingertips, ready to elevate your culinary creations and refresh your senses.
The beauty of this DIY project lies in its simplicity and adaptability. Whether you’re a seasoned gardener or a complete beginner, you can successfully cultivate mint indoors. The steps are straightforward, the materials are readily available, and the rewards are immeasurable. Imagine the satisfaction of snipping fresh mint leaves to garnish your morning tea, infuse your water, or add a burst of flavor to your favorite dishes.
But don’t stop there! Experiment with different varieties of mint to discover your favorites. Peppermint, spearmint, chocolate mint, orange mint – the possibilities are endless! Each variety offers a unique flavor profile that can add a special touch to your recipes. You can also explore different container options, from repurposed jars and teacups to stylish planters that complement your home décor. Consider using a self-watering planter to simplify maintenance, especially if you tend to forget to water your plants.
Beyond culinary uses, your indoor mint garden can also serve as a natural air freshener, filling your home with its invigorating scent. Mint is also known for its therapeutic properties, and simply being around the plant can help to reduce stress and improve your mood.
This DIY indoor mint garden is more than just a project; it’s an investment in your well-being and a step towards a more sustainable lifestyle. It’s a chance to connect with nature, learn new skills, and enjoy the simple pleasures of growing your own food.
We encourage you to give this DIY trick a try. It’s easier than you think, and the benefits are well worth the effort. Once you’ve set up your indoor mint garden, we’d love to hear about your experience. Share your photos, tips, and recipes in the comments below. Let’s create a community of indoor gardeners and inspire others to embrace the joy of growing their own mint! What are you waiting for? Get your hands dirty and start your indoor mint garden today! You’ll be amazed at how easy it is to grow your own fresh, flavorful mint, and you’ll wonder why you didn’t start sooner.
Frequently Asked Questions (FAQ)
What is the best type of mint to grow indoors?
The best type of mint to grow indoors depends on your personal preference and intended use. Spearmint and peppermint are two of the most popular and readily available varieties. Spearmint has a milder, sweeter flavor that’s perfect for teas, cocktails, and desserts. Peppermint has a stronger, more intense flavor that’s great for candies, chocolates, and digestive aids. Other varieties like chocolate mint, orange mint, and apple mint can also be grown indoors, offering unique flavor profiles to experiment with. Consider starting with a few different varieties to see which ones thrive best in your indoor environment and which flavors you enjoy the most. Remember to research the specific needs of each variety, as some may require more sunlight or have different watering requirements.
How much sunlight does my indoor mint garden need?
Mint thrives in bright, indirect sunlight. Aim for at least 4-6 hours of sunlight per day. If you don’t have a sunny windowsill, you can supplement with a grow light. Place the grow light about 6-12 inches above the plants and keep it on for 12-14 hours per day. Signs that your mint isn’t getting enough light include leggy growth (long, spindly stems) and pale leaves. If you notice these signs, try moving your mint to a brighter location or increasing the amount of time it spends under the grow light. Be careful not to expose your mint to direct sunlight for extended periods, as this can scorch the leaves. A south-facing window with a sheer curtain is often a good option.
How often should I water my indoor mint?
Water your indoor mint regularly, keeping the soil consistently moist but not waterlogged. Check the soil moisture by sticking your finger about an inch into the soil. If it feels dry, it’s time to water. Water thoroughly until excess water drains out of the bottom of the pot. Avoid letting the pot sit in standing water, as this can lead to root rot. The frequency of watering will depend on factors such as the size of the pot, the type of soil, and the humidity of your home. In general, you may need to water more frequently during the warmer months and less frequently during the cooler months. Overwatering is a common mistake, so it’s always better to err on the side of slightly underwatering than overwatering.
What kind of soil should I use for my indoor mint garden?
Use a well-draining potting mix that is rich in organic matter. A mixture of peat moss, perlite, and vermiculite is a good option. Avoid using garden soil, as it can be too heavy and compact, leading to poor drainage and root rot. You can also amend your potting mix with compost or other organic materials to provide additional nutrients. The ideal soil pH for mint is between 6.0 and 7.0. You can test the pH of your soil using a soil testing kit, which is available at most garden centers. If the pH is too high or too low, you can amend the soil with lime or sulfur to adjust it.
How do I harvest mint from my indoor garden?
Harvest mint by snipping off stems just above a leaf node (the point where leaves grow from the stem). This will encourage the plant to branch out and produce more leaves. You can harvest mint regularly throughout the growing season. Avoid removing more than one-third of the plant at a time, as this can stress the plant and slow down its growth. The best time to harvest mint is in the morning, after the dew has dried but before the sun gets too hot. This is when the leaves are at their most flavorful. You can use fresh mint immediately or store it in the refrigerator for a few days. To store mint, wrap it in a damp paper towel and place it in a plastic bag.
How do I prevent pests and diseases in my indoor mint garden?
Inspect your mint plants regularly for signs of pests or diseases. Common pests that can affect mint include aphids, spider mites, and whiteflies. You can control these pests by spraying your plants with insecticidal soap or neem oil. Diseases that can affect mint include powdery mildew and rust. You can prevent these diseases by providing good air circulation and avoiding overwatering. If you notice any signs of pests or diseases, isolate the affected plant from your other plants to prevent the problem from spreading. You can also remove any infected leaves or stems.
Can I propagate mint from cuttings?
Yes, mint is very easy to propagate from cuttings. Simply take a 4-6 inch cutting from a healthy stem, remove the lower leaves, and place the cutting in a glass of water. Roots should start to form within a week or two. Once the roots are about an inch long, you can transplant the cutting into a pot filled with potting mix. Keep the soil moist and the cutting in a bright, indirect location until it is established. Propagating mint from cuttings is a great way to expand your indoor mint garden or share your mint with friends and family.
My mint plant is flowering. Should I do anything?
While mint flowers are attractive to pollinators, flowering can reduce the flavor and leaf production of your mint plant. To encourage more leaf growth, pinch off the flower buds as soon as you see them. This will redirect the plant’s energy towards producing more leaves. You can also let your mint plant flower if you want to attract pollinators to your garden or collect the seeds. However, be aware that mint seeds are often not true to type, meaning that the plants grown from these seeds may not have the same characteristics as the parent plant.
Is mint invasive? Will it take over my other plants?
Mint is known for being an invasive plant, especially when planted directly in the ground. However, when grown in containers indoors, it is much easier to control. The key is to keep it contained within its pot and prevent it from spreading its roots into other containers. If you are growing multiple herbs in the same container, make sure to give your mint plant plenty of space and consider using a barrier to prevent it from encroaching on the other plants. Regularly pruning your mint plant will also help to keep it under control.
Can I use my indoor mint for tea?
Absolutely! Fresh mint tea is a delicious and refreshing beverage. Simply steep a few fresh mint leaves in hot water for 5-10 minutes. You can also add other ingredients to your tea, such as lemon, honey, or ginger. Mint tea is known for its digestive benefits and can help to soothe an upset stomach. It’s also a great way to relax and unwind after a long day. Experiment with different varieties of mint to find your favorite flavor.

Leave a Comment