

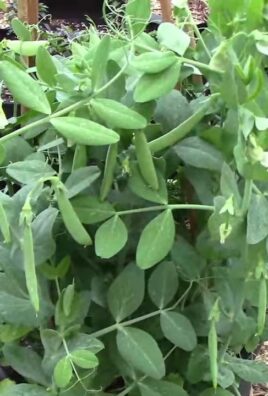
Growing green onions from scraps is easier than you might think, and I’m here to show you how! Have you ever tossed those little green onion ends, thinking they were destined for the compost bin? Well, hold on! You’re throwing away a chance to have a never-ending supply of fresh, flavorful green onions right in your own kitchen.
For centuries, resourceful gardeners have employed clever techniques to maximize their yields and minimize waste. The practice of regrowing vegetables from scraps taps into this rich history of sustainability and self-sufficiency. Think about it – our grandparents and great-grandparents often relied on these simple methods to supplement their food supply. Now, in a world increasingly focused on reducing our environmental footprint, these time-tested techniques are making a huge comeback.
Why should you learn this simple DIY trick? Because it’s incredibly rewarding! Imagine the satisfaction of snipping fresh green onions from your windowsill to garnish your favorite dishes. Plus, it saves you money at the grocery store and reduces food waste – a win-win for you and the planet. This method of growing green onions from scraps is perfect for beginners, apartment dwellers, or anyone looking for a fun and easy gardening project. Let’s dive in and discover how to transform those discarded ends into a thriving green onion bounty!
Growing Green Onions From Scraps: A Beginner’s Guide
Hey there, fellow green thumb enthusiasts! Are you tired of throwing away those green onion ends after you’ve chopped them up for your favorite recipes? Well, I’ve got some fantastic news for you: you can easily regrow them! It’s a super simple and rewarding DIY project that will keep your kitchen stocked with fresh green onions, and it’s a great way to reduce food waste. Let’s dive into how to do it!
What You’ll Need
Before we get started, let’s gather our supplies. The beauty of this project is that you probably already have most of these items at home:
- Green onion scraps: The bottom 1-2 inches of your green onions, with the roots still attached. Don’t worry if the roots look a little sad; they’ll bounce back!
- A glass or jar: Something to hold the green onion scraps in water. A small mason jar, a drinking glass, or even a repurposed yogurt container will work perfectly.
- Water: Tap water is fine!
- Potting soil (optional): If you want to transplant your green onions to a pot for longer-term growth.
- A small pot (optional): For transplanting, if you choose to go that route.
- A sunny windowsill: Green onions need sunlight to thrive.
Regrowing Green Onions in Water: Step-by-Step
This is the easiest method, and it’s a great way to get started. You’ll see new growth within just a few days!
- Prepare the green onion scraps: After you’ve used the green parts of your onions, carefully trim the bottom end, leaving about 1-2 inches of the white part with the roots intact. Make sure to remove any slimy or decaying outer layers.
- Place the scraps in water: Put the green onion scraps root-end down in your glass or jar. Add enough water to cover the roots, but don’t submerge the entire white part of the onion. We want the top part to stay dry to prevent rotting.
- Find a sunny spot: Place the glass on a sunny windowsill where it will receive at least 6 hours of sunlight per day. This is crucial for healthy growth.
- Change the water regularly: Every 1-2 days, change the water in the glass. This will prevent bacteria from growing and keep the water fresh. You’ll notice the water can get a little cloudy, so fresh water is key.
- Watch them grow! Within a few days, you’ll start to see new green shoots emerging from the top of the onion. It’s so exciting to watch!
- Harvest as needed: Once the green shoots have grown to a usable length (usually a few inches), you can snip off the amount you need for your cooking. The green onions will continue to grow back, providing you with a continuous supply.
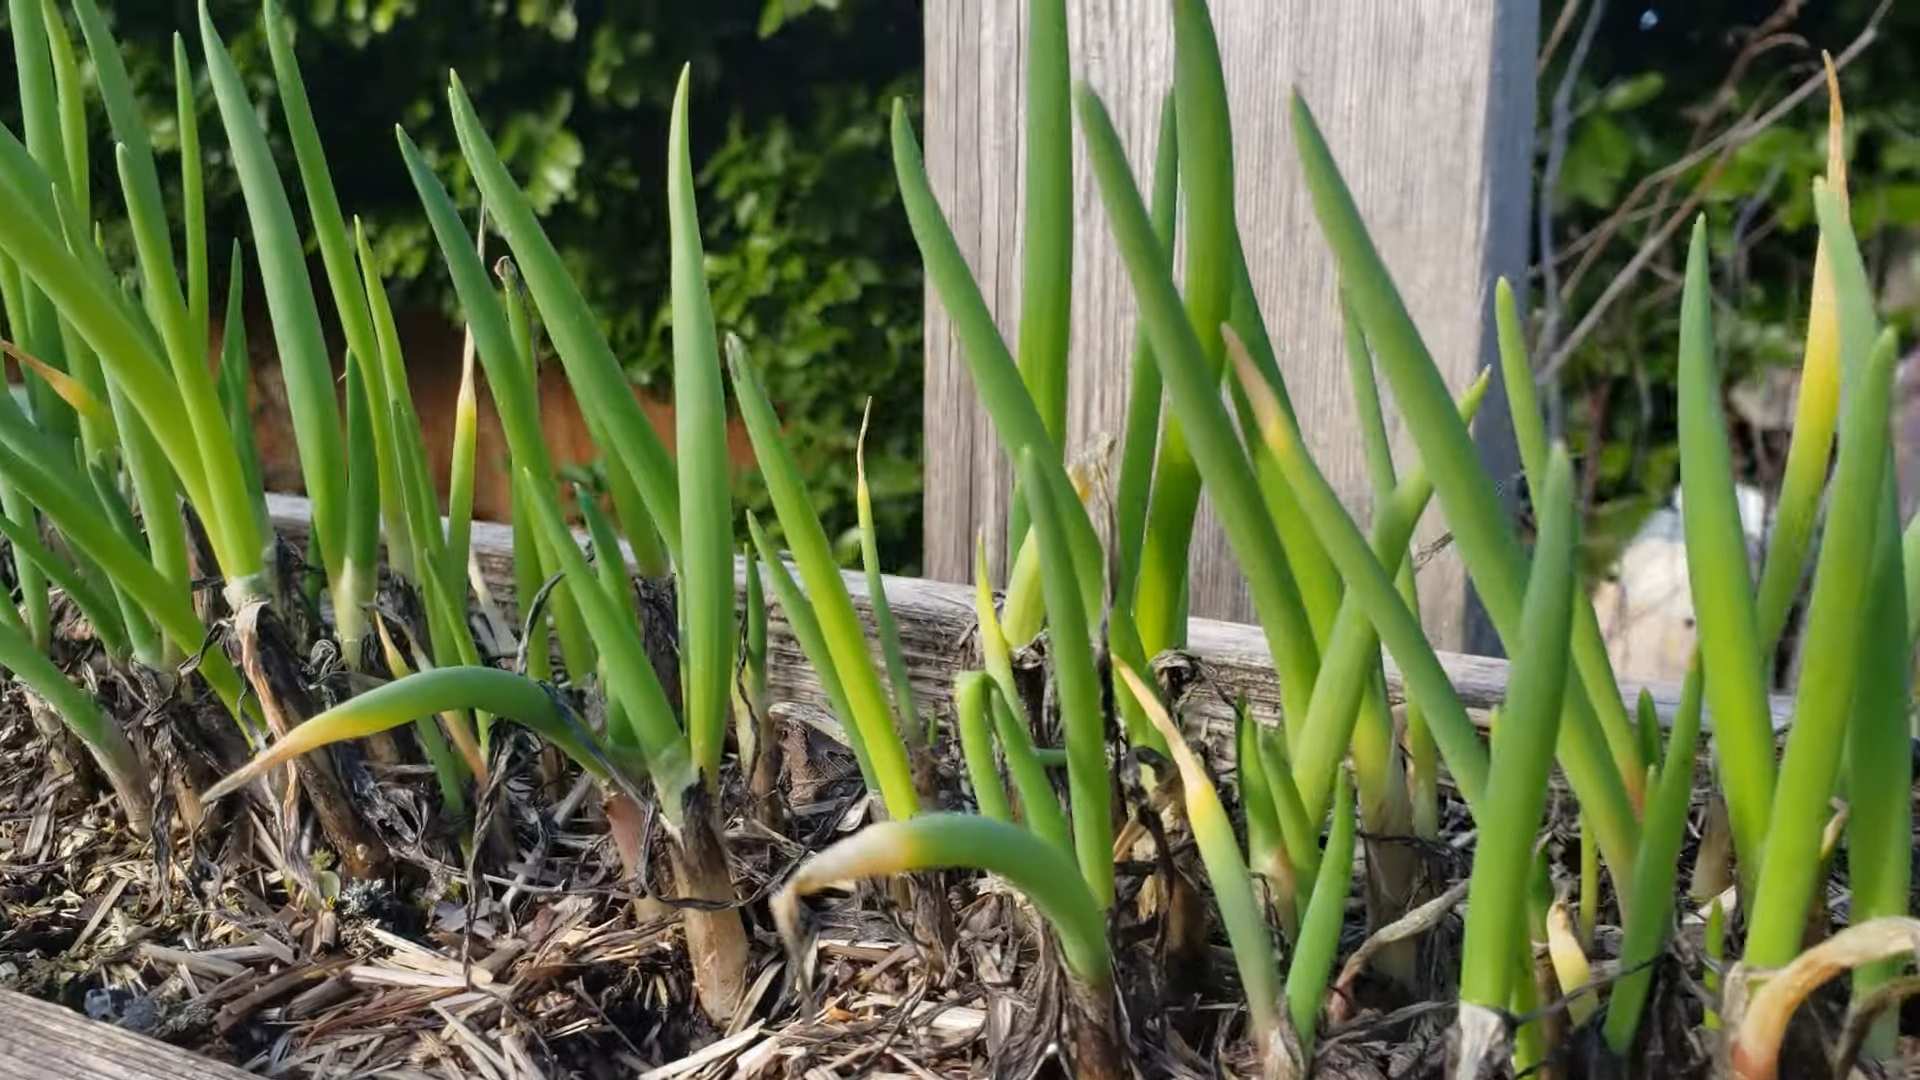
Transplanting to Soil for Longer-Term Growth
While growing green onions in water is convenient, transplanting them to soil will allow them to grow larger and stronger. This is how I get the most out of my green onion scraps!
When to Transplant
You’ll know it’s time to transplant when:
- The roots have grown significantly (at least an inch or two long).
- You’ve been regrowing them in water for a week or two, and they’re showing healthy new growth.
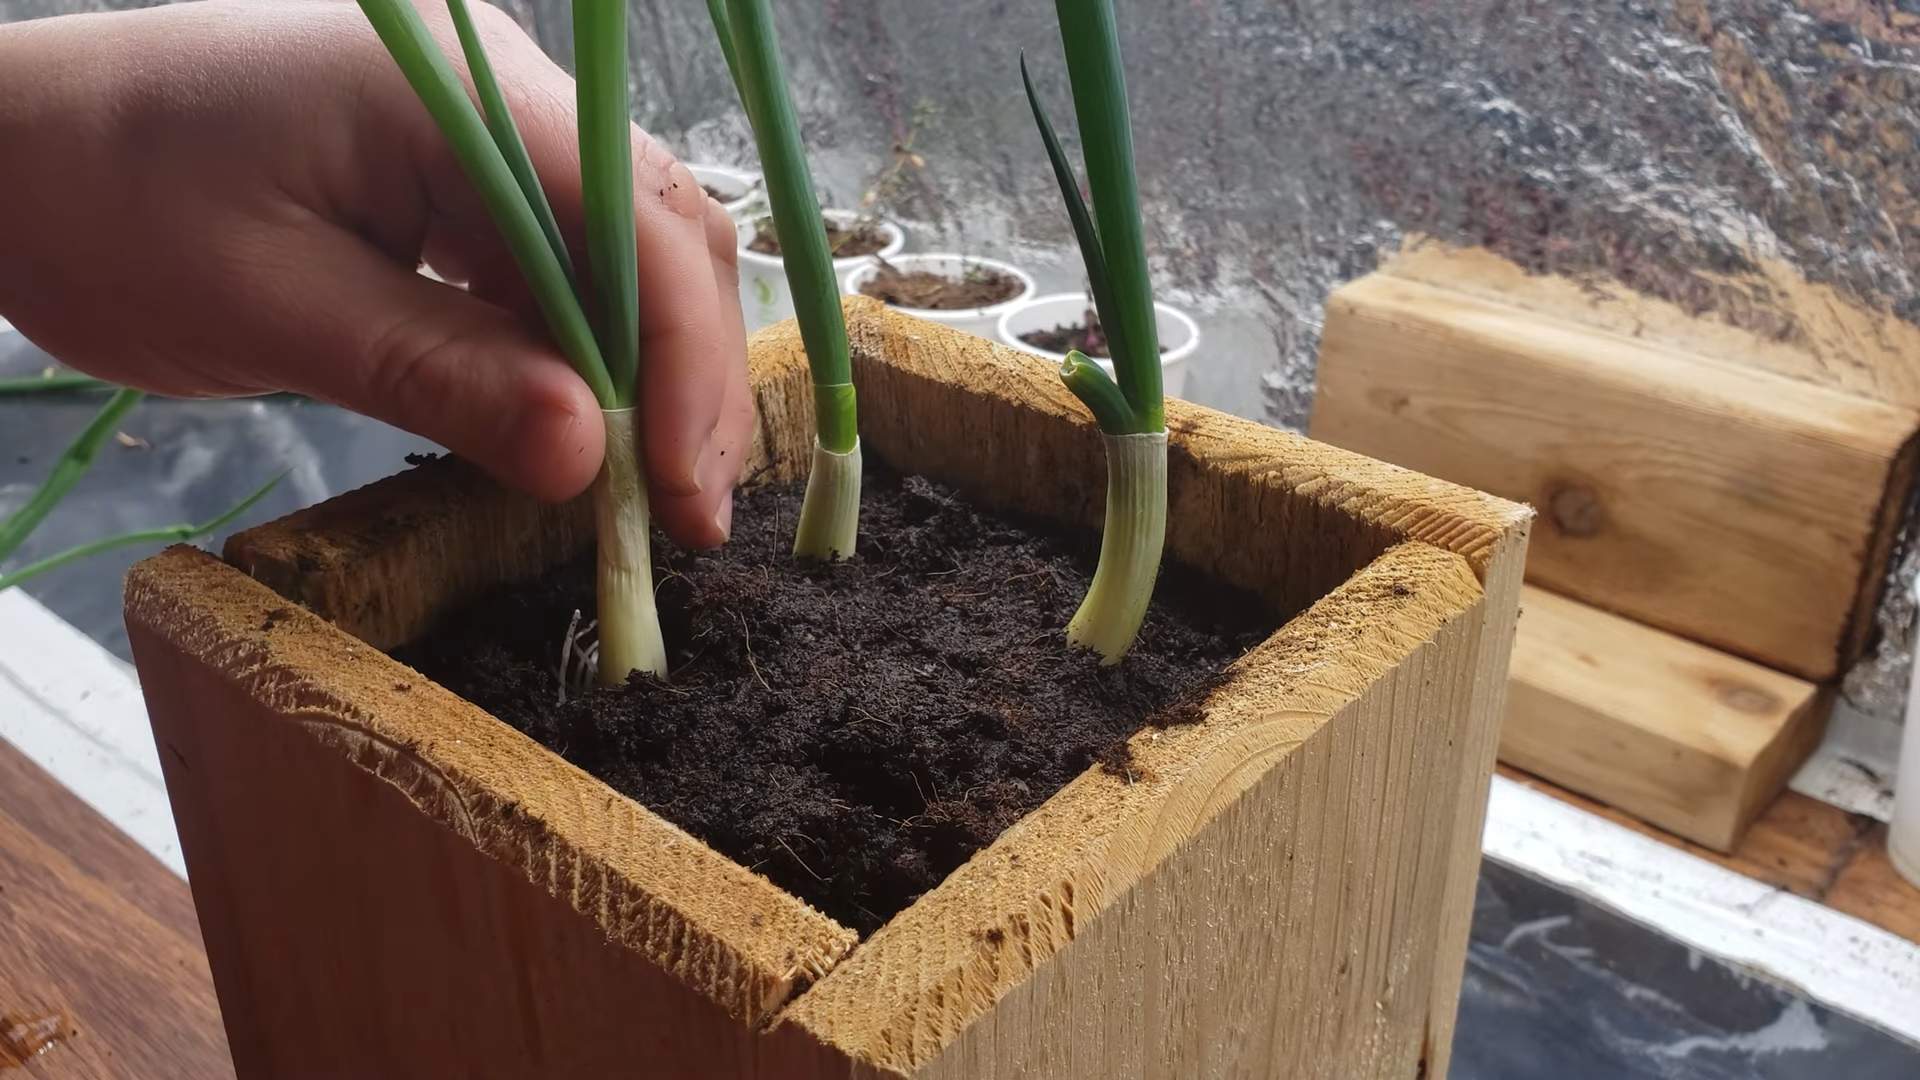
Transplanting Steps
- Prepare your pot: Choose a small pot (4-6 inches in diameter) with drainage holes. Fill it with good-quality potting soil.
- Make a hole: Use your finger or a small tool to create a hole in the soil that’s deep enough to accommodate the roots of the green onion scrap.
- Carefully remove the scrap from the water: Gently take the green onion scrap out of the water, being careful not to damage the roots.
- Plant the scrap: Place the roots into the hole and gently cover them with soil. Make sure the base of the white part of the onion is just above the soil line.
- Water thoroughly: Water the soil well after planting, making sure the water drains out of the drainage holes.
- Place in a sunny location: Just like when growing in water, your transplanted green onions need plenty of sunlight. Place the pot on a sunny windowsill or in a well-lit area.
- Water regularly: Keep the soil consistently moist, but not soggy. Water when the top inch of soil feels dry to the touch.
- Fertilize (optional): To encourage even more growth, you can fertilize your green onions every few weeks with a diluted liquid fertilizer. Follow the instructions on the fertilizer package.
- Harvest and enjoy! You can harvest the green shoots as needed, just like when growing in water. The green onions will continue to grow and produce new shoots.
Troubleshooting and Tips
Even with the simplest DIY projects, sometimes things don’t go exactly as planned. Here are a few common issues you might encounter and how to fix them:
- Yellowing leaves: This can be caused by a few things, including overwatering, underwatering, or lack of sunlight. Make sure you’re watering properly and that your green onions are getting enough light. If the yellowing is severe, you might need to trim off the affected leaves.
- Rotting: Rotting is usually caused by too much moisture. Make sure you’re not submerging the entire white part of the onion in water, and that your soil is well-draining if you’ve transplanted them. Remove any rotting parts immediately.
- Slow growth: Slow growth can be due to lack of sunlight, nutrients, or water. Make sure your green onions are getting enough light and water, and consider fertilizing them if they’re in soil.
- Gnats: Gnats can be attracted to moist soil. To prevent gnats, avoid overwatering and allow the top inch of soil to dry out between waterings. You can also use sticky traps to catch any gnats that do appear.
Extra Tips for Success
- Use fresh scraps: The fresher the green onion scraps, the better the chances of successful regrowth. Try to use them as soon as possible after you’ve used the green parts.
- Don’t be afraid to experiment: Try different types of containers, soil, and fertilizers to see what works best for you.
- Rotate your crops: If you’re growing green onions in soil, consider rotating them to different pots or areas of your garden each year to prevent soil depletion.
- Enjoy the process! Growing green onions from scraps is a fun and rewarding way to reduce food waste and enjoy fresh herbs at home. Don’t be discouraged if you encounter a few challenges along the way. Just keep experimenting and learning, and you’ll be a green onion-growing pro in no time!
Why This Works: The Science Behind It
You might be wondering, “How does this even work?” Well, green onions, like many other plants, have the ability to regenerate from their base. The white part of the onion contains dormant cells that can be activated when placed in water or soil. The roots absorb water and nutrients, which fuel the growth of new shoots. It’s a pretty amazing process!
Beyond Green Onions: Other Veggies to Regrow
Once you’ve mastered growing green onions from scraps, you might be inspired to try regrowing other vegetables. Here are a few other easy options:
- Celery: Place the celery base in a shallow dish of water, and new leaves will sprout from the center.
- Lettuce: Place the lettuce stump in a bowl of water, and new leaves will grow from the center.
- Garlic: Plant a single garlic clove in soil, and it will grow into a new garlic bulb.
- Ginger: Plant a piece of ginger root in soil, and it will sprout new shoots.
- Basil: Place basil cuttings in water, and they will develop roots.
So, there you have it! A comprehensive guide to growing green onions from scraps. I hope you found this helpful and that you’re inspired to give it a try. Happy gardening!
Conclusion
So, there you have it! Growing green onions from scraps isn’t just a fun little project; it’s a game-changer for your kitchen and your wallet. Think about it: no more last-minute grocery store runs for a handful of scallions. No more wasted green onion butts languishing in the trash. Just a constant, readily available supply of fresh, flavorful green onions right at your fingertips. This simple DIY trick transforms kitchen waste into a sustainable source of deliciousness.
But the benefits extend beyond mere convenience. You’re actively reducing food waste, contributing to a more sustainable lifestyle, and connecting with the natural world in a small but meaningful way. Plus, it’s incredibly satisfying to watch those little green shoots spring back to life, a testament to the resilience of nature and the power of a little bit of water and sunlight.
Don’t be afraid to experiment! While water propagation is the simplest method, you can also try planting your green onion scraps directly into soil. This can sometimes lead to even more robust growth, as the roots have access to a wider range of nutrients. You can also vary the type of container you use. While a simple glass or jar works perfectly well, you could also use a repurposed plastic container or even a decorative planter to add a touch of style to your kitchen windowsill.
Consider the placement of your green onions as well. While they thrive in sunlight, they can also tolerate partial shade. Experiment with different locations in your home to see what works best for your specific environment. You might even find that growing green onions from scraps indoors is a great way to add a touch of greenery to your home during the colder months.
And speaking of variations, why stop at green onions? You can apply similar principles to other vegetables, such as celery, lettuce, and even some herbs. With a little bit of experimentation, you can transform your kitchen scraps into a thriving indoor garden.
We wholeheartedly encourage you to give this DIY trick a try. It’s easy, it’s rewarding, and it’s a fantastic way to add a touch of freshness and sustainability to your life. Once you’ve experienced the joy of growing your own green onions from scraps, you’ll wonder why you didn’t start sooner!
But don’t just take our word for it. We want to hear about your experiences! Share your photos, tips, and tricks in the comments below. Let us know what works best for you, what challenges you encounter, and any creative variations you come up with. Together, we can create a community of green onion enthusiasts and inspire others to embrace the joys of sustainable gardening. So go ahead, grab those green onion scraps, and get growing! You’ll be amazed at how easy it is to have a constant supply of fresh green onions right at your fingertips. This simple act of growing green onions from scraps can bring so much joy and flavor to your life.
Frequently Asked Questions
How long does it take for green onions to regrow from scraps?
Generally, you’ll start to see noticeable regrowth within a few days. Within a week, you should have a significant amount of new green growth. The speed of regrowth depends on factors like sunlight, water quality, and the initial health of the green onion scraps. Warmer temperatures also tend to promote faster growth. Don’t be discouraged if it takes a little longer in cooler environments. Just be patient and ensure they have adequate light and water.
What’s the best way to cut the green onions so they regrow properly?
The key is to leave about an inch or two of the white root end intact. This is where the magic happens! Make sure you include the root base. Cut the green onions about an inch above the roots. This provides enough of a base for the plant to regenerate. Avoid cutting too close to the roots, as this can damage them and hinder regrowth.
How often should I change the water?
Changing the water every one to two days is crucial. This prevents the water from becoming stagnant and harboring bacteria, which can rot the roots. Fresh water provides the necessary oxygen for healthy growth. When you change the water, gently rinse the roots to remove any accumulated debris. This will help keep them clean and healthy.
Can I plant the regrown green onions in soil?
Absolutely! Once the green onions have regrown a few inches in water, you can transplant them into a pot with soil or directly into your garden. This can lead to even more robust growth and a longer lifespan for your green onions. Choose a well-draining potting mix and a sunny location. Water regularly, and you’ll be rewarded with a continuous supply of fresh green onions.
What kind of soil is best for growing green onions?
A well-draining potting mix is ideal. You can also amend your garden soil with compost or other organic matter to improve drainage and fertility. Green onions prefer soil that is rich in nutrients and retains moisture without becoming waterlogged. A slightly acidic to neutral pH is also beneficial.
How much sunlight do green onions need?
Green onions thrive in full sun, which means at least six hours of direct sunlight per day. However, they can also tolerate partial shade, especially in hotter climates. If you’re growing them indoors, place them near a sunny window. If you don’t have enough natural light, you can supplement with a grow light.
Can I use tap water to grow green onions?
While tap water is generally fine, it’s best to let it sit out for a few hours before using it. This allows chlorine and other chemicals to evaporate, which can be harmful to the plants. Filtered water or rainwater is even better. Avoid using softened water, as it can contain high levels of sodium, which can damage the roots.
How long will the green onions keep regrowing?
With proper care, green onions can regrow multiple times from the same scraps. However, the regrowth may become less vigorous over time. After a few cycles, it’s best to start with fresh scraps for optimal results. You can also divide the clumps of green onions that have been growing in soil to propagate new plants.
What if the green onions start to turn yellow or brown?
Yellowing or browning leaves can indicate a few different problems. It could be due to overwatering, underwatering, lack of sunlight, or nutrient deficiencies. Check the soil moisture and adjust your watering accordingly. Make sure the plants are getting enough sunlight. If the problem persists, you can try fertilizing them with a diluted liquid fertilizer.
Are there any pests or diseases that affect green onions?
Green onions are generally pest-resistant, but they can occasionally be affected by aphids, thrips, or onion maggots. You can control these pests with insecticidal soap or neem oil. Diseases like onion rot can also occur, especially in overly wet conditions. Ensure good drainage and avoid overwatering to prevent these problems.
Can I grow different varieties of green onions from scraps?
Yes, you can! There are several varieties of green onions, each with its own unique flavor and characteristics. Experiment with different types to see which ones you prefer. You can find different varieties at your local grocery store or farmers market.
Is it safe to eat green onions that have been regrown from scraps?
Yes, it is perfectly safe to eat green onions that have been regrown from scraps, as long as you follow proper hygiene practices. Wash the green onions thoroughly before eating them to remove any dirt or debris. If you notice any signs of mold or decay, discard the affected parts.
Leave a Comment