

Extend Strawberry Harvest: Who doesn’t love the taste of sweet, juicy strawberries fresh from the garden? Imagine baskets overflowing with these ruby-red gems, ready for pies, jams, or simply a delightful snack. But what if I told you that you could significantly extend your strawberry harvest, enjoying those delicious berries for weeks, even months, longer than you thought possible?
For centuries, gardeners have cherished strawberries, with evidence of their cultivation dating back to ancient Rome. These berries weren’t always the plump, vibrant fruits we know today; selective breeding over time has transformed them into the garden superstars they are. But even with the best varieties, the short harvest season can be a real disappointment. That’s where a few clever DIY tricks come in!
Let’s face it, the fleeting nature of strawberry season is a common frustration. You nurture your plants, eagerly await the first blossoms, and then, in what feels like a blink of an eye, the harvest is over. This DIY guide is your secret weapon to combat that frustration. I’m going to share simple, effective techniques that will help you extend strawberry harvest and maximize your yield. From strategic planting to clever protection methods, these hacks are designed to give you more of what you crave: delicious, homegrown strawberries for a longer period. Get ready to enjoy a season filled with the sweet taste of success!
Extending Your Strawberry Harvest: A DIY Guide
Hey there, fellow gardeners! Are you like me, utterly obsessed with fresh, juicy strawberries? I always feel like the strawberry season is way too short. So, I’ve spent years experimenting with different techniques to extend my strawberry harvest, and I’m excited to share my secrets with you! This guide will walk you through everything you need to know to enjoy strawberries for a longer period.
Choosing the Right Strawberry Varieties
The first step to extending your strawberry harvest is selecting the right varieties. Not all strawberries are created equal! They fall into three main categories: June-bearing, everbearing, and day-neutral.
* **June-Bearing Strawberries:** These produce one large crop, usually over a period of 2-3 weeks in June (hence the name!). They’re great for making jam or freezing because you get a lot of berries at once. Popular varieties include ‘Earliglow,’ ‘Honeoye,’ and ‘Chandler.’
* **Everbearing Strawberries:** These produce two or three crops per year – one in the spring, one in the late summer/early fall, and sometimes a smaller crop in between. While the individual harvests aren’t as large as June-bearing varieties, they provide a more consistent supply of berries. Good choices are ‘Ozark Beauty,’ ‘Quinault,’ and ‘Albion.’
* **Day-Neutral Strawberries:** These are the real workhorses for extending your harvest! They produce fruit continuously throughout the growing season, as long as the temperature is between 35°F and 85°F. They’re not as productive as June-bearing varieties in a single flush, but they provide a steady stream of berries all summer long. ‘Seascape,’ ‘Albion’ (yes, it’s also everbearing!), and ‘San Andreas’ are excellent options.
My recommendation: Plant a mix of all three types! This way, you’ll have a large initial harvest from the June-bearing varieties, followed by a steady supply from the everbearing and day-neutral types throughout the summer and fall.
Preparing Your Strawberry Patch
Proper preparation is key to a successful and extended strawberry harvest. Strawberries need well-drained, slightly acidic soil (pH 5.5-6.5).
1. **Soil Testing:** Before you do anything, test your soil! You can buy a soil testing kit at most garden centers or send a sample to your local agricultural extension office. This will tell you the pH of your soil and whether it’s lacking any essential nutrients.
2. **Soil Amendment:** Based on your soil test results, amend your soil accordingly. If your soil is too alkaline, you can add sulfur or peat moss to lower the pH. If it’s lacking nutrients, incorporate compost, well-rotted manure, or a balanced fertilizer (10-10-10) into the soil.
3. **Weed Removal:** Strawberries don’t like competition, so it’s crucial to remove all weeds from your planting area. You can do this by hand-pulling, hoeing, or using a pre-emergent herbicide.
4. **Raised Beds (Optional):** I highly recommend planting strawberries in raised beds, especially if you have heavy clay soil. Raised beds improve drainage and aeration, which are essential for healthy strawberry plants.
5. **Spacing:** Space your strawberry plants according to the variety. June-bearing varieties need more space than everbearing and day-neutral varieties. A good rule of thumb is to space June-bearing plants 18-24 inches apart in rows that are 3-4 feet apart. Everbearing and day-neutral varieties can be spaced 12-18 inches apart in rows that are 2-3 feet apart.
Planting Your Strawberries
Now comes the fun part – planting your strawberries!
1. **Timing:** The best time to plant strawberries is in the early spring or late fall. This gives the plants time to establish themselves before the hot summer months or the cold winter months.
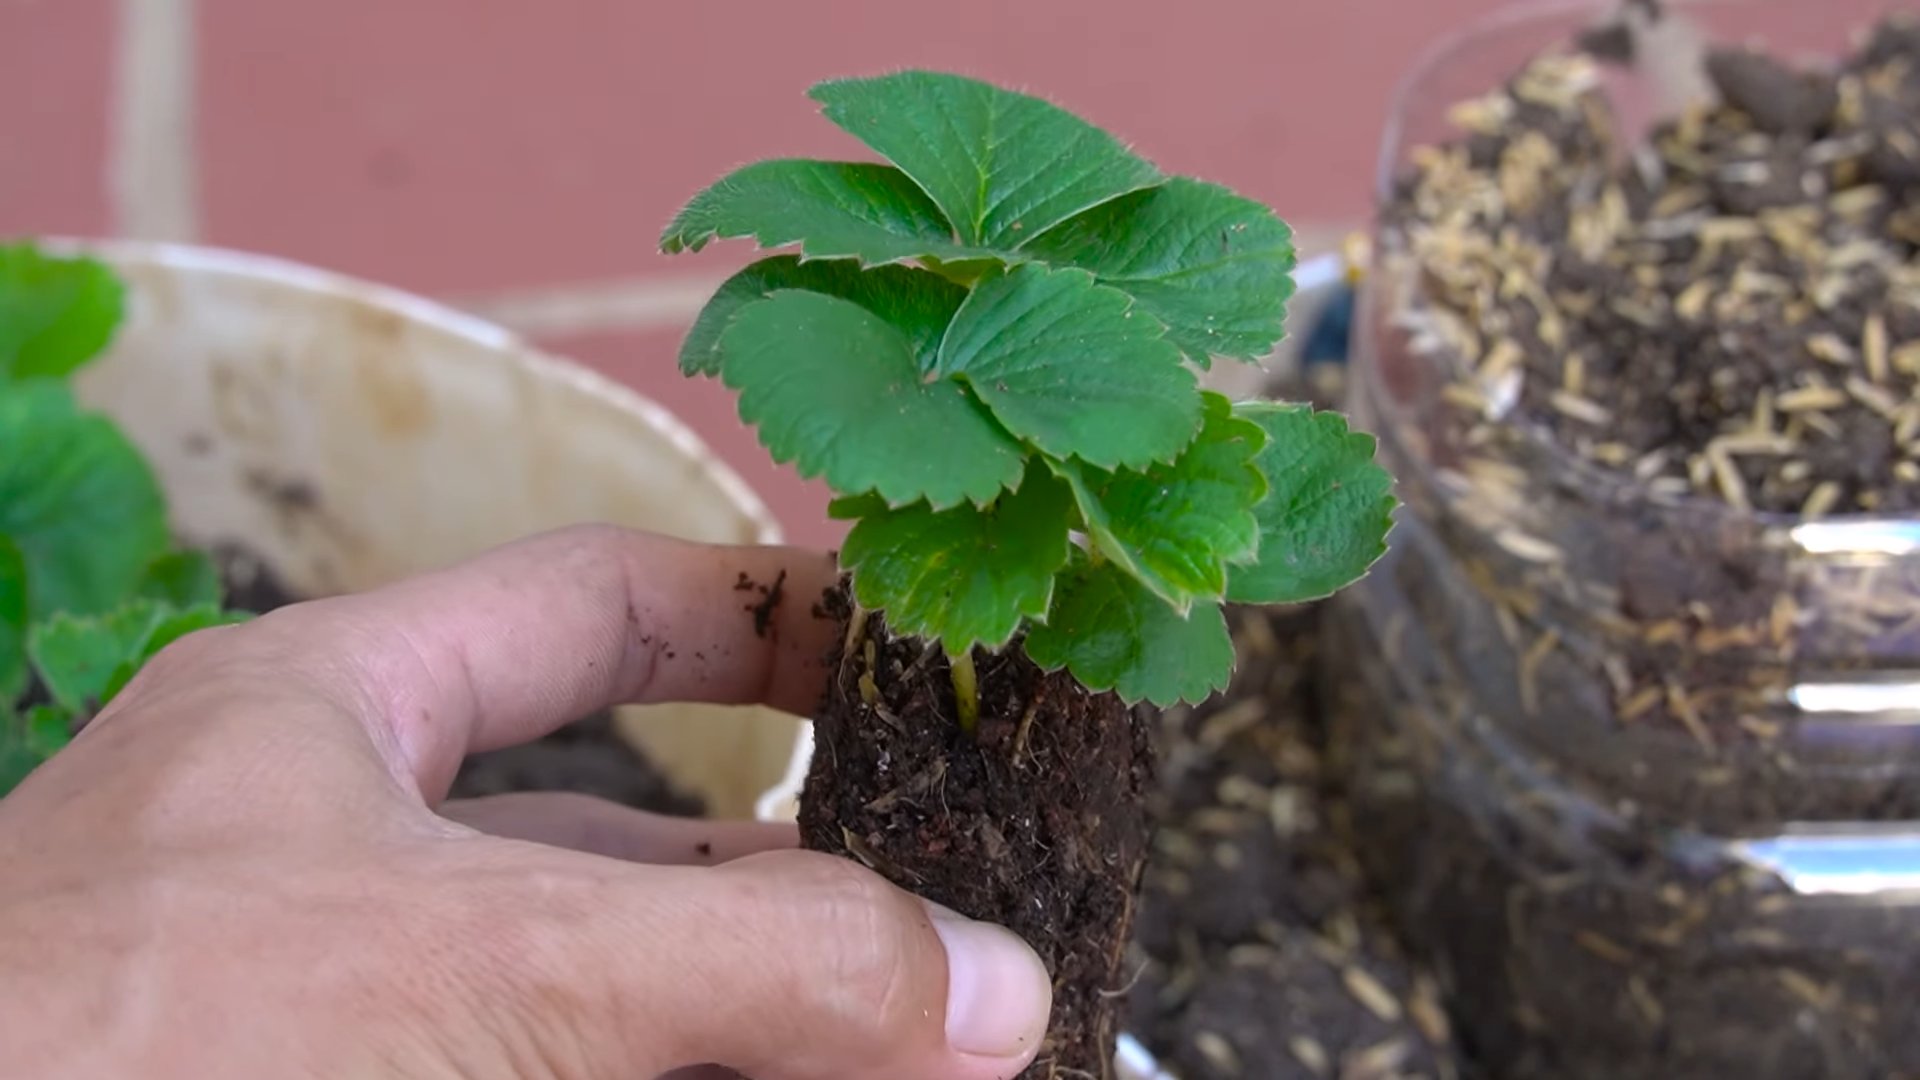
2. **Planting Depth:** When planting, make sure the crown of the plant (the point where the roots meet the stem) is level with the soil surface. Planting too deep can cause the crown to rot, while planting too shallow can cause the roots to dry out.
3. **Watering:** Water your newly planted strawberries thoroughly. Keep the soil consistently moist, but not waterlogged, until the plants are established.
4. **Mulching:** Apply a layer of mulch around your strawberry plants. Mulch helps to retain moisture, suppress weeds, and regulate soil temperature. Straw is a traditional mulch for strawberries (hence the name!), but you can also use wood chips, pine needles, or shredded leaves.
Extending the Harvest: Season Extension Techniques
Here’s where the real magic happens! These techniques will help you extend your strawberry harvest beyond the typical season.
Row Covers
Row covers are lightweight fabrics that you can place over your strawberry plants to protect them from frost, pests, and excessive heat.
1. **Early Spring Protection:** In the early spring, row covers can help to warm the soil and protect your plants from late frosts, allowing you to start harvesting earlier.
2. **Late Fall Protection:** In the late fall, row covers can help to protect your plants from early frosts, allowing you to extend your harvest later into the season.
3. **Pest Control:** Row covers can also help to protect your plants from pests, such as birds and insects.
4. **Installation:** To install row covers, simply drape the fabric over your plants and secure it to the ground with stakes or rocks. Make sure the fabric is loose enough to allow the plants to grow freely.
Cold Frames
Cold frames are mini-greenhouses that you can use to protect your strawberry plants from the cold.
1. **Construction:** You can build your own cold frame using wood, plastic, or glass. Alternatively, you can purchase a pre-made cold frame from a garden center.
2. **Placement:** Place your cold frame over your strawberry plants in the late fall.
3. **Ventilation:** On sunny days, open the cold frame to ventilate it and prevent the plants from overheating.
4. **Watering:** Water your plants regularly, even when they’re inside the cold frame.
High Tunnels
High tunnels are larger versions of cold frames that can cover an entire row of strawberry plants.
1. **Construction:** High tunnels are typically made from metal or PVC frames covered with plastic sheeting.
2. **Installation:** Install your high tunnel over your strawberry plants in the late fall.
3. **Ventilation:** Ventilate the high tunnel on sunny days to prevent the plants from overheating.
4. **Watering:** Water your plants regularly, even when they’re inside the high tunnel.
Succession Planting
Succession planting involves planting new strawberry plants every few weeks to ensure a continuous supply of berries throughout the growing season.
1. **Timing:** Start planting new strawberry plants in the early spring and continue planting every 2-3 weeks until mid-summer.
2. **Variety Selection:** Choose day-neutral varieties for succession planting, as they will produce fruit continuously throughout the growing season.
3. **Planting Location:** Plant your new strawberry plants in a different location than your existing plants to prevent the spread of diseases and pests.
Caring for Your Strawberry Plants
Proper care is essential for a healthy and productive strawberry patch.
1. **Watering:** Water your strawberry plants regularly, especially during dry periods. Aim for about 1 inch of water per week.
2. **Fertilizing:** Fertilize your strawberry plants every 4-6 weeks with a balanced fertilizer (10-10-10).
3. **Weed Control:** Keep your strawberry patch free of weeds. Weeds compete with your strawberry plants for water and nutrients.
4. **Pest and Disease Control:** Monitor your strawberry plants regularly for pests and diseases. Common strawberry pests include aphids, spider mites, and slugs. Common strawberry diseases include gray mold, leaf spot, and verticillium wilt. Treat any problems promptly with appropriate pesticides or fungicides.
5. **Renovating June-Bearing Strawberries:** After your June-bearing strawberries have finished fruiting, it’s important to renovate them. This involves mowing the plants down to about 1 inch above the ground and removing any runners that have formed. Renovating your June-bearing strawberries will help to keep them healthy and productive for years to come.
6. **Removing Runners from Everbearing and Day-Neutral Strawberries:** Everbearing and day-neutral strawberries produce runners (stems that grow horizontally along the ground and produce new plants). Removing these runners will encourage the plants to put more energy into producing fruit.
Harvesting Your Strawberries
Finally, the moment you’ve been waiting for – harvesting your strawberries!
1. **Timing:** Harvest your strawberries when they are fully ripe and red. The berries should be firm and plump.
2. **Technique:** Gently twist the berries off the plant, leaving the green cap and a short piece of stem attached.
3. **Storage:** Store your harvested strawberries in the refrigerator. They will keep for several days
Conclusion
So, there you have it! Extending your strawberry harvest isn’t just a pipe dream; it’s an achievable goal with a little planning and this simple DIY trick. We’ve shown you how to coax more delicious berries from your plants, stretching that sweet, summery flavor far beyond the typical season. Think of it: fresh strawberry shortcake in late autumn, homemade strawberry jam for holiday gifts, or simply enjoying the taste of summer a little longer.
This isn’t just about having more strawberries; it’s about maximizing your gardening efforts and enjoying the fruits (literally!) of your labor. It’s about reducing food waste by utilizing every last potential berry. And it’s about connecting with nature and understanding the rhythms of your garden.
But the best part? This method is incredibly adaptable. Want to experiment? Try using different types of row covers to see which provides the best protection in your specific climate. Consider companion planting with herbs like basil or thyme, known to deter pests and potentially enhance the flavor of your strawberries. You could even try succession planting, staggering your initial planting dates to further extend the harvest window.
Don’t be afraid to tweak the process to suit your needs and preferences. The key is to observe your plants, learn from your experiences, and adapt your approach accordingly. Gardening is a journey, not a destination, and every season brings new opportunities for learning and growth.
We truly believe that this DIY trick for extending your strawberry harvest is a game-changer for any strawberry lover. It’s easy, cost-effective, and yields impressive results. Imagine the satisfaction of picking fresh, juicy strawberries long after your neighbors’ plants have stopped producing.
Now, it’s your turn! We encourage you to give this method a try. Don’t be intimidated if you’re a beginner gardener; this is a great project to start with. And most importantly, share your experiences with us! We’d love to hear about your successes, your challenges, and any variations you’ve tried. Post photos of your extended strawberry harvest on social media using #ExtendedStrawberryHarvest or leave a comment below. Let’s build a community of strawberry enthusiasts and learn from each other. Let’s all enjoy the bounty of a longer, sweeter strawberry season! Remember, mastering this **DIY trick** will not only extend your harvest but also deepen your connection with your garden.
Frequently Asked Questions (FAQ)
Q: What type of strawberries work best with this method?
A: While this method can work with most strawberry varieties, everbearing and day-neutral strawberries tend to respond particularly well. These types are naturally inclined to produce fruit over a longer period, and the added protection and care provided by this DIY trick can significantly enhance their yield and extend their fruiting season. June-bearing strawberries can also benefit, particularly from early season protection to encourage a larger initial harvest.
Q: How do I know when to apply the row covers or mulch?
A: Timing is crucial. For extending the harvest into the fall, start monitoring the weather forecast closely in late summer or early fall. As soon as you see signs of the first frost approaching, it’s time to apply your row covers or mulch. For early spring harvests, remove the mulch gradually as the weather warms, allowing the plants to acclimate slowly. Watch for signs of new growth before completely removing the protection.
Q: Can I use plastic instead of fabric row covers?
A: While plastic can provide more insulation, it’s generally not recommended for extended periods. Plastic can trap moisture and heat, creating a humid environment that can promote fungal diseases. Fabric row covers, on the other hand, allow for better air circulation and breathability, reducing the risk of disease. If you do use plastic, be sure to vent it regularly to prevent moisture buildup.
Q: What kind of mulch is best for protecting strawberry plants?
A: Straw is an excellent choice for mulching strawberry plants, as it provides good insulation and allows for air circulation. Pine needles are another good option, as they are acidic and can help to maintain the soil’s pH level, which strawberries prefer. Avoid using heavy mulches like wood chips, as they can trap moisture and suffocate the plants.
Q: How often should I water my strawberries under row covers?
A: The frequency of watering will depend on the weather conditions and the type of soil you have. Generally, you’ll need to water less frequently under row covers, as they help to retain moisture. Check the soil moisture regularly by sticking your finger into the soil near the base of the plants. If the soil feels dry to the touch, it’s time to water. When watering, be sure to water deeply and thoroughly, allowing the water to reach the roots.
Q: What if I see pests or diseases under the row covers?
A: Regular monitoring is essential. If you notice any signs of pests or diseases, remove the row covers immediately and address the problem. You can use organic pest control methods, such as insecticidal soap or neem oil, to control pests. For diseases, ensure good air circulation and remove any infected leaves or fruit. Once the problem is resolved, you can reapply the row covers.
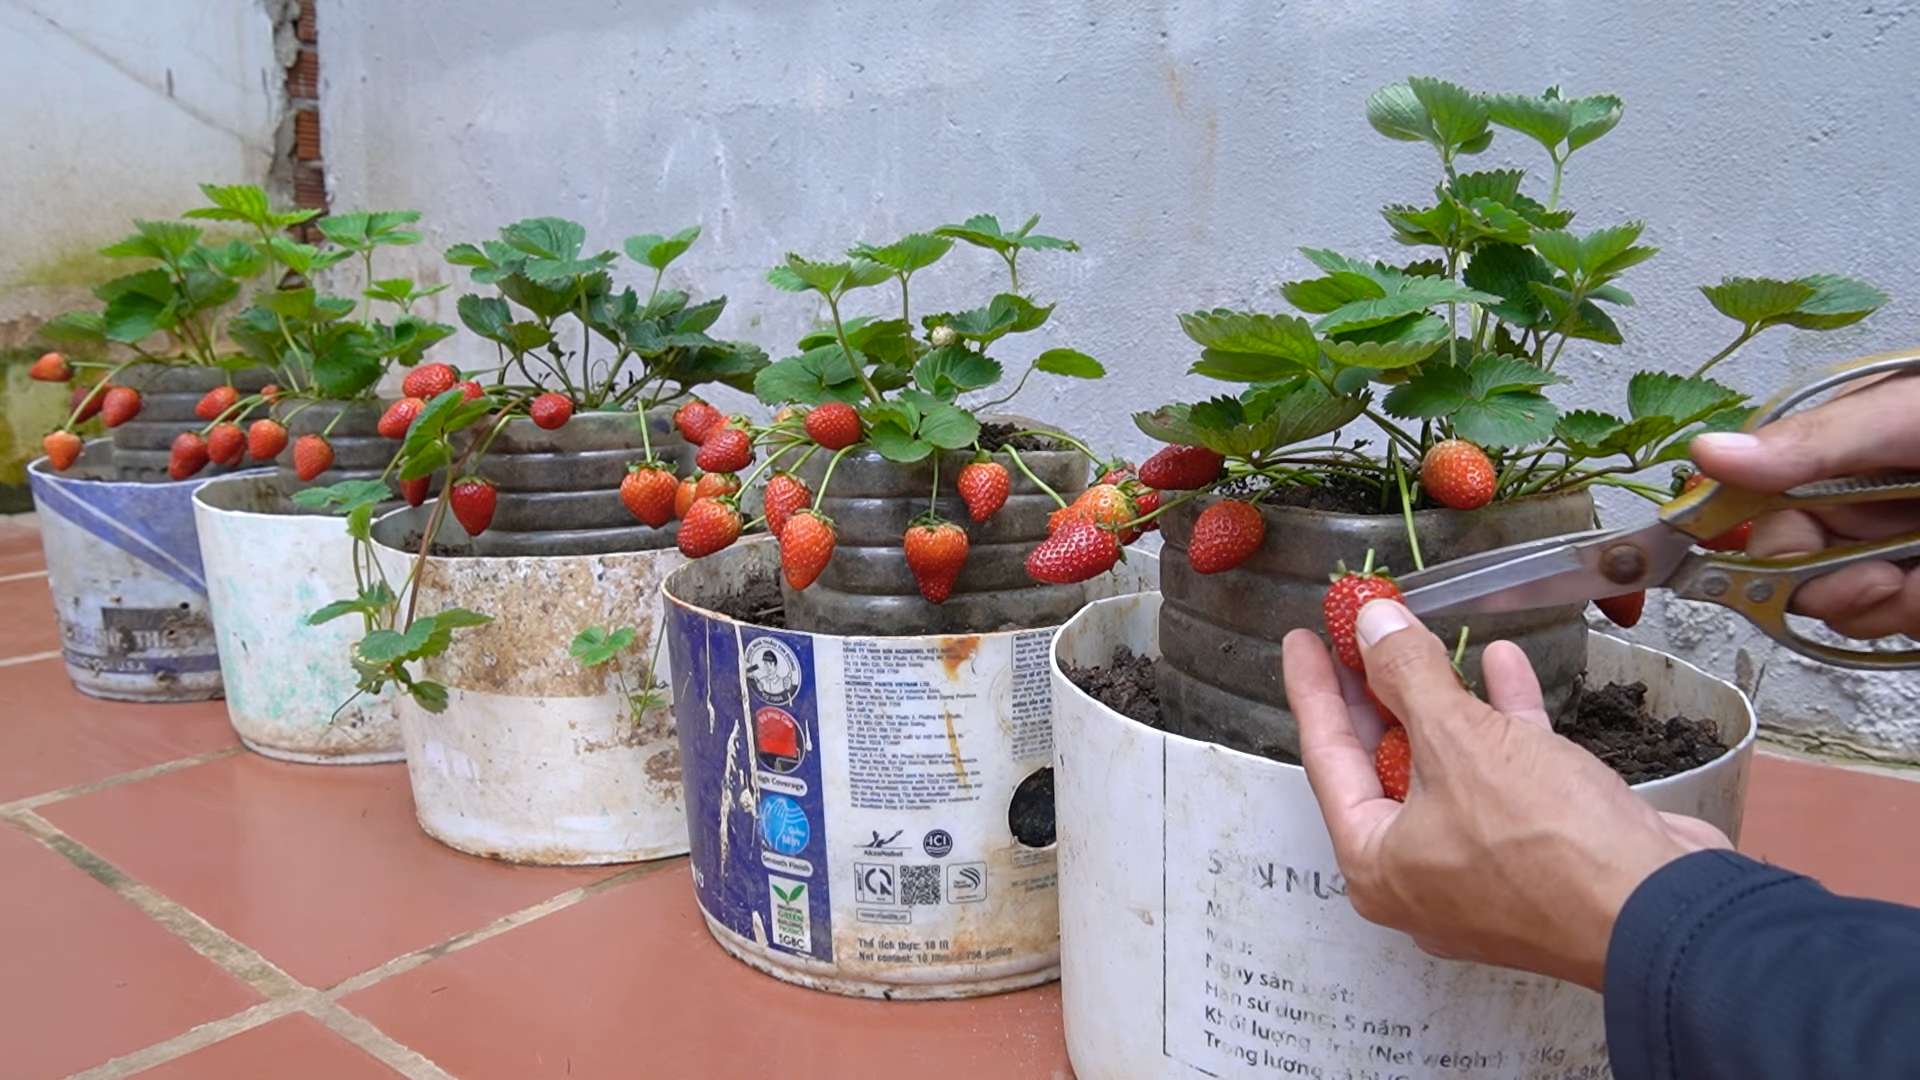
Q: Can I use this method in containers?
A: Yes, this method can be adapted for container gardening. Choose containers that are large enough to accommodate the root systems of your strawberry plants. Use a well-draining potting mix and follow the same principles of applying row covers or moving the containers to a sheltered location during cold weather.
Q: How long can I expect to extend my harvest using this method?
A: The length of time you can extend your harvest will depend on your climate and the specific techniques you use. In milder climates, you may be able to extend your harvest by several weeks or even months. In colder climates, you may only be able to extend it by a few weeks. However, even a few extra weeks of fresh strawberries can make a big difference.
Q: What are some other ways to extend my strawberry harvest?
A: In addition to using row covers and mulch, you can also extend your strawberry harvest by choosing the right varieties, providing proper fertilization, and practicing good sanitation. Everbearing and day-neutral varieties will naturally produce fruit over a longer period. Fertilizing your plants regularly with a balanced fertilizer will help to promote healthy growth and fruit production. Removing any dead or diseased leaves and fruit will help to prevent the spread of disease and encourage new growth.
Q: Is there a specific fertilizer that is best for extending strawberry harvest?
A: A balanced fertilizer with an NPK ratio of 10-10-10 or 12-12-12 is generally a good choice for strawberries. However, you may want to consider using a fertilizer that is specifically formulated for berries, as these fertilizers often contain micronutrients that are essential for healthy growth and fruit production. Avoid using fertilizers that are high in nitrogen, as they can promote excessive vegetative growth at the expense of fruit production.
Q: How do I protect my strawberry plants from birds?
A: Birds love strawberries just as much as we do! To protect your plants from birds, you can use bird netting. Drape the netting over your plants, making sure to secure it to the ground so that birds can’t get underneath. You can also use scarecrows or other visual deterrents to scare away birds.
Q: What do I do with my strawberry plants after the extended harvest is over?
A: After the extended harvest is over, it’s important to prepare your strawberry plants for winter. Remove any dead or diseased leaves and fruit. Apply a layer of mulch to protect the roots from freezing temperatures. Water your plants thoroughly before the ground freezes. In the spring, remove the mulch gradually as the weather warms.
Leave a Comment