

Grow spinach indoors? Absolutely! Imagine fresh, vibrant spinach leaves just steps away, ready to be tossed into your salad or whirled into your morning smoothie, even when the weather outside is frightful. Forget those sad, wilted bags from the grocery store – we’re talking about homegrown goodness, bursting with flavor and nutrients.
For centuries, cultivating greens has been a cornerstone of human sustenance. From ancient Roman gardens to medieval monastery plots, spinach and its leafy brethren have nourished communities. Today, the desire to connect with our food sources and embrace sustainable living is stronger than ever. But let’s face it, not everyone has a sprawling backyard or the time for extensive gardening. That’s where the magic of indoor gardening comes in!
This DIY guide is your passport to a thriving indoor spinach patch. I’ll walk you through simple, effective techniques to grow spinach indoors, regardless of your experience level. Whether you’re a seasoned green thumb or a complete beginner, you’ll discover how to create the perfect environment for these leafy greens to flourish. Say goodbye to expensive, pre-packaged spinach and hello to a continuous supply of fresh, organic goodness right in your own home. Let’s get started!
Growing Spinach Indoors: Your Comprehensive DIY Guide
Hey, garden friends! Do you want to harvest fresh spinach, even in winter? Then you’ve come to the right place! I’ll show you how easy it is to grow spinach indoors. It’s easier than you think, and you’ll be rewarded with delicious, home-grown spinach. Let’s get started!
What You Need: The Materials List
Before we get started, here’s a list of everything you’ll need for your indoor spinach project:
- Spinach seeds: Choose a variety suitable for container growing. “Bloomsdale Long Standing” or “Baby’s Leaf” are good options.
- Planting containers: You’ll need pots or containers with drainage holes. They should be at least 15 cm / 6 inches deep.
- High-quality potting soil: Use well-draining potting soil that is rich in organic matter.
- Grow light (optional, but recommended): Spinach needs a lot of light. If you don’t have enough natural light, a grow light is essential.
- Spray bottle: For moistening the soil.
- Watering can: For watering the plants.
- Fertilizer (optional): A liquid, organic fertilizer can promote growth.
- Small trowel or shovel: For filling the pots.
- Ruler or measuring tape: For measuring the planting distances.
The Preparation: Everything to Get Started
- Choosing the right pots: I recommend pots with a diameter of at least 20 cm / 8 inches. This gives the spinach plants enough space to spread their roots. Be sure to look for drainage holes so excess water can drain away and the roots don’t rot.
- Preparing the soil: Fill the pots with potting soil. Leave about 2-3 cm / 1 inch of space to the rim. Gently press the soil down, but not too firmly. It should remain loose and airy.
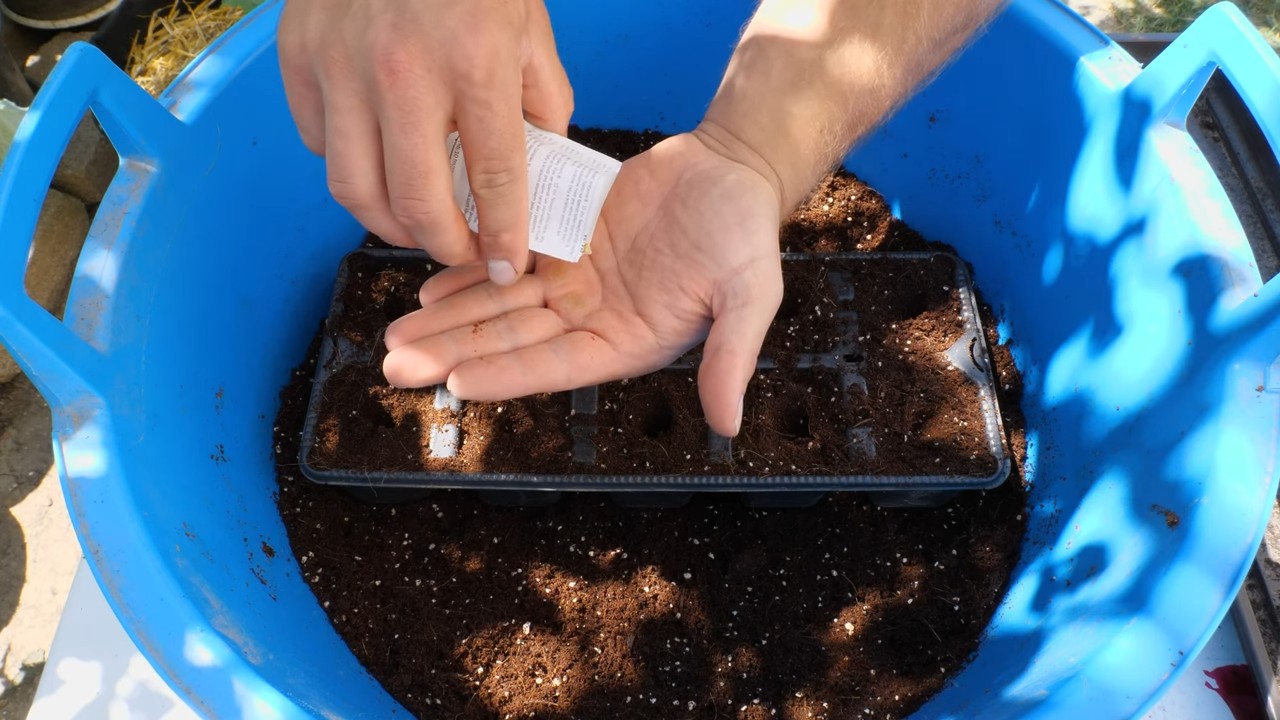
- Sowing the seeds: Now comes the exciting part! Distribute the spinach seeds evenly on the soil. I like to sow them in rows, about 2-3 cm / 1 inch apart. Then cover the seeds with a thin layer of soil (about 0.5 cm / 0.2 inches).
- Watering: Gently moisten the soil with the spray bottle. The soil should be damp but not wet. Avoid washing away the seeds.
- The right location: Place the pots in a bright location. A windowsill with direct sunlight is ideal. If you don’t have enough natural light, use a grow light.
The Growth Phase: Care and Patience
- Watering: Keep the soil moist, but not wet. Water regularly, but avoid waterlogging. I check the soil daily and water when the top layer feels dry.
- Lighting: Spinach needs a lot of light, especially in winter. If you are using a grow light, place it about 15-20 cm / 6-8 inches above the plants. Turn the lamp on for 12-14 hours per day.
- Temperature: Spinach prefers cool temperatures. The ideal temperature is between 15 and 20 degrees Celsius (59-68 degrees Fahrenheit). Avoid placing the plants near radiators or other heat sources.
- Fertilizing (optional): If you want, you can fertilize your spinach plants with a liquid, organic fertilizer. I fertilize about every two weeks after the plants have germinated. Be sure to follow the instructions on the fertilizer package.
- Thinning: If the spinach plants grow too close together, you need to thin them out. Remove the weakest plants to give the remaining plants more room to grow.
The Harvest: Finally, Fresh Spinach!
- The right time: You can harvest your spinach as soon as the leaves are large enough to eat. This is usually about 4-6 weeks after sowing.
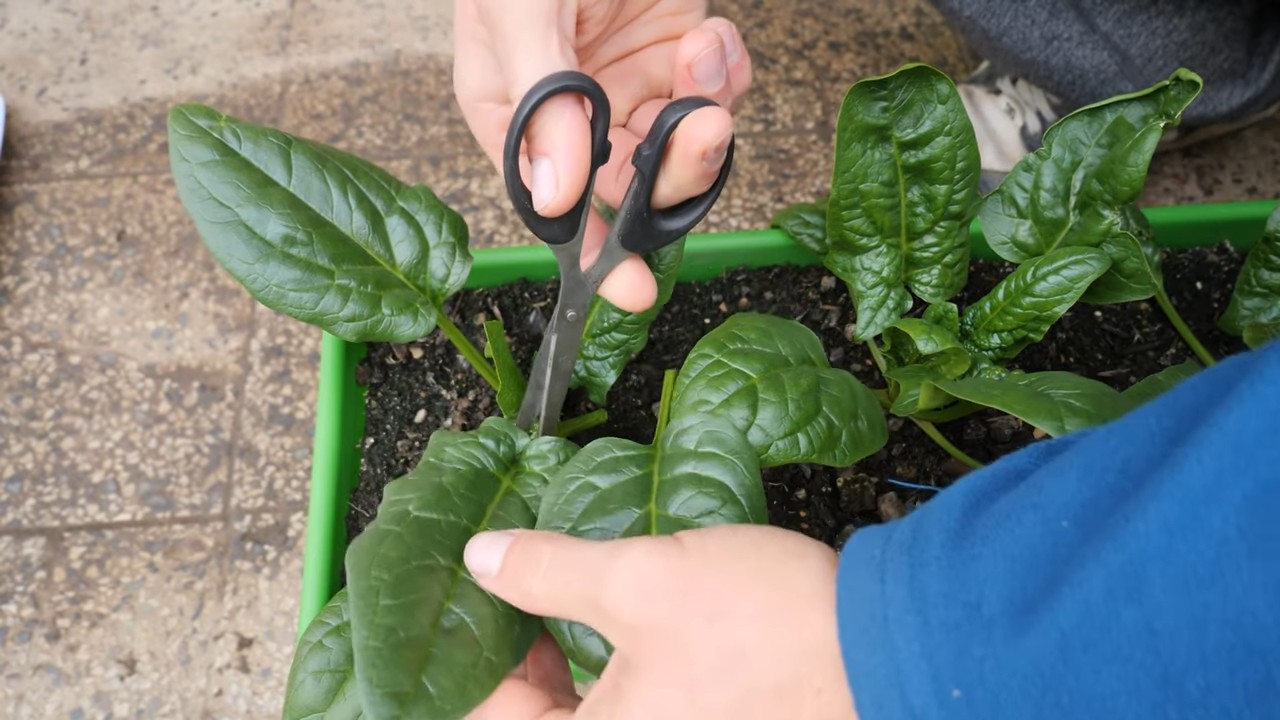
- The harvesting technique: Cut off the outer leaves with scissors or a knife. Leave the inner leaves so the plant can continue to grow. You can also harvest the whole plant by cutting it off just above the ground.
- Storage: Fresh spinach is best eaten immediately. But you can also store it in the refrigerator. Wrap the spinach in a damp paper towel and put it in a plastic bag. It will last for about 3-5 days.
Common Problems and Solutions
- Yellow leaves: Yellow leaves can be a sign of overwatering or nutrient deficiency. Check the watering and fertilize if necessary.
- Pests: Aphids or other pests can infest your spinach plants. Spray the plants with a mild soap solution to control the pests.
- Mold: Mold can occur if the humidity is too high. Ensure good ventilation and avoid wetting the leaves.
Additional Tips for Successful Spinach Growing
- Rotation: If you grow spinach regularly, change the location of the plants to prevent diseases and pests.
- Variety selection: Experiment with different spinach varieties to find out which ones grow best in your climate and under your conditions.
- Mulching: A thin layer of mulch (e.g., straw or coconut fibers) can help retain moisture in the soil and suppress weeds.
- Observation: Observe your plants regularly to identify and address problems early on.
Why Indoor Spinach is So Great
- Fresh spinach all year round: Whether it’s summer or winter, you always have fresh spinach on hand.
- Control over growing conditions: You determine the amount of light, temperature and watering.
- No pesticides: You know exactly what’s in your spinach because you grow it yourself.
- Sustainability: You reduce your environmental footprint because you don’t need long transport routes.
- Relaxation: Gardening is a great way to relieve stress and connect with nature.
Spinach Varieties for Indoor Growing
There are many different spinach varieties that are well-suited for indoor growing. Here are some of my favorites:
- Bloomsdale Long Standing: A robust variety that copes well with different conditions.
- Baby’s Leaf: A fast-growing variety with delicate leaves. Perfect for salads.
- Winter Bloomsdale: A cold-resistant variety, ideal for growing in winter.
- Tyee: A high-yielding variety with large, dark green leaves.
- Malabar Spinach: Although it doesn’t belong to the same family as “true” spinach, it is often used as such. It is heat-resistant and grows well in pots.
The Right Lighting for Your Indoor Spinach
Spinach needs a lot of light to grow well. If you don’t have enough natural light, a grow light is essential. Here are some options:
Fluorescent grow lights: Fluorescent lamps are a more cost-effective option than
LED grow lights: LED lights are energy-efficient and give off little heat. They are ideal for growing spinach indoors.
Conclusion
So, there you have it! Growing spinach indoors isn’t just a gardening trend; it’s a game-changer for fresh, readily available greens, regardless of the season or your outdoor space. We’ve walked you through the simple steps, from selecting the right container and soil to providing adequate light and water. The beauty of this DIY project lies in its accessibility and the sheer satisfaction of nurturing your own food.
Why is this a must-try? Because it puts you in control. You dictate the quality of your spinach, ensuring it’s free from harmful pesticides and bursting with flavor. Imagine the convenience of snipping fresh leaves for your salads, smoothies, or omelets, all from the comfort of your home. No more last-minute grocery store runs or wilted spinach in the crisper drawer!
But don’t stop there! Experiment with different varieties of spinach. Try baby spinach for its tender leaves or savoy spinach for its slightly more robust flavor. Consider companion planting. Basil, chamomile, and marigolds can all thrive alongside your indoor spinach, offering mutual benefits and creating a mini-ecosystem in your home. You can also explore different growing mediums. While we recommended a well-draining potting mix, hydroponics is another exciting avenue for indoor spinach cultivation, offering faster growth and reduced risk of soilborne diseases.
The key to successful indoor spinach cultivation is consistent care and attention. Monitor the moisture levels in the soil, adjust the lighting as needed, and be vigilant for any signs of pests or diseases. Remember, patience is a virtue. While spinach is a relatively fast-growing crop, it still requires time and nurturing to reach its full potential.
We wholeheartedly encourage you to embark on this rewarding journey of growing spinach indoors. It’s a simple, sustainable, and incredibly satisfying way to bring fresh, healthy greens into your life. Don’t be afraid to get your hands dirty, experiment with different techniques, and most importantly, have fun!
Once you’ve harvested your first batch of homegrown spinach, we’d love to hear about your experience. Share your tips, tricks, and photos in the comments below. Let’s build a community of indoor spinach enthusiasts and inspire others to embrace the joys of homegrown goodness. Your success story could be the motivation someone else needs to start their own indoor garden. So, go ahead, give it a try, and let us know how it goes! Happy growing!
Frequently Asked Questions (FAQ)
1. What is the best type of spinach to grow indoors?
While almost any type of spinach can be grown indoors, some varieties are better suited for container gardening. Baby spinach is a popular choice due to its compact size and tender leaves. Other good options include ‘Bloomsdale Long Standing’ and ‘Tyee’. These varieties are known for their disease resistance and ability to tolerate slightly warmer temperatures, which can be beneficial in an indoor environment. Ultimately, the best type of spinach for you will depend on your personal preferences and the specific conditions in your home. Consider trying a few different varieties to see which one thrives best in your indoor garden.
2. How much light does indoor spinach need?
Spinach requires a significant amount of light to grow properly. Ideally, it needs at least 6-8 hours of direct sunlight per day. If you don’t have a sunny window, you’ll need to supplement with artificial lighting. Grow lights are an excellent option, providing the necessary spectrum of light for healthy growth. LED grow lights are particularly energy-efficient and long-lasting. Position the lights about 6-12 inches above the spinach plants and adjust as they grow. Insufficient light can lead to leggy growth and pale leaves, so ensuring adequate light is crucial for a successful harvest.
3. What kind of soil is best for growing spinach indoors?
Spinach prefers well-draining soil that is rich in organic matter. A good quality potting mix specifically formulated for vegetables is an excellent choice. Avoid using garden soil, as it can be too heavy and may contain pests or diseases. You can also amend your potting mix with compost or other organic materials to improve its fertility and drainage. The ideal pH for spinach is between 6.5 and 7.0. You can test the pH of your soil using a soil testing kit and adjust it accordingly if necessary.
4. How often should I water my indoor spinach plants?
Watering frequency will depend on several factors, including the size of your container, the type of soil, and the temperature and humidity of your home. Generally, you should water your spinach plants when the top inch of soil feels dry to the touch. Avoid overwatering, as this can lead to root rot. Ensure that your container has drainage holes to allow excess water to escape. During warmer months or in drier climates, you may need to water more frequently. Conversely, during cooler months or in more humid environments, you may need to water less often.
5. How do I fertilize my indoor spinach plants?
Spinach is a relatively heavy feeder, so regular fertilization is important for optimal growth. Use a balanced liquid fertilizer diluted to half strength every 2-3 weeks. Look for a fertilizer that is specifically formulated for leafy greens. You can also amend your soil with compost or other organic materials to provide a slow-release source of nutrients. Avoid over-fertilizing, as this can lead to excessive leaf growth and reduced flavor.
6. How do I harvest my indoor spinach?
You can begin harvesting your spinach leaves when they are about 4-6 inches long. Simply snip off the outer leaves with scissors or a knife, leaving the inner leaves to continue growing. This cut-and-come-again method allows you to harvest spinach multiple times from the same plant. Avoid harvesting more than one-third of the leaves at a time, as this can stress the plant.
7. What are some common pests and diseases that affect indoor spinach?
While indoor spinach is generally less susceptible to pests and diseases than outdoor spinach, there are still some potential problems to watch out for. Aphids, spider mites, and whiteflies are common pests that can infest indoor spinach plants. You can control these pests by spraying your plants with insecticidal soap or neem oil. Fungal diseases, such as powdery mildew and downy mildew, can also affect indoor spinach. To prevent these diseases, ensure good air circulation and avoid overwatering. If you notice any signs of disease, remove the affected leaves immediately.
8. Can I grow spinach indoors year-round?
Yes, you can grow spinach indoors year-round, provided you provide the necessary light, water, and nutrients. Indoor growing allows you to control the environment and avoid the seasonal limitations of outdoor gardening. With proper care, you can enjoy fresh, homegrown spinach throughout the year.
9. My spinach leaves are turning yellow. What could be the problem?
Yellowing spinach leaves can be caused by several factors, including nutrient deficiencies, overwatering, underwatering, or pest infestations. Check the soil moisture levels and adjust your watering accordingly. Fertilize your plants with a balanced liquid fertilizer to address any nutrient deficiencies. Inspect your plants for pests and treat them as needed. If the problem persists, consider testing the pH of your soil to ensure it is within the optimal range.
10. How long does it take to grow spinach indoors?
Spinach is a relatively fast-growing crop. You can typically harvest your first leaves about 4-6 weeks after planting. The exact time will depend on the variety of spinach, the growing conditions, and your personal preferences. With proper care, you can continue harvesting spinach from the same plant for several weeks or even months.


Leave a Comment