

Malabar Spinach Summer Growth can feel like a Herculean task, especially when the summer heat is bearing down! But fear not, fellow gardening enthusiasts, because I’m here to share some simple yet effective DIY tricks to help you cultivate a thriving Malabar spinach patch, even when the sun is at its fiercest.
Malabar spinach, also known as Ceylon spinach or vine spinach, isn’t actually a true spinach, but a leafy green native to tropical Asia and Africa. For centuries, it’s been a staple in various cuisines, prized for its heat tolerance and nutritional value. Imagine, generations have relied on this resilient plant for sustenance, and now, you can too!
Why do you need these DIY hacks? Well, let’s face it, summer gardening can be tough. Scorching temperatures, intense sunlight, and thirsty plants can quickly lead to frustration. But with a few clever tricks, you can create the ideal environment for your Malabar spinach to flourish. I’ll show you how to optimize watering, provide shade, and even create your own nutrient-rich soil amendments. These simple steps will not only boost your Malabar Spinach Summer Growth, but also save you time, money, and a whole lot of gardening headaches. Let’s get our hands dirty and unlock the secrets to a bountiful Malabar spinach harvest!
DIY Trellis for Thriving Malabar Spinach: A Summer Growth Hack
Hey fellow gardeners! Malabar spinach, also known as Ceylon spinach or vine spinach, is a fantastic leafy green that thrives in the summer heat. But this vigorous grower needs support to really flourish. That’s where a trellis comes in! Building your own trellis is not only budget-friendly but also allows you to customize it to fit your garden’s specific needs and aesthetic. I’m going to walk you through building a sturdy and attractive trellis that will keep your Malabar spinach happy and productive all summer long.
Materials You’ll Need
Before we dive in, let’s gather our supplies. I always find it helpful to have everything organized before I start any DIY project.
* Wooden Stakes: I recommend using cedar or redwood stakes, as they are naturally rot-resistant. You’ll need at least three, but the number depends on the length of your trellis. For a 6-foot trellis, three stakes should be sufficient. I usually go for 2×2 inch stakes for good stability.
* Bamboo Poles or Twine: This will form the horizontal and vertical supports for the spinach to climb. Bamboo poles add a rustic touch, while twine is a more economical option. I personally love the look of bamboo.
* Wire or Zip Ties: To secure the bamboo poles or twine to the wooden stakes. I prefer using garden wire because it’s strong and blends in well.
* Measuring Tape: Essential for accurate measurements and ensuring your trellis is even.
* Saw (if needed): You might need a saw to cut the wooden stakes or bamboo poles to the desired length.
* Drill (optional): A drill can be helpful for pre-drilling holes in the stakes, making it easier to attach the wire or zip ties.
* Gloves: To protect your hands from splinters and dirt.
* Safety Glasses: Always a good idea when working with tools.
* Wood Stain or Paint (optional): If you want to add a pop of color or protect the wood further. I like to use a natural wood stain to enhance the wood grain.
Planning Your Trellis Design
Before you start building, take a moment to consider the size and shape of your trellis. Think about how much space your Malabar spinach will need to grow and how tall you want the trellis to be. I usually aim for a trellis that’s at least 6 feet tall, as Malabar spinach can grow quite long.
Here are a few design ideas to get you started:
* Simple A-Frame Trellis: This is a classic and easy-to-build design. It consists of two stakes angled towards each other, forming an “A” shape.
* Vertical Ladder Trellis: This design uses vertical stakes with horizontal supports running between them, creating a ladder-like structure.
* Arched Trellis: This adds a touch of elegance to your garden. It involves bending bamboo poles into an arch shape and securing them to the stakes.
* Fan Trellis: This design uses stakes arranged in a fan shape, with supports radiating outwards.
For this guide, I’ll focus on building a simple vertical ladder trellis, as it’s easy to construct and provides ample support for your Malabar spinach.
Step-by-Step Instructions: Building Your Vertical Ladder Trellis
Alright, let’s get building! Follow these steps, and you’ll have a beautiful and functional trellis in no time.
1. Prepare the Wooden Stakes:
* First, decide on the height of your trellis. I’m going with 6 feet. If your stakes are longer than that, use a saw to cut them to the desired length.
* If you’re planning to stain or paint the stakes, now is the time to do it. Apply the stain or paint according to the manufacturer’s instructions and let it dry completely. This will help protect the wood from the elements and extend the life of your trellis.
* If you’re using a drill, pre-drill holes along the stakes where you’ll be attaching the horizontal supports. This will make it easier to insert the wire or zip ties and prevent the wood from splitting. I usually drill holes every 12 inches.
2. Position the Stakes:
* Choose the location for your trellis. Make sure it’s in a sunny spot where your Malabar spinach will get plenty of sunlight.
* Drive the wooden stakes into the ground, spacing them about 2-3 feet apart. The stakes should be firmly planted in the ground to provide a stable base for the trellis. I usually use a rubber mallet to drive the stakes in, as it’s less likely to damage the wood.
* Ensure the stakes are aligned and evenly spaced. Use a measuring tape to check the distance between the stakes and adjust them as needed.
3. Attach the Horizontal Supports:
* Now it’s time to attach the bamboo poles or twine to the wooden stakes. Start by attaching the bottom support, positioning it about 6-12 inches above the ground.
* If you’re using bamboo poles, use wire or zip ties to secure them to the stakes. Wrap the wire or zip ties tightly around the bamboo pole and the stake, ensuring a secure connection.
* If you’re using twine, tie it tightly around the stake, then wrap it around the opposite stake, creating a horizontal line. Continue tying the twine to each stake, creating a series of horizontal supports.
* Repeat this process, adding horizontal supports every 12-18 inches. The closer the supports are, the more support your Malabar spinach will have.
* Make sure the horizontal supports are level. Use a level to check the alignment and adjust them as needed.
4. Reinforce the Trellis (Optional):
* For added stability, you can add diagonal supports to the trellis. These supports will help prevent the trellis from swaying or collapsing in strong winds.
* Cut additional bamboo poles or use twine to create diagonal supports. Attach them to the stakes at an angle, using wire or zip ties.
* Make sure the diagonal supports are securely attached and evenly spaced.
5. Finishing Touches:
* Once the trellis is complete, inspect it carefully to ensure that all the connections are secure. Tighten any loose wires or zip ties.
* Trim any excess wire or twine to create a clean and tidy look.
* If you’re using twine, you can weave it between the horizontal supports to create a more intricate pattern. This will provide additional support for the Malabar spinach and add a decorative touch to the trellis.
Planting Your Malabar Spinach
Now that your trellis is built, it’s time to plant your Malabar spinach! Here’s what I do:
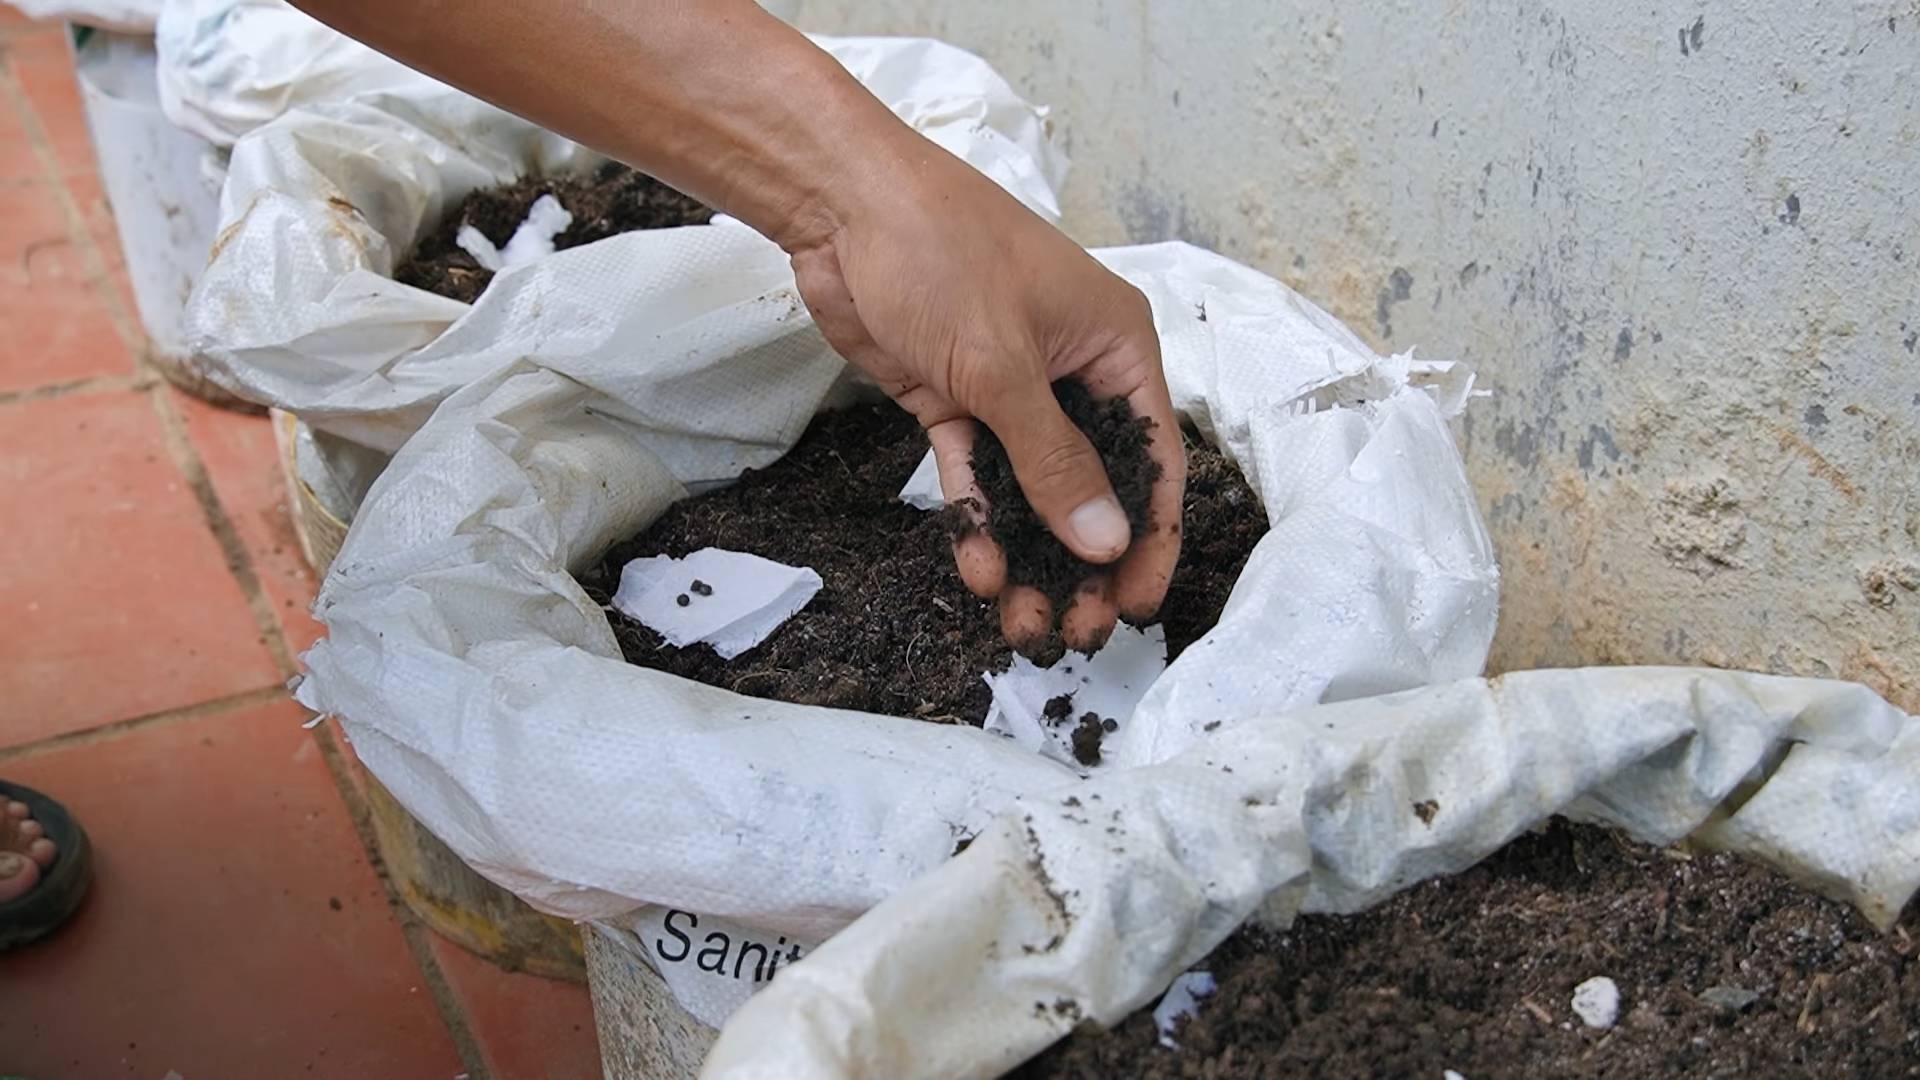
1. Prepare the Soil:
* Malabar spinach prefers well-drained soil that is rich in organic matter. Amend the soil with compost or well-rotted manure before planting.
* Loosen the soil to a depth of at least 12 inches. This will allow the roots to penetrate easily and establish themselves quickly.
2. Plant the Seedlings:
* If you’re starting with seedlings, gently remove them from their containers and plant them at the base of the trellis, spacing them about 12-18 inches apart.
* Make sure the top of the root ball is level with the soil surface.
* Water the seedlings thoroughly after planting.
3. Direct Sowing (Optional):
* You can also direct sow Malabar spinach seeds directly into the ground. Sow the seeds about 1/2 inch deep and 12-18 inches apart.
* Keep the soil moist until the seeds germinate. Germination usually takes about 7-14 days.
4. Training the Vines:
* As the Malabar spinach vines grow, gently guide them towards the trellis. Use twine or plant clips to attach the vines to the supports.
* Encourage the vines to climb upwards by regularly training them along the trellis.
* Prune the vines as needed to maintain their shape and encourage bushier growth.
Caring for Your Malabar Spinach
Malabar spinach is relatively easy to care for. Here are a few tips to keep your plants healthy and productive:
* Watering: Water regularly, especially during hot, dry weather. Malabar spinach prefers consistently moist soil.
* Fertilizing: Fertilize every 2-3 weeks with a balanced fertilizer. This will provide the plants with the nutrients they need to grow and produce abundant foliage. I like to use a liquid seaweed fertilizer.
* Sunlight: Malabar spinach needs at least 6 hours of sunlight per day.
* Pest Control: Keep an eye out for pests such as aphids and spider mites. Treat infestations promptly with insecticidal soap or neem oil.
* Harvesting: You can start harvesting Malabar spinach leaves as
Conclusion
So, there you have it! Cultivating a thriving Malabar spinach patch throughout the summer months doesn’t have to be a daunting task. By implementing these simple yet effective DIY tricks, you can unlock the full potential of this nutritious and delicious leafy green. We’ve covered everything from optimizing soil conditions and providing adequate support to mastering the art of watering and pest control, all tailored to the specific needs of Malabar spinach during the hot summer season.
Why is this a must-try? Because store-bought spinach, while convenient, simply can’t compare to the vibrant flavor and nutritional value of freshly harvested, homegrown Malabar spinach. Plus, you’ll have the satisfaction of knowing exactly where your food comes from and that it’s free from harmful chemicals and pesticides. Imagine adding tender, succulent leaves to your salads, stir-fries, and soups, all grown with your own two hands. The taste difference is truly remarkable.
But the benefits extend beyond just taste and nutrition. Growing your own Malabar spinach is also a sustainable and environmentally friendly practice. You’ll reduce your carbon footprint by eliminating the need for transportation and packaging, and you’ll contribute to a healthier planet. It’s a win-win situation for you and the environment.
Looking for variations? Consider experimenting with different trellising methods to find what works best for your space and aesthetic preferences. You could use a traditional trellis, a repurposed ladder, or even a simple string system. You can also try growing Malabar spinach in containers if you have limited garden space. Just be sure to choose a large container with good drainage and provide adequate support for the vines.
Another fun variation is to experiment with different companion plants. Malabar spinach is known to grow well alongside basil, tomatoes, and peppers. These companion plants can help to deter pests and improve the overall health of your garden.
Don’t be afraid to get creative and personalize your Malabar spinach growing experience. The most important thing is to have fun and enjoy the process.
We wholeheartedly encourage you to give this DIY approach to **Malabar spinach** cultivation a try. It’s easier than you might think, and the rewards are well worth the effort. You’ll be amazed at how quickly your plants will thrive and how much delicious spinach you’ll be able to harvest.
Once you’ve tried these tips, we’d love to hear about your experience! Share your photos, stories, and any additional tips you’ve discovered in the comments section below. Let’s create a community of Malabar spinach enthusiasts and help each other grow the best possible crop. Happy gardening!
Frequently Asked Questions (FAQ)
What kind of soil is best for Malabar spinach?
Malabar spinach thrives in well-draining soil that is rich in organic matter. A slightly acidic to neutral pH (around 6.5 to 7.0) is ideal. Before planting, amend your soil with compost, aged manure, or other organic materials to improve its fertility and drainage. If your soil is heavy clay, consider adding sand or perlite to improve drainage. A good starting mix would be equal parts garden soil, compost, and peat moss or coco coir. Regular soil testing can help you determine if your soil is lacking any essential nutrients.
How often should I water my Malabar spinach?
Malabar spinach needs consistent moisture, especially during the hot summer months. Water deeply whenever the top inch of soil feels dry to the touch. Avoid overwatering, as this can lead to root rot. A good rule of thumb is to water thoroughly every 2-3 days, depending on the weather conditions. Mulching around the base of the plants can help to retain moisture and reduce the need for frequent watering. In extremely hot weather, you may need to water daily. Consider using a soaker hose or drip irrigation system to deliver water directly to the roots, minimizing water loss through evaporation.
What kind of support does Malabar spinach need?
Malabar spinach is a vining plant and requires support to grow properly. A trellis, fence, or even a sturdy stake can provide the necessary support. The vines can grow quite long, so choose a support structure that is tall enough to accommodate their growth. Train the vines to climb the support structure by gently guiding them and tying them loosely with twine or plant ties. Regular pruning can also help to keep the vines manageable and encourage bushier growth.
How do I protect my Malabar spinach from pests?
Malabar spinach is generally resistant to pests, but it can occasionally be affected by aphids, spider mites, or snails. Regularly inspect your plants for signs of infestation. If you spot any pests, you can try washing them off with a strong stream of water or using insecticidal soap. For snails, you can set out beer traps or handpick them off the plants. Avoid using harsh chemical pesticides, as these can harm beneficial insects and contaminate your harvest. Encourage beneficial insects like ladybugs and lacewings to visit your garden by planting flowers that attract them.
When is the best time to harvest Malabar spinach?
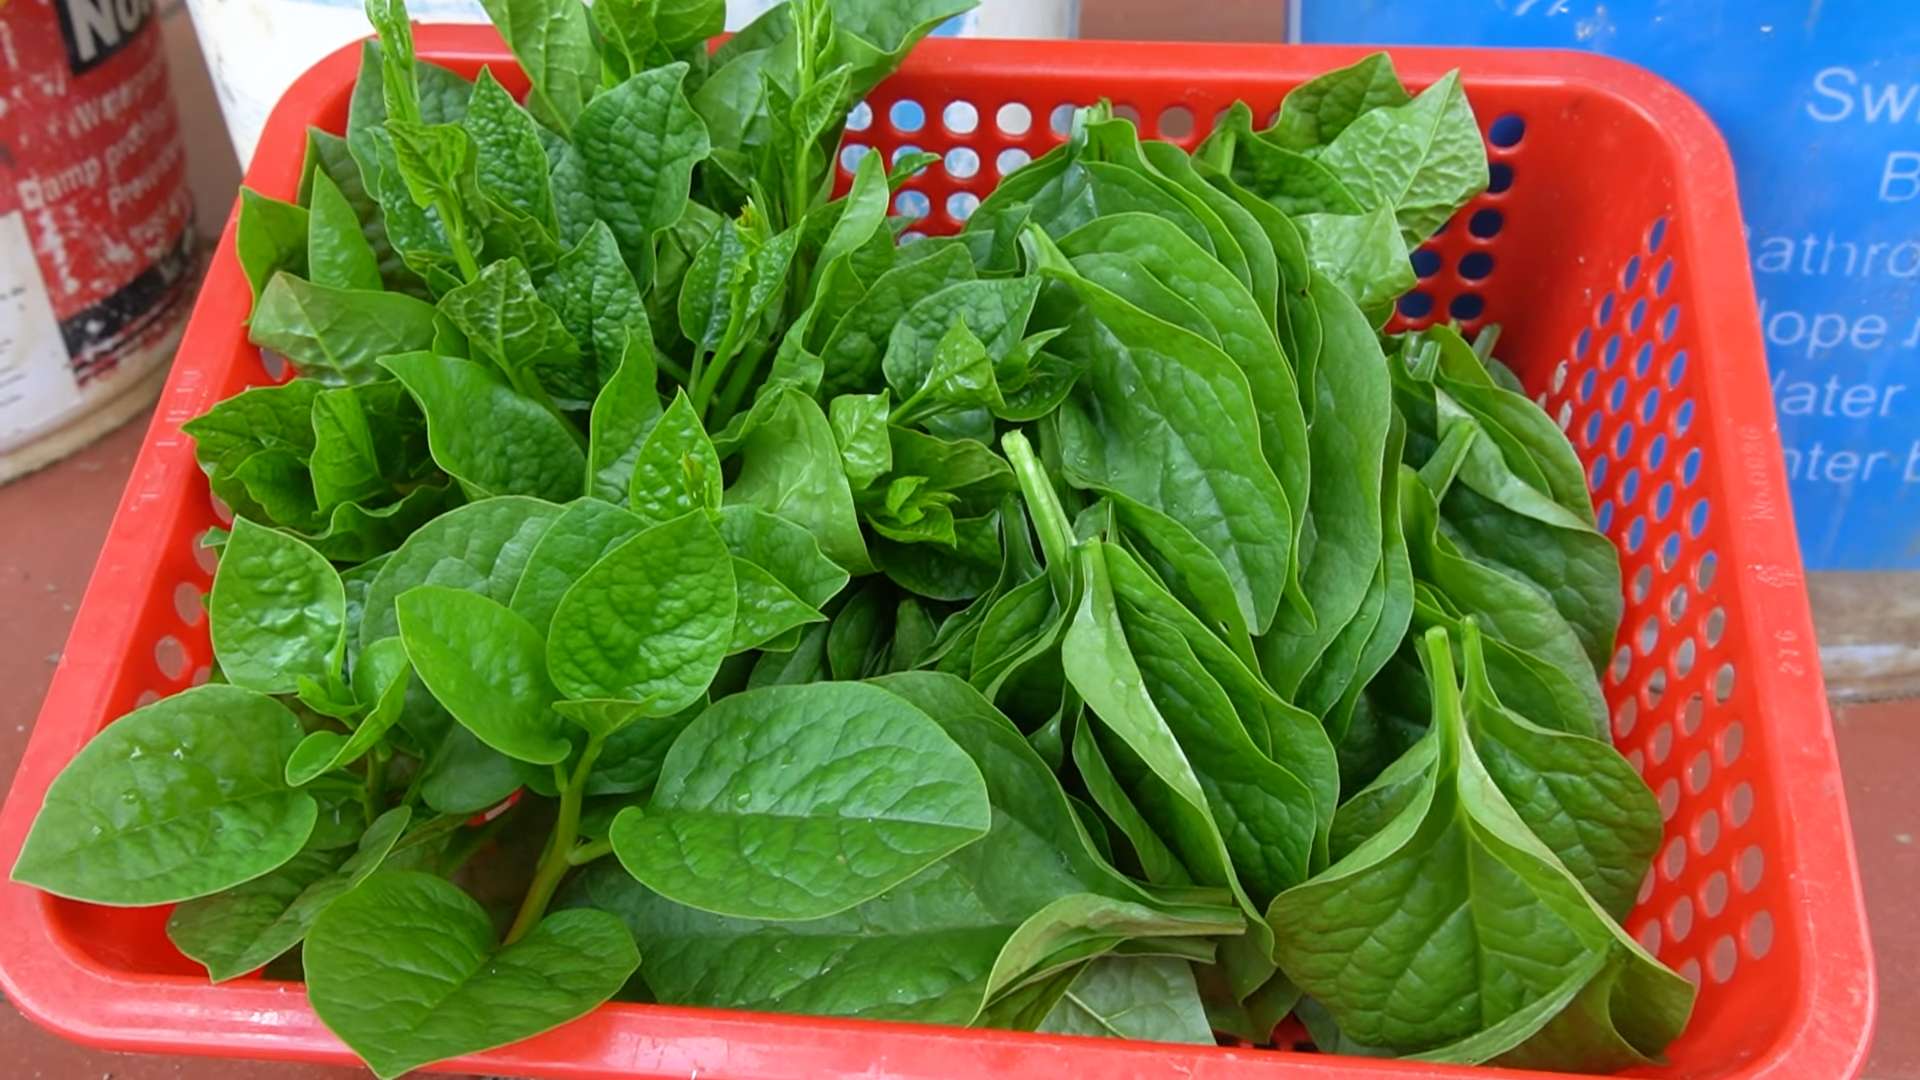
You can start harvesting Malabar spinach leaves as soon as the plants are established and the leaves are large enough to use. Simply snip off the leaves with scissors or pruning shears. Regular harvesting will encourage the plants to produce more leaves. The younger, more tender leaves are the most flavorful. Avoid harvesting more than one-third of the plant at a time, as this can stress the plant and reduce its productivity. Harvest in the morning, after the dew has dried, for the best flavor and texture.
Can I grow Malabar spinach in containers?
Yes, Malabar spinach can be successfully grown in containers. Choose a large container with good drainage and fill it with a well-draining potting mix. Provide a trellis or other support structure for the vines to climb. Water regularly and fertilize every few weeks with a balanced fertilizer. Place the container in a sunny location that receives at least 6 hours of sunlight per day. Container-grown Malabar spinach may require more frequent watering and fertilization than plants grown in the ground.
How do I store Malabar spinach after harvesting?
Malabar spinach leaves are best used fresh, but they can be stored in the refrigerator for a few days. Wrap the leaves in a damp paper towel and place them in a plastic bag or container. Store them in the crisper drawer of your refrigerator. Avoid washing the leaves until you are ready to use them, as this can shorten their shelf life. You can also freeze Malabar spinach leaves for longer storage. Blanch the leaves in boiling water for a minute or two, then plunge them into ice water to stop the cooking process. Drain the leaves well and pack them into freezer bags or containers.
Is Malabar spinach heat tolerant?
Yes, Malabar spinach is very heat tolerant, which is why it thrives during the summer months. It can withstand high temperatures and humidity without wilting or bolting (going to seed). This makes it an excellent choice for gardeners in hot climates. However, it’s still important to provide adequate water and shade during the hottest part of the day to prevent the plants from becoming stressed.
Can I save seeds from my Malabar spinach plants?
Yes, you can save seeds from your Malabar spinach plants. Allow some of the flowers to mature and form berries. Once the berries turn dark purple or black, they are ready to harvest. Gently squeeze the seeds out of the berries and allow them to dry completely before storing them in an airtight container in a cool, dark place. The seeds can be stored for several years.
What are the nutritional benefits of Malabar spinach?
Malabar spinach is a highly nutritious leafy green that is packed with vitamins, minerals, and antioxidants. It is a good source of vitamins A, C, and K, as well as iron, calcium, and magnesium. It is also low in calories and fat. Eating Malabar spinach can help to boost your immune system, improve your vision, and protect against chronic diseases.

Leave a Comment