

Vinegar and salt cleaning: Sounds like a recipe for disaster in the kitchen, right? Wrong! It’s actually a powerhouse duo for tackling some of the toughest cleaning challenges around your home. Forget those expensive, chemical-laden cleaners – we’re going back to basics with a DIY approach that’s both effective and surprisingly satisfying.
For generations, our grandmothers relied on simple, natural ingredients like vinegar and salt to keep their homes sparkling. Before the age of mass-produced cleaning products, these readily available items were the go-to solution for everything from scrubbing pots to disinfecting surfaces. This isn’t just about nostalgia, though; it’s about harnessing the power of natural chemistry to achieve a truly clean home.
Let’s face it, nobody enjoys spending hours scrubbing grime and stains. We all crave a simpler, more efficient way to keep our homes looking their best. That’s where these vinegar and salt cleaning hacks come in. I’m going to show you how to use this dynamic duo to conquer everything from stubborn hard water stains to grimy grout, saving you time, money, and a whole lot of elbow grease. Get ready to unlock the cleaning secrets that have been hiding in your pantry all along!
DIY Power Cleaner: Vinegar and Salt to the Rescue!
Okay, let’s talk cleaning. I know, not the most glamorous topic, but trust me, this DIY cleaning solution using just vinegar and salt is a game-changer. It’s cheap, effective, and uses ingredients you probably already have in your pantry. Forget those harsh chemicals – we’re going natural (and saving money!) today. I’m going to walk you through everything you need to know to make this amazing cleaner and how to use it around your house.
What Makes Vinegar and Salt So Powerful?
Before we dive into the how-to, let’s quickly understand why this combo works so well. Vinegar, specifically white distilled vinegar, is a mild acid. This acidity helps to dissolve hard water stains, soap scum, and even some types of mold and mildew. Salt, on the other hand, acts as a gentle abrasive, helping to scrub away grime without scratching most surfaces. Plus, salt enhances the cleaning power of vinegar, making it even more effective. It’s a dynamic duo!
What You’ll Need
Here’s a quick list of everything you’ll need to create your own vinegar and salt cleaning solution:
* White distilled vinegar
* Table salt (or kosher salt – it dissolves well)
* Spray bottle (a clean, empty one, of course!)
* Measuring cup or spoons
* A small saucepan (optional, for heating the vinegar)
* Cleaning cloths or sponges
* Gloves (optional, but recommended if you have sensitive skin)
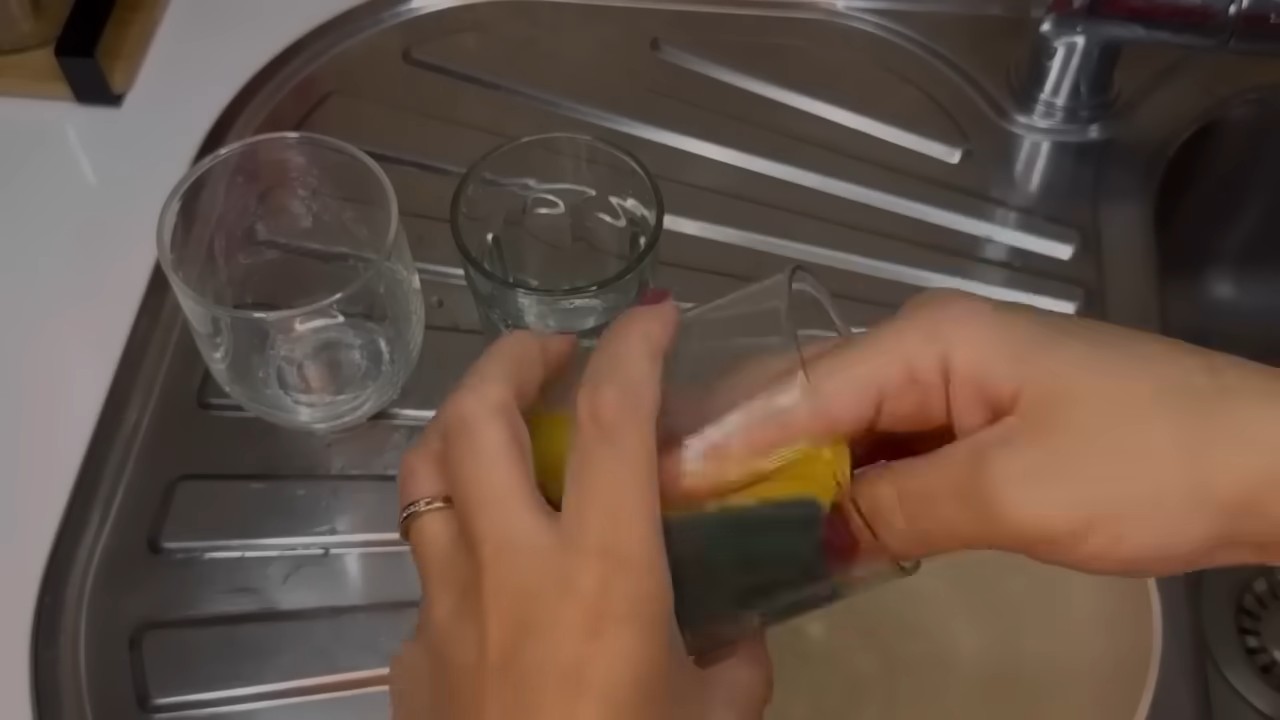
Making Your Vinegar and Salt Cleaning Solution
This is the easy part! There are a couple of ways to make this solution, depending on what you’re cleaning and how strong you need it to be. I’ll give you both options.
Method 1: The Basic Mix
This is your go-to for everyday cleaning.
1. Gather Your Supplies: Make sure you have your vinegar, salt, spray bottle, and measuring tools ready.
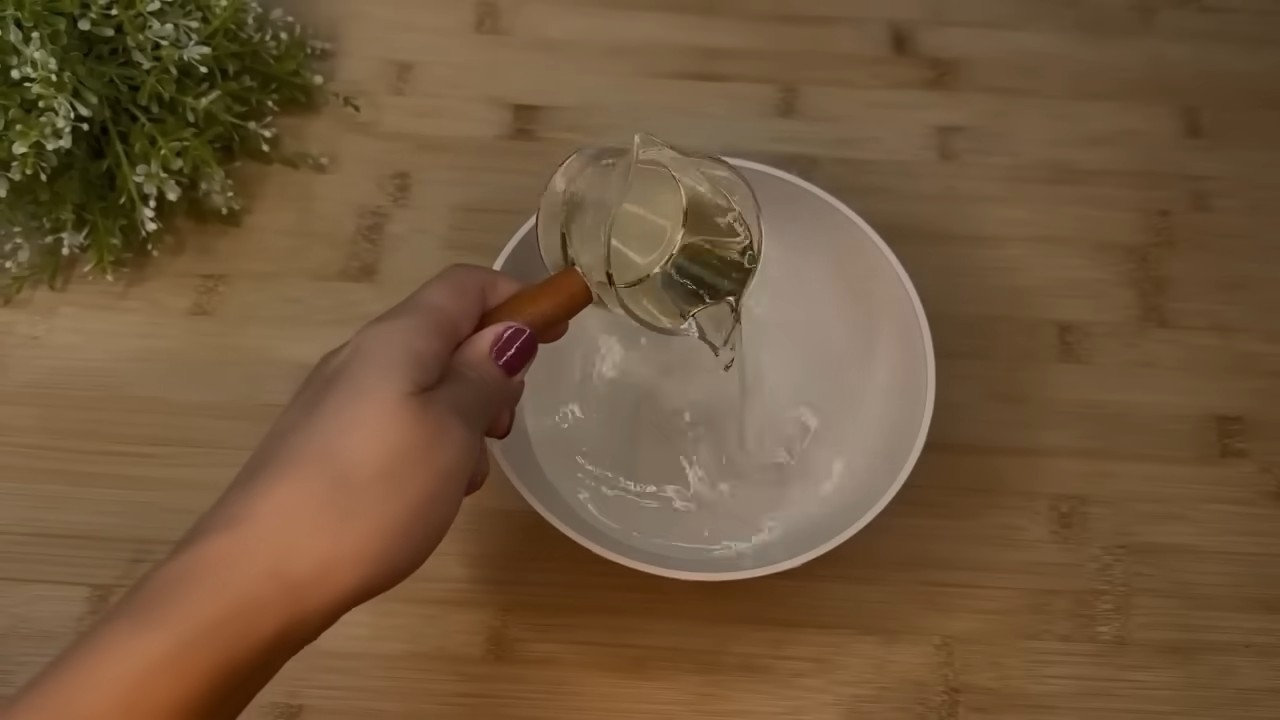
2. Combine Vinegar and Salt: In your spray bottle, mix equal parts white distilled vinegar and salt. I usually start with 1 cup of vinegar and 1 cup of salt. You can adjust the amount depending on the size of your spray bottle.
3. Shake Well: Put the spray nozzle on the bottle and shake vigorously until the salt is completely dissolved. This might take a minute or two, so be patient.
4. Test It Out: Before you go crazy spraying everything, test the solution on a small, inconspicuous area to make sure it doesn’t damage the surface.
Method 2: The Heated Power-Up
This method is great for tougher stains and grime. Heating the vinegar helps the salt dissolve faster and increases the cleaning power.
1. Gather Your Supplies: Same as before – vinegar, salt, spray bottle, measuring tools, and a saucepan.
2. Heat the Vinegar: Pour the vinegar into the saucepan and heat it over medium heat. You don’t want it to boil, just get it nice and warm.
3. Dissolve the Salt: Remove the vinegar from the heat and slowly add the salt, stirring constantly until it’s completely dissolved. Again, use equal parts vinegar and salt.
4. Cool and Transfer: Let the mixture cool down completely before pouring it into your spray bottle.
5. Test It Out: As always, test the solution on a small, hidden area first.
Putting Your DIY Cleaner to Work: Where to Use It
Now for the fun part – cleaning! This vinegar and salt solution is surprisingly versatile. Here are some of my favorite ways to use it:
1. Bathroom Bliss
* Shower and Tub: Spray the solution on shower walls, tiles, and the tub to combat soap scum and hard water stains. Let it sit for a few minutes, then scrub with a sponge or brush and rinse thoroughly.
* Toilet Bowl: Pour about a cup of the solution into the toilet bowl and let it sit for at least 30 minutes (or even overnight for stubborn stains). Then, scrub with a toilet brush and flush.
* Sink and Faucet: Spray the solution on the sink and faucet to remove water spots and grime. Wipe clean with a cloth.
* Showerheads: To remove mineral buildup, you can soak your showerhead in a bag filled with the vinegar and salt solution. Secure the bag with a rubber band and let it soak for a few hours or overnight. Rinse thoroughly.
2. Kitchen Clean-Up
* Countertops: This solution works great on most countertops, but avoid using it on granite or marble, as the acidity can damage the stone. Test a small area first!
* Sinks: Just like in the bathroom, this solution will help keep your kitchen sink sparkling.
* Microwave: Spray the inside of your microwave with the solution and let it sit for a few minutes. Then, wipe clean with a damp cloth. This will help loosen food splatters and odors.
* Cutting Boards: Sanitize your cutting boards by spraying them with the solution and letting it sit for a few minutes. Rinse thoroughly.
* Coffee Maker: Descale your coffee maker by running a cycle with a mixture of equal parts vinegar and water. Then, run a few cycles with plain water to rinse.
3. General Household Cleaning
* Windows and Mirrors: Mix the vinegar and salt solution with water (about 1 part solution to 3 parts water) and use it to clean windows and mirrors. Wipe clean with a microfiber cloth for a streak-free shine.
* Floors: This solution can be used on some types of floors, but again, avoid using it on natural stone or waxed surfaces. Test a small area first! Mix the solution with water (about 1/4 cup solution per gallon of water) and mop as usual.
* Grout: Spray the solution on grout lines and let it sit for a few minutes. Then, scrub with a grout brush and rinse.
* Stovetop: For greasy stovetops, spray the solution, let it sit, and then scrub. The salt helps to lift the grease.
Important Considerations and Precautions
While vinegar and salt are generally safe, there are a few things to keep in mind:
* Always test on a small, inconspicuous area first. This is crucial to ensure the solution doesn’t damage the surface you’re cleaning.
* Avoid using on natural stone surfaces like granite and marble. The acidity can etch and damage these materials.
* Don’t mix vinegar with bleach. This can create toxic fumes.
* Wear gloves if you have sensitive skin. Vinegar can be irritating to some people.
* Ventilate the area well when cleaning. The smell of vinegar can be strong.
* Store the solution in a cool, dark place. This will help prevent the vinegar from degrading.
* Keep out of reach of children and pets. While it’s a natural cleaner, it’s still not meant for consumption.
Troubleshooting: What If It’s Not Working?
Sometimes, even the best DIY cleaner needs a little help. Here are a few troubleshooting tips:
* Increase the concentration: If the solution isn’t strong enough, try using a higher ratio of vinegar and salt.
* Let it sit longer: For stubborn stains, let the solution sit for a longer period of time before scrubbing.
* Use a scrub brush: A good scrub brush can make a big difference in removing tough grime.
* Try a different abrasive: If salt isn’t doing the trick, you can try using baking soda as a gentle abrasive.
* Consider a commercial cleaner: Sometimes, a commercial cleaner is necessary for extremely tough stains or messes.
Why I Love This DIY Cleaner
Honestly, I’m a huge fan of this vinegar and salt cleaning solution. It’s:
* Affordable: Vinegar and salt are incredibly cheap, especially compared to commercial cleaners.
* Eco-friendly: It’s a natural and biodegradable alternative to harsh chemicals.
* Effective: It really does work! I’ve been amazed at how well it cleans various surfaces in my home.
* Easy to make: It takes just a few minutes to whip up a batch.
* Versatile: You can use it for so many different cleaning tasks.
So, there you have it! My ultimate guide to making and using a powerful vinegar and salt cleaning solution. Give it a try, and I think you’ll be pleasantly surprised at how well it works. Happy cleaning!
Conclusion
So, there you have it! This simple yet incredibly effective vinegar and salt cleaning solution is a game-changer for anyone looking to ditch harsh chemicals and embrace a more natural and budget-friendly approach to keeping their home sparkling. We’ve explored how the acidic power of vinegar, combined with the abrasive action of salt, creates a dynamic duo capable of tackling everything from stubborn grime in your bathroom to baked-on messes in your kitchen.
Why is this DIY trick a must-try? Because it’s not just about cleaning; it’s about making a conscious choice for a healthier home and a healthier planet. You’re reducing your exposure to potentially harmful chemicals, saving money on expensive cleaning products, and minimizing your environmental impact all in one fell swoop. Plus, the satisfaction of creating your own effective cleaning solution is surprisingly rewarding!
But the beauty of this method lies in its versatility. Feel free to experiment with variations to suit your specific needs. For example, for extra-tough stains, consider creating a paste of vinegar, salt, and baking soda. The baking soda adds an extra layer of scrubbing power and can help neutralize odors. If you’re dealing with mold or mildew, adding a few drops of tea tree oil to your vinegar and salt solution can provide an added boost of antifungal properties. For a more pleasant scent, infuse your vinegar with citrus peels for a few weeks before using it in your cleaning solution. Lemon, orange, or grapefruit peels all work wonderfully and leave behind a refreshing aroma.
Remember to always test your vinegar and salt cleaning solution in an inconspicuous area first, especially on delicate surfaces like marble or granite. While vinegar is generally safe for most surfaces, it’s always better to be cautious and prevent any potential damage.
We are confident that once you experience the cleaning power of vinegar and salt, you’ll be hooked. It’s a simple, effective, and eco-friendly solution that delivers impressive results.
Now, it’s your turn! We encourage you to try this DIY vinegar and salt cleaning trick and see the difference it can make in your home. Don’t be afraid to experiment with different variations and find what works best for you. And most importantly, we want to hear about your experience! Share your before-and-after photos, your favorite uses for this cleaning solution, and any tips or tricks you’ve discovered in the comments below. Let’s build a community of clean, green, and happy homes together! Let us know how this **vinegar and salt cleaning** method worked for you!
Frequently Asked Questions
Is vinegar and salt cleaning safe for all surfaces?
While vinegar and salt cleaning is generally safe for many surfaces, it’s crucial to exercise caution and test the solution in an inconspicuous area first. Avoid using it on delicate surfaces like marble, granite, or waxed wood, as the acidity of the vinegar can potentially damage or etch these materials. For these surfaces, consider using a pH-neutral cleaner specifically designed for them. Always dilute the vinegar solution with water, especially when cleaning painted surfaces, to minimize the risk of discoloration. When in doubt, consult the manufacturer’s instructions for the specific surface you’re cleaning.
What type of salt and vinegar should I use?
For most cleaning purposes, plain white distilled vinegar is the best choice. It’s readily available, inexpensive, and has a consistent acidity level. Avoid using flavored vinegars, such as balsamic or apple cider vinegar, as they may contain sugars or other additives that could leave a sticky residue. As for salt, regular table salt or sea salt works perfectly well. Coarse salt can provide extra scrubbing power for tough stains, but be mindful of potential scratching on delicate surfaces. Epsom salt can also be used, especially for cleaning bathroom fixtures, as it helps to dissolve soap scum and mineral deposits.
Can I use vinegar and salt cleaning to remove mold?
Yes, vinegar and salt cleaning can be effective in removing mold, especially in small areas. Vinegar’s acidity helps to kill mold spores, while salt acts as a mild abrasive to scrub away the mold. However, for large or severe mold infestations, it’s best to consult with a professional mold remediation service. To use vinegar and salt for mold removal, mix equal parts vinegar and water, add a tablespoon of salt, and spray the solution onto the affected area. Let it sit for at least an hour, then scrub with a brush and rinse thoroughly. Ensure the area is well-ventilated to prevent moisture buildup, which can encourage mold growth.
How do I get rid of the vinegar smell after cleaning?
The vinegar smell can be a deterrent for some, but it dissipates quickly. To minimize the odor, ensure proper ventilation by opening windows and doors while cleaning. You can also add a few drops of essential oils, such as lemon, lavender, or eucalyptus, to your vinegar and salt solution to mask the smell. Another trick is to boil a pot of water with citrus peels or cinnamon sticks after cleaning to freshen the air. Alternatively, you can simply wait for the vinegar smell to naturally dissipate, which usually takes a few hours.
Can I store the vinegar and salt cleaning solution?
Yes, you can store the vinegar and salt cleaning solution for future use. However, it’s best to store it in a tightly sealed container, preferably a glass or plastic spray bottle. Label the bottle clearly to avoid confusion. Store the solution in a cool, dark place away from direct sunlight and heat. While the solution doesn’t typically expire, it’s best to use it within a few months to ensure its effectiveness. Over time, the salt may settle at the bottom of the container, so shake well before each use.
Is vinegar and salt cleaning safe for pets and children?
Vinegar and salt cleaning is generally considered safe for pets and children, as it doesn’t contain harsh chemicals. However, it’s still important to exercise caution and keep the cleaning solution out of reach of children and pets. Avoid spraying the solution directly onto pets or allowing them to ingest it. If your pet accidentally ingests a small amount of the solution, it may cause mild stomach upset, but it’s unlikely to be serious. If you’re concerned, contact your veterinarian. Always rinse surfaces thoroughly after cleaning to remove any residue that could be harmful if ingested.
What are some other uses for vinegar and salt cleaning?
Beyond general cleaning, vinegar and salt can be used for a variety of other purposes. It’s effective for cleaning showerheads and faucets, removing hard water stains, and unclogging drains. You can also use it to clean your microwave by heating a solution of vinegar and water inside for a few minutes. Vinegar and salt can also be used to remove rust from metal surfaces. Simply soak the rusty item in a vinegar and salt solution for several hours, then scrub with a brush. It’s a versatile and eco-friendly solution for many household cleaning tasks.

Leave a Comment