

Patio Summer Squash Production might seem like a far-fetched dream if you’re short on space, but I’m here to tell you it’s absolutely achievable! Forget sprawling gardens; we’re bringing the bounty of summer squash right to your doorstep, balcony, or patio. For centuries, humans have cultivated squash, with evidence pointing back to ancient civilizations in the Americas. These early varieties were crucial food sources, and now, we’re adapting that rich history to fit our modern, space-conscious lifestyles.
Are you tired of bland, store-bought vegetables? Do you crave the satisfaction of harvesting your own food? Then this DIY guide is for you! I’ll walk you through simple, effective techniques to maximize your patio summer squash production, even in the smallest of areas. Imagine fresh, vibrant zucchini and yellow squash gracing your summer meals, all grown with your own two hands. This isn’t just about growing vegetables; it’s about connecting with nature, reducing your carbon footprint, and enjoying the unparalleled flavor of homegrown goodness. Let’s get started and transform your patio into a thriving summer squash haven!
Maximizing Your Patio Summer Squash Harvest: A DIY Guide
Hey there, fellow gardeners! I’m so excited to share my tried-and-true method for getting a bumper crop of summer squash, even if you’re limited to a patio or balcony. Forget those sprawling vines taking over your entire yard – we’re going vertical and compact! This guide will walk you through everything you need to know to grow delicious, abundant summer squash in containers.
Choosing the Right Squash Variety
Before we dive into the nitty-gritty, let’s talk squash. Not all summer squash varieties are created equal when it comes to container gardening. You’ll want to choose bush varieties that are naturally more compact and less prone to sprawling.
Here are some of my personal favorites:
* Spaghetti Squash (Bush Delicata): While technically a winter squash, the bush variety is perfect for containers.
* Zucchini (Bush): Look for varieties specifically labeled “bush” or “compact.” Black Beauty and Gold Rush are popular choices.
* Yellow Crookneck (Early Crookneck): This classic summer squash offers a delightful flavor and manageable size.
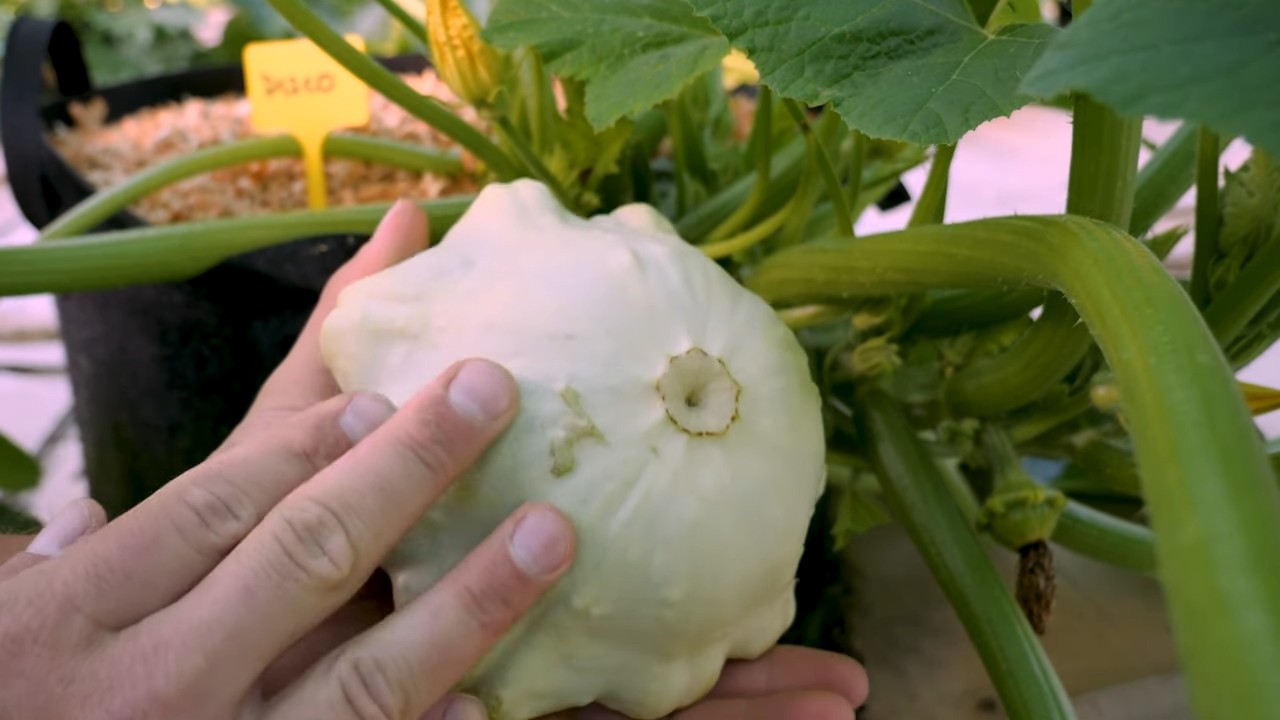
* Patty Pan (Scallopini): These adorable, saucer-shaped squash are both productive and visually appealing.
Gathering Your Supplies
Okay, now that we’ve chosen our squash, let’s gather the necessary supplies. This is where the “DIY” aspect really shines – you can often repurpose items you already have!
Here’s what you’ll need:
* Large Containers: This is crucial! Each squash plant needs at least a 15-gallon container. I prefer using 20-gallon containers to give the roots plenty of room to grow. Make sure your containers have drainage holes!
* High-Quality Potting Mix: Don’t skimp on this! Use a well-draining potting mix specifically formulated for containers. Avoid using garden soil, as it can compact and hinder drainage.
* Trellis or Support System: Even bush varieties can benefit from some support, especially as the squash start to develop. A tomato cage, sturdy stakes, or even a DIY trellis will work wonders.
* Slow-Release Fertilizer: This will provide your squash plants with a steady supply of nutrients throughout the growing season.
* Watering Can or Hose: Essential for keeping your plants hydrated.
* Gardening Gloves: Protect your hands from dirt and potential irritants.
* Hand Trowel: For planting and transplanting.
* Pruning Shears or Scissors: For removing yellowing leaves and harvesting squash.
* Optional: Mulch (straw, wood chips, or shredded leaves) to help retain moisture and suppress weeds.
Planting Your Summer Squash
Now for the fun part – planting! I usually start my squash seeds indoors about 3-4 weeks before the last expected frost. This gives them a head start and ensures a longer growing season. However, you can also direct sow seeds directly into your containers after the danger of frost has passed.
Starting Seeds Indoors (Optional)
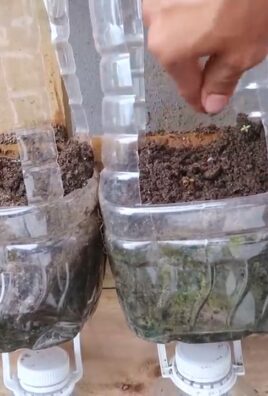
1. Prepare Seed Starting Trays: Fill seed starting trays or small pots with seed starting mix.
2. Sow Seeds: Plant 2-3 seeds per cell or pot, about 1 inch deep.
3. Water Gently: Moisten the soil thoroughly, but avoid overwatering.
4. Provide Warmth and Light: Place the trays in a warm location (around 70-75°F) and provide plenty of light. A sunny windowsill or grow lights will work.
5. Thin Seedlings: Once the seedlings emerge and have a few true leaves, thin them to one plant per cell or pot. Choose the strongest, healthiest seedling.
Direct Sowing Seeds (Alternative)
1. Prepare Containers: Fill your containers with high-quality potting mix, leaving a few inches of space at the top.
2. Sow Seeds: Plant 2-3 seeds per container, about 1 inch deep.
3. Water Gently: Moisten the soil thoroughly, but avoid overwatering.
4. Thin Seedlings: Once the seedlings emerge and have a few true leaves, thin them to one plant per container. Choose the strongest, healthiest seedling.
Transplanting Seedlings (If Starting Indoors)
1. Harden Off Seedlings: Before transplanting, gradually acclimate your seedlings to outdoor conditions. Start by placing them outside for a few hours each day, increasing the time over a week or so.
2. Prepare Containers: Fill your containers with high-quality potting mix, leaving a few inches of space at the top.
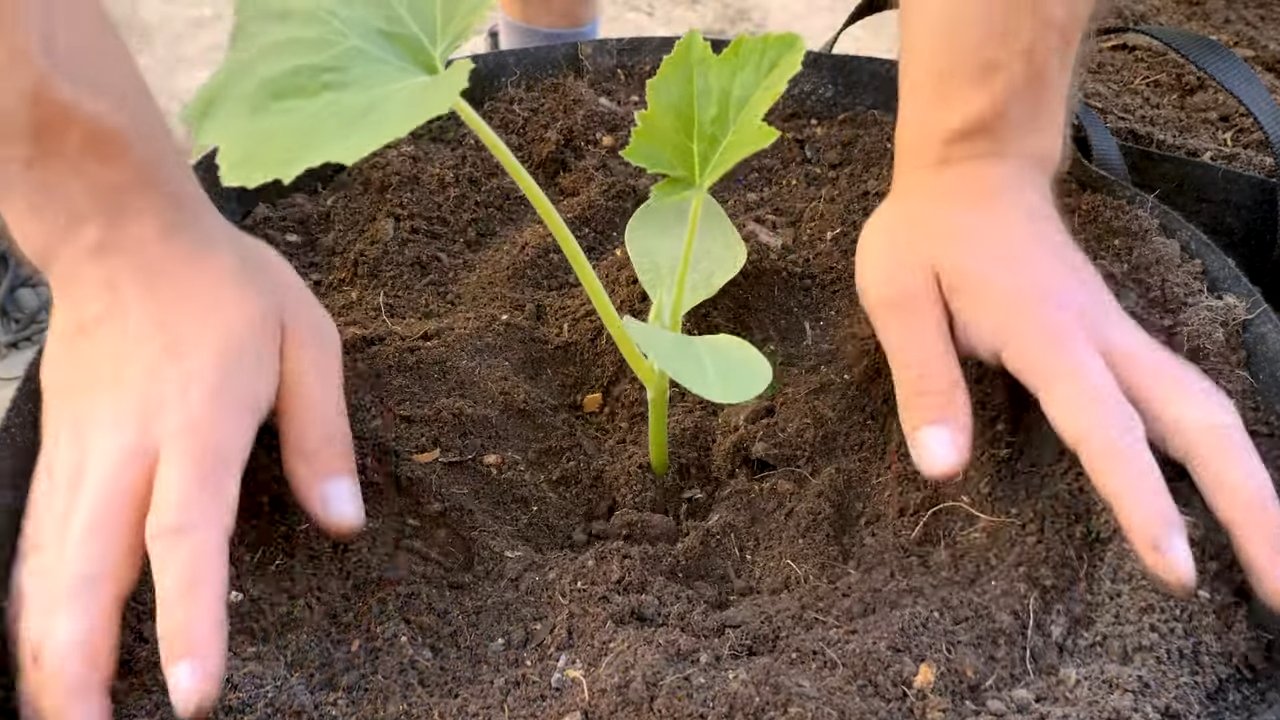
3. Transplant Seedlings: Gently remove the seedlings from their trays or pots and plant them in the center of the containers.
4. Water Thoroughly: Water the transplanted seedlings well to help them settle in.
Providing Ongoing Care
Once your squash plants are established, it’s time to provide them with the care they need to thrive. This includes watering, fertilizing, pruning, and pest control.
Watering
Summer squash needs consistent moisture, especially during hot weather. Water deeply whenever the top inch of soil feels dry to the touch. Avoid overhead watering, as this can lead to fungal diseases. I prefer to water at the base of the plant, using a watering can or soaker hose.
Fertilizing
Summer squash are heavy feeders, so regular fertilization is essential. Apply a slow-release fertilizer at planting time, and then supplement with a liquid fertilizer every 2-3 weeks. Look for a fertilizer that is high in phosphorus and potassium, which are essential for fruit production.
Pruning
While bush varieties are more compact, they can still benefit from some pruning. Remove any yellowing or damaged leaves to improve air circulation and prevent disease. You can also prune away any excessive foliage to encourage fruit production.
Pest Control
Summer squash can be susceptible to a variety of pests, including squash bugs, squash vine borers, and aphids. Regularly inspect your plants for signs of infestation, and take action promptly.
Here are some common pests and how to deal with them:
* Squash Bugs: These pesky bugs can suck the sap from your plants, causing them to wilt and die. Handpick them off the plants or use insecticidal soap.
* Squash Vine Borers: These borers tunnel into the stems of your plants, causing them to collapse. Wrap the base of the stems with aluminum foil to prevent them from entering. If you see signs of infestation, you can try to remove the borers manually or use a systemic insecticide.
* Aphids: These tiny insects can suck the sap from your plants, causing them to become weak and stunted. Spray them off with a strong stream of water or use insecticidal soap.
Pollination
Summer squash requires pollination to produce fruit. If you’re growing your squash indoors or in an area with limited pollinators, you may need to hand-pollinate the flowers.
Here’s how to hand-pollinate squash flowers:
1. Identify Male and Female Flowers: Male flowers have a long, thin stem, while female flowers have a small, immature fruit at the base.
2. Collect Pollen: Use a small brush or cotton swab to collect pollen from the male flower.
3. Transfer Pollen: Gently transfer the pollen to the stigma (the center part) of the female flower.
4. Repeat: Repeat this process for all the female flowers that you want to pollinate.
Harvesting Your Summer Squash
The moment we’ve all been waiting for – harvesting! Summer squash is best harvested when it’s young and tender. The exact size will depend on the variety, but generally, you want to harvest zucchini when they’re about 6-8 inches long, yellow squash when they’re about 4-6 inches long, and patty pan squash when they’re about 3-4 inches in diameter.
To harvest, simply cut the squash from the plant using pruning shears or a sharp knife. Be careful not to damage the plant.
Harvest your squash regularly to encourage continued production. The more you harvest, the more your plants will produce!
Troubleshooting Common Problems
Even with the best care, you may encounter some problems while growing summer squash. Here are some common issues and how to address them:
* Blossom End Rot: This condition causes the ends of the squash to rot. It’s usually caused by calcium deficiency or inconsistent watering. Ensure your soil is rich in calcium and water your plants regularly.
* Powdery Mildew: This fungal disease causes a white, powdery coating on the leaves. Improve air circulation by pruning away excessive foliage and avoid overhead watering. You can also treat with a fungicide.
* Lack of Fruit Production: This can be caused by a variety of factors, including poor pollination, nutrient deficiencies, or pest infestations. Ensure your plants are properly pollinated, fertilized, and protected from pests.
Enjoying Your Harvest
Conclusion
So, there you have it! Transforming your patio into a summer squash haven is not only achievable but also incredibly rewarding. We’ve explored a simple yet effective DIY trick that bypasses common gardening hurdles and maximizes your yield, even in limited spaces. This isn’t just about growing vegetables; it’s about connecting with nature, enjoying the freshest possible ingredients, and experiencing the satisfaction of nurturing something from seed to table.
Why is this DIY trick a must-try? Because it addresses the core challenges of patio gardening: space constraints, soil quality, and pest control. By focusing on container selection, optimized soil mixes, and strategic companion planting, you create an environment where your summer squash can thrive. Imagine stepping onto your patio and being greeted by vibrant green foliage and the promise of delicious, homegrown squash.
But the beauty of this method lies in its adaptability. Feel free to experiment with different summer squash varieties. Zucchini, yellow squash, and even pattypan squash can all flourish using this technique. Consider adding a trellis for vining varieties to maximize vertical space and improve air circulation. You can also tailor the companion plants to your specific needs and preferences. Marigolds are excellent for pest control, while basil can enhance the flavor of your squash dishes.
Don’t be afraid to get creative with your container choices. While large pots are ideal, you can also repurpose items like old buckets or even grow bags. Just ensure they have adequate drainage to prevent waterlogging. Remember, the key is to provide your summer squash with a stable and supportive environment.
This DIY approach to patio summer squash production is more than just a gardening technique; it’s an invitation to embrace a sustainable and fulfilling lifestyle. It’s a chance to reduce your reliance on store-bought produce, minimize your environmental impact, and enjoy the unparalleled flavor of homegrown vegetables.
We wholeheartedly encourage you to try this DIY trick and witness the magic of growing your own summer squash. The process is simpler than you might think, and the rewards are immeasurable. From the moment you sow the seeds to the day you harvest your first squash, you’ll be captivated by the journey.
And most importantly, we want to hear about your experience! Share your photos, tips, and challenges in the comments below. Let’s create a community of patio gardeners who are passionate about growing their own food and sharing their knowledge with others. Together, we can transform our patios into vibrant and productive spaces. Let’s get growing and unlock the potential of **patio summer squash production**!
Variations to Consider
* **Vertical Gardening:** Utilize trellises or cages to support vining varieties, maximizing space and improving air circulation.
* **Succession Planting:** Plant new seeds every few weeks to ensure a continuous harvest throughout the summer.
* **Companion Planting:** Experiment with different companion plants to deter pests, attract pollinators, and enhance the flavor of your squash.
* **Container Size:** Adjust the container size based on the specific variety of summer squash you are growing. Larger varieties may require larger containers.
Final Thoughts
Growing your own summer squash on your patio is a rewarding experience that connects you with nature and provides you with fresh, delicious produce. By following these simple tips and tricks, you can overcome the challenges of patio gardening and enjoy a bountiful harvest. So, get your hands dirty, embrace the process, and savor the fruits (or vegetables!) of your labor.
FAQ
Q: What is the best type of container for growing summer squash on a patio?
A: The ideal container for patio summer squash production is a large pot or container with a minimum capacity of 15-20 gallons. This provides ample space for the roots to develop and ensures the plant has access to sufficient nutrients and water. Choose a container made from durable materials like plastic, terracotta, or even repurposed items like large buckets or grow bags. Ensure the container has adequate drainage holes to prevent waterlogging, which can lead to root rot. Dark-colored containers can absorb more heat, which can be beneficial in cooler climates but may require more frequent watering in hotter regions.
Q: What kind of soil mix should I use for patio summer squash?
A: Summer squash thrives in well-draining, nutrient-rich soil. A good soil mix for patio summer squash production consists of equal parts of the following:
* **Potting soil:** Provides a light and airy base for the roots to grow.
* **Compost:** Adds essential nutrients and improves soil structure.
* **Peat moss or coco coir:** Helps retain moisture and prevent the soil from drying out too quickly.
You can also add a slow-release fertilizer to the soil mix to provide a steady supply of nutrients throughout the growing season. Avoid using garden soil in containers, as it can become compacted and poorly drained.
Q: How often should I water my patio summer squash plants?
A: Summer squash requires consistent watering, especially during hot and dry weather. Water deeply whenever the top inch of soil feels dry to the touch. Avoid overwatering, as this can lead to root rot. The frequency of watering will depend on factors such as the size of the container, the weather conditions, and the type of soil mix you are using. Check the soil moisture regularly and adjust your watering schedule accordingly. In general, you may need to water your plants daily or even twice a day during the hottest part of the summer.
Q: What are some common pests and diseases that affect summer squash, and how can I prevent them?
A: Summer squash can be susceptible to several pests and diseases, including squash bugs, squash vine borers, powdery mildew, and squash mosaic virus. To prevent these problems, consider the following:
* **Companion planting:** Plant marigolds, nasturtiums, or other pest-repelling plants near your summer squash to deter insects.
* **Crop rotation:** Avoid planting summer squash in the same location year after year to prevent the buildup of soilborne diseases.
* **Good air circulation:** Ensure your plants have adequate spacing and air circulation to prevent fungal diseases.
* **Regular inspection:** Inspect your plants regularly for signs of pests or diseases and take action promptly.
* **Organic pest control:** Use organic insecticides or fungicides to control pests and diseases if necessary.
Q: How do I know when my summer squash is ready to harvest?
A: Summer squash is typically ready to harvest when it is young and tender. The size of the squash will vary depending on the variety, but generally, you should harvest zucchini when it is 6-8 inches long and yellow squash when it is 4-6 inches long. The skin should be smooth and glossy, and the squash should feel firm to the touch. Use a sharp knife or pruners to cut the squash from the plant, leaving a short stem attached. Regular harvesting will encourage the plant to produce more squash.
Q: Can I grow different varieties of summer squash in the same container?
A: While it’s technically possible to grow different varieties of summer squash in the same large container, it’s generally not recommended. Different varieties may have different growth habits and nutrient requirements, which can lead to competition and reduced yields. It’s best to grow each variety in its own separate container to ensure optimal growth and productivity.
Q: What is the best location on my patio for growing summer squash?
A: Summer squash requires at least 6-8 hours of direct sunlight per day to thrive. Choose a location on your patio that receives ample sunlight throughout the day. Avoid placing your plants in shady areas, as this can lead to stunted growth and reduced yields. Also, consider the prevailing wind direction and protect your plants from strong winds, which can damage the foliage and stems.
Q: How can I improve pollination for my patio summer squash plants?
A: Summer squash relies on pollinators, such as bees and butterflies, to transfer pollen from the male flowers to the female flowers. If you are not seeing many pollinators in your area, you can hand-pollinate your plants. To do this, use a small paintbrush to collect pollen from the male flowers and transfer it to the female flowers. You can identify the female flowers by the small squash-like structure at the base of the flower. Hand-pollination is best done in the morning, when the pollen is most viable. Planting flowers that attract pollinators, such as lavender, salvia, and zinnias, can also help improve pollination.

Leave a Comment