

Growing bush beans at home can be incredibly rewarding, offering fresh, delicious produce right at your fingertips! Have you ever dreamt of strolling into your backyard and harvesting a bowlful of vibrant green beans for dinner? Well, that dream can easily become a reality with a few simple tricks and DIY hacks. For centuries, beans have been a staple crop in cultures worldwide, providing essential nutrients and playing a vital role in sustainable agriculture. From ancient civilizations in the Americas to traditional European gardens, beans have nourished communities and connected people to the land.
But let’s be honest, sometimes gardening can feel a little intimidating, right? That’s where these DIY tricks come in! Whether you’re a seasoned gardener or just starting out, mastering the art of growing bush beans at home doesn’t have to be a daunting task. I’m here to share some easy-to-follow tips and clever hacks that will help you maximize your yield, minimize common problems, and enjoy a bountiful harvest of delicious bush beans. Imagine the satisfaction of serving a meal made with ingredients you grew yourself – it’s an experience that’s both fulfilling and incredibly tasty! So, let’s dive in and unlock the secrets to successful bush bean gardening!

Growing Bush Beans: A Beginner’s Guide to a Bountiful Harvest
Hey there, fellow garden enthusiasts! I’m so excited to share my experience with growing bush beans. They’re incredibly rewarding, relatively easy to care for, and perfect for small gardens or even container gardening. Get ready to enjoy fresh, homegrown beans in no time!
Choosing Your Bush Bean Variety
Before we dive into the nitty-gritty, let’s talk about bean varieties. Bush beans come in a rainbow of colors and flavors. Some popular choices include:
* Blue Lake Bush Beans: These are classic, reliable, and produce stringless, dark green beans.
* Contender Bush Beans: Early producers, known for their tolerance to cool weather.
* Provider Bush Beans: Another early variety, great for areas with shorter growing seasons.
* Roma Bush Beans: Flat, wide beans with a distinctive flavor, perfect for Italian dishes.
* Golden Wax Bush Beans: Yellow beans with a buttery flavor.
I personally love growing Blue Lake and Roma beans because they’re so versatile in the kitchen. But feel free to experiment and find your favorites!
Preparing Your Garden Bed or Containers
Bush beans thrive in well-drained soil that’s rich in organic matter. Here’s how to get your planting area ready:
* Sunlight: Bush beans need at least 6-8 hours of direct sunlight per day. Choose a sunny spot in your garden.
* Soil: Amend your soil with compost or well-rotted manure to improve drainage and fertility. Beans prefer a slightly acidic to neutral soil pH (around 6.0 to 7.0). You can test your soil pH with a simple soil testing kit.
* Container Gardening: If you’re growing in containers, choose pots that are at least 12 inches deep and wide. Use a high-quality potting mix that drains well.
* Weed Removal: Clear the area of any weeds and grass. Weeds compete with your bean plants for nutrients and water.
Planting Your Bush Beans
Now for the fun part – planting!
1. Timing is Key: Bush beans are warm-season crops, so wait until the danger of frost has passed and the soil has warmed up to at least 60°F (15°C). I usually plant my beans about two weeks after the last expected frost.
2. Direct Sowing: Bush beans are best direct-sown into the garden. They don’t transplant well.
3. Spacing: Sow seeds about 1 inch deep and 2-3 inches apart in rows that are 18-24 inches apart.
4. Watering: Water the soil gently after planting to ensure good seed-to-soil contact.
5. Germination: You should see seedlings emerge in about 7-14 days, depending on the soil temperature and moisture levels.
Caring for Your Bush Bean Plants
Once your bean plants are up and growing, here’s how to keep them happy and healthy:
* Watering: Water regularly, especially during dry spells. Beans need consistent moisture to produce well. Aim for about 1 inch of water per week. Water at the base of the plants to avoid wetting the foliage, which can lead to fungal diseases.
* Weeding: Keep the area around your bean plants free of weeds. Hand-pull weeds carefully to avoid disturbing the bean plant roots.
* Fertilizing: Bush beans don’t need a lot of fertilizer, but you can give them a boost with a side dressing of compost or a balanced organic fertilizer a few weeks after they emerge. Avoid over-fertilizing, as this can lead to excessive foliage growth at the expense of bean production.
* Pest Control: Keep an eye out for common bean pests like aphids, bean beetles, and slugs. You can control aphids with a strong spray of water or insecticidal soap. Handpick bean beetles and slugs.
* Disease Prevention: To prevent fungal diseases, ensure good air circulation around your plants and avoid overhead watering. If you notice any signs of disease, such as leaf spots or mildew, remove the affected leaves immediately.
Harvesting Your Bush Beans
Harvesting is the most rewarding part!
1. Timing: Bush beans are typically ready to harvest about 50-60 days after planting.
2. Check Regularly: Check your plants regularly for beans that are firm, plump, and snap easily.
3. Harvesting Technique: Gently snap the beans off the plant, being careful not to damage the stems or leaves.
4. Succession Planting: For a continuous harvest, plant a new batch of beans every 2-3 weeks.
5. Overripe Beans: Don’t let the beans get too large and tough. Overripe beans will be less flavorful and may become stringy.
6. Enjoy Your Harvest: Enjoy your fresh, homegrown beans in salads, stir-fries, soups, or as a simple side dish.
Troubleshooting Common Problems
Even with the best care, you might encounter some challenges. Here are a few common problems and how to address them:
* Poor Germination: If your bean seeds aren’t germinating, it could be due to cold soil, poor seed quality, or overwatering. Make sure the soil is warm enough before planting, use fresh seeds, and avoid overwatering.
* Yellowing Leaves: Yellowing leaves can be a sign of nutrient deficiency, overwatering, or disease. Check your soil pH and nutrient levels, adjust your watering schedule, and look for signs of disease.
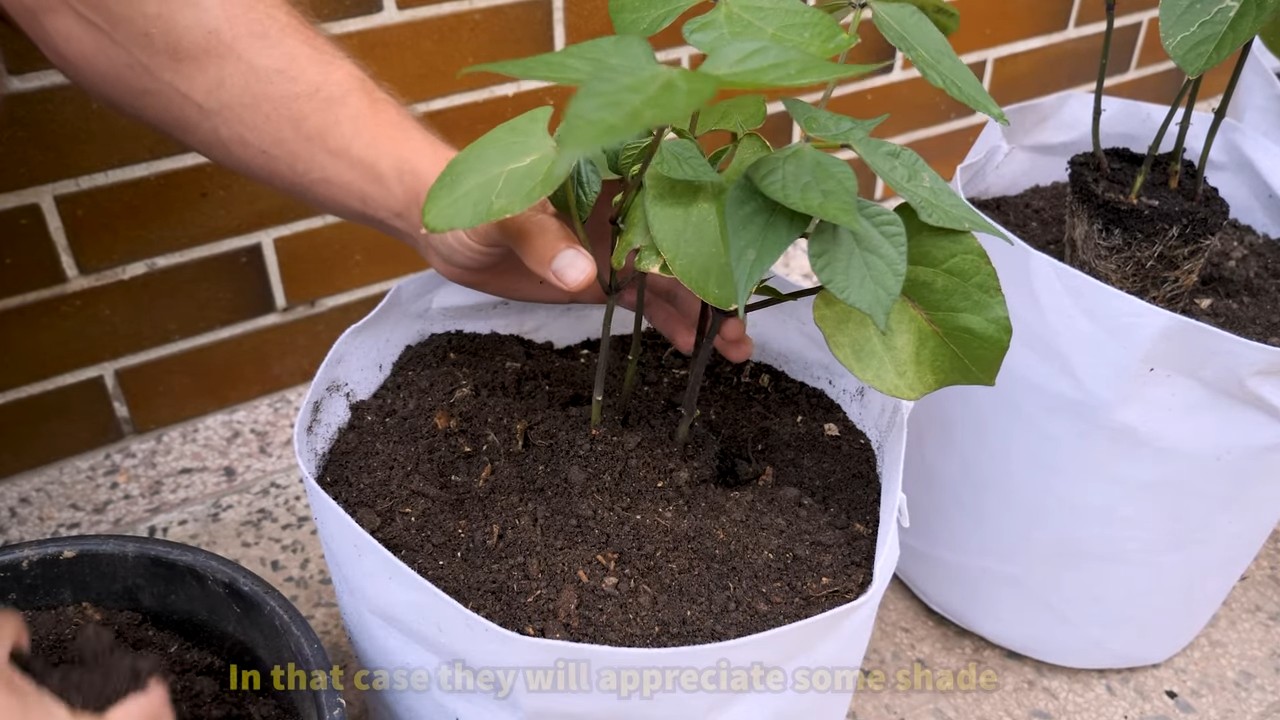
* Lack of Bean Production: If your plants are growing well but not producing beans, it could be due to lack of pollination, high temperatures, or over-fertilizing. Ensure that bees and other pollinators have access to your garden, provide shade during the hottest part of the day, and avoid over-fertilizing.
* Pest Infestations: Regularly inspect your plants for pests and take action promptly to prevent infestations from getting out of control.
Extending Your Bean Season
Want to enjoy fresh beans for as long as possible? Here are a few tips for extending your bean season:
* Succession Planting: As mentioned earlier, plant a new batch of beans every 2-3 weeks to ensure a continuous harvest.
* Cold Frames or Row Covers: Use cold frames or row covers to protect your plants from frost and extend the growing season in the spring and fall.
* Choose Cold-Tolerant Varieties: Select bean varieties that are known for their tolerance to cool weather, such as Contender or Provider.
Saving Bean Seeds
If you want to save seeds from your bush bean plants for next year, here’s how:
1. Choose Healthy Plants: Select healthy, vigorous plants that produce high-quality beans.
2. Allow Beans to Mature: Allow some of the beans to mature fully on the plant. They should become dry and brown.
3. Harvest the Dry Beans: Harvest the dry beans and remove them from the pods.
4. Dry the Seeds: Spread the seeds out on a screen or tray in a well-ventilated area to dry completely.
5. Store the Seeds: Store the dry seeds in an airtight container in a cool, dark, and dry place.
Bush Beans in Containers: A Detailed Guide
Growing bush beans in containers is a fantastic option if you have limited garden space or want to grow them on a balcony or patio. Here’s a more detailed guide:
1. Choosing the Right Container: As I mentioned before, select a container that is at least 12 inches deep and wide. This will provide enough space for the roots to grow and support the plant. Make sure the container has drainage holes to prevent waterlogging.
2. Selecting the Right Potting Mix: Use a high-quality potting mix that is specifically designed for container gardening. Avoid using garden soil, as it can become compacted and doesn’t drain well in containers.
3. Planting the Seeds: Follow the same planting instructions as for garden beds. Sow seeds about 1 inch deep and 2-3 inches apart. You can plant several seeds in a larger container, but be sure to thin them out to the strongest plants once they emerge.
4. Watering and Fertilizing: Container-grown beans will need more frequent watering than those grown in the ground, especially during hot weather. Check the soil moisture regularly and water when the top inch feels dry. Fertilize every 2-3 weeks with a balanced liquid fertilizer.
5. Sunlight: Place your containers in a location that receives at least 6-8 hours of direct sunlight per day.
6. Support: While bush beans don’t typically need staking, you may want to provide some support if they become top-heavy with beans. You can use small stakes or a tomato cage.
7. Pest and Disease Control: Monitor your
Conclusion
So, there you have it! Growing bush beans at home is not only surprisingly simple, but also incredibly rewarding. From the vibrant green leaves unfurling to the satisfying snap of a freshly picked bean, the entire process is a testament to the magic of gardening. Forget those limp, flavorless beans from the grocery store; imagine instead, plump, crisp bush beans bursting with homegrown goodness, ready to elevate your salads, stir-fries, and side dishes.
This isn’t just about saving a few dollars at the supermarket, although that’s certainly a perk. It’s about connecting with your food, understanding where it comes from, and experiencing the joy of nurturing something from seed to table. It’s about adding a touch of green to your life, both literally and figuratively.
But the best part? The possibilities are endless! Once you’ve mastered the basics of growing bush beans, you can experiment with different varieties. Try the classic ‘Blue Lake’ for its exceptional flavor and productivity, or opt for the ‘Provider’ bean, known for its early maturity and resilience. For a touch of color, consider ‘Royal Burgundy’ bush beans, which boast beautiful purple pods that turn green when cooked. You can even explore heirloom varieties for unique flavors and textures.
Don’t have a large garden? No problem! Bush beans thrive in containers, making them perfect for balconies, patios, and even sunny windowsills. Just be sure to choose a pot that’s at least 12 inches deep and wide to accommodate their root systems.
And if you’re feeling adventurous, why not try companion planting? Bush beans are known to be excellent companions for carrots, cucumbers, and strawberries, as they help to fix nitrogen in the soil, benefiting these neighboring plants.
We truly believe that growing bush beans at home is a must-try for any gardener, regardless of experience level. It’s a fun, educational, and delicious way to connect with nature and enjoy the fruits (or rather, vegetables) of your labor.
So, grab some seeds, prepare your soil, and get ready to embark on your own bush bean growing adventure. We’re confident that you’ll be amazed by how easy and rewarding it is. And most importantly, don’t forget to share your experiences with us! We’d love to hear about your favorite varieties, your gardening tips, and the delicious dishes you create with your homegrown bush beans. Share your photos and stories in the comments below – let’s build a community of bean-loving gardeners! Happy growing!
Frequently Asked Questions (FAQ)
What is the best time to plant bush beans?
The ideal time to plant bush beans is after the last frost of spring, when the soil has warmed to at least 60°F (15°C). Bush beans are sensitive to cold temperatures, so planting too early can result in poor germination or stunted growth. In most regions, this typically falls between late spring and early summer. To determine the best planting time for your specific area, consult your local extension office or gardening resources for frost date information. You can also start seeds indoors a few weeks before the last frost to get a head start, but be sure to harden them off gradually before transplanting them outdoors.
How much sunlight do bush beans need?
Bush beans require at least 6-8 hours of direct sunlight per day to thrive. Choose a planting location that receives ample sunlight throughout the day. If you’re growing bush beans in containers, you may need to move them around to ensure they get enough sunlight. Insufficient sunlight can lead to leggy growth, reduced yields, and increased susceptibility to pests and diseases.
What kind of soil is best for growing bush beans?
Bush beans prefer well-drained, fertile soil with a slightly acidic to neutral pH (around 6.0 to 7.0). Before planting, amend the soil with compost or other organic matter to improve drainage, fertility, and water retention. Avoid heavy clay soils, as they can become waterlogged and hinder root growth. If you have clay soil, consider adding sand or other amendments to improve drainage. A soil test can help you determine the pH and nutrient levels of your soil and guide you in making necessary amendments.
How often should I water bush beans?
Bush beans need consistent moisture, especially during germination and pod development. Water deeply and regularly, aiming to keep the soil consistently moist but not waterlogged. Avoid overhead watering, as it can promote fungal diseases. Instead, water at the base of the plants using a soaker hose or drip irrigation system. The frequency of watering will depend on the weather conditions and soil type. Check the soil moisture regularly and water when the top inch feels dry to the touch.
Do bush beans need fertilizer?
While bush beans are relatively low-maintenance, they can benefit from fertilization, especially in nutrient-poor soils. Before planting, incorporate a balanced fertilizer into the soil according to the package instructions. Avoid over-fertilizing, as this can lead to excessive foliage growth at the expense of pod production. You can also side-dress the plants with a nitrogen-rich fertilizer a few weeks after they emerge to promote healthy growth. However, be cautious with nitrogen, as too much can inhibit pod formation.
How do I harvest bush beans?
Bush beans are typically ready to harvest about 50-60 days after planting. Harvest the pods when they are firm, plump, and snap easily. Pick the beans regularly, as this encourages the plant to produce more pods. Overripe beans can become tough and stringy. To harvest, gently snap the pods off the plant, being careful not to damage the stems or leaves.
What are some common pests and diseases that affect bush beans?
Bush beans can be susceptible to various pests and diseases, including aphids, bean beetles, spider mites, and fungal diseases like powdery mildew and bean rust. To prevent pest and disease problems, practice good garden hygiene, such as removing weeds and debris, providing adequate spacing between plants, and avoiding overhead watering. Inspect your plants regularly for signs of pests or diseases and take action promptly. Organic pest control methods, such as insecticidal soap or neem oil, can be effective for controlling many common pests. For fungal diseases, consider using a copper-based fungicide or other appropriate treatment.
Can I grow bush beans in containers?
Yes, bush beans are well-suited for container gardening. Choose a pot that is at least 12 inches deep and wide to accommodate their root systems. Use a well-draining potting mix and provide adequate sunlight and water. Container-grown bush beans may require more frequent watering and fertilization than those grown in the ground.
How do I save seeds from bush beans?
Saving seeds from bush beans is a relatively easy process. Allow some of the pods to mature fully on the plant until they are dry and brown. Harvest the pods and shell the beans. Spread the beans out on a tray to dry completely for a few weeks. Store the dried beans in an airtight container in a cool, dark, and dry place. Properly stored bean seeds can remain viable for several years. However, note that if you are growing hybrid varieties, the seeds may not produce plants that are true to type.

Leave a Comment