

Growing Sweet Peppers Indoors might seem like a summer dream confined to sprawling gardens, but I’m here to tell you it’s absolutely achievable, even if you’re short on space or battling unpredictable weather! Forget those bland, store-bought peppers – imagine biting into a juicy, sun-ripened sweet pepper, bursting with flavor, all thanks to your own indoor efforts.
For centuries, cultivating peppers has been a vibrant part of human history, tracing back to South America where they were prized for their culinary and medicinal properties. Now, we’re bringing that tradition indoors, adapting ancient knowledge to modern living. But why bother growing sweet peppers indoors? Well, for starters, you gain complete control over the growing environment, shielding your precious plants from pests, diseases, and those late-season frosts that can ruin your harvest. Plus, it’s incredibly rewarding to nurture a plant from seed to table, knowing exactly what went into its growth.
This DIY guide is packed with simple, effective tricks and hacks that will empower you to successfully growing sweet peppers indoors, regardless of your experience level. I’ll walk you through everything from choosing the right varieties and providing optimal lighting to mastering watering techniques and troubleshooting common problems. Get ready to transform your windowsill or balcony into a thriving indoor pepper paradise!
Growing Sweet Peppers Indoors: A Beginner’s Guide
Hey there, fellow gardening enthusiasts! Dreaming of fresh, juicy sweet peppers even when the snow is falling outside? Well, you’re in the right place! I’m going to walk you through the process of growing sweet peppers indoors, from seed to harvest. It might seem daunting, but trust me, with a little patience and the right setup, you’ll be enjoying homegrown peppers in no time.
Choosing the Right Pepper Variety
First things first, not all pepper varieties are created equal when it comes to indoor growing. Some are simply better suited for container gardening and indoor environments. Here are a few of my personal favorites:
* ‘Mini Bell’ Peppers: These are compact and produce adorable, bite-sized peppers. They’re perfect for smaller spaces.
* ‘Sweet Banana’ Peppers: These are prolific producers and offer a mild, sweet flavor. They also tend to stay relatively compact.
* ‘Lunchbox’ Peppers: Similar to mini bells, these are small, sweet, and come in a variety of colors.
* ‘Gypsy’ Peppers: A slightly larger pepper, but still manageable indoors. They mature early and offer a delicious, sweet taste.
When selecting your seeds, make sure to choose varieties that are labeled as “compact” or “suitable for containers.” This will save you a lot of headaches down the road.
Gathering Your Supplies
Before we dive into the planting process, let’s make sure you have everything you need. Here’s a checklist:
* Pepper Seeds: Choose your desired variety from the list above or experiment with others!
* Seed Starting Trays or Small Pots: These will be used to germinate your seeds.
* Seed Starting Mix: This is a light, sterile mix that’s perfect for delicate seedlings. Avoid using garden soil at this stage.
* Larger Pots (5-gallon or larger): These will be the final homes for your pepper plants.
* Potting Mix: A well-draining potting mix is essential for healthy pepper growth.
* Grow Lights: Peppers need plenty of light to thrive indoors. LED grow lights are a great option.
* Fertilizer: A balanced fertilizer formulated for vegetables will provide your plants with the nutrients they need.
* Watering Can or Spray Bottle: For gentle watering.
* Optional: Heat Mat: This can speed up germination.
* Optional: Small Fan: To improve air circulation and prevent fungal diseases.
Starting Your Seeds
This is where the magic begins! Starting your seeds indoors gives you a head start on the growing season.
1. Prepare Your Seed Starting Trays: Fill your seed starting trays or small pots with seed starting mix. Gently tamp it down, but don’t pack it too tightly.
2. Sow Your Seeds: Make a small indentation (about 1/4 inch deep) in the soil. Place 2-3 seeds in each indentation. This increases your chances of at least one seed germinating.
3. Cover the Seeds: Gently cover the seeds with more seed starting mix.
4. Water Thoroughly: Use a spray bottle to mist the soil until it’s evenly moist. Avoid overwatering, as this can lead to rot.
5. Provide Warmth: Peppers love warmth! Place your seed starting trays on a heat mat or in a warm location (around 70-80°F).
6. Cover with a Humidity Dome (Optional): A humidity dome will help retain moisture and speed up germination. If you don’t have a dome, you can cover the trays with plastic wrap.
7. Wait Patiently: Germination typically takes 7-14 days. Keep the soil consistently moist, but not soggy.
8. Remove the Dome/Plastic Wrap: Once the seedlings emerge, remove the humidity dome or plastic wrap to prevent fungal diseases.
9. Provide Light: Place the seedlings under grow lights. Position the lights a few inches above the seedlings and adjust as they grow. Aim for 14-16 hours of light per day.
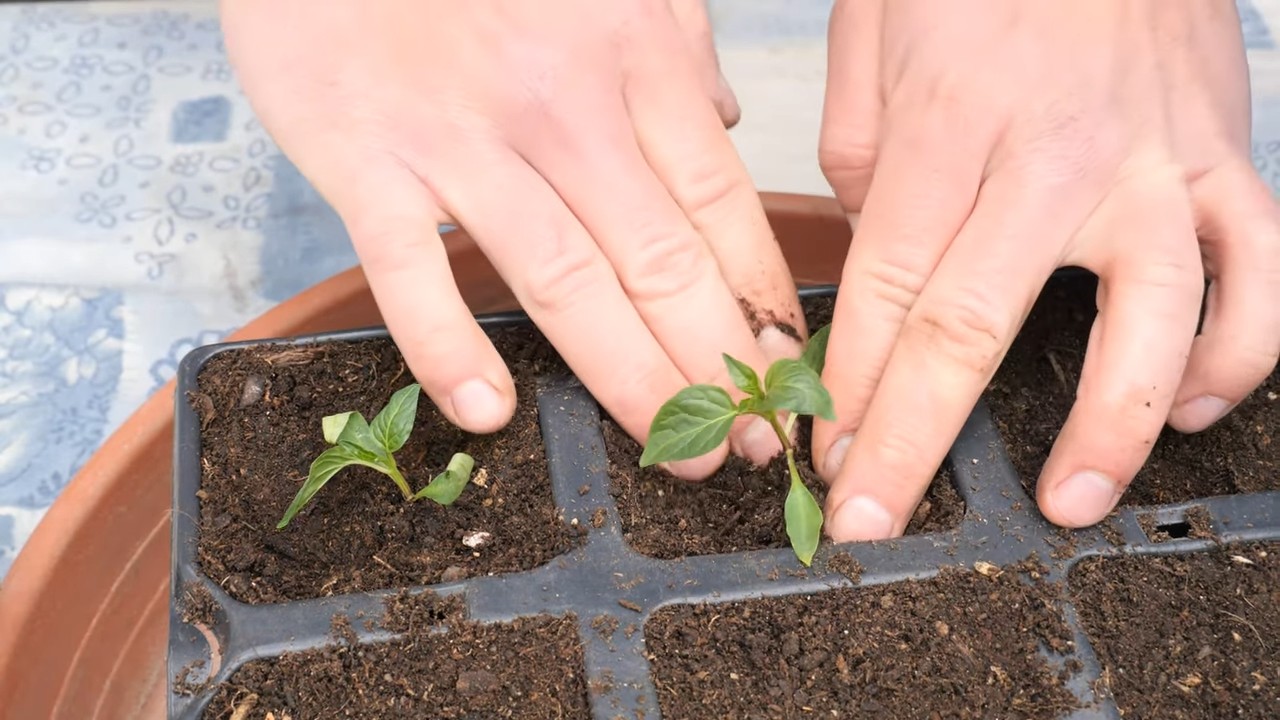
Transplanting Your Seedlings
Once your seedlings have developed a few sets of true leaves (the leaves that look like miniature pepper leaves), it’s time to transplant them into larger pots.
1. Prepare Your Larger Pots: Fill your 5-gallon (or larger) pots with well-draining potting mix.
2. Carefully Remove the Seedlings: Gently loosen the soil around the seedlings in the seed starting trays. Carefully lift each seedling out, being mindful not to damage the roots. If you planted multiple seeds in one cell, choose the strongest seedling and snip off the others at the soil line.
3. Create a Hole: Make a hole in the potting mix in your larger pot that’s large enough to accommodate the seedling’s root ball.
4. Transplant the Seedling: Place the seedling in the hole and gently backfill with potting mix. Make sure the top of the root ball is level with the surrounding soil.
5. Water Thoroughly: Water the transplanted seedling thoroughly.
6. Provide Support (Optional): If your pepper variety tends to get tall and leggy, you may want to provide support with a stake or tomato cage.
Caring for Your Pepper Plants
Now that your pepper plants are in their final homes, it’s time to provide them with the care they need to thrive.
1. Light: Peppers need at least 8 hours of direct light per day. If you’re using grow lights, aim for 14-16 hours.
2. Watering: Water your pepper plants when the top inch of soil feels dry to the touch. Avoid overwatering, as this can lead to root rot. Water deeply, allowing the water to drain out of the bottom of the pot.
3. Fertilizing: Feed your pepper plants with a balanced fertilizer every 2-3 weeks. Follow the instructions on the fertilizer package.
4. Temperature: Peppers prefer temperatures between 70-80°F during the day and 60-70°F at night.
5. Humidity: Peppers prefer moderate humidity. If the air in your home is very dry, you can increase humidity by placing a tray of water near your plants or using a humidifier.
6. Air Circulation: Good air circulation is essential for preventing fungal diseases. Use a small fan to gently circulate the air around your plants.
7. Pollination: Indoors, you’ll need to hand-pollinate your pepper flowers. Use a small paintbrush or cotton swab to transfer pollen from one flower to another. You can also gently shake the plant to help distribute the pollen.
8. Pruning: Pruning can help improve air circulation and encourage bushier growth. Remove any yellowing or dead leaves. You can also pinch off the tips of the branches to encourage more branching.
Dealing with Pests and Diseases
Even indoors, your pepper plants can be susceptible to pests and diseases. Here are a few common problems and how to deal with them:
* Aphids: These tiny insects can suck the sap from your plants. You can control them by spraying your plants with insecticidal soap or neem oil.
* Spider Mites: These tiny pests create webs on your plants and can cause the leaves to turn yellow. You can control them by spraying your plants with insecticidal soap or neem oil. Increasing humidity can also help.
* Whiteflies: These small, white insects fly around your plants and suck the sap from the leaves. You can control them by using sticky traps or spraying your plants with insecticidal soap.
* Fungal Diseases: Fungal diseases, such as powdery mildew and leaf spot, can be a problem in humid environments. Improve air circulation and avoid overwatering to prevent these diseases. You can also treat them with a fungicide.
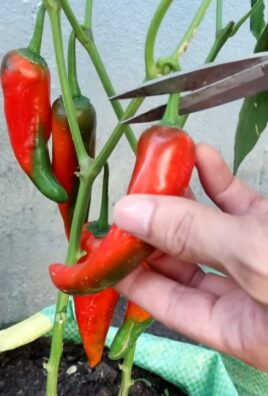
Harvesting Your Peppers
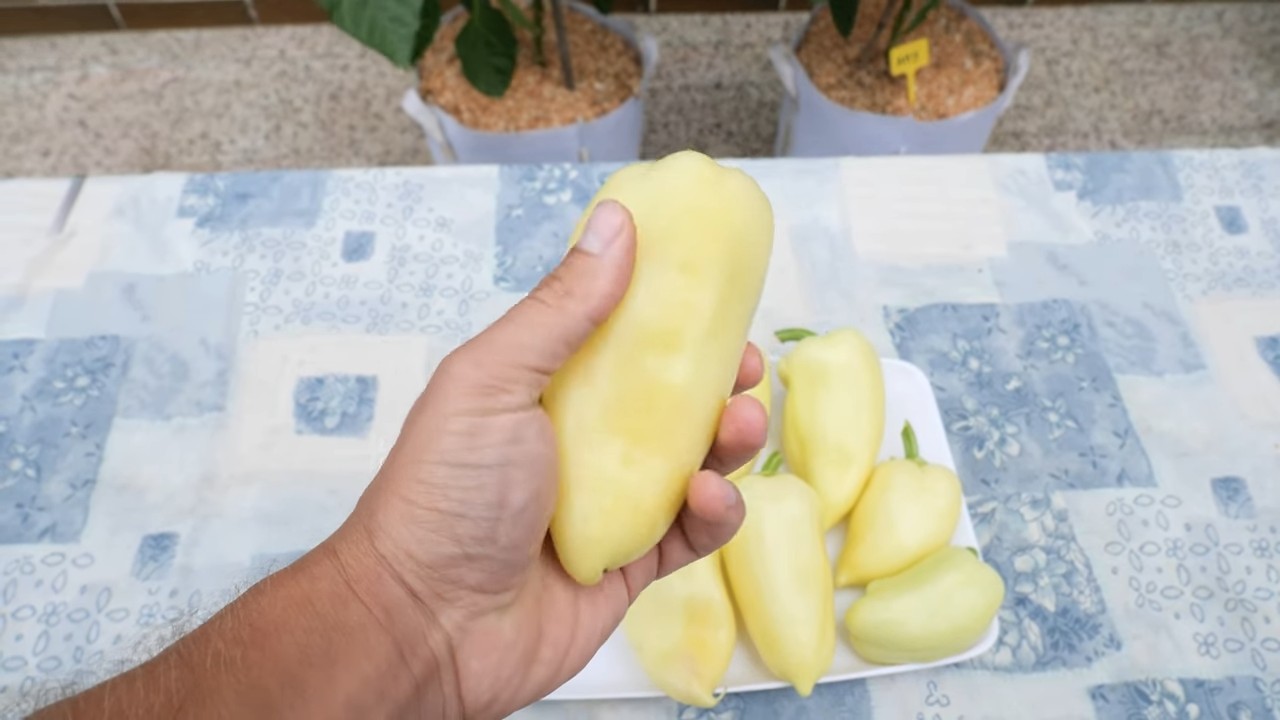
The most rewarding part of growing sweet peppers indoors is, of course, harvesting your own delicious peppers!
1. Check for Ripeness: Peppers are typically ready to harvest when they’ve reached their mature color and size. The color will depend on the variety you’re growing.
2. Harvest Carefully: Use a sharp knife or scissors to cut the peppers from the plant. Leave a small piece of stem attached to the pepper.
3. Enjoy Your Harvest: Use your homegrown peppers in salads, stir-fries, or any other dish you like!
Troubleshooting Tips
* Yellowing Leaves: This can be caused by overwatering, underwatering, nutrient deficiencies, or pests. Check the soil moisture and fertilize your plants if needed.
* Blossom End Rot: This is a common problem in peppers, caused by a calcium deficiency. Make sure your potting mix contains enough calcium and water your plants consistently.
* Lack of Fruit: This can be caused by insufficient light, poor pollination
Conclusion
So, there you have it! Growing sweet peppers indoors might seem like a daunting task, but with a little patience, the right setup, and these simple DIY tricks, you can enjoy a bountiful harvest of fresh, delicious peppers right from the comfort of your home. Forget those bland, overpriced peppers from the grocery store – imagine the vibrant colors and intense flavors of homegrown sweet peppers gracing your salads, stir-fries, and snacks, even in the dead of winter.
This isn’t just about saving money; it’s about connecting with your food, understanding the growing process, and experiencing the immense satisfaction of nurturing a plant from seed to table. Plus, it’s a fantastic way to add a touch of green to your indoor space and boost your mood with the vibrant energy of living plants.
But the best part? You can customize this process to perfectly suit your needs and preferences. Experiment with different varieties of sweet peppers – from the classic bell pepper to the sweeter banana pepper or even the slightly spicy poblano. Try different potting mixes to see which one yields the best results for you. And don’t be afraid to get creative with your lighting setup – a combination of natural and artificial light might be the key to unlocking even greater yields.
Consider these variations to elevate your indoor pepper growing game:
* Hydroponics: For a more advanced approach, explore hydroponic systems. These soilless setups can provide even faster growth and higher yields, although they require a bit more initial investment and monitoring.
* Vertical Gardening: If space is limited, consider a vertical garden setup. This allows you to grow multiple pepper plants in a small area, maximizing your harvest potential.
* Companion Planting: Introduce companion plants like basil or marigolds to your indoor pepper garden. These plants can help deter pests and attract beneficial insects, creating a healthier and more productive environment.
The key to success with growing sweet peppers indoors is observation and adaptation. Pay close attention to your plants’ needs, adjust your watering and feeding schedule as necessary, and don’t be afraid to experiment. Remember, every growing environment is unique, so what works for one person might not work for another.
We’re confident that with these DIY tricks and a little bit of love, you’ll be well on your way to enjoying a delicious harvest of homegrown sweet peppers. So, grab your seeds, gather your supplies, and get ready to embark on this rewarding journey.
We’d love to hear about your experiences! Share your tips, tricks, and photos of your indoor pepper gardens in the comments below. Let’s create a community of indoor pepper growers and learn from each other. Happy growing!
Frequently Asked Questions (FAQ)
What are the best varieties of sweet peppers to grow indoors?
Choosing the right variety is crucial for indoor success. Smaller, more compact varieties tend to thrive better in containers. Some excellent choices include:
* ‘Sweet Palermo’: These elongated peppers are incredibly sweet and productive, even in smaller spaces.
* ‘Mini Bell’: As the name suggests, these are miniature bell peppers that are perfect for snacking and easy to grow indoors.
* ‘Lunchbox Peppers’: These colorful, bite-sized peppers are not only delicious but also visually appealing, making them a great addition to any indoor garden.
* ‘Gypsy’: A fast-maturing variety that produces sweet, yellow peppers. Its early maturity is advantageous for indoor growing where conditions might not always be optimal.
* ‘Banana Pepper’: While often pickled, fresh banana peppers offer a mild sweetness and are relatively easy to grow in containers.
Consider the size of your growing space and the amount of light available when selecting your pepper varieties.
How much light do sweet peppers need when grown indoors?
Light is arguably the most critical factor for successful indoor pepper growing. Sweet peppers require at least 6-8 hours of direct sunlight per day. If you don’t have a south-facing window that provides adequate sunlight, you’ll need to supplement with artificial grow lights.
Full-spectrum LED grow lights are an excellent choice, as they provide the necessary wavelengths of light for optimal plant growth. Position the lights close enough to the plants (usually 6-12 inches) to provide sufficient intensity, but not so close that they burn the leaves. Adjust the height of the lights as the plants grow to maintain the optimal distance. A timer can automate the on/off cycle, ensuring consistent light exposure.
What type of soil is best for growing sweet peppers in containers?
Sweet peppers need well-draining soil that is rich in organic matter. A good potting mix will provide the necessary nutrients and drainage for healthy root development. Avoid using garden soil, as it can become compacted in containers and hinder drainage.
A suitable potting mix can be made by combining equal parts of:
* Peat moss or coco coir: These provide moisture retention and aeration.
* Perlite or vermiculite: These improve drainage and prevent soil compaction.
* Compost: This adds essential nutrients and beneficial microbes to the soil.
You can also purchase pre-made potting mixes specifically formulated for vegetables or container gardening.
How often should I water my indoor sweet pepper plants?
Watering frequency depends on several factors, including the size of the container, the type of potting mix, the temperature, and the humidity. Generally, you should water your pepper plants when the top inch of soil feels dry to the touch.
Water thoroughly until water drains out of the bottom of the container. Avoid overwatering, as this can lead to root rot. Also, avoid letting the soil dry out completely, as this can stress the plants.
During the flowering and fruiting stages, sweet peppers require more water than during the vegetative stage. Monitor your plants closely and adjust your watering schedule accordingly.
How do I fertilize my indoor sweet pepper plants?
Sweet peppers are heavy feeders and require regular fertilization to produce a bountiful harvest. Start fertilizing your plants a few weeks after transplanting them into their final containers.
Use a balanced fertilizer with an NPK ratio (nitrogen, phosphorus, potassium) of 10-10-10 or 14-14-14 during the vegetative stage. Once the plants start flowering, switch to a fertilizer with a higher phosphorus content, such as 5-10-5 or 10-15-10, to promote fruit development.
Follow the instructions on the fertilizer label for application rates. You can use a liquid fertilizer diluted in water or a slow-release granular fertilizer. Fertilize every 2-3 weeks during the growing season.
How do I pollinate my indoor sweet pepper plants?
Since there are no bees or other pollinators indoors, you’ll need to manually pollinate your sweet pepper plants. This is a simple process that can be done by gently shaking the plants or using a small paintbrush to transfer pollen from one flower to another.
The best time to pollinate is in the morning when the pollen is dry and easily released. Repeat the pollination process every few days to ensure that all the flowers are pollinated.
What are some common pests and diseases that affect indoor sweet pepper plants?
Indoor sweet pepper plants are susceptible to several pests and diseases, including aphids, spider mites, whiteflies, and fungal diseases like powdery mildew.
Regularly inspect your plants for signs of pests or diseases. If you find any, take action immediately to prevent them from spreading.
Some common pest control methods include:
* Insecticidal soap: This is effective against aphids, spider mites, and whiteflies.
* Neem oil: This is a natural insecticide and fungicide that can be used to control a wide range of pests and diseases.
* Sticky traps: These can be used to trap flying insects like whiteflies and fungus gnats.
To prevent fungal diseases, ensure good air circulation around your plants and avoid overwatering. If you notice any signs of disease, remove the affected leaves or stems and treat the plants with a fungicide.
How long does it take for sweet peppers to mature indoors?
The time it takes for sweet peppers to mature indoors depends on the variety and the growing conditions. Generally, it takes about 60-90 days from transplanting to harvest.
The peppers are ready to harvest when they have reached their mature size and color. Gently twist or cut the peppers from the plant, being careful not to damage the stems.
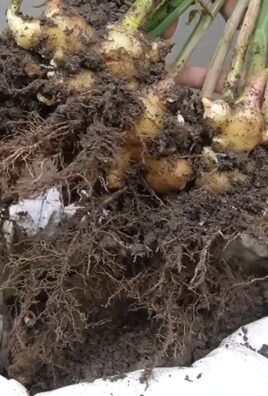
Can I overwinter my indoor sweet pepper plants?
Yes, you can overwinter your indoor sweet pepper plants to enjoy another harvest the following year. To overwinter your plants, reduce watering and fertilization in the fall. Prune back the plants to about one-third of their original size.
Move the plants to a cool, dark location, such as a basement or garage, where the temperature stays above freezing. Water sparingly throughout the winter, just enough to keep the soil from drying out completely.
In the spring, gradually acclimate the plants to warmer temperatures and brighter light. Repot them into fresh potting mix and resume regular watering and fertilization.

Leave a Comment