

Grow Angled Luffa at Home and unlock a world of homegrown goodness! Have you ever dreamed of harvesting your own natural sponges, right from your backyard? It sounds like something out of a fairytale, doesn’t it? Well, it’s entirely possible, and I’m here to guide you through the process with some simple, yet effective DIY tricks.
The Luffa, also known as the sponge gourd, has a rich history, particularly in Asian cultures, where it’s been cultivated for centuries not only for its fibrous interior but also as a delicious vegetable when young. Imagine the satisfaction of using a sponge you nurtured from seed to scrub, or even better, enjoying a stir-fry with your very own homegrown luffa!
In today’s world, where sustainability and natural living are gaining momentum, learning to grow angled luffa at home is more relevant than ever. Why spend money on synthetic sponges filled with chemicals when you can create your own eco-friendly alternative? Plus, it’s a fantastic way to connect with nature, reduce your carbon footprint, and impress your friends with your gardening prowess. This DIY guide will provide you with the essential hacks and tips to successfully cultivate these fascinating gourds, even if you have limited space or gardening experience. Let’s get started!
Grow Your Own Angled Luffa Sponges: A DIY Guide
Hey there, fellow gardening enthusiasts! Ever thought about growing your own sponges? I know, it sounds a little crazy, but it’s totally doable and incredibly rewarding. I’m talking about angled luffa, also known as Chinese okra or ridge gourd. These amazing gourds, when dried, transform into fantastic natural sponges perfect for everything from exfoliating in the shower to scrubbing your dishes. Plus, they’re delicious when young! So, let’s dive into how you can cultivate these beauties in your own backyard.
Choosing the Right Variety and Starting Seeds
Before we get our hands dirty, let’s talk about variety and seed starting. Not all luffas are created equal!
* Variety Selection: Look for angled luffa seeds specifically (Luffa acutangula). They’re generally easier to grow than smooth luffa (Luffa aegyptiaca), especially in shorter growing seasons. Check your local climate and choose a variety that matures within your region’s warm weather window.
* Seed Starting Indoors (Recommended): Angled luffa needs a long growing season, so starting seeds indoors is highly recommended, especially if you live in a cooler climate. Start about 6-8 weeks before your last expected frost.
1. Soaking the Seeds: To help with germination, soak the luffa seeds in warm water for 24 hours. This softens the hard outer shell and encourages sprouting. I like to use a small bowl and place it in a warm spot.
2. Preparing the Seed Starting Mix: Use a well-draining seed starting mix. Avoid using garden soil, as it can be too heavy and compact. I usually mix equal parts peat moss, perlite, and vermiculite.
3. Planting the Seeds: Fill your seed starting trays or pots with the mix. Plant the seeds about 1 inch deep. I usually plant two seeds per cell to increase my chances of germination.
4. Watering and Warmth: Gently water the soil until it’s moist but not soggy. Cover the trays with a plastic dome or plastic wrap to create a humid environment. Place the trays in a warm location, ideally around 80-85°F (27-29°C). A heat mat can be really helpful here.
5. Germination: Keep the soil consistently moist. Germination usually takes about 7-14 days. Once the seedlings emerge, remove the plastic cover and place them under grow lights or in a sunny window.
6. Thinning (If Necessary): If both seeds in a cell germinate, thin out the weaker seedling by snipping it off at the soil line. Don’t pull it out, as this can disturb the roots of the remaining seedling.
* Direct Sowing (If Warm Climate): If you live in a region with a long, warm growing season, you can direct sow the seeds into the garden after the last frost. Make sure the soil temperature is consistently above 70°F (21°C). Follow steps 1-3 above, but plant the seeds directly into the garden bed.
Preparing the Garden Bed
Luffa vines are vigorous growers and need plenty of space and support. Proper bed preparation is crucial for a successful harvest.
* Sunlight: Choose a location that receives at least 6-8 hours of direct sunlight per day. Luffa plants thrive in full sun.
* Soil: Luffa prefers well-drained, fertile soil. Amend the soil with plenty of compost or well-rotted manure before planting. This will provide the necessary nutrients for healthy growth. I usually dig in a generous amount of compost a few weeks before planting.
* Support System: Luffa vines need a strong support system to climb on. A sturdy trellis, fence, or pergola works well. The support should be at least 6-8 feet tall. I’ve used everything from cattle panels to homemade wooden trellises. The stronger, the better!
* Spacing: Space the plants 2-3 feet apart along the trellis or support system. This allows for adequate air circulation and prevents overcrowding.
Transplanting Seedlings (If Started Indoors)
Once the seedlings have developed a few sets of true leaves and the danger of frost has passed, it’s time to transplant them into the garden.
1. Hardening Off: Before transplanting, harden off the seedlings by gradually exposing them to outdoor conditions. Start by placing them in a sheltered location for a few hours each day, gradually increasing the amount of time they spend outdoors over the course of a week. This helps them acclimate to the sun, wind, and temperature changes.
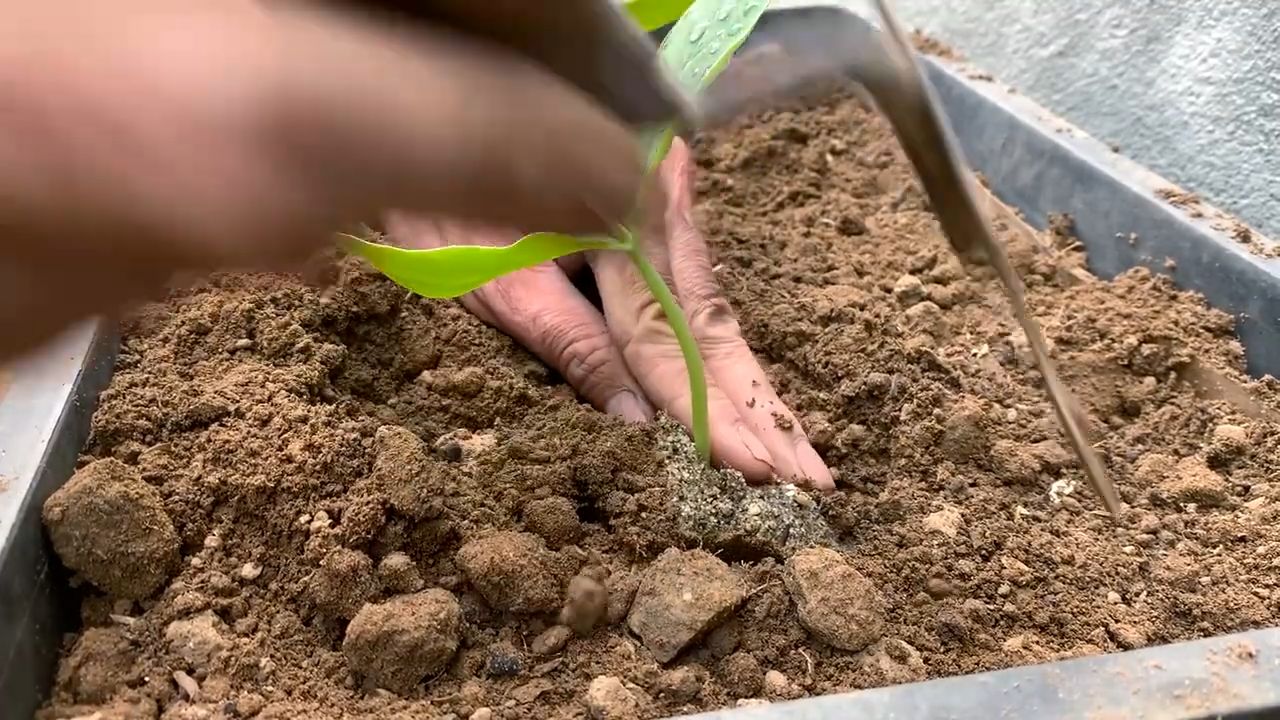
2. Transplanting: Dig holes that are slightly larger than the root balls of the seedlings. Gently remove the seedlings from their containers and place them in the holes. Backfill with soil and water thoroughly.
3. Mulching: Apply a layer of mulch around the base of the plants to help retain moisture, suppress weeds, and regulate soil temperature. I like to use straw or wood chips.
Caring for Your Luffa Plants
Now that your luffa plants are in the ground, it’s time to provide them with the care they need to thrive.
* Watering: Luffa plants need consistent watering, especially during hot, dry weather. Water deeply and regularly, ensuring the soil stays moist but not waterlogged. I usually water early in the morning to allow the foliage to dry before nightfall, which helps prevent fungal diseases.
* Fertilizing: Feed the plants with a balanced fertilizer every 2-3 weeks. You can also side-dress with compost or well-rotted manure. Avoid over-fertilizing, as this can lead to excessive foliage growth and fewer fruits.
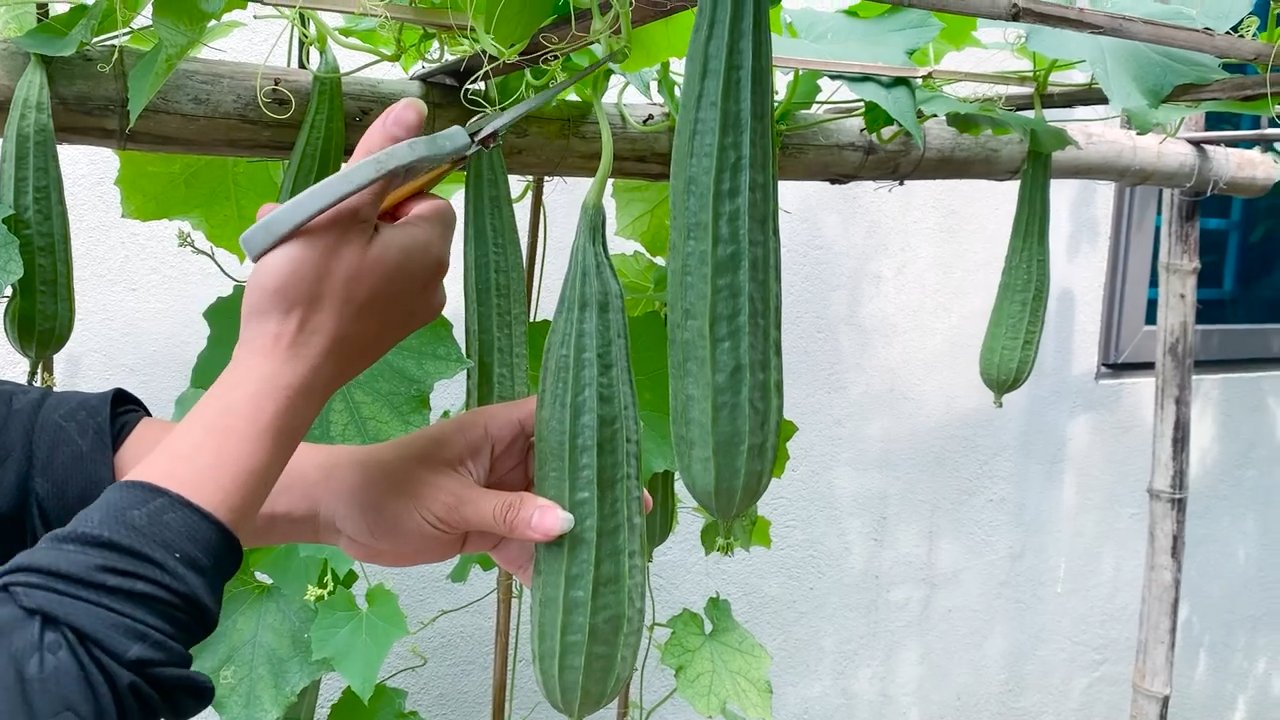
* Pruning: Prune the vines to encourage branching and fruit production. Remove any yellowing or dead leaves. You can also pinch off the tips of the vines to encourage lateral growth.
* Pollination: Luffa plants produce both male and female flowers. The female flowers have a small luffa fruit behind them. Bees and other pollinators are essential for pollination. If you notice a lack of fruit set, you can hand-pollinate the flowers by transferring pollen from the male flowers to the female flowers using a small brush. I usually do this early in the morning when the flowers are open.
* Pest and Disease Control: Keep an eye out for pests such as aphids, squash bugs, and cucumber beetles. Treat infestations with insecticidal soap or neem oil. Prevent fungal diseases by providing good air circulation and avoiding overhead watering.
Harvesting and Processing Your Luffa Sponges
This is the exciting part! Harvesting and processing your own luffa sponges is incredibly satisfying.
* Harvesting: Harvest the luffa fruits when they are mature and the skin has turned brown and dry. The fruits should feel lightweight and the seeds should rattle inside. It’s best to harvest before the first frost.
* Peeling: To peel the luffa, you can either soak it in water for a few days to soften the skin or simply peel it off with your hands. I find that soaking makes the process easier.
* Seed Removal: After peeling, shake out the seeds. You can save these seeds for planting next year.
* Washing: Rinse the luffa thoroughly with water to remove any remaining pulp or debris.
* Drying: Dry the luffa in a well-ventilated area or in the sun. This can take several weeks. Make sure the luffa is completely dry before storing it.
* Bleaching (Optional): If you want a whiter sponge, you can soak the dried luffa in a diluted bleach solution for a few minutes. Rinse thoroughly with water and dry again. I personally prefer to leave mine natural.
* Cutting and Shaping: Once the luffa is dry, you can cut it into smaller pieces and shape it as desired. I like to cut mine into different sizes for various uses.
Using Your Homegrown Luffa Sponges
Now that you have your own homegrown luffa sponges, it’s time to put them to use!
* Exfoliating: Luffa sponges are excellent for exfoliating the skin. Use them in the shower or bath to remove dead skin cells and improve circulation.
* Dishwashing: Luffa sponges are also great for washing dishes. They’re gentle enough for delicate items but strong enough to scrub away stubborn food particles.
* Gardening: Use luffa sponges to scrub your gardening tools or to clean plant pots.
* Crafting: Get creative and use luffa sponges in your craft projects. They can be used to make decorative items, bath products, and more.
Growing angled luffa at home is a rewarding experience that provides you with natural, sustainable sponges. With a little patience and care, you can enjoy a bountiful harvest of these amazing gour
Conclusion
So, there you have it! Growing your own angled luffa at home is not only achievable but also incredibly rewarding. Forget those expensive, mass-produced luffa sponges filled with questionable chemicals. With a little patience and effort, you can cultivate your own sustainable, all-natural exfoliating wonders right in your backyard. This DIY project offers a unique connection to nature, allowing you to witness the entire life cycle of this fascinating plant, from tiny seed to bountiful sponge.
But why is this DIY trick a must-try? Beyond the obvious benefit of having a readily available supply of natural luffa sponges, consider the environmental impact. By growing your own, you’re reducing your reliance on commercially produced sponges, which often contribute to plastic waste and unsustainable farming practices. You’re also gaining a deeper appreciation for the effort that goes into producing the everyday items we often take for granted. Plus, let’s be honest, there’s something incredibly satisfying about using a sponge you grew yourself!
The possibilities don’t end with the standard angled luffa sponge. Experiment with different varieties of luffa seeds to discover which ones thrive best in your climate. You can also explore different drying and processing techniques to achieve varying textures and sizes. Consider adding essential oils to your luffa sponges after they’re dried for an aromatherapy experience during your shower. Or, get creative and use smaller pieces of luffa in homemade soaps or bath bombs. The only limit is your imagination!
We encourage you to embark on this exciting gardening adventure and discover the joys of growing your own angled luffa. Don’t be afraid to experiment, learn from your mistakes, and most importantly, have fun! Once you’ve harvested your first crop of luffa sponges, we’d love to hear about your experience. Share your tips, tricks, and photos with us in the comments below. Let’s build a community of luffa-loving gardeners and inspire others to embrace this sustainable and rewarding DIY project. Remember, growing your own angled luffa is more than just a gardening project; it’s a step towards a more sustainable and fulfilling lifestyle. So, grab your seeds, get your hands dirty, and prepare to be amazed by the wonders of nature!
Ready to ditch the store-bought sponges and embrace the natural goodness of homegrown luffa?
Don’t wait, start your angled luffa growing journey today!
Frequently Asked Questions (FAQ)
What is the best time to plant angled luffa seeds?
The ideal time to plant angled luffa seeds is after the last frost, when the soil has warmed up to at least 70°F (21°C). Luffa plants are heat-loving and require a long growing season of at least 150-200 days to mature properly. If you live in a cooler climate with a shorter growing season, you can start the seeds indoors 6-8 weeks before the last expected frost and transplant them outdoors once the weather warms up. Starting indoors gives the plants a head start and ensures they have enough time to produce mature luffa gourds.
How much space do angled luffa plants need?
Angled luffa plants are vigorous climbers and require ample space to grow. They can easily reach lengths of 20-30 feet (6-9 meters), so it’s essential to provide them with a sturdy trellis or support structure. Space the plants at least 3-4 feet (1-1.2 meters) apart to allow for adequate air circulation and prevent overcrowding. If you’re growing them on a fence, make sure the fence is strong enough to support the weight of the mature vines and gourds. Proper spacing and support are crucial for healthy growth and abundant luffa production.
What kind of soil is best for growing angled luffa?
Angled luffa plants thrive in well-drained, fertile soil that is rich in organic matter. Amend the soil with compost, aged manure, or other organic materials before planting to improve its fertility and drainage. The ideal soil pH for luffa is between 6.0 and 7.0. Avoid planting in heavy clay soil, as it can become waterlogged and hinder root development. If you have clay soil, consider amending it with sand and organic matter to improve its drainage. Regular soil testing can help you determine if your soil needs any amendments to provide the optimal growing conditions for your luffa plants.
How often should I water angled luffa plants?
Angled luffa plants require consistent watering, especially during hot and dry weather. Water deeply and regularly, ensuring that the soil remains moist but not waterlogged. Avoid overhead watering, as it can promote fungal diseases. Instead, water at the base of the plants using a soaker hose or drip irrigation system. Mulching around the plants can help retain moisture in the soil and suppress weed growth. During periods of heavy rainfall, you may need to reduce watering to prevent root rot. Monitor the soil moisture regularly and adjust your watering schedule accordingly.
How do I know when angled luffa gourds are ready to harvest?
The best time to harvest angled luffa gourds for sponges is when they are fully mature and have turned yellow or brown. The skin should be dry and brittle, and the gourd should feel lightweight. You can also gently squeeze the gourd to check for ripeness. If it feels firm and the seeds rattle inside, it’s ready to harvest. Use a sharp knife or pruning shears to cut the gourd from the vine, leaving a few inches of stem attached. Avoid harvesting immature gourds, as they will not develop into good-quality sponges.
How do I process angled luffa gourds to make sponges?
Processing angled luffa gourds to make sponges is a relatively simple process. First, soak the harvested gourds in water for a few days to soften the skin. Then, use your hands or a knife to peel off the outer skin, revealing the fibrous sponge inside. Remove the seeds and any remaining pulp. Rinse the sponge thoroughly with water and allow it to dry completely in a well-ventilated area. You can also soak the sponge in a diluted bleach solution to disinfect it and remove any remaining debris. Once the sponge is dry, it’s ready to use!
Can I eat angled luffa?
Yes, young angled luffa gourds can be eaten as a vegetable. They are similar in taste and texture to zucchini or summer squash. Harvest the gourds when they are young and tender, before the fibers develop. You can use them in stir-fries, soups, stews, or any other dish that calls for summer squash. However, mature luffa gourds are too fibrous to eat and are best used for making sponges.
Are there any pests or diseases that affect angled luffa plants?
Angled luffa plants are generally resistant to pests and diseases, but they can be susceptible to certain problems, such as squash bugs, vine borers, and powdery mildew. Inspect your plants regularly for signs of infestation or disease and take appropriate action if necessary. You can use organic pest control methods, such as insecticidal soap or neem oil, to control pests. To prevent powdery mildew, ensure good air circulation around the plants and avoid overhead watering. If you notice any signs of disease, remove the affected leaves or vines to prevent it from spreading.
Can I save seeds from my angled luffa gourds to plant next year?
Yes, you can save seeds from your angled luffa gourds to plant next year. Allow a few gourds to fully mature on the vine and dry completely. Once the gourds are dry, crack them open and remove the seeds. Spread the seeds out on a paper towel to dry completely. Store the dried seeds in an airtight container in a cool, dark, and dry place. Properly stored luffa seeds can remain viable for several years.
How can I use angled luffa besides as a body sponge?
Angled luffa has many uses beyond being a body sponge! You can use smaller pieces of luffa in homemade soaps, bath bombs, or even as pot scrubbers. Luffa can also be used in crafts, such as creating decorative wreaths or filling for stuffed animals. Some people even use luffa as a natural filter in aquariums. The possibilities are endless!
Leave a Comment