

Small space gardening ideas can transform even the tiniest balcony or patio into a thriving oasis! Are you dreaming of fresh herbs, vibrant flowers, or even homegrown veggies, but think you don’t have enough room? I’m here to tell you that’s simply not true! For centuries, people have cultivated gardens in limited areas, from the hanging gardens of Babylon to the intricate courtyard gardens of Japan, proving that size isn’t everything when it comes to growing your own little piece of paradise.
In today’s world, where urban living is increasingly common, small space gardening ideas are more relevant than ever. We all crave a connection with nature, and gardening offers a fantastic way to de-stress, improve our well-being, and even reduce our carbon footprint. But let’s face it, not everyone has access to sprawling acres of land. That’s where these clever DIY tricks and hacks come in!
This article is packed with creative and practical solutions to help you maximize every inch of your available space. I’ll share my favorite tips for vertical gardening, container gardening, choosing the right plants, and even building your own space-saving structures. Get ready to unleash your inner gardener and create a beautiful and productive garden, no matter how small your space may be!

Transform Your Tiny Space into a Lush Garden Oasis!
Hey there, fellow garden enthusiasts! Living in a small apartment or having a limited outdoor area doesn’t mean you have to give up on your gardening dreams. I’m here to show you how to maximize every inch of your space and create a thriving garden, no matter how small it is. We’ll explore some clever DIY hacks and techniques that will have you harvesting fresh herbs, vegetables, and beautiful flowers in no time. Let’s get our hands dirty!
Choosing the Right Plants for Small Spaces
Before we dive into the DIY projects, it’s crucial to select plants that are well-suited for container gardening and limited spaces. Look for compact varieties and plants that don’t require excessive sunlight if you have a shady balcony or patio.
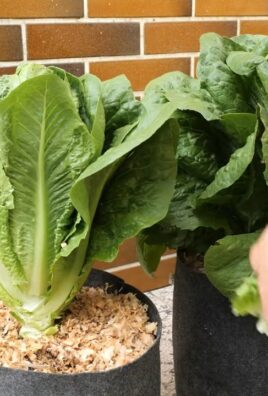
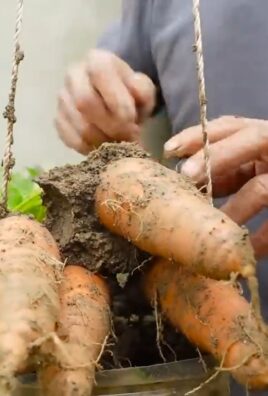
* Compact Vegetables: Think bush beans, dwarf tomatoes, peppers, radishes, lettuce, spinach, and herbs like basil, thyme, and rosemary. These are all fantastic choices for containers.
* Trailing Plants: These are great for adding visual interest and maximizing vertical space. Consider trailing herbs like creeping thyme, or flowering plants like petunias, verbena, and calibrachoa.
* Dwarf Fruit Trees: Yes, you can even grow fruit in small spaces! Look for dwarf varieties of citrus trees, apples, pears, or figs that are specifically bred for container gardening.
* Flowers for Pollinators: Attract bees and butterflies to your garden by including flowers like lavender, salvia, zinnias, and cosmos. These will not only add beauty but also help pollinate your vegetables.
* Consider Your Climate: Choose plants that are appropriate for your local climate and growing season. This will ensure that your plants thrive and produce a bountiful harvest.
DIY Vertical Garden from Pallets
Vertical gardens are a fantastic way to maximize space and add a touch of greenery to any wall or fence. Pallets are readily available (often for free!) and can be easily transformed into a stunning vertical garden.
Materials You’ll Need:
* A wooden pallet (look for one that’s heat-treated and not chemically treated)
* Heavy-duty landscape fabric
* Staple gun and staples
* Gloves
* Scissors
* Potting soil
* Plants of your choice
* Sandpaper (optional, for smoothing rough edges)
* Exterior wood sealant or paint (optional, for weatherproofing)
Step-by-Step Instructions:
1. Prepare the Pallet: First, inspect the pallet for any loose nails or splinters. Sand down any rough edges to prevent injuries. If you want to protect the wood from the elements and give it a more polished look, apply a coat of exterior wood sealant or paint. Let it dry completely before proceeding.
2. Line the Pallet: This is where the landscape fabric comes in. We’ll use it to create pockets for the soil and plants. Start by cutting the landscape fabric into pieces that are slightly larger than the openings in the pallet.
3. Create the Pockets: Now, carefully staple the landscape fabric to the inside of each opening in the pallet, creating a pocket. Make sure the fabric is securely attached and that there are no gaps where soil can escape. Overlap the fabric slightly to ensure a strong and durable pocket. I usually do two layers of fabric for extra security.
4. Reinforce the Bottom: Pay special attention to the bottom of each pocket. This is where the weight of the soil and plants will be concentrated, so you want to make sure it’s extra strong. You can add an extra layer of landscape fabric or even use a piece of wood to reinforce the bottom.
5. Fill the Pockets with Soil: Once the pockets are lined, it’s time to fill them with potting soil. Use a high-quality potting mix that is well-draining and rich in nutrients. Gently pack the soil into each pocket, leaving enough space for the plants.
6. Plant Your Plants: Now comes the fun part! Carefully remove your plants from their containers and gently loosen the roots. Plant them in the pockets, making sure the roots are well-covered with soil. Choose plants that are appropriate for the size of the pockets and that complement each other in terms of color and texture.
7. Water Thoroughly: After planting, water the vertical garden thoroughly. This will help settle the soil and ensure that the plants get a good start.
8. Hang or Lean the Pallet: You can either hang the pallet on a wall or fence using heavy-duty hooks or lean it against a sturdy surface. Make sure the pallet is securely positioned and won’t tip over.
9. Maintain Your Garden: Water your vertical garden regularly, especially during hot and dry weather. Fertilize the plants as needed to promote healthy growth. Trim any dead or dying leaves to keep the garden looking its best.
DIY Hanging Gutter Garden
Another fantastic way to maximize space is by creating a hanging gutter garden. This is a simple and affordable project that can be easily customized to fit your specific needs and preferences.
Materials You’ll Need:
* PVC gutters (the length will depend on your space)
* End caps for the gutters
* Drill and drill bits
* Hanging brackets or chains
* Potting soil
* Plants of your choice
Step-by-Step Instructions:
1. Prepare the Gutters: Start by cutting the gutters to the desired length. Attach the end caps to each end of the gutters to prevent soil from spilling out. You can use PVC cement to secure the end caps, or simply press them on tightly.
2. Drill Drainage Holes: Drainage is essential for healthy plant growth. Drill drainage holes along the bottom of the gutters, spacing them about 6-8 inches apart. This will allow excess water to drain out and prevent the soil from becoming waterlogged.
3. Attach Hanging Brackets or Chains: Decide how you want to hang your gutter garden. You can use hanging brackets that attach to a wall or fence, or you can use chains to suspend the gutters from a ceiling or pergola. Attach the brackets or chains to the gutters, making sure they are securely fastened.
4. Fill the Gutters with Soil: Fill the gutters with a high-quality potting mix. Leave about an inch of space at the top of the gutters to prevent soil from spilling out when you water.
5. Plant Your Plants: Plant your plants in the gutters, spacing them according to their mature size. Choose plants that are well-suited for container gardening and that will thrive in the amount of sunlight your hanging garden receives.
6. Hang the Gutters: Carefully hang the gutters in their designated location. Make sure the brackets or chains are strong enough to support the weight of the gutters, soil, and plants.
7. Water Thoroughly: Water the hanging gutter garden thoroughly after planting. This will help settle the soil and ensure that the plants get a good start.
8. Maintain Your Garden: Water your hanging gutter garden regularly, especially during hot and dry weather. Fertilize the plants as needed to promote healthy growth. Trim any dead or dying leaves to keep the garden looking its best.
DIY Herb Spiral
An herb spiral is not only a beautiful addition to any garden, but it’s also a highly efficient way to grow a variety of herbs in a small space. The spiral design creates different microclimates, allowing you to grow herbs that prefer different levels of sunlight and moisture.
Materials You’ll Need:
* Bricks, stones, or other materials for building the spiral
* Gravel or crushed stone for drainage
* Potting soil
* Herbs of your choice
Step-by-Step Instructions:
1. Choose a Location: Select a sunny location for your herb spiral. It should receive at least 6 hours of sunlight per day.
2. Mark the Spiral: Use a rope or garden hose to mark out the spiral shape on the ground. The spiral should start at the center and gradually widen as it spirals outwards.
3. Build the Walls: Start building the walls of the spiral using bricks, stones, or other materials. The walls should gradually increase in height as you spiral outwards, creating a tiered effect.
4. Add Drainage: Add a layer of gravel or crushed stone to the bottom of the spiral to improve drainage. This will prevent the soil from becoming waterlogged.
5. Fill with Soil: Fill the spiral with a high-quality potting mix. The soil should be well-draining and rich in nutrients.
6. Plant Your Herbs: Plant your herbs in the spiral, placing them according to their sunlight and moisture requirements. Herbs that prefer dry conditions, such as rosemary and thyme, should be planted at the top of the spiral, while herbs that prefer moist conditions, such as mint and parsley, should be planted at the bottom.
7. Water Thoroughly: Water the herb spiral thoroughly after planting. This will help settle the soil and ensure that the herbs get a good start.
8. Maintain Your Garden
Conclusion
So, there you have it! Transforming a cramped balcony, a sun-drenched windowsill, or even a neglected corner of your patio into a thriving green oasis is not only possible, but surprisingly rewarding. These small space gardening ideas are more than just a trend; they’re a practical solution for bringing the joy of gardening to everyone, regardless of their living situation.
We’ve explored a range of techniques, from the vertical charm of stacked planters and hanging baskets to the space-saving efficiency of container gardening and the innovative use of repurposed materials. Each method offers a unique way to maximize your limited area and cultivate a vibrant collection of herbs, vegetables, flowers, or even a miniature fruit tree.
But why is this DIY approach a must-try? Because it empowers you to take control of your environment, to connect with nature in a meaningful way, and to enjoy the freshest, most flavorful produce right at your doorstep. Imagine snipping fragrant basil from your balcony garden to garnish your pasta, or harvesting juicy tomatoes from your patio containers for a summer salad. The satisfaction of growing your own food and flowers is unparalleled, and it’s an experience that everyone deserves to enjoy.
Don’t be afraid to experiment and personalize your small space garden. Try different combinations of plants, play with colors and textures, and let your creativity guide you. Consider adding companion plants to deter pests naturally, or incorporating a small water feature to attract beneficial insects. For example, marigolds are excellent companions for tomatoes, repelling nematodes and other unwanted visitors. You could also try growing herbs like mint and rosemary in containers near your seating area to create a fragrant and relaxing atmosphere.
And remember, success in small space gardening often comes down to careful planning and attention to detail. Choose the right soil mix for your plants, provide adequate drainage, and water regularly, especially during hot weather. Consider using a slow-release fertilizer to provide your plants with a steady supply of nutrients.
We encourage you to embrace these small space gardening ideas and embark on your own green journey. Start small, learn as you go, and don’t be discouraged by setbacks. Gardening is a process of continuous learning and experimentation, and the rewards are well worth the effort.
Once you’ve created your own miniature paradise, we’d love to hear about your experience! Share your photos, tips, and challenges in the comments below. Let’s inspire each other to transform even the smallest spaces into thriving gardens. Your success story could be just the encouragement someone else needs to get started. So, grab your gardening gloves, get your hands dirty, and let’s grow something amazing together!
FAQ
What are the best plants for a small space garden?
Choosing the right plants is crucial for success in small space gardening. Consider compact varieties of vegetables, herbs, and flowers that are well-suited to container growing. Some excellent options include:
* **Vegetables:** Bush beans, cherry tomatoes, dwarf peppers, lettuce, spinach, radishes, and herbs like basil, parsley, and chives. Look for “patio” or “dwarf” varieties specifically bred for containers.
* **Flowers:** Petunias, pansies, impatiens, begonias, marigolds, and calibrachoa are all excellent choices for adding color and beauty to your small space garden. Consider trailing varieties for hanging baskets and window boxes.
* **Herbs:** Most herbs thrive in containers, making them perfect for small spaces. Consider growing basil, mint, rosemary, thyme, oregano, and chives. Be mindful of mint’s tendency to spread and keep it contained in its own pot.
* **Fruits:** Dwarf citrus trees, such as Meyer lemons and limes, can be grown in containers in warmer climates. Strawberries are also a great option for hanging baskets and containers.
How much sunlight do my plants need?
Sunlight is a critical factor for plant growth. Most vegetables and flowering plants require at least six hours of direct sunlight per day. However, some plants, like lettuce, spinach, and herbs like mint and parsley, can tolerate partial shade. Observe your space throughout the day to determine how much sunlight it receives and choose plants accordingly. If your space is shaded, consider using grow lights to supplement natural light.
What type of soil should I use for container gardening?
Using the right soil mix is essential for healthy plant growth in containers. Avoid using garden soil, as it can become compacted and poorly drained in containers. Instead, opt for a high-quality potting mix specifically formulated for container gardening. These mixes typically contain a blend of peat moss, perlite, and vermiculite, which provide good drainage, aeration, and water retention. You can also amend your potting mix with compost to add nutrients and improve soil structure.
How often should I water my plants?
Watering frequency depends on several factors, including the type of plant, the size of the container, the weather, and the soil mix. Generally, you should water your plants when the top inch of soil feels dry to the touch. Avoid overwatering, as this can lead to root rot. During hot weather, you may need to water your plants daily, or even twice a day. Consider using a moisture meter to accurately gauge the moisture level in your soil.
How do I fertilize my plants in containers?
Container plants rely on you to provide them with the nutrients they need to thrive. Use a balanced fertilizer specifically formulated for container gardening. You can use a slow-release fertilizer, which provides a steady supply of nutrients over several months, or a liquid fertilizer, which you apply every few weeks. Follow the instructions on the fertilizer label carefully to avoid over-fertilizing, which can damage your plants.
How do I deal with pests and diseases in my small space garden?
Prevention is key when it comes to pests and diseases in your small space garden. Inspect your plants regularly for signs of infestation or disease. Remove any affected leaves or plants immediately. You can also use organic pest control methods, such as insecticidal soap, neem oil, or diatomaceous earth, to control common pests like aphids, spider mites, and whiteflies. Encourage beneficial insects, such as ladybugs and lacewings, to visit your garden by planting flowers that attract them.
What are some creative ideas for small space gardening?
There are endless possibilities for creating a beautiful and productive small space garden. Here are a few creative ideas to get you started:
* **Vertical gardening:** Use trellises, hanging baskets, and stacked planters to maximize vertical space.
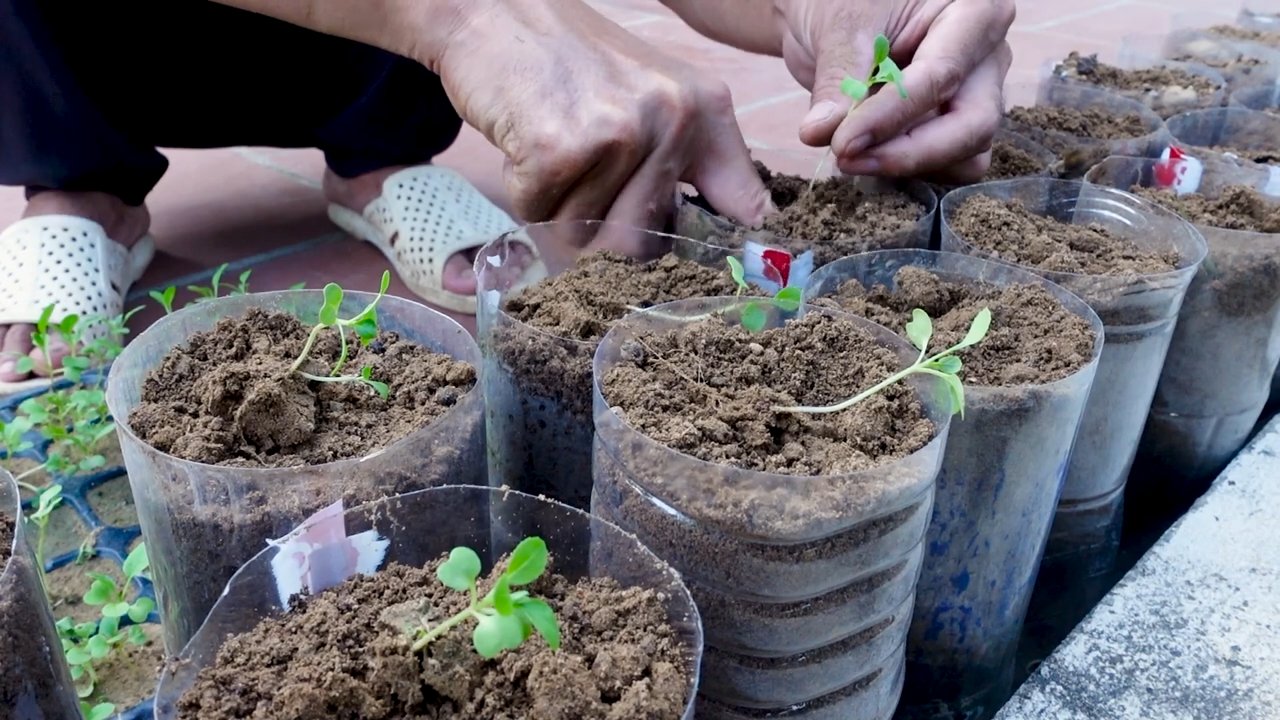
* **Repurposed containers:** Get creative with repurposed materials, such as old tires, pallets, and plastic bottles, to create unique and eco-friendly planters.
* **Window boxes:** Add a touch of charm to your windows with colorful window boxes filled with flowers or herbs.
* **Herb spirals:** Create a visually appealing and functional herb spiral using bricks or stones.
* **Living walls:** Transform a blank wall into a lush green oasis with a living wall system.
How can I make my small space garden more sustainable?
There are many ways to make your small space garden more sustainable. Consider these tips:
* **Composting:** Compost your kitchen scraps and yard waste to create nutrient-rich soil for your plants.
* **Water conservation:** Use a drip irrigation system or soaker hoses to water your plants efficiently. Collect rainwater in a rain barrel to reduce your water consumption.
* **Organic gardening:** Avoid using synthetic pesticides and fertilizers. Instead, opt for organic methods to control pests and diseases and nourish your plants.
* **Plant native species:** Choose native plants that are well-adapted to your local climate and require less water and maintenance.
* **Support local nurseries:** Purchase your plants from local nurseries to reduce your carbon footprint and support your community.

Leave a Comment