

Malabar Spinach Growing Tips: Unlock the secrets to a thriving, vibrant garden with this often-overlooked leafy green! Have you ever dreamt of stepping into your backyard and harvesting fresh, nutritious greens for a delicious and healthy meal? Well, dream no more! This DIY guide is your passport to cultivating your very own Malabar spinach haven, even if you think you have a “brown thumb.”
Malabar spinach, also known as Basella alba, isn’t actually a true spinach, but its succulent leaves and climbing habit have made it a beloved vegetable in Asian and African cuisines for centuries. Imagine adding its slightly peppery flavor to your stir-fries, soups, or salads – all grown with your own two hands!
But why should *you* specifically learn these Malabar spinach growing tips? Because it’s incredibly rewarding! Not only is Malabar spinach packed with vitamins and minerals, but it’s also surprisingly easy to grow, especially with the right knowledge. Many gardeners struggle with traditional spinach, which bolts quickly in warm weather. Malabar spinach, on the other hand, thrives in the heat, making it a perfect summer crop. Plus, its vining nature means it can add a beautiful vertical element to your garden. I’m excited to share my favorite Malabar spinach growing tips and tricks to help you enjoy a bountiful harvest all season long!
Growing Malabar Spinach: A Beginner’s Guide to This Climbing Green
Malabar spinach, also known as Ceylon spinach or vine spinach, isn’t actually spinach at all! It’s a heat-loving, fast-growing vine that thrives in warm climates. I’ve found it to be a fantastic addition to my garden, providing a continuous supply of delicious greens throughout the summer when traditional spinach bolts. If you’re looking for a low-maintenance, productive vegetable, Malabar spinach is definitely worth considering. Let me share my tips and tricks for successfully growing this amazing plant.
Choosing the Right Variety and Starting Seeds
Before you even get your hands dirty, you need to decide which variety of Malabar spinach you want to grow. There are two main types:
- Green-stemmed: This variety has green stems and leaves, and it’s the most common type you’ll find.
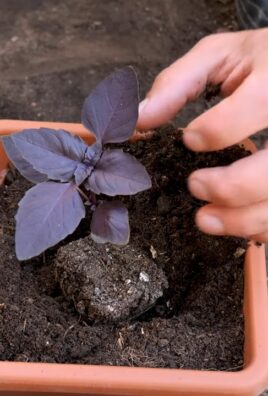
- Red-stemmed: As the name suggests, this variety has red stems and leaves, adding a beautiful splash of color to your garden. The taste is similar to the green-stemmed variety.
I personally prefer the red-stemmed variety for its visual appeal, but both are equally delicious.
Now, let’s talk about starting seeds. Malabar spinach seeds have a hard outer shell, which can make germination a bit tricky. Here’s how I get them to sprout successfully:
- Scarification: This is the key to breaking down that tough seed coat. Gently rub the seeds with sandpaper or nick them with a knife. Be careful not to damage the inside of the seed! I usually just give them a light scuffing.
- Soaking: After scarifying, soak the seeds in warm water for 24-48 hours. This helps to further soften the seed coat and encourages germination. I change the water every 12 hours.
- Sowing: You can start seeds indoors 6-8 weeks before the last expected frost, or direct sow them outdoors after the soil has warmed up to at least 70°F (21°C). I prefer starting them indoors to get a head start.
- Indoor Starting: Fill seed trays or small pots with a good quality seed-starting mix. Sow the seeds about ½ inch deep and keep the soil consistently moist. Place the trays in a warm location, ideally with a heat mat. Germination can take anywhere from 1-3 weeks.
- Direct Sowing: If direct sowing, plant the seeds about ½ inch deep and 2-3 inches apart. Thin the seedlings to 12-18 inches apart once they have a few true leaves.
Preparing the Soil and Planting Seedlings
Malabar spinach thrives in well-drained soil that’s rich in organic matter. Before planting, I always amend my soil with compost or well-rotted manure. This provides essential nutrients and improves drainage.
Here’s what I do to prepare the soil:
- Choose a sunny location: Malabar spinach needs at least 6 hours of sunlight per day.
- Amend the soil: Dig in plenty of compost or well-rotted manure. I usually add a couple of inches of compost to the topsoil and mix it in thoroughly.
- Ensure good drainage: Malabar spinach doesn’t like soggy soil, so make sure your soil drains well. If you have heavy clay soil, consider adding some sand or perlite to improve drainage.
- Provide a trellis or support: This is a climbing vine, so it needs something to climb on. A trellis, fence, or even a sturdy stake will work. I use a simple trellis made from bamboo poles.
Once your soil is prepared, it’s time to plant your seedlings.
- Harden off seedlings: If you started your seeds indoors, gradually acclimate them to outdoor conditions before planting. This process, called hardening off, involves exposing the seedlings to increasing amounts of sunlight and wind over a period of 7-10 days.
- Plant seedlings: Dig a hole slightly larger than the root ball of the seedling. Gently remove the seedling from its container and place it in the hole. Backfill with soil and water thoroughly. Space the seedlings 12-18 inches apart.
Caring for Your Malabar Spinach
Malabar spinach is relatively low-maintenance, but there are a few things you can do to ensure a bountiful harvest.
- Watering: Water regularly, especially during hot, dry weather. I aim to keep the soil consistently moist, but not waterlogged. A good rule of thumb is to water deeply once or twice a week, depending on the weather.
- Fertilizing: Feed your Malabar spinach every few weeks with a balanced fertilizer. I like to use a liquid seaweed fertilizer, which provides essential nutrients and promotes healthy growth.
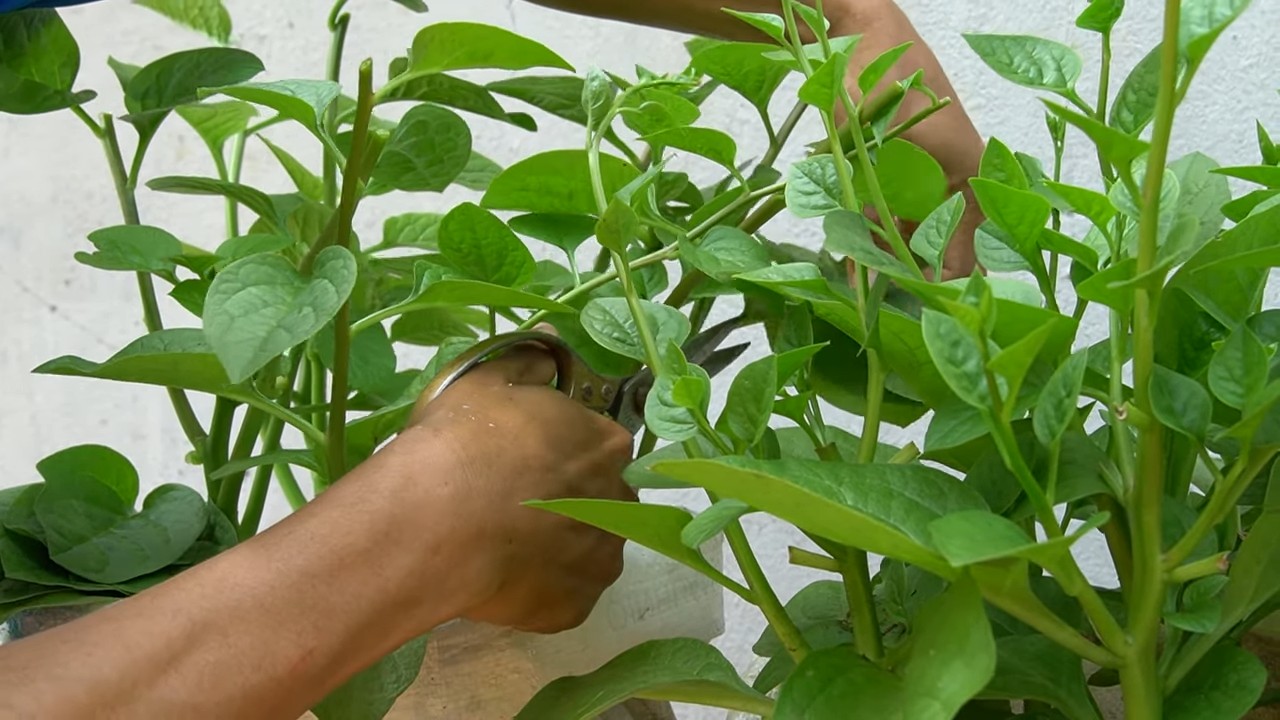
- Pruning: Regular pruning encourages bushier growth and prevents the vine from becoming too leggy. I pinch back the tips of the vines regularly to promote branching.
- Pest and Disease Control: Malabar spinach is generally pest and disease resistant. However, keep an eye out for aphids, spider mites, and leaf miners. If you spot any pests, treat them with insecticidal soap or neem oil. Good air circulation can help prevent fungal diseases.
Harvesting and Using Malabar Spinach
One of the best things about Malabar spinach is that you can start harvesting it as soon as the leaves are large enough to eat. I usually start harvesting when the vines are about 12 inches long.
Here’s how I harvest my Malabar spinach:
- Harvest regularly: The more you harvest, the more the plant will produce. I usually harvest a few leaves from each vine every week or two.
- Cut the stems: Use scissors or pruning shears to cut the stems just above a leaf node. This will encourage new growth.
- Wash the leaves: Wash the leaves thoroughly before using them.
Malabar spinach has a mild, slightly citrusy flavor. It can be used in a variety of dishes, including:
- Salads: The young, tender leaves are delicious in salads.
- Soups and stews: Malabar spinach adds a nice thickness to soups and stews.
- Stir-fries: It’s a great addition to stir-fries.
- Sauteed: You can saute it with garlic and olive oil for a simple and delicious side dish.
I personally love adding it to my smoothies for an extra boost of nutrients. The leaves are also great for thickening sauces and gravies.
Troubleshooting Common Problems
Even with the best care, you might encounter a few problems while growing Malabar spinach. Here are some common issues and how to address them:
- Slow germination: As mentioned earlier, Malabar spinach seeds can be slow to germinate. Make sure you scarify and soak the seeds before planting. Also, ensure the soil is warm enough.
- Yellowing leaves: Yellowing leaves can be a sign of nutrient deficiency. Try fertilizing with a balanced fertilizer or adding compost to the soil.
- Pest infestations: Keep an eye out for pests like aphids and spider mites. Treat them with insecticidal soap or neem oil.
- Fungal diseases: Good air circulation can help prevent fungal diseases. Avoid overcrowding the plants and water in the morning so the leaves have time to dry before nightfall.
Extending the Growing Season
Malabar spinach is a warm-weather crop, but you can extend the growing season by using a few simple techniques.
- Start seeds indoors: Starting seeds indoors gives you a head start on the growing season.
- Use row covers: Row covers can protect your plants from frost and extend the growing season by a few weeks.
- Grow in containers: Growing in containers allows you to move the plants indoors if frost is threatened.
I’ve even had success overwintering Malabar spinach in a greenhouse. With a little extra care, you can enjoy fresh greens well into the fall.
Saving Seeds for Next Year
If you want to save seeds from your Malabar spinach plant for next year, here’s what you need to do:
- Allow the plant to flower: Let a few of the flowers mature and develop into berries.
- Harvest the berries: Once the berries turn dark purple or black, they are ready to harvest.
- Extract the seeds: Gently crush the berries and remove the seeds.
- Dry the seeds: Spread the seeds out on a paper towel and let them dry completely.
- Store the seeds: Store the dried seeds in an airtight container in a cool, dark place.
Conclusion
So, there you have it! Mastering the art of growing Malabar spinach doesn’t require a green thumb blessed by the gardening gods. With these simple yet effective DIY tricks, you can transform your garden, balcony, or even a sunny windowsill into a thriving haven for this nutritious and delicious leafy green. We’ve explored everything from optimizing your soil composition to crafting the perfect support system for those vigorous vines.
Why is this a must-try? Because growing your own Malabar spinach offers a multitude of benefits that far outweigh the minimal effort involved. Imagine stepping outside your door to harvest fresh, vibrant leaves for your salads, stir-fries, and soups. Think of the satisfaction of knowing exactly where your food comes from and that it’s free from harmful pesticides and chemicals. And consider the sheer joy of nurturing a plant from seed to harvest, witnessing the miracle of nature unfold before your eyes.
But the benefits extend beyond the purely practical. Growing Malabar spinach is also a fantastic way to connect with nature, relieve stress, and add a touch of beauty to your surroundings. The lush green foliage and delicate flowers of this plant can transform any space into a tranquil oasis.
Don’t be afraid to experiment! While we’ve provided a solid foundation for success, there’s always room for customization. Try different soil amendments to see what works best in your specific climate and growing conditions. Explore various trellising methods to find the one that best suits your space and aesthetic preferences. Consider companion planting to attract beneficial insects and deter pests.
For example, some gardeners have found success using repurposed materials like old ladders or even sturdy branches as trellises. Others have experimented with growing Malabar spinach in hanging baskets, creating a stunning vertical display. You could even try different varieties of Malabar spinach, such as the red-stemmed variety, for a pop of color in your garden.
Remember, gardening is a journey of discovery, and there’s no one-size-fits-all approach. The key is to be observant, patient, and willing to learn from your mistakes.
We are confident that with these **Malabar spinach growing tips**, you’ll be well on your way to enjoying a bountiful harvest of this versatile and nutritious vegetable. So, grab your gardening gloves, gather your supplies, and get ready to embark on a rewarding gardening adventure.
We encourage you to try these DIY tricks and share your experiences with us! Post photos of your Malabar spinach plants on social media using #MalabarSpinachDIY and tag us so we can see your amazing results. Let’s create a community of passionate gardeners who are dedicated to growing their own food and sharing their knowledge with others. We can’t wait to see what you create! Happy gardening!
FAQ
What are the ideal growing conditions for Malabar spinach?
Malabar spinach thrives in warm, humid climates with plenty of sunlight. Aim for at least 6-8 hours of direct sunlight per day. The ideal temperature range is between 70°F and 90°F (21°C and 32°C). It prefers well-drained soil that is rich in organic matter. Consistent moisture is crucial, but avoid waterlogging the soil.
How often should I water my Malabar spinach plants?
Water your Malabar spinach plants regularly, especially during hot and dry periods. The soil should be consistently moist but not soggy. Check the soil moisture level by sticking your finger about an inch deep into the soil. If it feels dry, it’s time to water. Water deeply and thoroughly, ensuring that the water reaches the roots. Avoid overhead watering, as this can promote fungal diseases. Mulching around the plants can help retain moisture and suppress weeds.
What kind of fertilizer should I use for Malabar spinach?
Malabar spinach is a heavy feeder and benefits from regular fertilization. Use a balanced fertilizer with equal amounts of nitrogen, phosphorus, and potassium (e.g., 10-10-10) or a fertilizer specifically formulated for leafy greens. You can also amend the soil with compost or well-rotted manure to provide a slow-release source of nutrients. Fertilize every 2-3 weeks during the growing season, following the instructions on the fertilizer package. Avoid over-fertilizing, as this can lead to excessive foliage growth at the expense of flavor.
How do I trellis Malabar spinach?
Malabar spinach is a vining plant and requires a trellis or other support structure to grow properly. You can use a variety of materials for trellising, such as bamboo stakes, wooden trellises, wire mesh, or even repurposed materials like old ladders or branches. The trellis should be sturdy enough to support the weight of the mature plant. Train the vines to climb the trellis by gently guiding them and tying them with soft twine or plant ties. Ensure the trellis is tall enough to accommodate the plant’s growth, which can reach several feet in length.
Are there any common pests or diseases that affect Malabar spinach?
Malabar spinach is generally resistant to pests and diseases, but it can occasionally be affected by aphids, spider mites, or fungal diseases. Inspect your plants regularly for signs of infestation or disease. If you notice any pests, you can try spraying them with insecticidal soap or neem oil. For fungal diseases, ensure good air circulation around the plants and avoid overhead watering. You can also apply a fungicide if necessary.
When and how should I harvest Malabar spinach?
You can start harvesting Malabar spinach leaves about 6-8 weeks after planting. Harvest the leaves when they are young and tender, typically about 4-6 inches long. Simply snip off the leaves with scissors or pruning shears, leaving about an inch of stem attached. Regular harvesting encourages the plant to produce more leaves. You can harvest the leaves continuously throughout the growing season.
Can I grow Malabar spinach in containers?
Yes, Malabar spinach can be successfully grown in containers. Choose a large container that is at least 12 inches in diameter and depth. Use a well-draining potting mix that is rich in organic matter. Provide a trellis or other support structure for the vines to climb. Water regularly and fertilize every 2-3 weeks. Place the container in a sunny location that receives at least 6-8 hours of direct sunlight per day.
Is Malabar spinach heat tolerant?
Yes, Malabar spinach is exceptionally heat tolerant, making it an excellent choice for gardeners in hot climates. It thrives in warm temperatures and can withstand high humidity. In fact, it often performs better in hot weather than other leafy greens like spinach or lettuce.
Can I eat Malabar spinach raw?
Yes, you can eat Malabar spinach raw, especially the young, tender leaves. The flavor is mild and slightly peppery. It’s a great addition to salads, sandwiches, and wraps. However, some people prefer to cook the leaves, as they can become slightly mucilaginous when cooked.
How can I store Malabar spinach?
Store Malabar spinach leaves in the refrigerator in a plastic bag or container. They will typically last for about 3-5 days. To prolong their shelf life, you can wrap them in a damp paper towel before storing them. Avoid washing the leaves until you are ready to use them.

Leave a Comment