

Easy Bitter Gourd Setup: Ever dreamt of harvesting your own bounty of fresh, healthy bitter gourds right in your backyard? I know I have! There’s something incredibly satisfying about growing your own food, and bitter gourd, with its unique flavor and impressive health benefits, is a fantastic choice. But let’s be honest, setting up the ideal growing environment for these climbing vines can sometimes feel like a daunting task. That’s where this DIY guide comes in!
For centuries, bitter gourd has been a staple in Asian cuisine and traditional medicine, revered for its medicinal properties and distinctive taste. From stir-fries to curries, this vegetable adds a unique touch to countless dishes. But beyond its culinary uses, growing bitter gourd connects us to a rich agricultural heritage.
Many gardeners struggle with creating the right support system for bitter gourd vines, leading to stunted growth, disease, and ultimately, a disappointing harvest. That’s why I’m so excited to share this simple, effective, and budget-friendly easy bitter gourd setup. This DIY project will guide you through creating the perfect trellis system, ensuring your bitter gourd vines have the support they need to thrive. With this easy-to-follow guide, you’ll be enjoying a plentiful harvest of homegrown bitter gourds in no time. Let’s get started!

DIY: Effortless Bitter Gourd Trellis for Bountiful Harvests
Hey there, fellow gardeners! Are you ready to take your bitter gourd game to the next level? I’ve always loved the unique flavor and health benefits of bitter gourd, but growing it can be a bit of a challenge without proper support. That’s why I’m so excited to share my super easy and effective DIY bitter gourd trellis setup. This method is budget-friendly, customizable, and will help you maximize your yield while keeping your gourds healthy and off the ground. Let’s get started!
What You’ll Need:
Before we dive in, let’s gather all the necessary materials. Don’t worry, most of these are readily available at your local hardware store or even lying around your backyard.
* Sturdy Bamboo Poles or Wooden Stakes: These will form the main structure of your trellis. I recommend using poles that are at least 6-8 feet tall, depending on how high you want your trellis to be. The taller, the better, as bitter gourd vines can get quite long.
* Heavy-Duty Garden Twine or Jute Rope: This will be used to create the climbing grid for your bitter gourd vines. Choose a strong and weather-resistant material.
* Metal Wire (Optional): If you want extra stability, especially for a larger trellis, you can use metal wire to reinforce the structure.
* Zip Ties (Optional): These are handy for securing the twine or rope to the poles quickly and easily.
* Measuring Tape: To ensure even spacing and a symmetrical trellis.
* Gloves: To protect your hands while working with the materials.
* Scissors or a Utility Knife: For cutting the twine, rope, or wire.
* Hammer or Mallet: To drive the poles or stakes into the ground.
* Drill (Optional): If you’re using wooden stakes, you might want to drill pilot holes for the twine to prevent splitting.
* Level (Optional): To ensure your poles are perfectly vertical.
Planning Your Trellis Design
Before you start building, take a moment to plan the layout of your trellis. Consider the following factors:
* Available Space: How much space do you have in your garden for the trellis?
* Sunlight: Ensure your trellis is positioned in a location that receives at least 6-8 hours of sunlight per day.
* Number of Plants: How many bitter gourd plants do you plan to grow? Each plant will need adequate space to climb and spread.
* Trellis Shape: You can choose from various shapes, such as a simple A-frame, a tunnel, or a vertical wall. I personally prefer a simple A-frame or a vertical wall against an existing fence or wall.
Building the Trellis: Step-by-Step Instructions
Okay, let’s get our hands dirty! Here’s how to build your own bitter gourd trellis:
1. Preparing the Ground and Positioning the Poles
* Clear the Area: Remove any weeds, rocks, or debris from the area where you’ll be building the trellis.
* Mark the Locations: Use your measuring tape to mark the locations for your poles. If you’re building an A-frame, space the poles about 3-4 feet apart at the base. For a vertical wall, space them according to the width of your desired trellis.
* Drive the Poles into the Ground: Using a hammer or mallet, drive the poles into the ground. Make sure they are securely anchored and stand upright. For added stability, you can bury the poles deeper into the ground. I usually aim for at least 1-2 feet deep.
* Check for Level (Optional): Use a level to ensure the poles are perfectly vertical. Adjust as needed.
2. Creating the Climbing Grid
This is where the magic happens! We’ll create a grid that the bitter gourd vines can easily grip and climb.
* Tie the First Row of Twine: Starting at the bottom of the poles, tie the twine or rope securely to one pole. I usually use a simple square knot for this.
* Weave the Twine Horizontally: Run the twine horizontally to the opposite pole, pulling it taut. Tie it securely to the second pole.
* Repeat for Subsequent Rows: Continue weaving the twine horizontally, creating rows spaced about 6-8 inches apart. This spacing allows the vines to easily reach and grip the twine.
* Tie Vertical Twine (Optional): For added support and a more defined grid, you can also tie vertical strands of twine to the horizontal rows. Space the vertical strands about 6-8 inches apart as well. This creates a grid pattern that the vines will love.
* Secure with Zip Ties (Optional): If you’re using zip ties, use them to secure the twine to the poles at each intersection. This will prevent the twine from slipping and keep the grid taut.
3. Reinforcing the Trellis (Optional)
For larger or heavier trellises, you might want to reinforce the structure for added stability.
* Add Cross Braces: For an A-frame trellis, you can add cross braces between the poles to prevent them from spreading apart. Simply tie or screw additional pieces of wood or bamboo diagonally between the poles.
* Use Metal Wire: Wrap metal wire around the poles and twine at key points to reinforce the structure. This is especially helpful if you’re expecting strong winds.
* Anchor to a Wall or Fence: If you’re building a vertical trellis against a wall or fence, you can use brackets or screws to secure the poles to the structure.
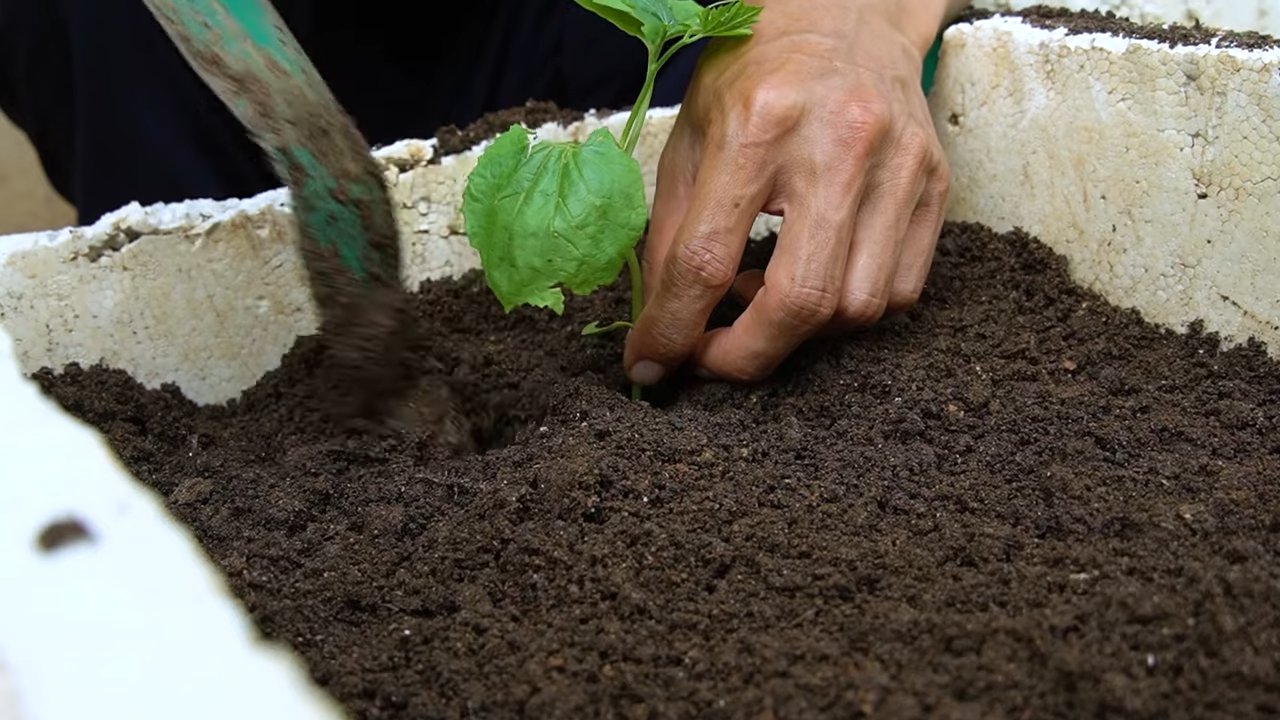
4. Planting Your Bitter Gourd
Now for the fun part – planting your bitter gourd!
* Prepare the Soil: Ensure the soil around the base of the trellis is well-drained and fertile. Amend with compost or other organic matter if needed.
* Plant the Seeds or Seedlings: Follow the instructions on your seed packet or seedling label for proper planting depth and spacing. I usually plant my bitter gourd seeds directly in the ground after the last frost.
* Water Thoroughly: Water the newly planted seeds or seedlings thoroughly.
* Mulch (Optional): Apply a layer of mulch around the base of the plants to help retain moisture and suppress weeds.
5. Training the Vines
As your bitter gourd vines grow, you’ll need to train them to climb the trellis.
* Gently Guide the Vines: As the vines emerge, gently guide them towards the trellis and encourage them to wrap around the twine.
* Tie the Vines (If Necessary): If the vines are struggling to grip the twine, you can use small pieces of twine or plant clips to tie them to the trellis.
* Prune as Needed: Prune any excessive growth or side shoots to encourage the plant to focus its energy on producing fruit.
Tips for Success
Here are a few extra tips to help you get the most out of your bitter gourd trellis:
* Choose the Right Variety: Select a bitter gourd variety that is well-suited to your climate and growing conditions.
* Provide Adequate Sunlight: Bitter gourd needs at least 6-8 hours of sunlight per day to thrive.
* Water Regularly: Keep the soil consistently moist, but not waterlogged.
* Fertilize Regularly: Feed your bitter gourd plants with a balanced fertilizer every few weeks to promote healthy growth and fruit production.
* Protect from Pests and Diseases: Monitor your plants regularly for pests and diseases and take appropriate action if necessary.
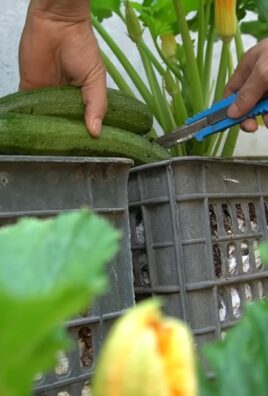
* Harvest Regularly: Harvest your bitter gourds when they are young and tender for the best flavor.
Troubleshooting
Even with the best planning, you might encounter a few challenges along the way. Here are some common issues and how to address them:
* Trellis Instability: If your trellis is wobbly or unstable, reinforce it with additional supports or anchors.
* Vines Not Climbing: If the vines are not climbing the trellis, gently guide them towards the twine and tie them if necessary.
* Pest Infestations: If you notice pests on your plants, treat them with an appropriate insecticide or organic pest control method.
* Disease Problems: If your plants are showing signs of disease, treat them with an appropriate fungicide or organic disease control method.
Enjoy Your Bountiful Harvest!
And there you have it! A simple, effective, and budget-friendly DIY bitter gourd trellis that will help you grow a bountiful harvest. With a little bit of effort and these helpful tips, you’ll be enjoying fresh, homegrown bitter gourd in no time. Happy gardening! I hope you found this guide helpful and that your bitter gourd plants thrive! Let me know in the comments if you have any questions or if you try this out yourself. I’d love to hear about your experience!
Conclusion
So, there you have it! Transforming bitter gourd from a culinary challenge into a delightful ingredient is entirely within your reach. This simple, yet effective, DIY trick is more than just a recipe hack; it’s a gateway to unlocking the full potential of this incredibly nutritious vegetable. We’ve shown you how to significantly reduce the bitterness, making it palatable and even enjoyable for those who typically shy away from its strong flavor.
Why is this a must-try? Because it opens up a world of culinary possibilities. Imagine incorporating bitter gourd into stir-fries, curries, soups, and even juices without the overpowering bitterness that often dominates. Think of the health benefits you’ll be reaping – bitter gourd is packed with vitamins, minerals, and antioxidants, making it a fantastic addition to a balanced diet. This method allows you to enjoy those benefits without sacrificing taste.
But don’t stop there! Feel free to experiment with variations. Try different types of salt – sea salt, Himalayan pink salt, or even kosher salt – to see which works best for your palate. Adjust the salting time based on the size and maturity of the bitter gourd; larger, more mature gourds might require a slightly longer salting period. You can also add a touch of lemon juice or vinegar during the rinsing process for an extra layer of flavor and to further neutralize any remaining bitterness.
Consider adding spices like turmeric, ginger, or garlic during the cooking process to complement the unique flavor of bitter gourd. These spices not only enhance the taste but also offer additional health benefits. For a sweeter twist, try pairing bitter gourd with ingredients like onions, tomatoes, or even a touch of honey or maple syrup. The possibilities are truly endless!
This DIY trick for preparing bitter gourd is not just about making it less bitter; it’s about empowering you to embrace a healthy and flavorful ingredient that you might have previously avoided. It’s about expanding your culinary horizons and discovering new ways to enjoy nutritious foods. It’s about taking control of your cooking and creating dishes that are both delicious and good for you.
We are confident that once you try this method, you’ll be amazed at the difference it makes. You’ll be able to confidently incorporate bitter gourd into your meals, knowing that you’ve tamed its bitterness and unlocked its full potential.
So, go ahead, give it a try! We encourage you to experiment, adapt, and create your own unique bitter gourd recipes. And most importantly, we want to hear about your experience. Share your tips, tricks, and favorite bitter gourd dishes with us in the comments below. Let’s build a community of bitter gourd enthusiasts and inspire others to embrace this wonderful vegetable. We believe that everyone can learn to love bitter gourd with the right preparation, and this DIY trick is the perfect starting point. Don’t be intimidated by its reputation; with a little effort, you can transform bitter gourd into a culinary star.
Now, let’s dive into some frequently asked questions to address any concerns or curiosities you might have.
Frequently Asked Questions (FAQ)
Why is bitter gourd so bitter in the first place?
The bitterness in bitter gourd is primarily due to the presence of compounds called cucurbitacins. These compounds are naturally occurring and serve as a defense mechanism for the plant against pests. The concentration of cucurbitacins varies depending on the variety of bitter gourd, its maturity, and growing conditions. Younger bitter gourds tend to be less bitter than older ones.
Does this salting method remove all the bitterness?
While the salting method significantly reduces the bitterness, it might not eliminate it completely. The extent of bitterness reduction depends on several factors, including the initial bitterness of the gourd, the amount of salt used, and the duration of salting. However, most people find that this method makes the bitter gourd palatable and enjoyable. If you are particularly sensitive to bitterness, you can try increasing the salting time or using a combination of methods, such as salting and blanching.
Can I use other methods to reduce the bitterness of bitter gourd?
Yes, there are several other methods you can try. Blanching the bitter gourd in boiling water for a few minutes can help to leach out some of the bitter compounds. Soaking the bitter gourd in yogurt or buttermilk can also help to reduce bitterness. Some people also recommend removing the seeds and the white pith inside the gourd, as these parts tend to be more bitter. Combining different methods, such as salting and blanching, can often yield the best results.
How long should I salt the bitter gourd?
The ideal salting time depends on the size and maturity of the bitter gourd. For smaller, younger gourds, 30 minutes to an hour might be sufficient. For larger, more mature gourds, you might need to salt them for up to two hours. It’s best to start with a shorter salting time and then taste a small piece of the gourd to check the bitterness level. If it’s still too bitter, you can continue salting for a longer period.
What type of salt should I use?
You can use any type of salt for this method, but coarse salt, such as sea salt or kosher salt, is generally preferred. Coarse salt draws out more moisture from the gourd, which helps to remove the bitter compounds. However, table salt can also be used if that’s what you have on hand. Just be sure to use a generous amount of salt to ensure that it effectively draws out the bitterness.
Can I skip the rinsing step after salting?
No, rinsing is a crucial step in this process. The salt draws out the bitter compounds from the gourd, and rinsing removes the salty water that contains these compounds. If you skip the rinsing step, the bitter gourd will be overly salty and still retain some of its bitterness. Be sure to rinse the gourd thoroughly under running water until all the salt is removed.
How should I store bitter gourd after salting and rinsing?
After salting and rinsing, you can store the bitter gourd in the refrigerator for up to 2-3 days. Be sure to pat it dry with paper towels before storing it to prevent it from becoming soggy. You can also freeze the bitter gourd for longer storage. To freeze it, blanch it in boiling water for a few minutes, then cool it in ice water. Pat it dry and store it in an airtight container or freezer bag.
What are some good recipes to use bitter gourd in?
Bitter gourd can be used in a variety of dishes, including stir-fries, curries, soups, and even juices. It pairs well with ingredients like onions, tomatoes, garlic, ginger, and spices like turmeric and cumin. Some popular bitter gourd recipes include bitter gourd stir-fry with eggs, bitter gourd curry with coconut milk, and bitter gourd soup with lentils. You can also try adding bitter gourd to juices or smoothies for a healthy boost.
Are there any health benefits to eating bitter gourd?
Yes, bitter gourd is packed with nutrients and offers numerous health benefits. It is a good source of vitamins A and C, as well as minerals like iron and potassium. Bitter gourd is also known for its antioxidant properties and its ability to help regulate blood sugar levels. Some studies have suggested that bitter gourd may also have anti-inflammatory and anti-cancer properties.
Can I use this method on other bitter vegetables?
While this method is specifically designed for bitter gourd, it can also be effective in reducing the bitterness of other vegetables, such as eggplant and radishes. The principle is the same: salt draws out the bitter compounds, and rinsing removes them. However, you might need to adjust the salting time and the amount of salt used depending on the specific vegetable.


Leave a Comment